Summary: You can import PST files into Office 365 in different ways. This blog will discuss the Drive Shipping method to import PST files into Microsoft Office 365. You’ll also know about a PST to Office 365 migrator tool that can help you directly import PST files into Office 365 mailboxes.
There are several methods to import PST files into Office 365 (Microsoft 365). One of the methods is the Drive Shipping method. In this, you need to first copy the PST files to a BitLocker-encrypted hard drive and then physically ship that hard drive to Microsoft. On receiving the hard drive, the Microsoft center personnel copy the PST files from the hard drive to a storage location on the Microsoft cloud. You can then import the PST files into the user mailboxes on Office 365. Below, we’ll be discussing this method in detail to help you import PST files into Office 365 with ease.
Steps to Use Drive Shipping Method to Import PST Files into Office 365
Following are the steps to import PST files into Microsoft 365 mailboxes using the Drive Shipping method:
Step 1: Download the PST Import Tool
You need to first download the Azure Import/Export tool. To download it, follow these steps:
- Login to Office 365 Security & Compliance portal using the Administrator credentials.
- Click Data lifecycle management > Microsoft 365 > Import.
- In the Import option, click New import job.
- In the Import job wizard, give a name to the PST import job and then click the Next button.
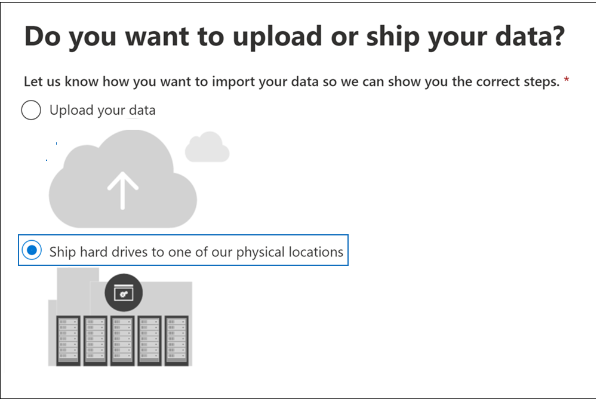
- The Choose import job type window is displayed. Click Ship hard drives to one of our physical locations and then choose Next button.

- Download the Azure Import/Export tool (WAImportExport.exe) and install it.
- Click Cancel to close the window. You will be redirected to the Import window in the compliance portal.
Step 2: Copy the PST Files to the Hard Drive
Now, you need to use the WAImportExport.exe for copying the PST files to hard drive. This tool helps encrypt the hard drive, copy the PST files to hard drive, and create a journal file to store the information about the process. Here are the steps:
- Open Command Prompt on your system.
- Go to the directory where you’ve installed WAImportExport.exe and run the below command:
WAImportExport.exe PrepImport /j:<Name of journal file> /t:<Drive letter> /id:<Name of session> /srcdir:<Location of PST files> /dstdir:<PST file path> /blobtype:BlockBlob /encrypt /logdir:<Log file location>
The tool will start copying the PST files to the hard drive. When finished, it will show the number of copied files.
Things to note:
- When copying the PST files to hard drive, ensure that each PST file is not more than 20 GB in size.
- Microsoft charges $2 per GB of data.
- You can ship a maximum of 10 hard drives for a single import job.
- You can use hard drives up to 10 TB.
Step 3: Create the PST Import Mapping File
You have to create an Import Mapping file in CSV file format. This file is required later when you create PST Import job. To create the PST mapping file, follow these steps:
- Download a copy of the PST import mapping file.
- Save the CSV file to your system.

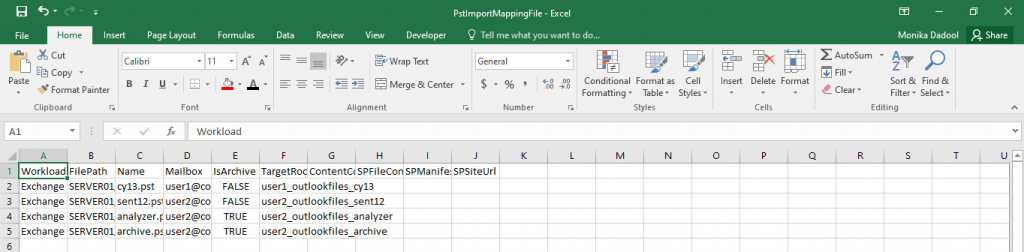
You can open the file in Microsoft Excel or Notepad and edit it.
Step 4: Create a PST Import Job
Now, you need to create the PST import job. Follow these steps:
- Sign in to https://compliance.microsoft.com.
- Go to Data lifecycle management > Microsoft 365 > Import.
- On the Import tab, click New import job.
- Type a name for the PST import job and then click Next.
- On the Choose import job type wizard, click Ship hard drives to one of our physical locations, and then click Next.
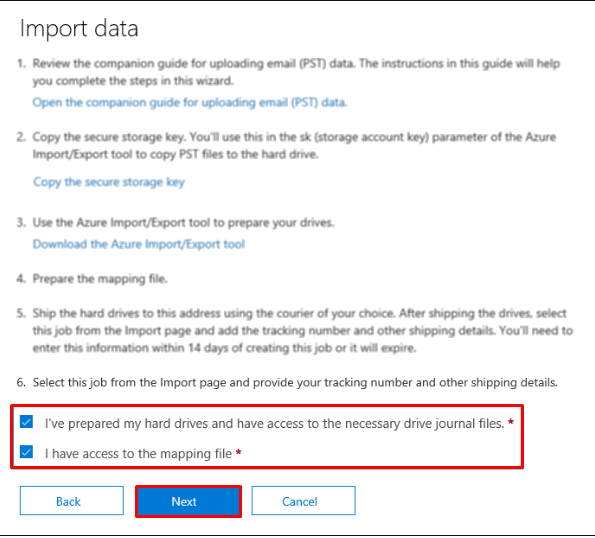
- Select the checkboxes “I’ve prepared my hard drives and have access to the necessary drive journal files and I have access to the mapping file, and then click Next.

- The “Select the drive file” page is displayed. Click Select drive file to select the drive file that was created by the Azure Import/Export tool.

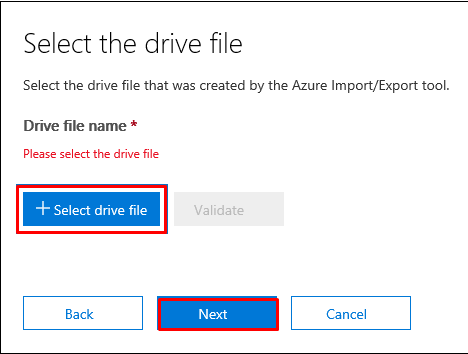
- Select the Journal file.
- When the drive file name displays, click Validate to check your drive file for errors.
Note: The drive file has to be successfully validated to create a PST import job. The file name will appear green if it is successfully validated. If the validation fails, click on the View log link to know the information regarding the issue.
- Once you add and validate a journal file, click Next.
- Click +Select mapping file to submit the mapping file (created in Step 3).

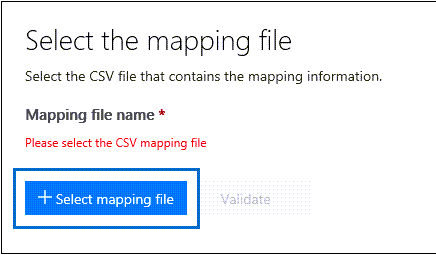
- Once you select the mapping file, the name of the CSV file appears under the mapping file name. Click Validate to check the file for errors.
- When the PST mapping file is successfully validated, click the Next button.
- On the Provide contact information wizard, enter your contact information in the applicable fields. The Microsoft location address where you ship your hard drive is displayed. Note down this address.
- Read the terms and conditions of the document, click the checkbox, and then click the Save button to submit the import job.
- Click “Refresh” on the import page to display the new drive shipping import job in the list of import jobs.
Step 5: Ship Hard Drive to Microsoft
The next step is to ship the hard drive to Microsoft, along with the tracking number and return shipment number for the drive shipping job. When Microsoft receives this drive, the data center personnel can take up to 10 business days to upload the PST files to the Azure storage location. Once you shipped the hard drive to Microsoft, follow the below procedure:
- Open the Compliance portal and click Data lifecycle management > Import.
- On the Import button, select the job for the drive shipment you need to enter the tracking number for.
- On the status flyout window, click Enter tracking number and then provide the shipping information such as delivery carrier, tracking number, and return carrier account number.
- After providing the information, click Save.
- Now go to the Import tab and click Refresh to update the information for your drive shipping import job. Your status will appear as Drives in transit.
Step 6: Start the PST Import Job
When Microsoft receives your hard drive, the status for the import job will change to Drives received. The data center personnel will use the information in the journal file to upload the PST files to Azure storage. After uploading, the status will change to Analysis in progress. This status specifies that Office 365 is analyzing the information in PST files. Once analysis is complete, the status for the import job is changed to Analysis completed. Now you can start PST import using the below steps:
- Go to the Compliance portal and click Data lifecycle management > Microsoft 365 > Import.
- On the Import tab, select the PST import job you created earlier and click Import to Office 365.
Note: Your PST files may contain duplicate emails that can lead to confusion or increase the size of the Office 365 mailbox, and take up more cloud storage. In such a case, you can remove duplicate items from your PST files. To know more, read how to import PST file into Office 365 without duplicates.
When the import process is complete, the status of the import job will be changed to Completed.
Limitations of Drive Shipping Method
The Drive Shipping method has a few limitations, such as:
- Importing PST files more than 20 GB in size can impact the import performance.
- It can take 1-2 weeks to import the PST data into Office 365.
- Microsoft charges $2/1 GB or $2000/1 TB of PST files.
- The process is tedious and lengthy as it requires multiple steps to import PST files into Office 365.
An Alternative Method – Use a Specialized PST to Office 365 Migration Tool
To overcome the limitations of the Drive Shipping method, you can use a specialized PST to Office 365 migration tool, such as Stellar Migrator for Outlook. It allows you directly import PST files into Office 365 in a few clicks. Also, you can easily import up to 50 GB of PST files into Office 365. It comes with a “pay-per-use” plan. It means that you can choose and pay for the number of mailboxes/PST files you want to import into Office 365. It also offers advanced filter options to exclude or include mail items based on email IDs and date range.
Closure
Drive Shipping is one of the manual methods to import PST files into Office 365. This blog covered the detailed steps to use this method to import PST files into Office 365. However, migrating PST to Office 365 manually using the Drive Shipping method is a tedious job as it requires you to perform multiple steps. Alternatively, you can use a professional PST to Office 365 migration tool, such as Stellar Migrator for Outlook that can help you directly migrate PST files to Office 365 in just a few simple steps.

