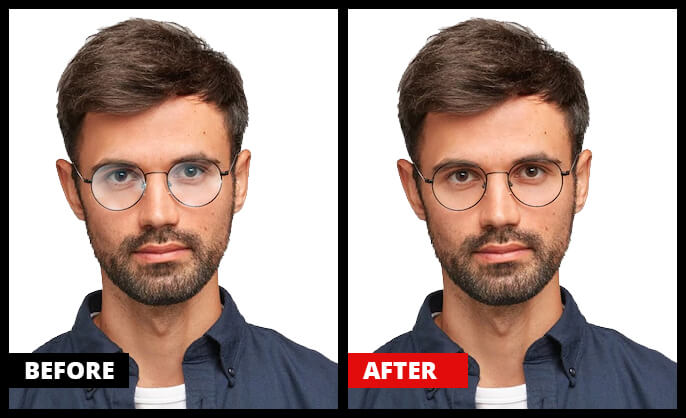
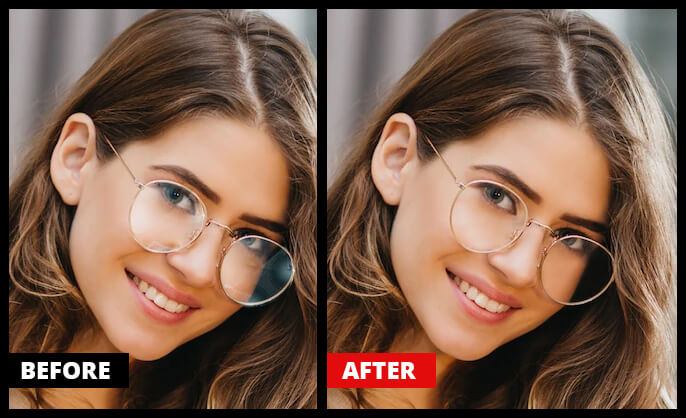
Have you ever taken the perfect selfie but felt the glare in your glasses ruined it? The presence of reflection and glare can be annoying. Luckily, you can easily remove glass glare using photo editing software during post-processing. But first, let’s understand what glass glare is.
Glasses glare occurs when light reflects off the lenses of your or someone else’s glasses in a photograph. This unwanted and distracting addition to your photo is formed when you do a sunny photoshoot or take your picture with a flash. Fortunately, several options exist to remove glare from glasses in a photo without compromising the original photo.
Read this guide to learn the techniques to get rid of glare from glasses. In addition, we have curated a few tips in this post to help you avoid running into the glass glare issue again.

Remove Glass Glare from Photos Using Photo Editing Software
Sometimes, a glass glare may be difficult to prevent or unavoidable during shooting. That’s why knowing how to remove glass glare in photos during post-processing can be helpful. Here, we have used Photoshop and Lightroom to edit the glass glare; however, there are other editing tools like CorelDRAW and PaintShop Pro.
4 Ways to Remove Glare From Glasses in Adobe Photoshop and Lightroom
There are several tools to eliminate glasses glare without compromising the original image in Adobe Photoshop and Lightroom. Read on to learn what photo editing tools in Photoshop and Lightroom can help you remove glare from photos.
1. Lasso Tool
This Adobe Photoshop tool can help eliminate glass glare in photos easily. Let’s see how to use this tool works:
- Open the photo with glass glare in Photoshop.
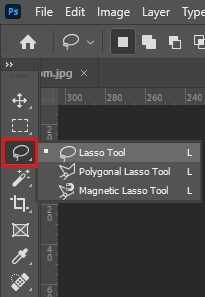
- Click on the Lasso Tool from the toolbar and circle around the spot you want to remove.
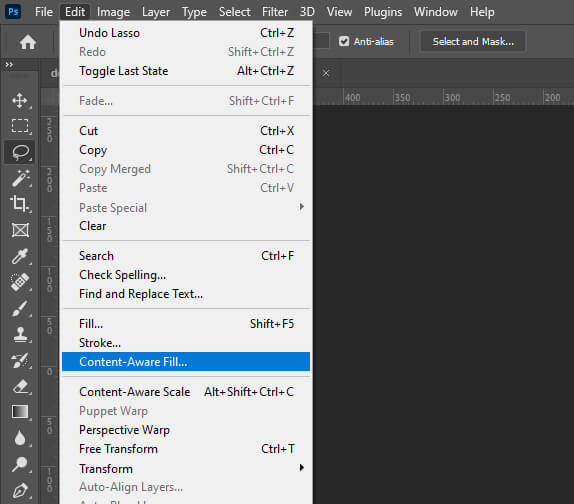
- Then, right-click on the area and choose the Content-Aware fill option. This allows Photoshop to analyze the color and pattern of the surrounding area and then fill the newly created area automatically.
2. Dehaze Tool
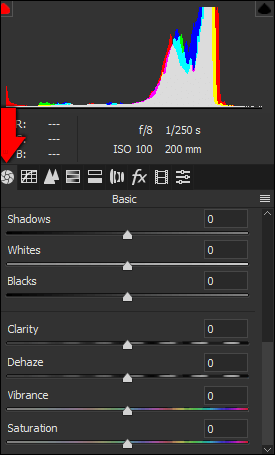
This tool is one of the easiest and quickest ways to remove haze in a photo. In Adobe Lightroom, you can find the Dehaze Tool at the bottom-right of the Basic Panel box in the Develop Mode.
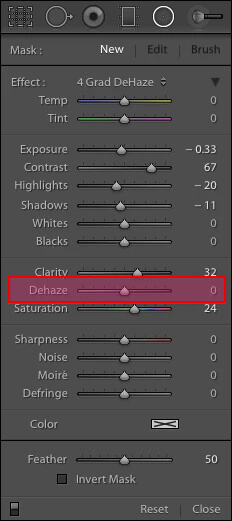
In Photoshop, you can find this by going to Filter > Camera Raw Filter. Here, drag the Dehaze Slider to increase or decrease the glare in the photo with precision.
3. Clone and Patch Tool
When unwanted light enters behind the subject of a photo, using the Clone Stamp Tool and Patch Tool in Photoshop can help you remove glare from the glasses in the photo.
The Clone Stamp tool paints the imperfections using a single source color copied from a nearby point on the photo to get a seamless fill.
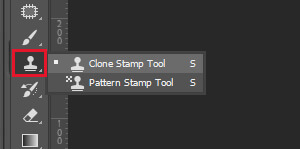
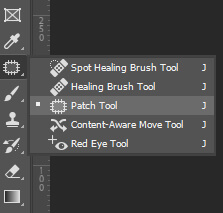
The Patch Tool works just like the Clone Stamp Tool to cover up the imperfections of the photo. Use this tool to move or delete imperfections, and Photoshop will automatically use the surrounding pixels to replace its seamless background.
4. Spot Removal Tool
Lightroom Spot Removal Tool is one of the best tools for cleaning up certain areas of a photo and enhancing its overall look. It is similar to the Clone Stamp tool of Photoshop and the Healing Brush Tool. Spot Removal Tool is a great tool for removing glass glare in a picture. Perform these steps to learn how to use this tool:
- Open the photo with glass glare in Lightroom.
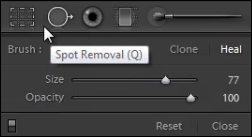
- Click Develop Module, and then locate Spot Removal under the Histogram tab.
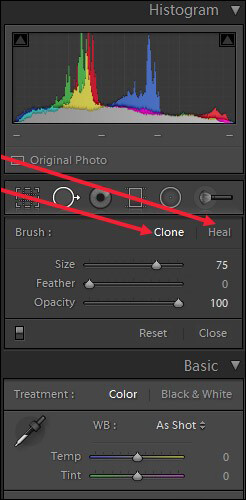
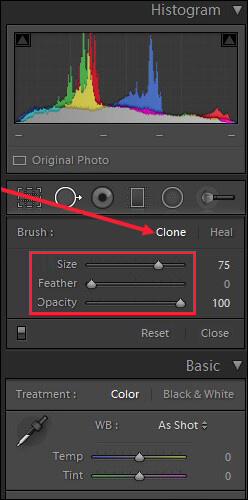
- Select the Clone option to replicate an area of the photo onto the area to be fixed.
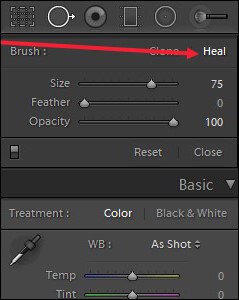
- Next, choose Heal to match the lighting and shading texture of the nearby area to the area to be fixed.
Although Photoshop and Lightroom are brilliant photo editing software, they are not flawless. For example, your RAW photo with glass glare may get corrupted while importing or exporting them on the hard disk.
If your photo gets corrupted while using these editing tools, use Stellar Repair for Photo to fix those issues. This advanced photo repair software efficiently repairs corrupt photos, invalid structures, and damaged file headers stored on an SSD, SD card, hard drive, USB flash drive, or other data storage medium.


How to Avoid Reflections When Shooting?
Fixing glare on glasses is not fun. So next time, while going out for a photo shoot, follow a few tips so you don’t end up fixing glass glare in post-processing.
1. Identify the Problem
First, check why reflections are there on the glasses. It can be due to the angle of the model or the angle from which you are shooting them. Making the model or camera turn slightly one way or another can eliminate the reflection.
2. Adjust the Light
If the reflection is because of artificial light, then adjust it. For example, using diffused light or softbox helps make the light source less direct, thereby reducing glare.
3. Change Direction
While shooting outdoors in natural light, try changing your direction. For example, try shooting in the shade or with the sun on the back.
4. Use Filters
If everything fails, attach a circular polarizing filter to your lens to reduce reflection and glare on glass. However, while purchasing the circular polarizer, choose the correct size for the front of your camera lens. While using a polarizer, your photo will be slightly dark, so adjust the camera setting accordingly.
5. Shade Your Lens
To remove glass glare from photos, stop the light source from shining into your camera lens. For example, use a lens hood to stop the light source from entering your lens. Or use your other hand or hat above and in front of your lens to block the light.
Wrapping Up
Removing glass glare from photo post-processing is time taking. You can save time by avoiding reflections during the photoshoot itself. If you spend more time and effort during the shoot and follow the tips mentioned above, your photos will look perfect. However, if these tips fail and your photos have glass glare, then getting rid of glare in glasses is easy for Photoshop and Lightroom to remove them.