Hard Drives are sensitive to logical or physical damage. Be it internal or external, a hard drive might run into an error and become inaccessible or RAW for many reasons, eventually causing data loss. Similarly, when a hard drive shows 0 bytes, it is an error that makes the drive and its data inaccessible. Data recovery from such drive is consequently difficult but not impossible. In this blog, we’ll share some proven methods to recover data from a hard drive that shows “0 bytes available.” Go through the methods and carefully follow the steps to recover your data from a hard drive showing 0 Bytes.
What does the ‘Hard drive Showing 0 Bytes’ error mean?
Zero bytes means no data or no space to store more data. However, when a hard drive shows 0 bytes while still having sufficient space, the drive has turned RAW or is inaccessible. When you open the drives’ properties, it shows 0 bytes of space available, plus the used space and capacity. Even if you try to open the hard drive, it may throw an error – “Access is denied.”
What are the reasons behind a hard drive showing “0 Bytes Available?”
For several reasons, your hard drive may throw a 0-byte or access denied error. The major reasons are shared below:
- Incorrect removal of hard drive without safe ejection
- Too many bad sectors available on the hard drive, turning the drive RAW
- Hard drive corruption
- Virus infection
- Unexpected or sudden system crash
- Improper disk partitioning
- Power surge or improper system shutdown
- Interrupted file transfer, making files corrupted
- Corrupted index cable in the file system
How to Recover Data from a Hard Drive That Shows 0 Bytes?
All the below methods are easy-to-apply. However, some contain Notes, so read the methods carefully and apply them.
1. Scan Drive for Errors
Try changing the file extensions with the following steps. It may also help you fix the hard drive showing 0 bytes.
- Locate the HDD showing 0 bytes, right-click, and open its Properties.
- Go to Tools > Check.
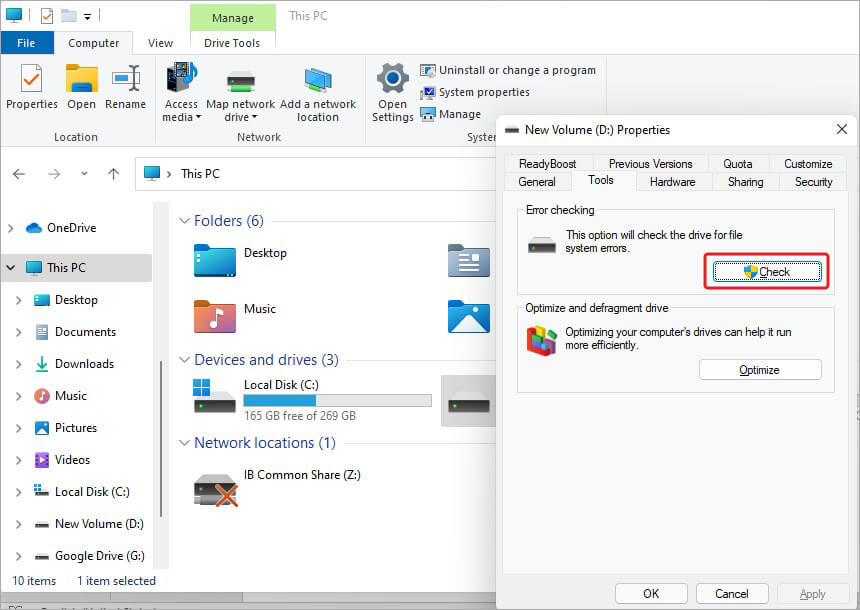
- If you get the Scan drive option, click it, and let the scanning process end.
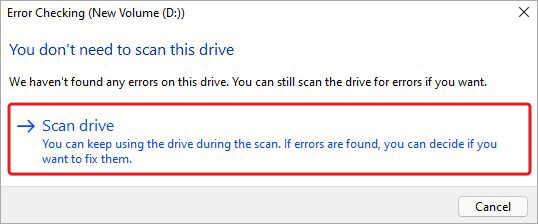
Follow the further instructions to troubleshoot any issues with the hard drive.
2. Run CHKDSK Scan
If the error occurs due to hard drive corruption, running a CHKDSK scan can help you fix it. To run this scan, follow the given steps:
- Go to Windows Search, type cmd, and select Run as administrator. Then, in the open cmd window, type the following command, and hit Enter.
CHKDSK /f /r D: (Replace D: with your hard drive letter)
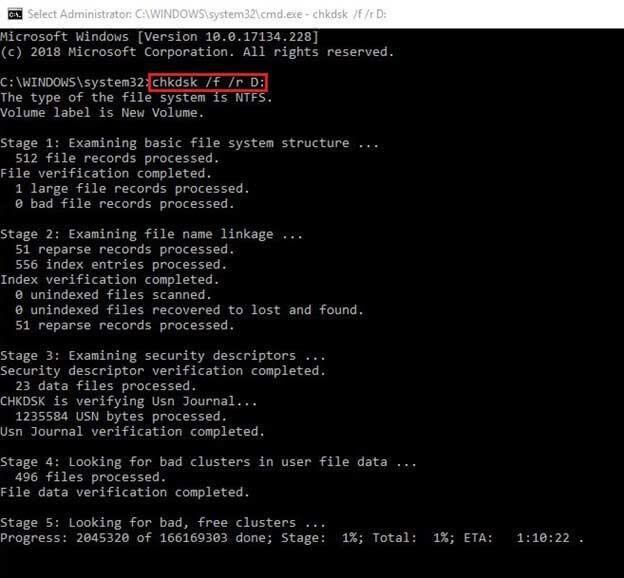
Wait until the process is completed. Once done, see the process results. If further instructions are required, complete that and then close the window. Next, reboot your system and check if you can access your hard drive now.
| Note: CHKDSK, along with fixing hard drive corruption, also locates and marks the bad sectors on it and prevents Windows from accessing and storing data from those sectors, thereby causing data loss. However, worry not, as you can recover data lost after the CHKDSK scan with reliable data recovery software. |
3. Use Microsoft Safety Scanner
Microsoft Safety Scanner is a freely downloadable security scanner tool from Microsoft which helps find and eliminate viruses that might be causing this issue. You can download it and follow the steps:
- Download and install Microsoft Safety Scanner.
- Select the ‘Accept all the terms of the preceding license agreement’ option and click Next.
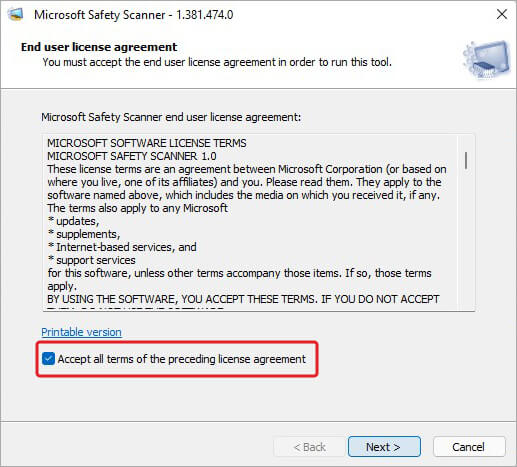
- Click Next again to proceed.
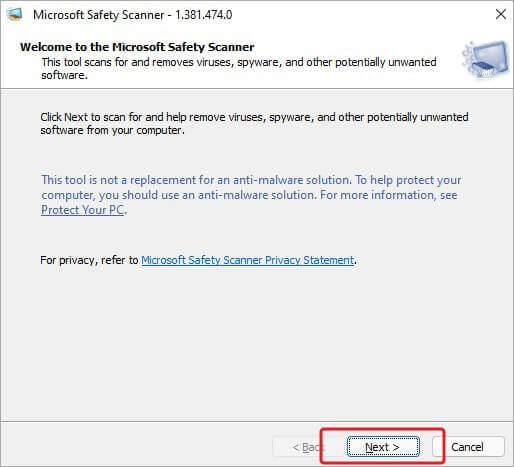
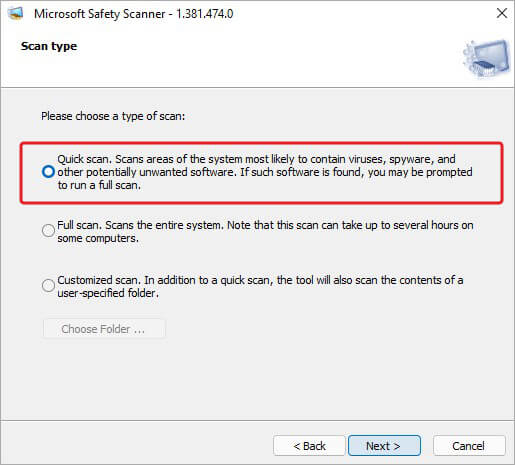
- Select the type of scan you wish to run from the available options and click Next.
- The scanning process will initiate. Wait until the process is completed. Keep reviewing the scan results on the screen simultaneously.
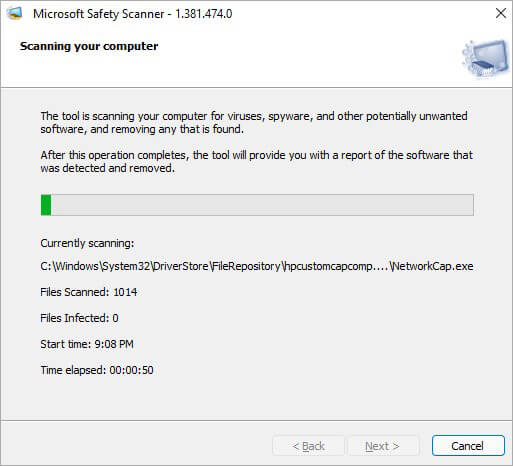
- Let the process end and do its work.
- Once done, click Finish and close the window. Reboot your system now and check if the hard drive is accessible.
4. Recover Data with Powerful Data Recovery Software
It’s fine if the above methods don’t work in your favor. A powerful data recovery software like Stellar Data Recovery Professional is your best bet to regain access to your data. This software can restore all files stored on your Windows system and storage media drives, such as HDD, SSD, USB drives, SD cards, etc. In addition, the software can retrieve data in case of accidental deletion, drive formatting, corruption, malware attack, etc. Even if the hard drive is RAW or inaccessible, you can still retrieve data using Stellar Data Recovery Professional. Follow the steps to get back your files from the hard drive that shows 0 bytes:
- Download, install, and run Stellar Data Recovery Professionals on your system.
- On the first screen – Select What to Recover, click All data and then click Next.
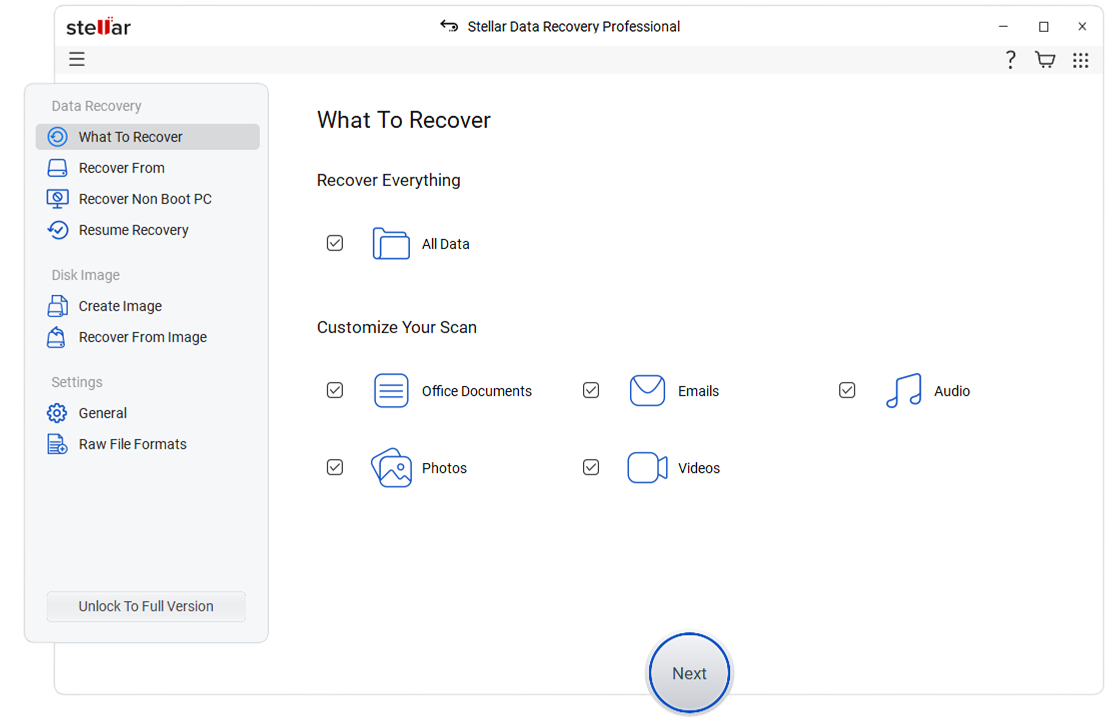
- Now, on the ‘Recover from’ screen, click ‘Can’t Find Drive’ under ‘Connected Drives’ and then click Scan.
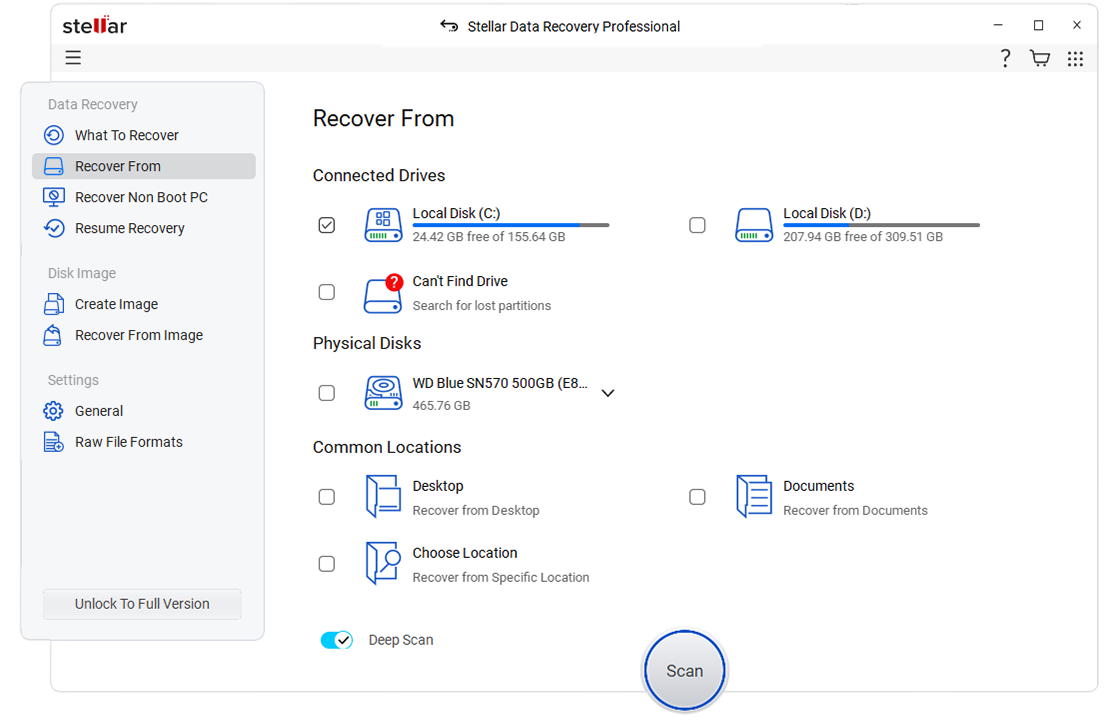
- Once the scanning is done, the software will locate the Raw or inaccessible hard drive. Select the drive and click Search.
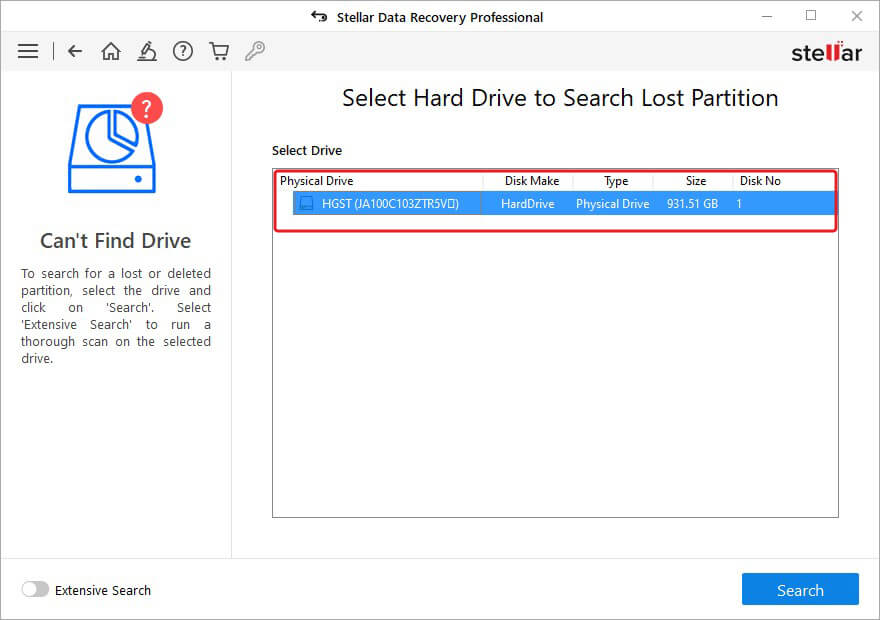
- Now, the software will work towards searching for drive partitions. Once you see the partitions listed on the screen, select the one from which you want to retrieve files and click Scan.
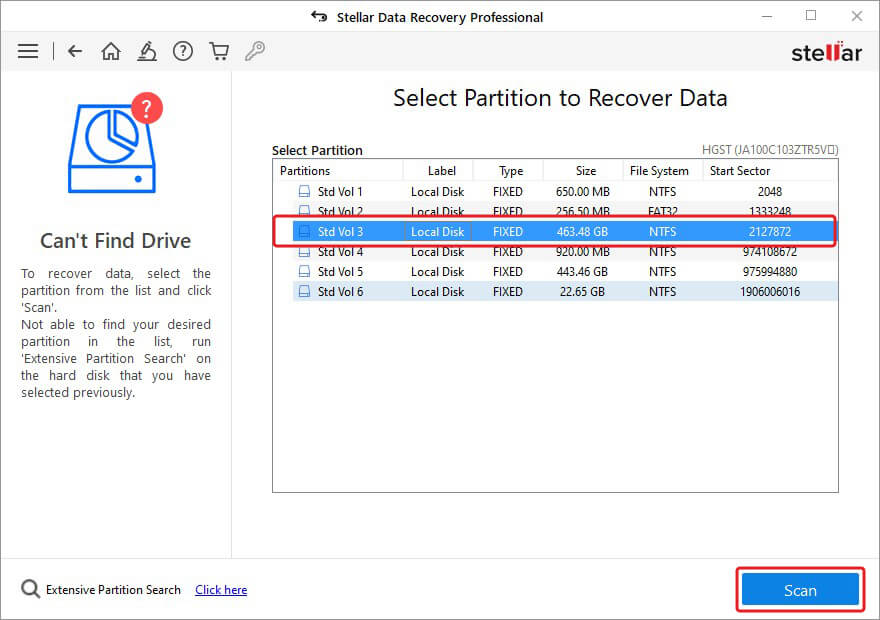
- After the scan, select the files you want to retrieve from the results and click Recover.
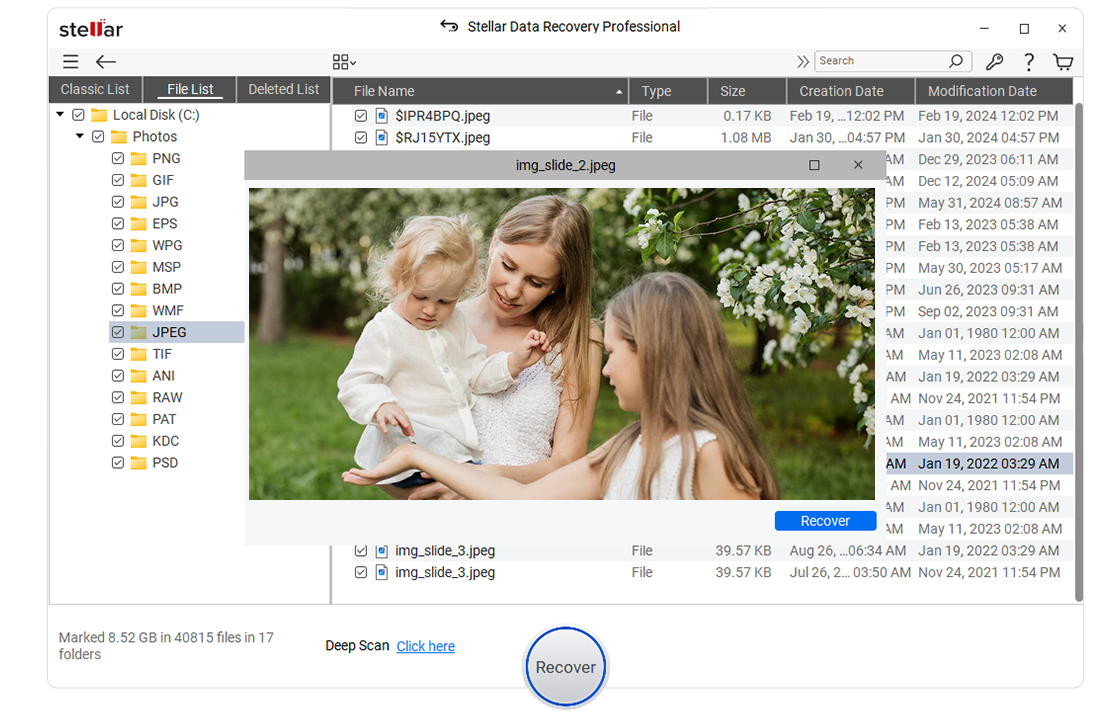
- Next, click Browse to choose the storage location and then click Start-Saving to complete the process.
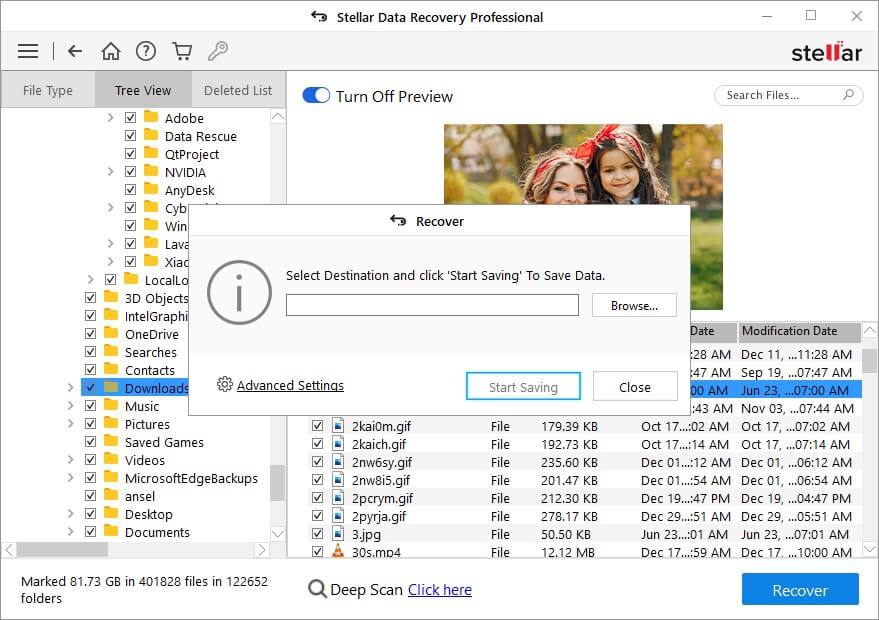
The recovered files will be saved at the chosen location.
A hard drive showing 0 bytes is a problem because it doesn’t let you access your data. However, the methods shared in this blog will help you retrieve your data from an inaccessible or RAW hard drive. So, try them out and let us know your queries or suggestions in the comment box below!
FAQs
Does 0 bytes mean no data?
Each file containing data is of different sizes in kilobytes (KBs) or megabytes (MBs). But when a file shows 0-byte, it generally means no data is available.
Was this article helpful?