The Newer Mac model’s internal storage drive, by default, comes with a single APFS container (or partition). And, macOS is installed on a volume group, in which Macintosh HD (the first volume) stores system files and Macintosh HD – Data (the second volume) saves user data.
But you can divide your Mac storage drive into multiple containers and split any container into more than one volume. You can take the help of Disk Utility to Add, Delete, or Enlarge APFS volumes on Mac running on Ventura or earlier.
Safe Merging Process
Since enlargement or merging requires deletion, you must back up your Mac storage drive using Time Machine to ensure you safely merge volumes without losing data. Once merging is over, restore the backed-up data.
Merge Mac Partitions with Disk Utility
Warning: Merge operation results in data loss. So, ensure you have a backup of your Mac before you execute any partition operation.a) Navigate to Finder > Applications > Utilities > Disk Utility to open the Disk Utility app.
b) In Disk Utility, go to View > Show All Devices to list storage disk structure in the sidebar.
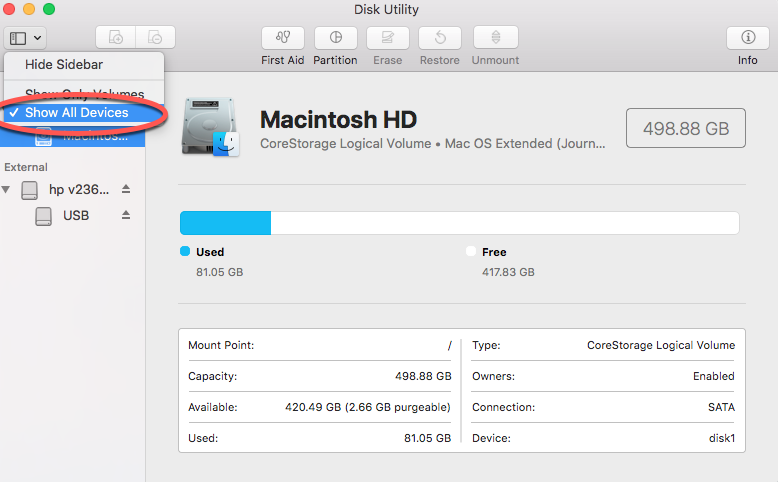 Image: Show all devices
 c) Select the required APFS volume and click the Partition button from the toolbar.
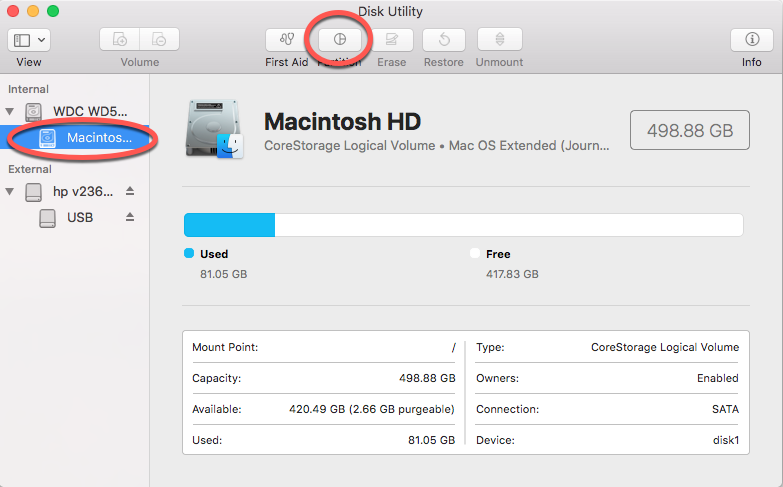 Image: Select Macintosh HD and go to the Partition tab
 d) In the Apple File System Space Sharing dialog window, click the Partition button. The“Partition device” screen opens with a pie chart.
e) From the pie chart, select the succeeding Partition, then click (–), the delete button.
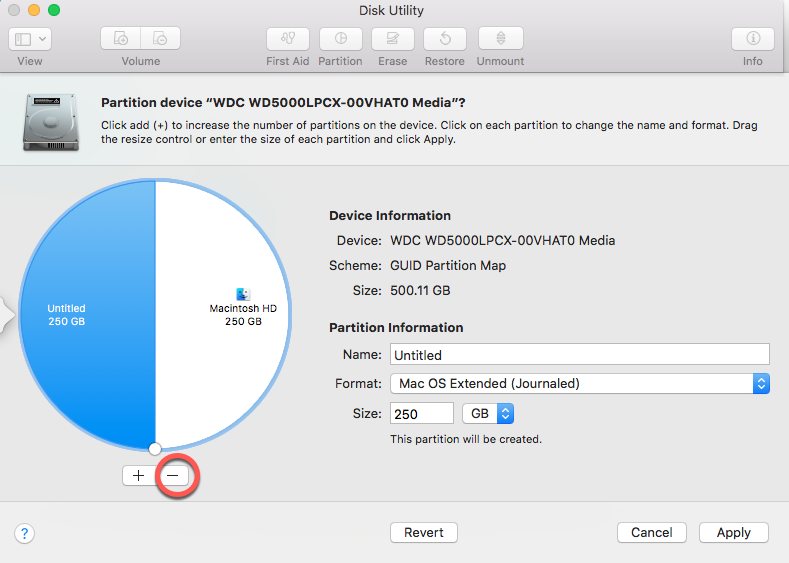 Image: Press minus sign
 f) Click Apply. In the Partition Device dialog window, click Partition. Finally, click Done.
g) If required, drag the endpoint of the partition you wish to enlarge to the freed space.
Congratulations! You have successfully merged (enlarged) a partition/volume on Mac.Can’t merge partitions on Mac?
It is impossible to enlarge the last volume, as there is no volume succeeding it that you can delete. But you can, of course, delete the last volume and merge it with the preceding volume. If the delete button is dimmed, you can’t delete the volume because it’s in use. In that case, you need to open Disk Utility in macOS Recovery mode to merge the Mac partitions.
Mac Partition Recovery Using Stellar Data Recovery Software
Mac data recovery software can search for lost partitions and recover data from the selected partition. Mac partition recovery steps are as follows:
a) Install, launch the free trial of “Stellar Data Recovery Professional” for Mac software.

b) On the Select “What To Recover” screen, click “Next.”
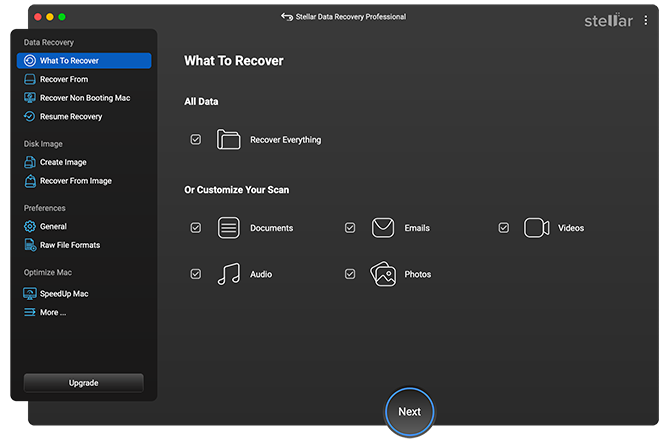 Image: Select What To Recover
 c) On the Select Location screen, click Can’t Find Volume, then click Next.
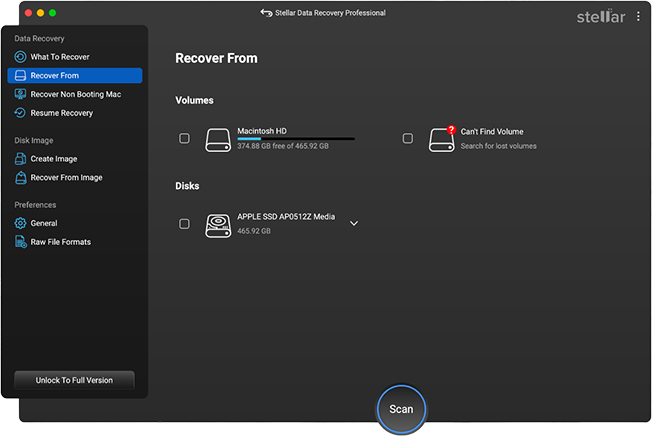 Image: Look for Deleted Partition
 d) In the Select Disk to Search Lost Volume screen, select a storage drive that you want to scan for lost partitions, then click Search.
e) Select a partition from the list, toggle on Deep Scan, then click Scan. The software finds and displays the data present on the missing Partition.
f) Preview the scanned files and select the required ones. Finally, click Recover > Browser to specify a distinct save location, then click Save.
Once the files are recovered from the lost Partition, restore them to the required Partition.
Stellar Data Recovery Professional for Mac is helpful for free scanning and previewing. But to recover data from a lost partition, you need to activate the software. Also, get a 30-day money-back guarantee.Conclusion
Now you know how to merge Mac storage drive partitions without losing data. The best preemptive measure is to back up the entire Mac drive, then perform the partition merge operations using Disk Utility. In case you didn’t back up and lost data due to merging, leverage Stellar Data Recovery Professional for Mac to search for any lost partition and recover data from the Partition.
Was this article helpful?