Microsoft Office 365 is a robust cloud-based service for managing emails and other tasks. It allows users to access their emails anytime and from anywhere, if they have access to the internet. Also, it contains various enhanced features that compel the users to shift from desktop-based or on-premises platforms to Office 365. As Office 365 supports the PST format, users need to import their email account data into Office 365 in this format. Importing PST with duplicate items may consume unnecessary space and make the import process time-consuming. In this blog, we have mentioned different methods to import PST into Office 365 without duplicates.
Methods to Import PST File into Office 365 without Duplicates
There are various methods to import PST file into Office 365 without duplicates. Here are some of them:
1. Use Outlook Import/Export Wizard
You can import the PST file into Office 365 mailbox via Outlook Import Export wizard. It provides an option to exclude the duplicate items in the .pst file while importing. Here are the steps to import PST file into Office 365 without duplicates by using Outlook:
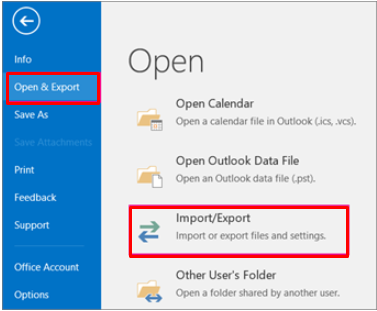
- Open MS Outlook and go to File > Open & Export > Import/Export.
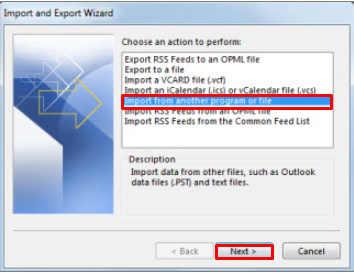
- In Import/Export Wizard, select the Import from another program or file option and click the Next tab.
- Select Outlook Data File (.pst) option and click Next.
- Browse the PST file location, select the Do not import duplicates tab, and click Finish.
Note: This method is feasible if you have to import a few PST files into Office 365 as you can only import one PST at a time.
2. Network Upload
In the Network Upload method, you have to download the AzCopy tool to upload the PST files to a temporary Azure storage location on the cloud. Then, use the Microsoft 365 import service to import the PST files into the target users’ mailboxes. You have to also create a PST mapping file in CSV format. You can use the filter data option to filter the duplicated item from the PST files while importing. For detailed steps, read How to Use Network Upload to Import PST into Office 365.
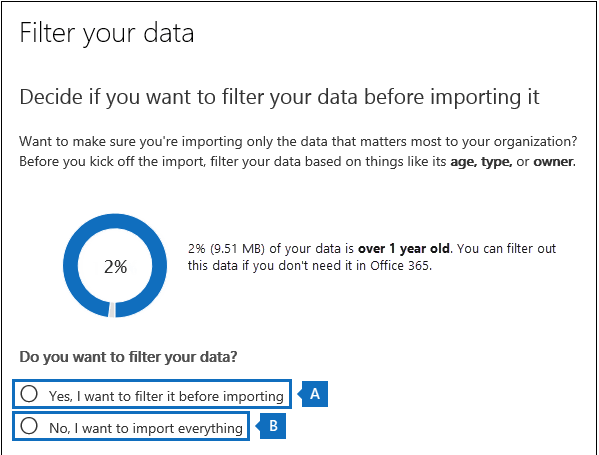
You can use this method to import multiple PST files into Office 365 at once. However, it is a lengthy process and has some limitations, such as:
- Requires downloading AzCopy tool to upload the PST files.
- The size of the PST file should not be more than 20 GB.
- The mapping file should contain a maximum of 500 rows, otherwise validation will fail. Therefore, you need to create multiple mapping files.
- Performing multiple manual steps is slightly complicated for a non-technical person.
3. Drive Shipping Method
Instead of uploading the PST files to Azure storage, you can copy the PST files to a BitLocker-encrypted hard drive and then physically ship that drive to Microsoft Data Center. After receiving the hard drive, Microsoft team uploads the PST files to a storage area on Microsoft Cloud. After this, you can use the Office 365 import service to import the PST file into users’ mailboxes. You can get the option to filter the PST files data before importing.
Although this method helps you import the PST files from Office 365 without duplicates, it has a few limitations, such as:
- It is time-consuming and tedious process as you have to follow various steps.
- It can take several days to upload PST files on Azure storage.
- It is costly as Microsoft charges $2/GB or $2000/1000GB for uploading PST files to Azure Storage.
For quick and hassle-free process, you can use a specialized PST to Office 365 migration tool. Stellar Migrator for Outlook is an effective tool to import PST files into Office 365 without duplicates. It merges the identical folders in the Office 365 mailbox to prevent duplicate mail folders. You don’t have to assign any mailbox role, upload a PST mapping file, and ship the hard drive to Microsoft. It allows you to import a PST file up to 50 GB or more with complete integrity. Follow the below steps to import Outlook PST into Office 365 using this tool:
- Launch Stellar Migrator for Outlook.
- Go to Select Mailbox, click Choose Manually to select the PST file, and click Scan.
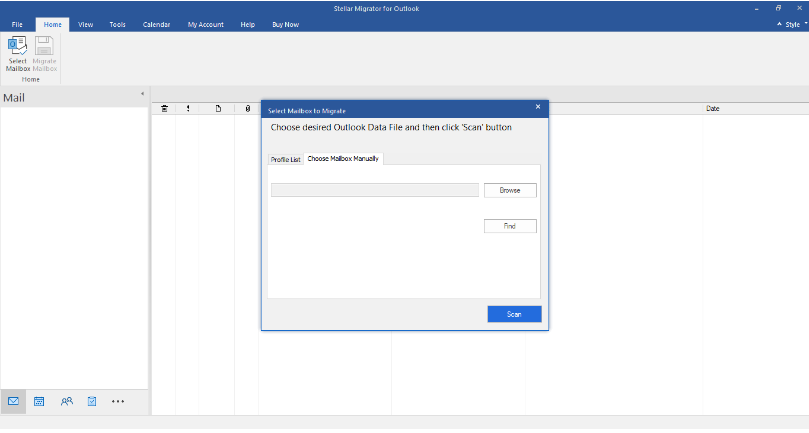
- The software analyzes the PST file and starts the scan process.
- Once the scanning process is completed, the tool provides a preview of the file.
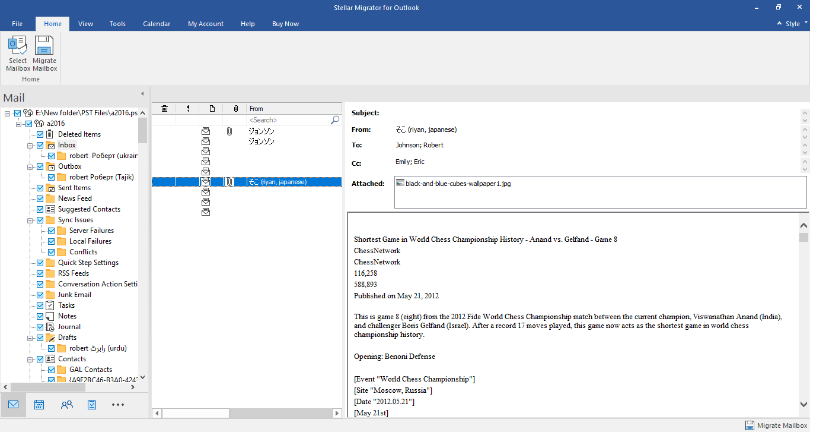
- Select the mail items and folders you need to upload to Office 365 and click Migrate.
- Enter the software’s license details, click Office 365, and then Next.
- Enter the Office 365 mailbox credentials and click Migrate.
- The tool establishes a secure connection with Office 365 and starts migrating the PST file to Office 365.
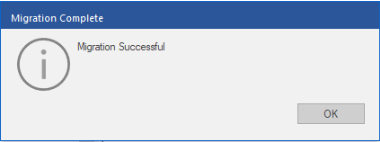
- A message is displayed notifying the successful migration of PST to Office 365. Click OK.
Conclusion
The duplicate emails can lead to confusion, increase the size of the Office 365 mailbox, and take up more cloud storage. This blog discusses the methods to import the PST file into Office 365 without duplicates. You can use any of the methods mentioned in this post to import PST into Office 365. There are multiple challenges and limitations associated with the manual methods. If you are looking for a time-saving solution while ensuring no duplicates are imported, try Outlook PST to Office 365 migration tool. It can directly import PST files into Office 365 mailboxes without duplicates.
Was this article helpful?