The data storage files for Outlook for Mac (OLM) is different from the Outlook for Windows (PST) and Microsoft has no defined utility for data transfer of OLM files into Office 365 or Microsoft 365 directly.
In case, you are a Mac user that’s using OLM Datafiles and wanting to save the OLM file in Office 365 or Microsoft 365 without the MAC system, then first convert the OLM file into PST format followed by importing the converted PST file into Office 365 or Microsoft 365 mailing platform. However, Microsoft suggested methods do not support importing of OLM directly to PST format, and the user gets stuck with the following error:
The file <path>.olm is
not an Outlook data file (.pst)
Since no direct converter
method exists, then the transfer is feasible with the conversion of OLM to PST using an IMAP mail account.
Convert OLM to PST by using IMAP account
The conversion of OLM into
PST involves setting up an IMAP mail account followed by transferring the
emails from one platform to another. Gmail with IMAP settings is a common
platform which can configure with Mac and the Outlook account.
- Setup a Gmail account with an IMAP: Set up a new Gmail account with IMAP settings or use the existing account and change its settings to IMAP
- Configure OLM with Gmail account: The Outlook for Mac account can be easily configured by using the Gmail account.
- Create a Gmail label: In the Gmail account with iMAP Settings, create a Gmail label to move the data from OLM file to the iMAP mailbox.
- Configure Outlook with Gmail: Once the data is transferred from OLM to Gmail label, the next step is to configure the Gmail account with Microsoft Outlook account.
- Move emails from Gmail to Outlook: Move all emails from iMAP based Gmail account to Microsoft Outlook and start accessing the OLM files in PST format.
- Import PST to Office 365 or Microsoft 365: Once all the files are imported in PST format, use the Office 365 or Microsoft 365 account to import the converted PST files to access the account through Cloud.
Note:
The
Gmail account acts as a transition
account for easy conversion from OLM to PST format.
A detailed analysis of importing the OLM
files into Office 365
- A long list of commands to be repeatedly performed
on multiple machines tends to cause mistakes while performing the steps.
- In case of a large enterprise scale migration, the time and effort required to import OLM files in Office 365 or Microsoft 365 by using the PST Capture Agent would be quite high
- A small mistake at any step will result in initiating
the whole process again, which is easily avoidable with software-based import process.
OLM to Office 365 Import in 3-easy steps
Software-based import method such as Stellar Converter for OLM (Technician) is one of the top preferences to import OLM files in Office 365 or Microsoft 365. The software-based methodology:
- Helps import OLM files to Office365 in three easy steps: Select > Scan > Save
- Is easy-to-use and enables easy and fast import of OLM files into Office 365 or Microsoft 365
- Displays a free preview of converted emails and other mailbox components for verification
- Support all Outlook versions including 2021 to earlier versions for Windows.
- Provides ‘Smart saving Options’ to save converted data into multiple formats
- Facilitates an option to ‘Find’ the OLM database file when the file location is not known
The following steps will help to convert OLM to office 365:
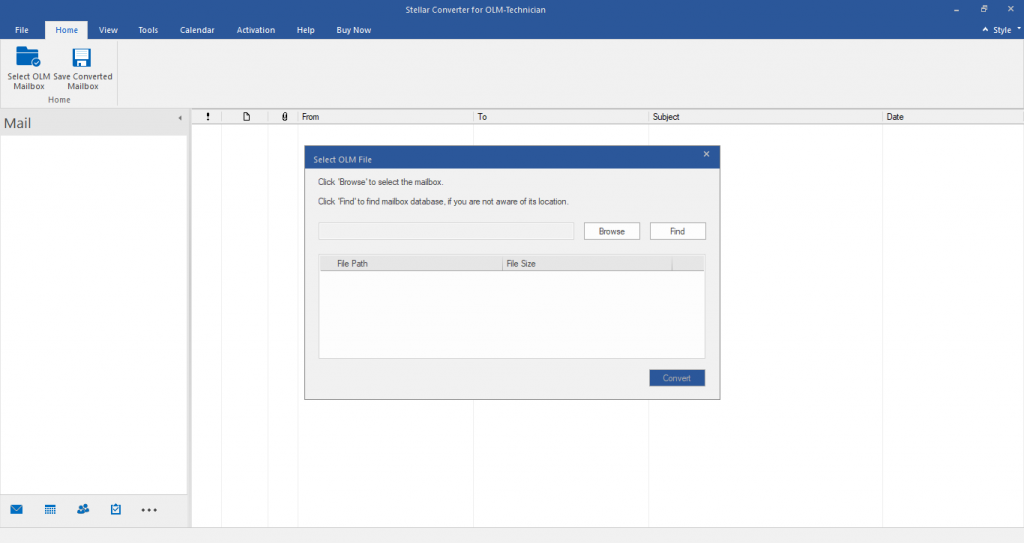
- Install and open the OLM file. The Home-screen provides an option to select the OLM file with Select Mailbox option. If the file location is not known, click the Find Mailbox option and the software displays the list of files with .OLM extension.

- Click the Convert button, and the software starts scanning process
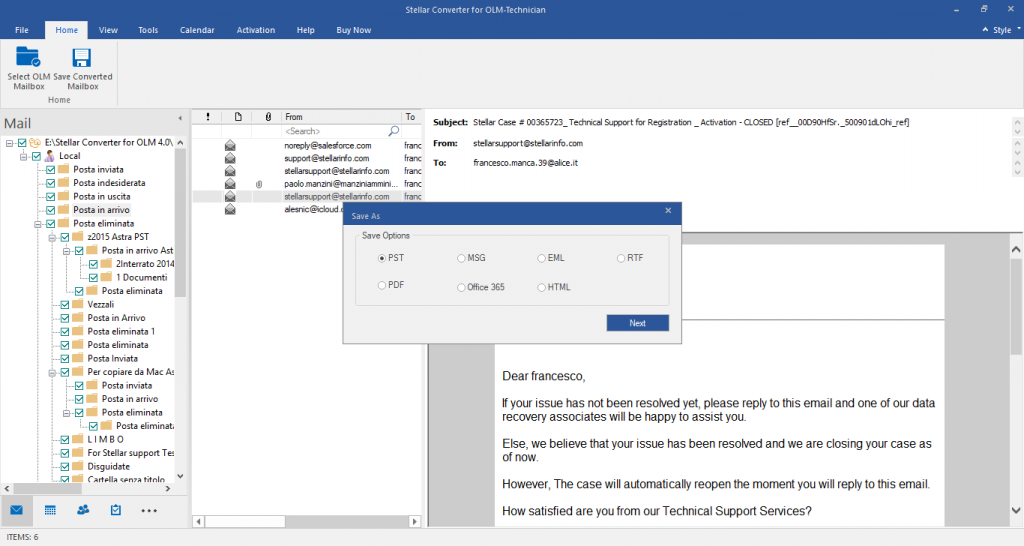
- A scanning process starts and once
completed, the software displays the mailbox content for preview. Verify the
mailbox content and click on Save
- The converted files are saved in user-specified format say PST.
Alternatively, the files are also imported directly to Office 365 with the
Technician version of the software. Specify the login credentials of Cloud
Office 365 to import the OLM files into Office 365.

- Once the process is completed, a pop-up of mentioning ‘Message Completion’ status appears. Click OK to conclude the process.
Conclusion
Importing OLM file into Office 365 or Microsoft 365 is not supported by Microsoft utility. Due to this factor, it becomes challenging to migrate to Cloud Office 365. This is true that conversion is possible with IMAP account configuration or configuring the PST Capture Agent, but both these methods have their limitations (scalability, proneness to error etc.) which make them less efficient, in comparison. Also, the use of advanced OLM to PST converter software such as Stellar Converter for OLM (Technician) is recommended to import OLM into Office 365 or Microsoft 365 format, as the software converts and directly exports all components of the mailbox data to Office 365 or Microsoft 365 without affecting the file format.
Was this article helpful?