How To Format SD Card on Different Devices [Without Losing Data]?
Summary: This blog outlines various methods of formatting the SD card. Learn the step-by-step solutions for formatting SD card on Windows, Mac, Android, and digital cameras.
An SD card is a portable little device for storing all kinds of data, like photos, music, videos, and documents. Sometimes, you might need to format your SD card because of compatibility issues, storage needs, or some other SD card error. Formatting wipes everything on the card, giving you a fresh start.
The steps to format an SD card can vary depending on whether you're using a Windows PC, Mac, Android device, or a digital camera. Therefore, it's crucial to do it right to avoid any unexpected data loss from the SD card. In this post, we'll guide you through the process for each device.
How to Format SD Card on Windows PC?
There are three methods to successfully format an SD card on your Windows system.
Note: Formatting the SD card will erase everything saved on it. Therefore, make sure to take proper backup of your important data.
Method 1: Format SD Card Using Windows Explorer
One of the easiest ways to format a memory card on Windows is to use File Explorer. To do this, follow the steps below:
- Connect your SD card to your Windows system via a card reader.
- Go to My Computer and select your SD card.
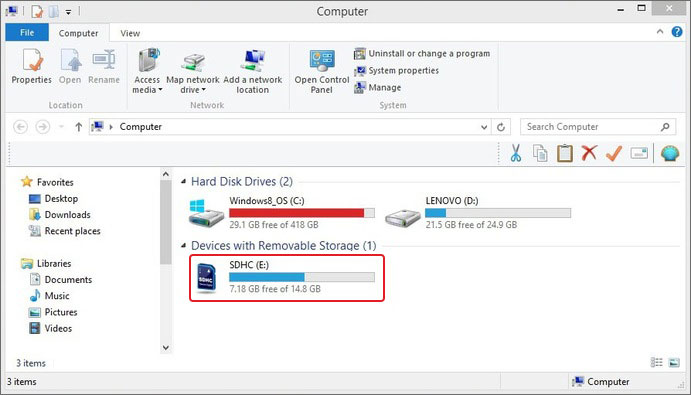
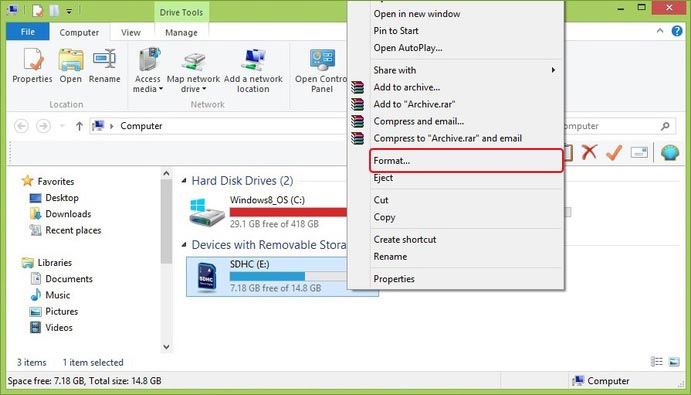
- Right-click on your SD card and click Format.
- A format window will appear. Specify the file system and set a volume label for your SD card. Moreover, select Format options and click Start.
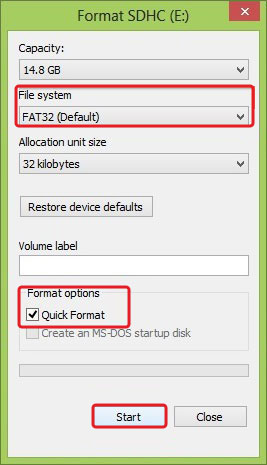
- Windows will start the formatting process for your SD card.
Method 2: Format SD Card Using Disk Management
The built-in Windows utility Disk Management can be used for managing disks and volumes on your system. It can be used to format, delete, or resize partitions, and create new ones. Here’s how to use Disk Management to format a memory card:
- Insert the SD card into the card reader and then connect it to your Windows system.
- Go to This PC in the left pane, right-click on it, and select Manage.
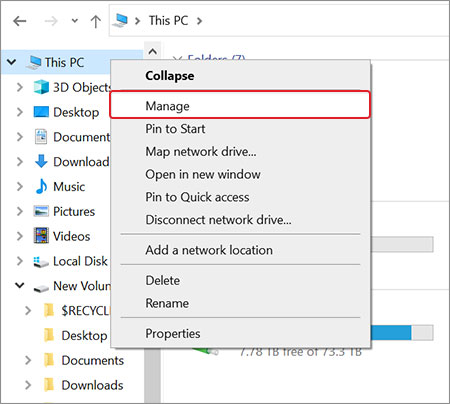
- A Computer Management window will appear, go to Storage and click Disk Management in the left pane.
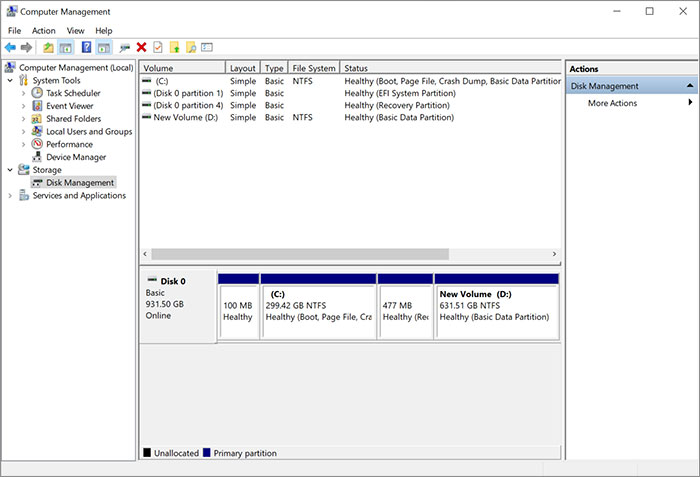
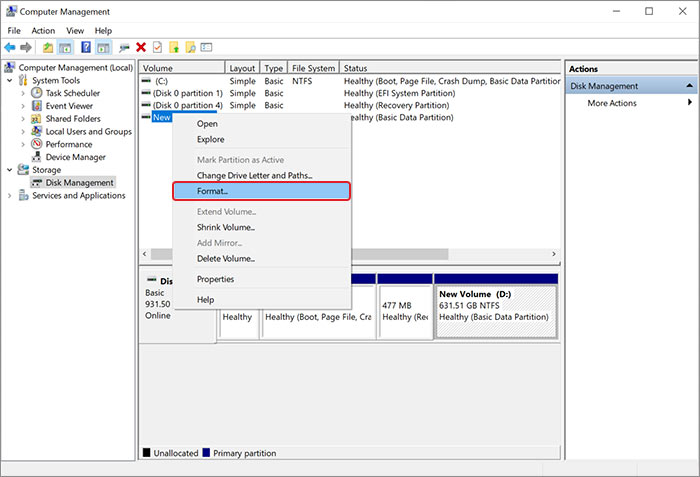
- Locate your SD card, right-click on it, and choose the Format option.
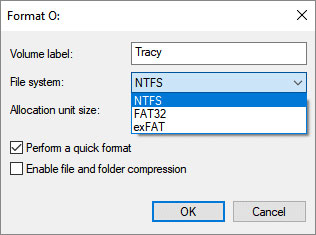
- Next, set a new Volume label, File system, and Allocation unit size for your SD card. Then click OK to format your memory card.
Method 3: Format SD Card Using Command Prompt
In Windows, Command Prompt is the default command line interpreter, which lets you control your system all from a single place. The Diskpart command lets you manage the disk partition and can be used to create, format, and delete partitions. Here’s how to use the Diskpart command in CMD to format the memory card:
- Connect the SD card to your computer.
- Type CMD in the search bar at the bottom of the Windows screen, and click the Run as Administrator option under the Command Prompt from the search result.
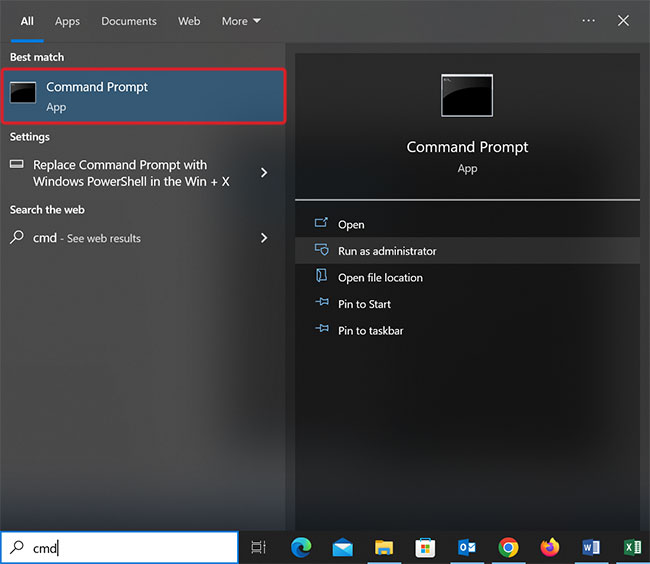
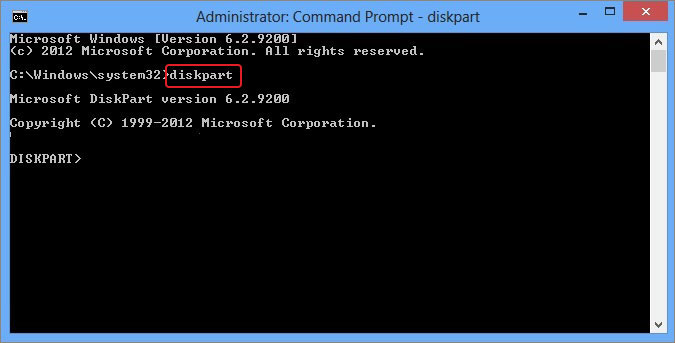
- Type diskpart in the command prompt and click Enter.
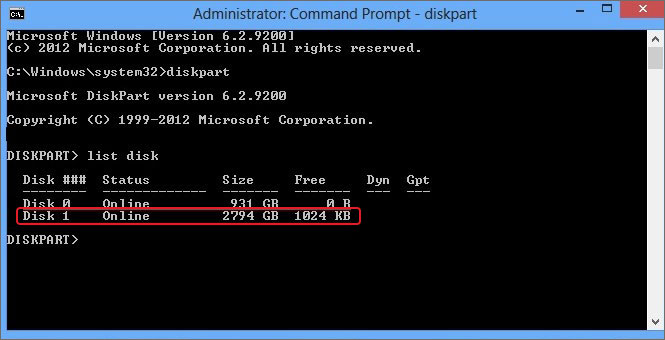
- Next, type list disk to see all accessible disks on your computer and click Enter.
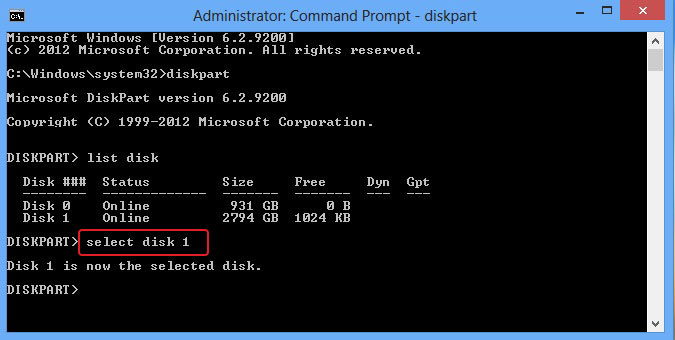
- Type select disk followed by the specific disk number of your SD card i.e. select disk 1 and press Enter key.
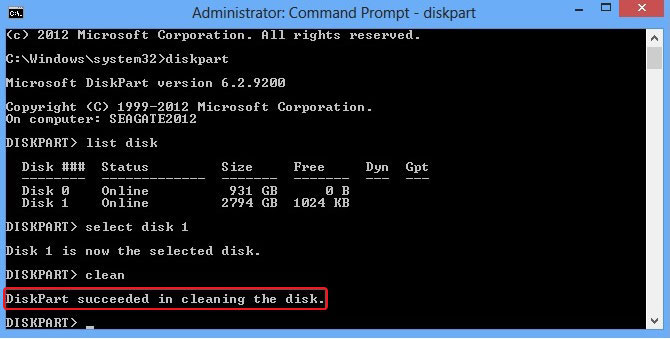
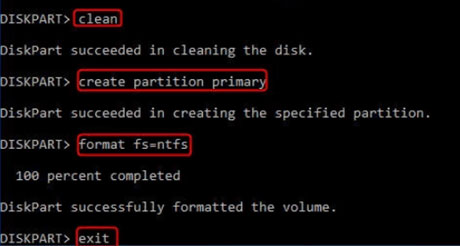
- Your SD card disk is selected. Next, type clean in the prompt and press Enter. It will delete everything from your SD card.
- Type create partition primary and hit Enter key.
- Next, type format fs=ntfs or format fs=fat32/exfat to format your SD card disk and press Enter Key.
- Next, wait until formatting is completed, type exit and click Enter.
How to Format SD Card on Mac?
You can format your SD card on Mac using – Disk Utility, Terminal, or the SD Card Formatter app.
Method 1: Format SD Card Using Disk Utility
- Connect your SD card to your Mac either by inserting it directly into the built-in SD card slot or using the memory card reader.
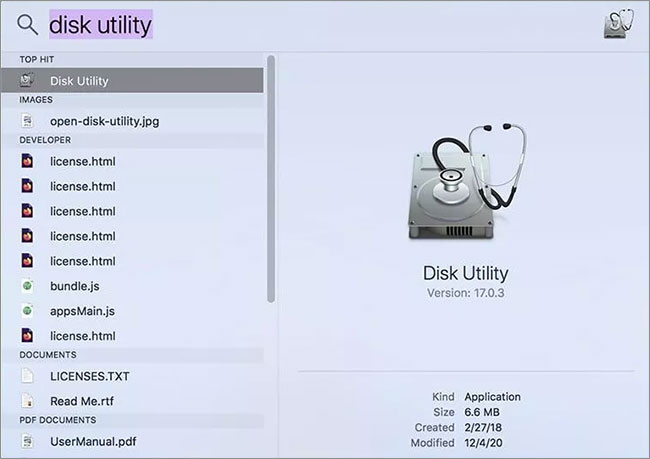
- Press Command + Space Bar and type Disk Utility into Spotlight search to open the Disk Utility App.
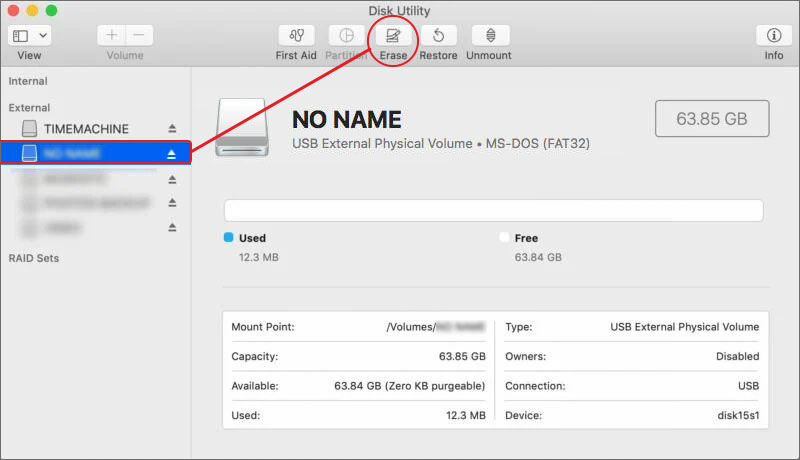
- Look for your SD card and select it.
- Next, click on the Erase button at the top of the screen.
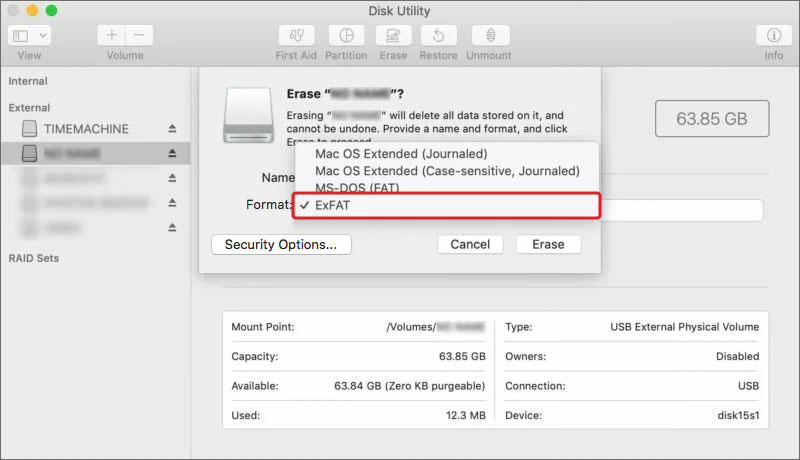
- A pop-up will appear with a warning that erasing the SD card will delete data stored on it.
- Here, you have the option to change the name of the SD card and select the file format from the drop-down menu.
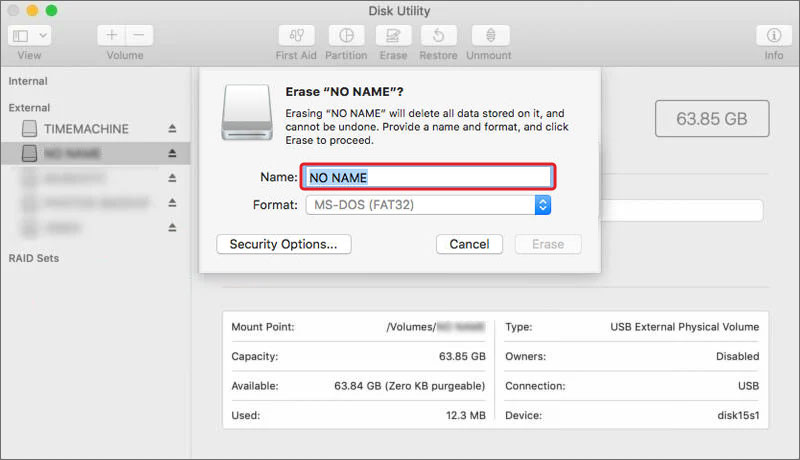
- Choose the file system format of your card from the Format drop-down menu. Hit the Erase button, all your media files stored on the card will be deleted and your SD card will be formatted to the appropriate file system.
Method 2: Format SD Card Using Terminal
This is a complex way to format the SD card and is suitable for advanced users. Here are the commands you need to use while formatting the SD card using the Terminal app:
- Connect the SD card to Mac using a card reader.
- Press Command + Space and type Terminal to open it.
- Type diskutil list to know details about all disks connected to Mac.
- Search for your SD card in the disks list.
- Next, type sudo diskutil eraseDisk FAT32 SDCARD MBRFormat /dev/disk4 for 32 GB or smaller SD cards. For 32 GB and larger SD cards, type sudo diskutil eraseDisk ExFAT SDCARD MBRFormat /dev/disk4.
- If prompted, type your Mac password.
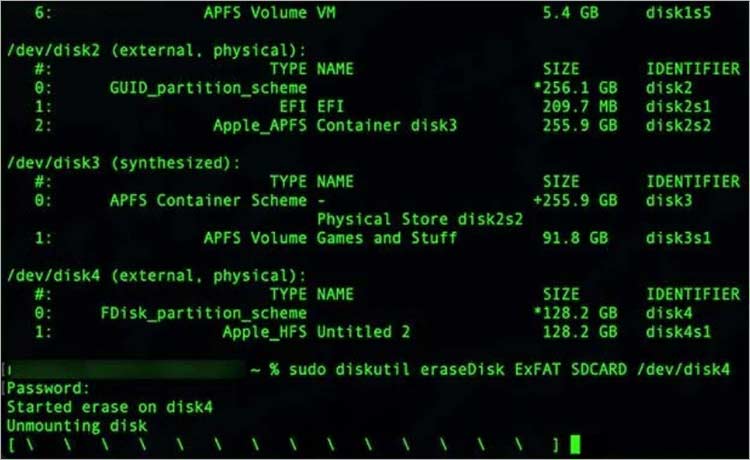
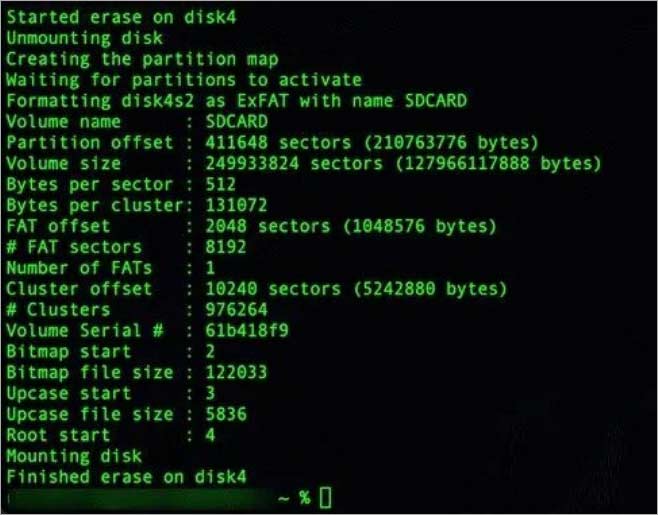
- Wait for the command to finish. Once done, your SD card will be ready to use after formatting.
Method 3: Format SD Card Using SD Card Formatter
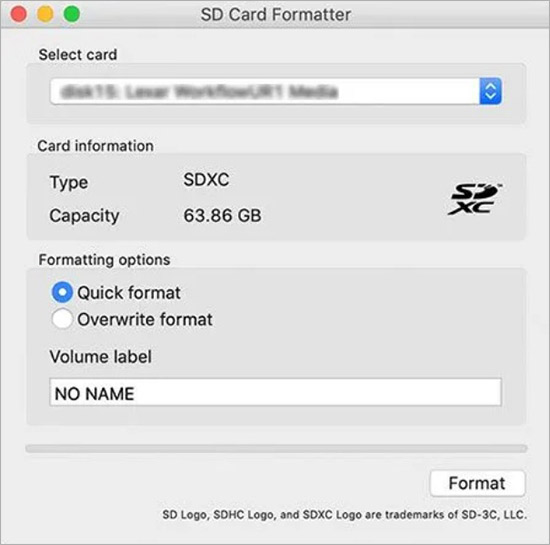
You can even use the SD card formatter app developed by SD Association to format the SD card on Mac. This app is easy-to-use and can automatically detect your SD card, its size, and choose an appropriate file system. For example, if you connect a 64 GB SD card, it will detect the card easily and will only allow to format it to SDXC specification using exFAT.
How To Format SD Card on an Android Device?
Formatting the memory card on an Android smartphone is a simple process and can be done in just a few simple steps. However, before formatting, it's necessary to back up any important data on the card to a cloud storage or an external backup drive. Here’s how to format the card in various Android versions:
- Insert the SD card into your Android smartphone.
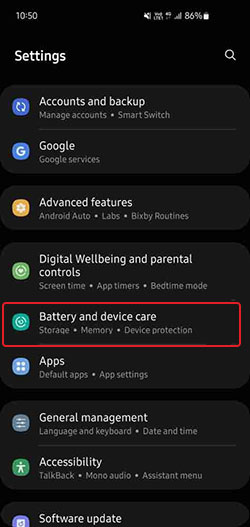
- Open the Settings app, scroll down, and tap on Battery and Device Care option (in some Android, it is Battery and Storage).
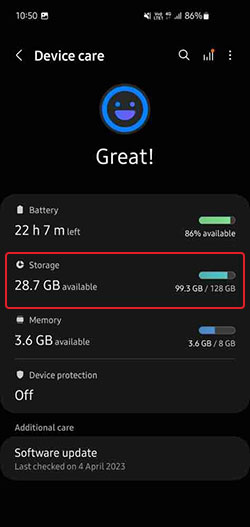
- Next, select Storage from the list of available options.
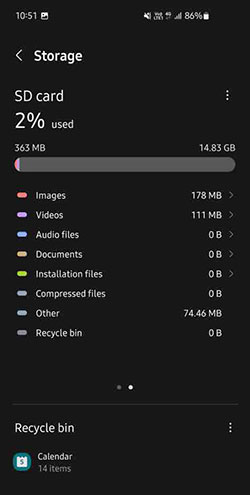
- On the Storage screen, swipe the screen to see SD card details (in some Android phones, the SD card will appear at the bottom of the screen).
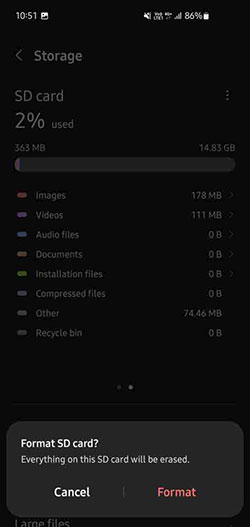
- Next, click on the three dots at the top and select the option of Format. (In some Android phones, click on three dots, then Advanced, select your SD card, and then choose Format option).
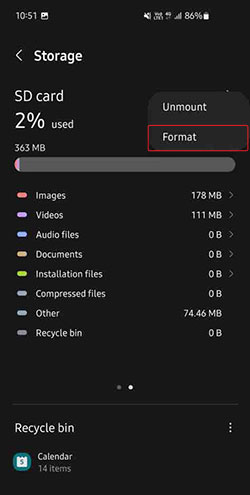
- In the pop-up window, click Format to confirm and initiate the formatting process.
How to Format SD Card on Camera?
Formatting an SD card on your camera is crucial to prevent issues with saving new photos and videos. It also minimizes the risk of file corruption and helps avoid problems caused by low storage space or low battery. Here’s how to format SD cards on some popular brands of cameras, such as Canon, Nikon, and Sony.
Method 1: Format SD Card on a Canon Camera
- Insert your memory card into the Camera.
- Turn on the camera, press the MENU button, and reach the ‘Wrench’ tab using the INFO button.
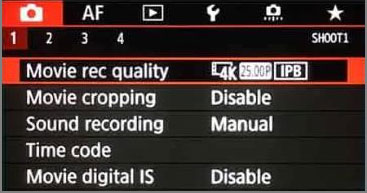
- Next, select the ‘SET’ button and move further to choose the ‘Format card’ option.
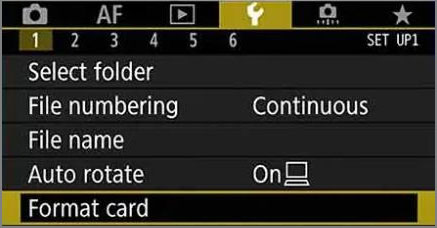
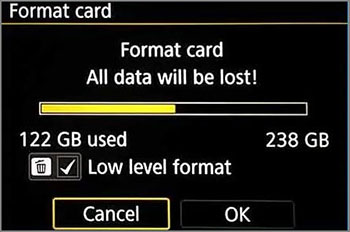
- Now, choose how you want to format your memory card i.e. Low-level format or quick format.
- Select OK and then press the SET button to initiate the formatting.
Method 2: Format SD Card on a Sony Camera
- Turn on the camera after inserting the memory card into it.
- Press MENU and use the control wheel to select Setup, then choose Format.
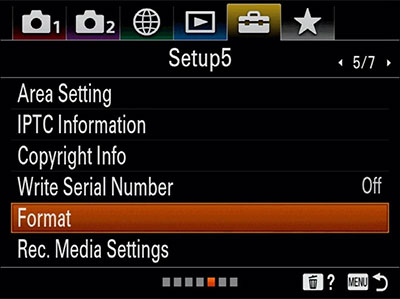
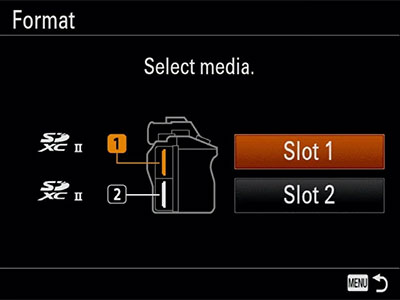
- Chose the Memory card you want to format.
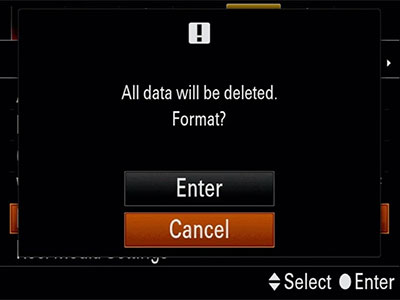
- Click Enter to start the formatting.
Method 3: Format SD Card on a Nikon Camera
- Insert the memory card into the Nikon camera.
- Press the MENU button on the top-right of the camera.
- Move the wrench icon to the Setup menu item.
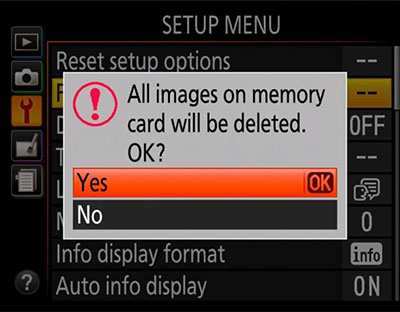
- Now, select the Format Memory Card option and choose whether you want to format the SD card or the Compact Flash card.
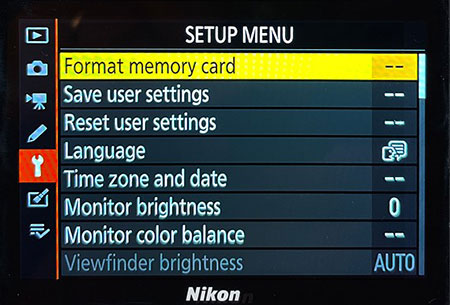
- Confirm your choice by pressing Yes.
How to Recover Media Files from the SD Card Before Formatting It?
Before formatting an SD card, your first step should be to recover the photos, videos, and audio files stored on it. Recovering your data before formatting the memory card helps you prevent unwanted data loss scenarios. Use a reliable SD card recovery software like Stellar Photo Recovery to restore all your data before formatting.
The software can recover lost or deleted media files from corrupted/ damaged/ inaccessible SD cards (Mini, Micro, SDHC, SDXC) memory cards, compact flash, CF cards, and more. Follow the step-by-step method to recover media files from the SD card using Stellar Photo Recovery:
Step 1: Connect the SD card to your computer using an SD card reader.
Step 2: Download, install, and launch Stellar Photo Recovery software on your PC.
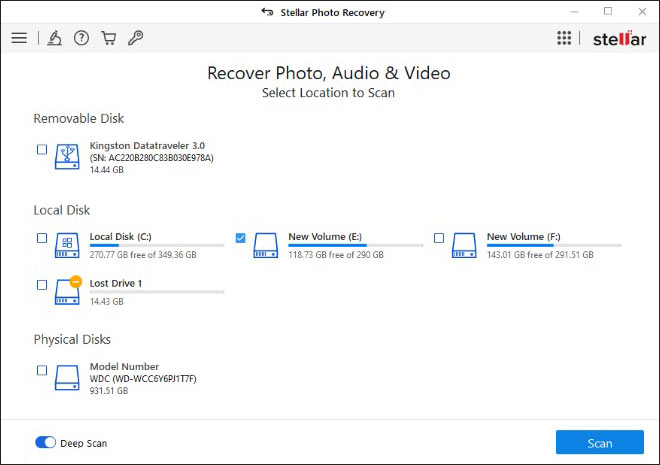
Step 3: From the home screen, select the SD card from which you want to recover your files and click Scan.
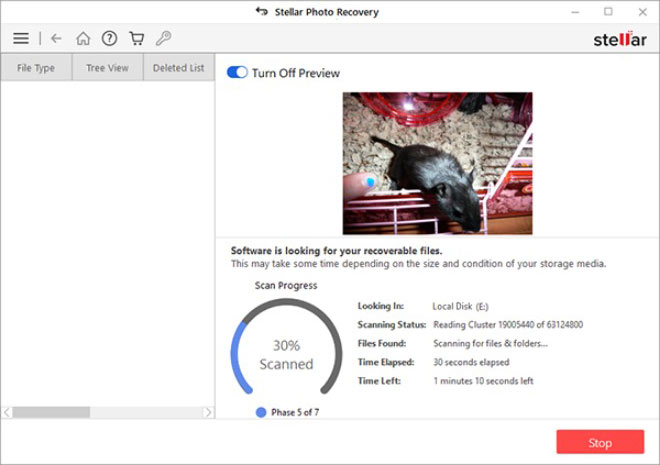
Step 4: The scanning will start and once completed, you can Preview the recoverable files.
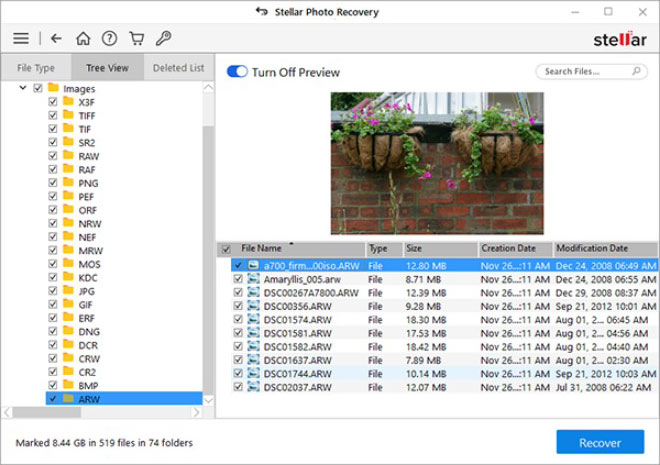
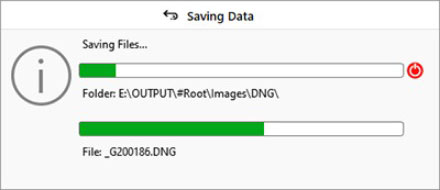
Step 5: Select the media files you want to restore and click Recover to save them at a desired location.
Conclusion
Formatting an SD card is a straightforward process, whether you’re doing it on Windows, Mac, Android, or a digital camera. However, it’s important to remember that formatting an SD card will erase all data on the card, so it’s crucial to back up any important data before proceeding forward.
By following the methods outlined in this blog post, you should be able to format your SD card easily, regardless of the device you’re using.
FAQ
1. How to fix the “SD card won’t format” error?
There can be various reasons why SD card format errors occur, such as a corrupt card, bad sectors or virus infection. To resolve the SD card won’t format error, you can refer to this blog.
2. What are the signs that show my SD is corrupted?
Your SD card is corrupted if you see the following signs:
- Photos on your SD cards are missing.
- Your SD card is not accessible.
- Unable to see the stored photos or videos.
- Unable to add, delete, or copy anything on SD card.
3. How to fix the error ‘SD card is blank’?
You can try the following methods to fix the SD card is blank error:
- Run CHKDSK on SD card.
- Restart your device.
- Connect your card to any other machines.
- Format your SD card.
4. How to recover photos from a formatted SD card?
You can recover photos from the formatted SD card until you have overwritten them.





Formatting on camera is different on my camera. As the steps are different. I have Nikon coolpix p950 and its not showing what you have mentioned.
Hi Harman,
Sometimes, steps may differ on different cameras or camera brands. Please visit this Nikon guide to know how to format SD card on Nikon P950.