Video playback issues like lagging, stuttering, or glitches can disrupt your experience, whether you’re streaming online or playing downloaded content. Common causes include outdated drivers, corrupt files, or even hardware limitations. In this guide, we’ll explore practical solutions to fix these issues, ensuring smooth video playback.
Whether you’re dealing with video lagging, wondering why is my video lagging, or looking for ways to remove lag from video, we’ve got you covered. Let’s dive in.
What Causes Video Lag or Glitches?
Before troubleshooting, it’s essential to understand why these issues occur:
- Outdated or Corrupt Drivers: Graphics or sound drivers may be outdated or improperly installed.
- Hardware Limitations: Insufficient RAM or an outdated processor can struggle with high-resolution videos.
- Corrupt Files: Videos that are partially downloaded or transferred can show errors.
- Software Conflicts: Codec issues or outdated media players can hinder playback.
- Network Issues: Slow internet speed can cause buffering and glitches while streaming.
Top Methods to Fix Video Lag, Stutter or Glitches
- Reinstall or Update Device Drivers
- Repair Video Using VLC Media Player
- Scan for hardware changes
- Disable hardware decoding
- Decrease the video size & resolutions
- Re-download or Re-transfer the Video
- Use a Reliable Video Repair Tool
1. Reinstall or Update Device Drivers
Outdated drivers often lead to stuttering or video lagging. Here’s how to update them:
- Open the Control Panel and select Device Manager.
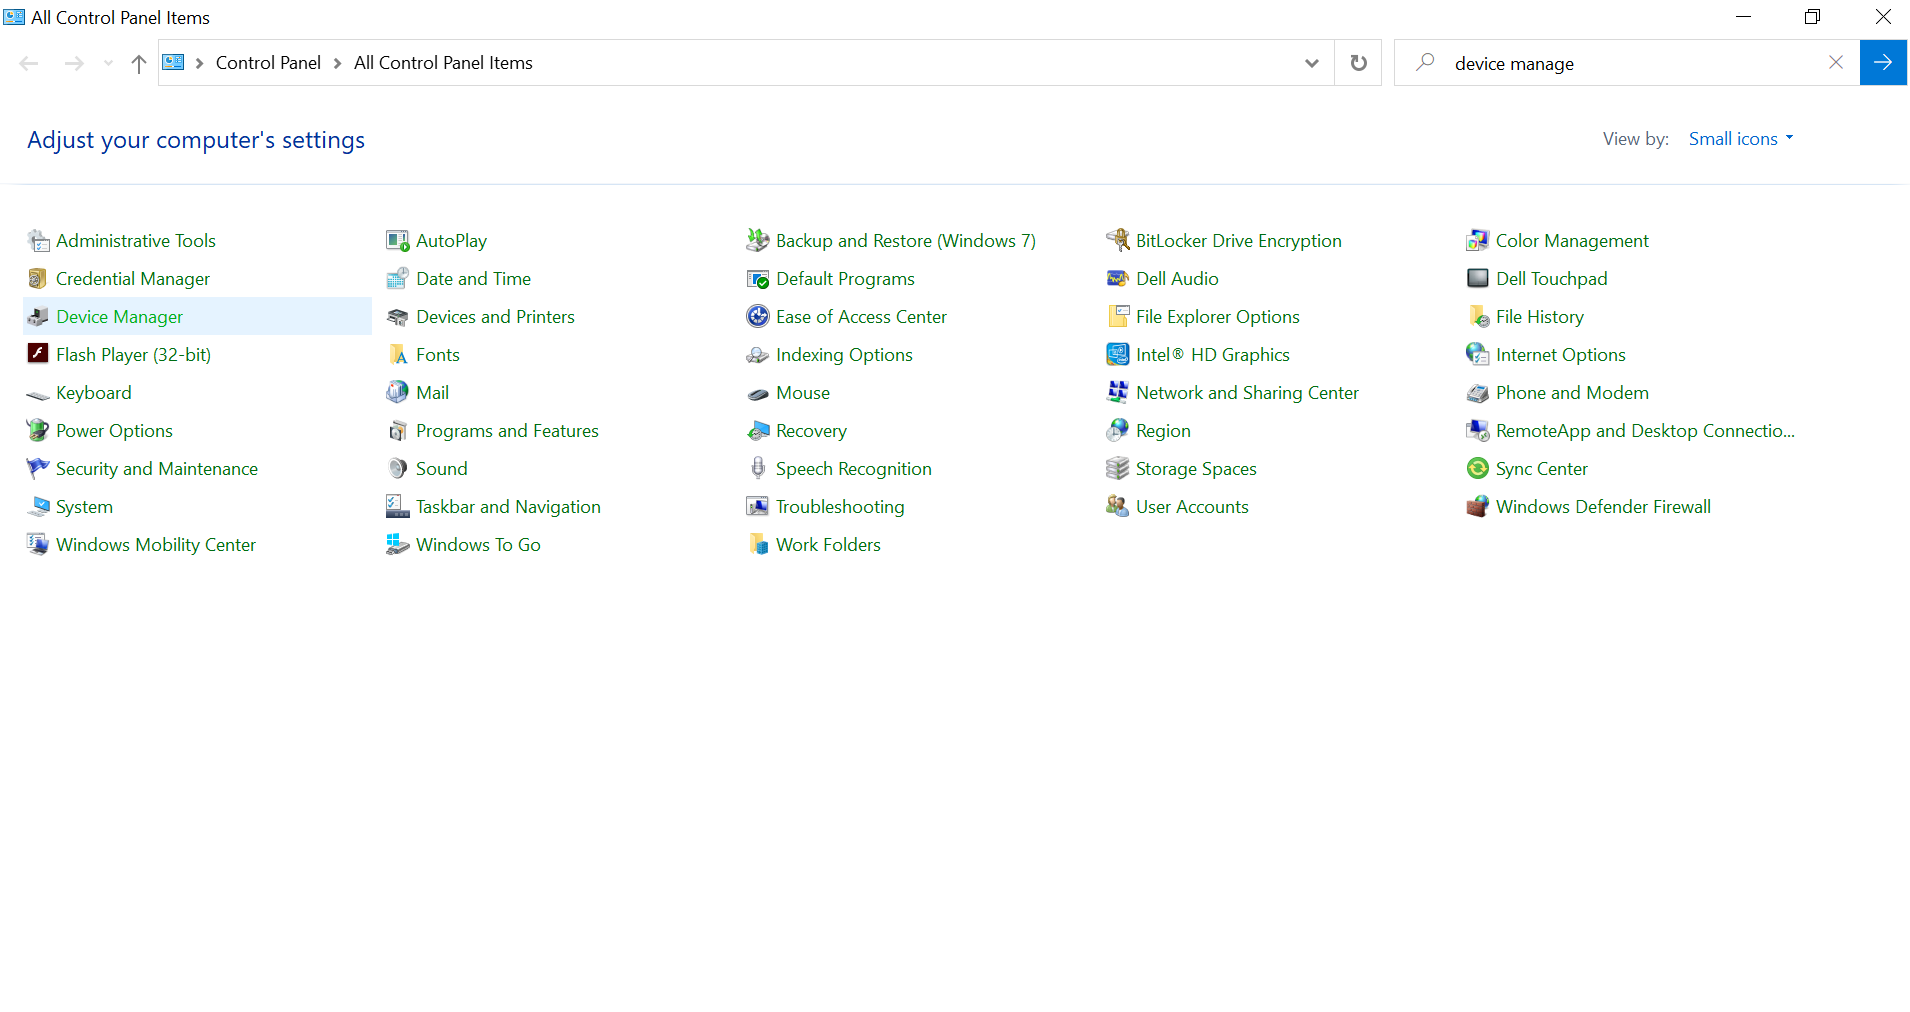 Figure 1: Open Control Panel and search Device Manager.
- Expand the Sound, Video, and Game Controllers section.
 Figure 2: Select Sound, video and game controllers.
- Right-click on your device and select Update Driver or reinstall the driver if needed.
Pro Tip: Use tools like Driver Booster to automate this process.
2. Repair Videos Using VLC Media Player
VLC Media Player is not just a video player—it can also repair corrupt files. Follow these steps:
- Open your video in VLC and go to Tools > Preferences.
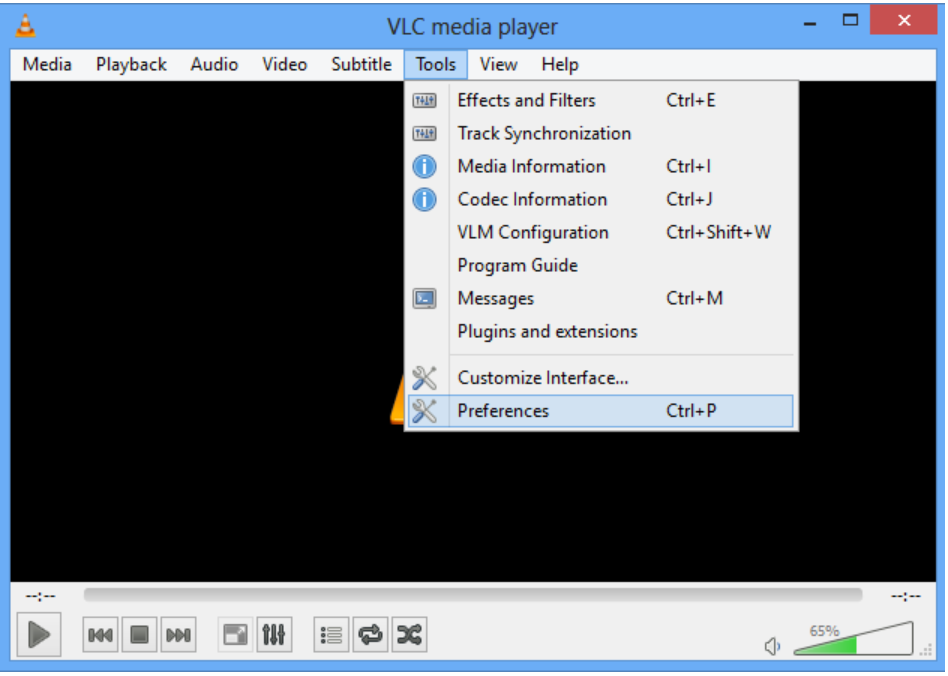 Figure 3: Choose Preferences under Tools section.
- Under the Input & Codecs tab, select Always Fix for damaged files and click Save.
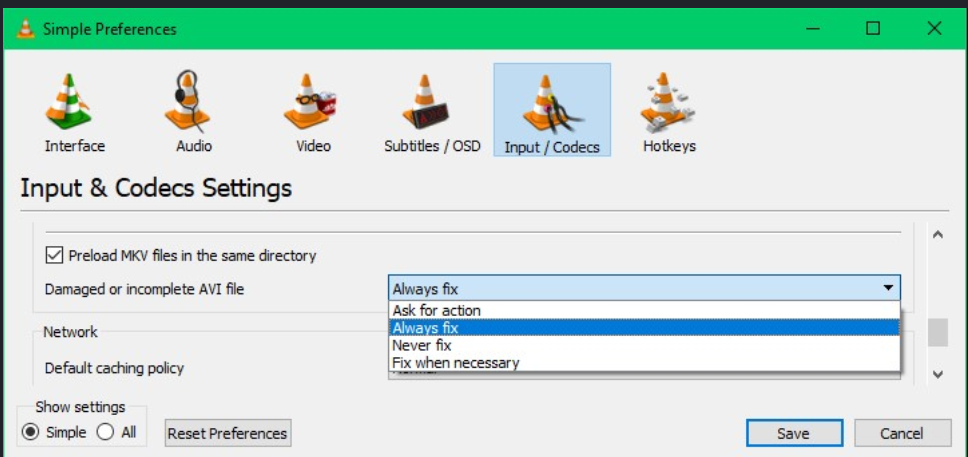 Figure 4: Choose Always Fix > Save option.
 This method is especially effective for minor corruption issues.
3. Scan for Hardware Changes
If recent hardware changes have caused playback issues, you can scan for conflicts:
- Open the WinX Menu by pressing Windows + X.
- Select Device Manager and click on Scan for Hardware Changes.
Recheck your video playback after the scan.
4. Disable Hardware Decoding
Hardware-accelerated decoding can sometimes lead to choppy playback. Disabling it may help:
- Open VLC and go to Tools > Preferences.
- In the left sidebar, click Input & Codecs.
- Uncheck the box for Hardware-Accelerated Decoding.
This setting is particularly useful for high-resolution videos like 4K or UHD.
5. Decrease Video Size and Resolution
High-definition videos can strain your system. Use a video converter to lower the resolution:
- Adjust parameters like frame rate, bitrate, and resolution.
- Save the optimized video and try playing it again.
Tools like HandBrake or Online Video Converter work well for this purpose.
6. Re-download or Re-transfer the Video
Improper downloads or interruptions during transfers can corrupt video files. To resolve this:
- Delete the faulty file.
- Download or transfer the video again, ensuring no interruptions.
7. Use a Reliable Video Repair Tool
If the above methods fail, using a professional repair tool is your best bet. Stellar Repair for Video is one such option:
- Download, install and run Stellar Repair for Video.
- Click Add Videos and upload your corrupted videos.
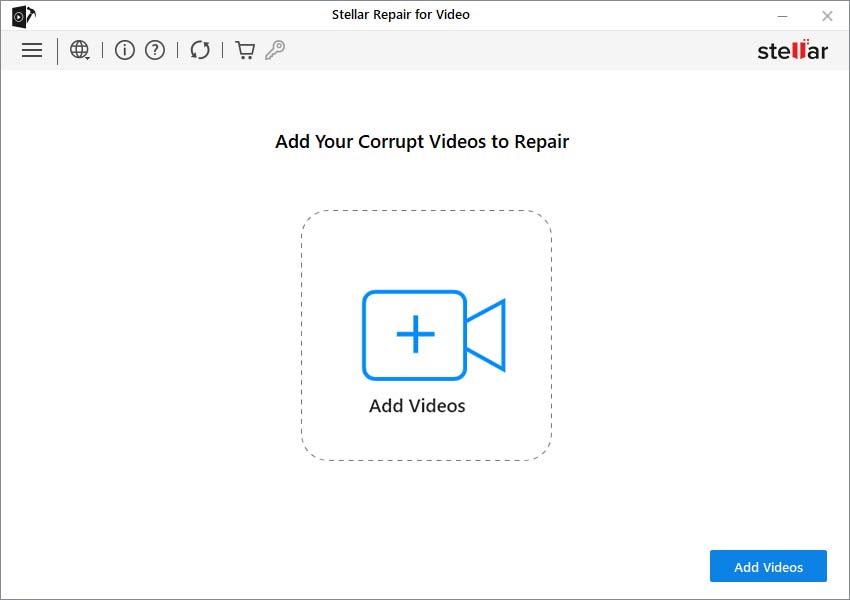 Figure 5: Add Videos to Repair.
- Hit Repair, preview the fixed file, and save it.
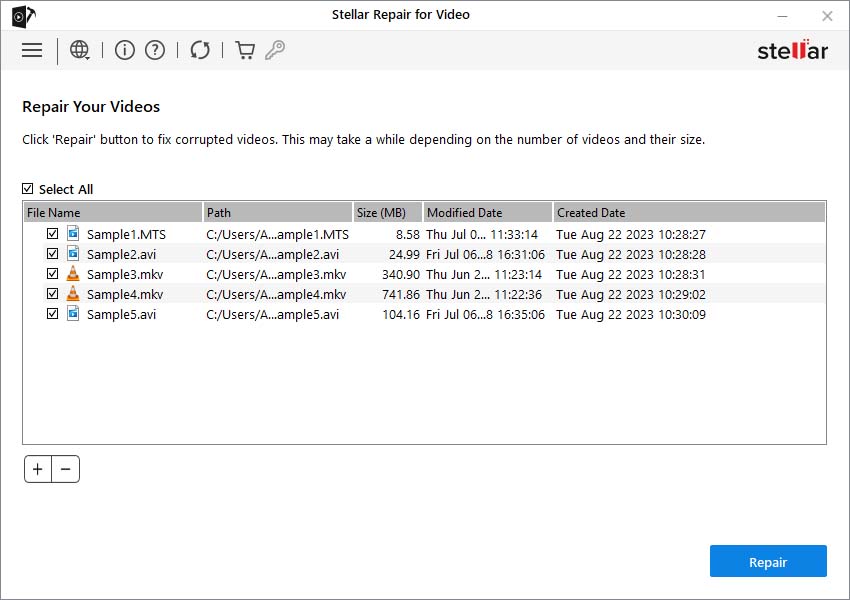 Figure 6: Click Repair to repair the corrupt videos.
- Click Save Repaired File to save the videos at your desired location.
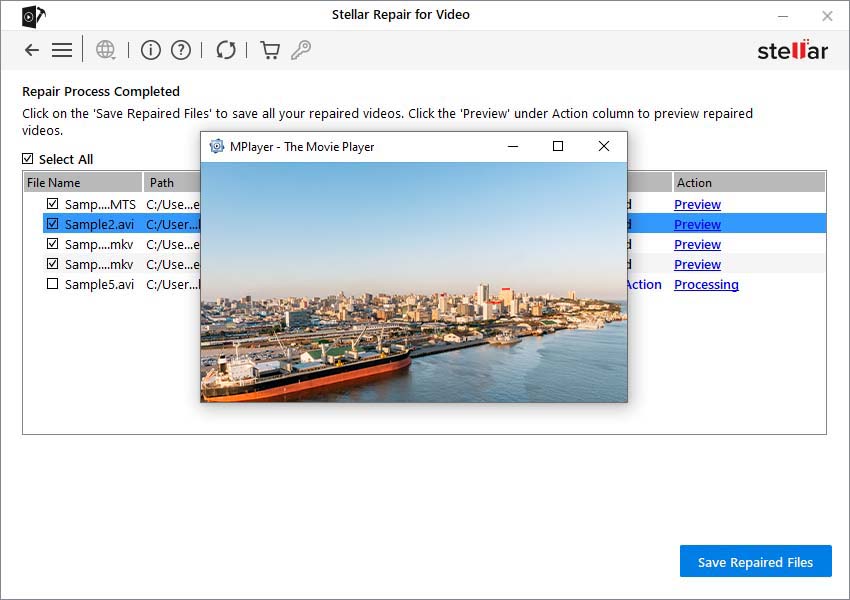 Figure 7: Click Save Repaired Files to save at your desired location.
 Alternatives include Online Video Repair by Stellar.
Pro Tips for Fixing Online Video Lag
If you’re facing issues while streaming, try these quick fixes:
- Clear cookies and temporary files in your browser.
- Use a wired internet connection instead of Wi-Fi.
- Update your browser and media player to the latest versions.
- Watch videos in a different browser or Safe Mode to rule out software conflicts.
Conclusion
Dealing with lagging, stuttering, or glitches can be frustrating, but these solutions should help you restore smooth playback. Start with simple fixes like updating drivers or using VLC, and move on to specialized tools like Stellar Repair for Video if needed.
Remember, understanding the root cause is key to resolving the issue. Whether you’re troubleshooting how to remove glitch from video or trying to remove lag from video, a step-by-step approach will save you time and effort.
If you have any questions or additional suggestions, drop them in the comments below!
Was this article helpful?