The newly released Windows 11 comes with many new features. However, it has retained some of its legacy features, such as Backup and Restore (Windows 7) and System Restore. With System Restore, you can create a restore point that helps you recover Windows by reverting to a previous working state, if Windows OS runs into a major problem. However, it will undo all the system changes that occurred from that point. This feature is not enabled by default. You need to do it manually. Below, we’ll be discussing the step-by-step process to create restore point in Windows 11.
Note: It is recommended to set a restore point before making any changes to your system. Doing so will enable you to instantly take action, if something goes wrong due to faulty device drivers, problematic system updates, invalid registry settings, etc.
Methods to Create a Restore Point in Windows 11?
Creating a restoring point won’t take much time. First, you need to enable the System Restore feature and then make the restore point. Let’s get started.
1. Enable System Restore
- Locate the Search bar, type Create a restore point, and click Open.
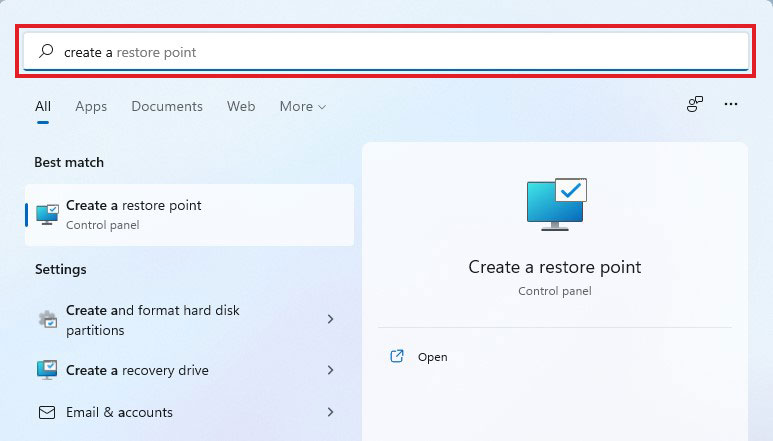
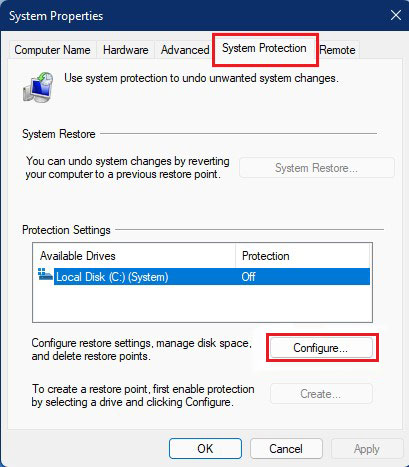
- The System Properties window will pop up.
- Under the System Protection tab, click Configure.
- Now, on the next prompt, click Turn on system protection and click OK.
- It will enable System Protection on the system drive. You can also use the Drag option to adjust the maximum disk space used for system protection.
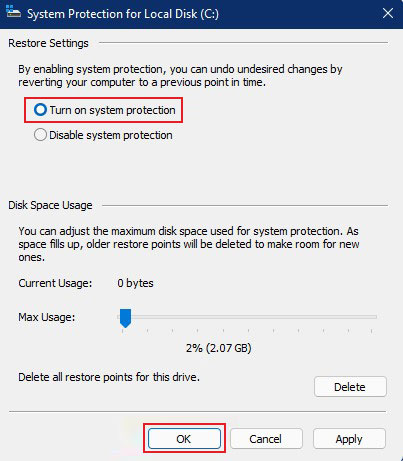
- It will enable the System Restore.
2. Create a Restore Point
Now that System Restore is enabled, proceed further with the following steps:
- Go back to the System Protection tab and then click Create.
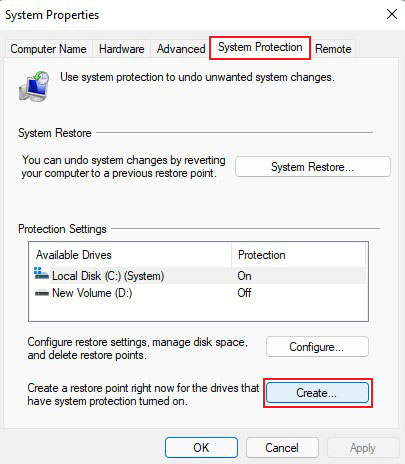
- In the next window, give a name to restore point and click Create > OK.
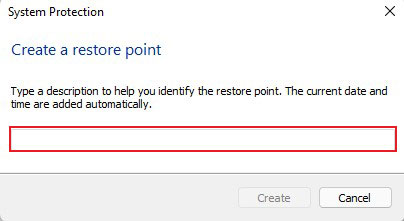
- You’ll see the progress bar. Once you’re done with creating the restore point, a message about process completion will appear on the screen.
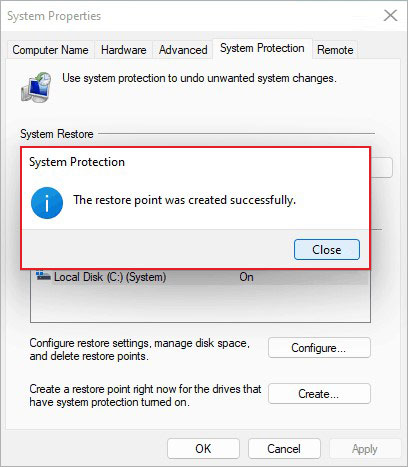
- And, that’s all. The restore point is created. You can use it to perform System Restore.
How to Use System Restore in Windows 11?
Now that you’re done setting up the restore point, you can learn how to use System Restore in Windows 11. Follow the given steps:
- Go to the Search bar, type Create a restore point, and open it.
- On the next prompt, under the System Protection tab, click System Restore.
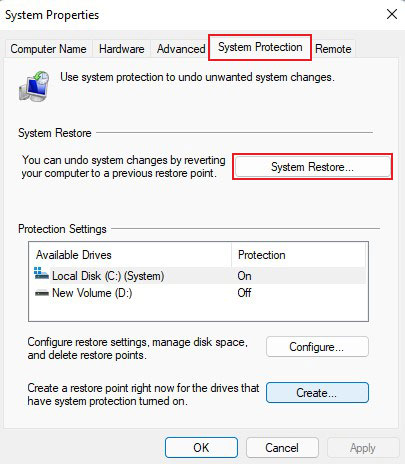
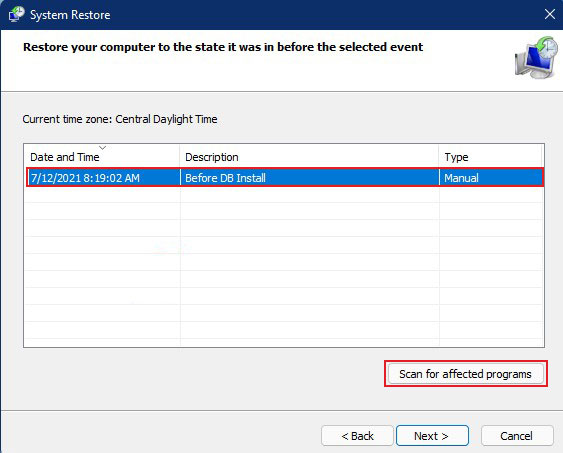
- Now, click Next and choose the restore point from the list to which you want to return the system settings and configurations.
- Click Scan for affected programs. It will show you the system programs, registry settings, files, etc., that will be affected during the process.
- Finally, click Finish to complete the process.
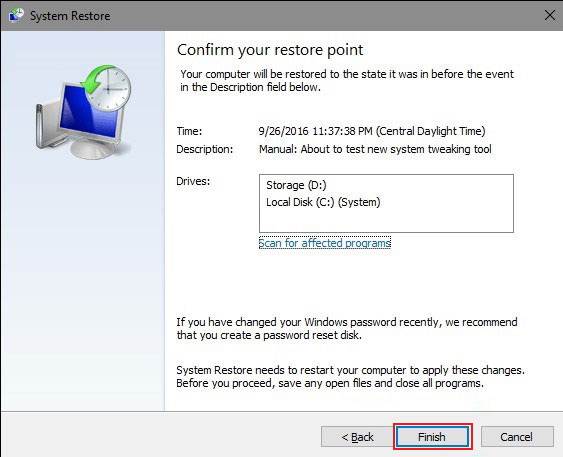
- Once done, close the window and restart your PC.
To Wrap Up
Creating a restore point and using it to perform System Restore may help you fix system issues, such as BSOD errors, Boot Up errors, etc., by bringing the system to its good old state. However, it will remove the system setting changes, affecting system files, Windows update, etc., due to which you may end up losing your crucial system data.
To avoid data loss, keep in hand a data recovery software, such as Stellar Data Recovery Free Edition.
The software can retrieve data even from a formatted, corrupted, unbootable, or crashed Windows system. It’s a DIY software that can recover data from Windows systems and external storage media, such as HDDs, SSDs, USB drives, and more. With the free version, you can retrieve data up to 1 GB.
What is a restore point?
The restore point is referred to as a fixed condition of your system and its data. It starts creating a copy of your system settings and files from the moment it’s completed. Using the restore point, you may perform System Restore and fix your system when any install failure, data corruption, or other problem occurs.
Can I stop System Restore process in Windows 11?
Windows generates a warning message stating that the process shouldn’t be interrupted after its commencement. It could drastically interfere with the restoration process and turn your system into bricking condition.
Was this article helpful?