Summary: Here are the 4 DIY methods to clear system storage on Mac and detailed instructions on how to do that. Also, we’ll show you how to make all the processes safe by protecting your data with Stellar Data Recovery software.


Insufficient storage on your Mac is a common problem with which you are most likely familiar. You probably tried to delete everything you could and save your data on the cloud services, but that wasn’t helpful enough.
So what is the reason for this headache? The cause of the issue could be full system storage. It’s not always easy to find and understand what you can delete in such a situation. The great news is that we can show you how to resolve this issue!
Let’s figure everything out step by step.
What is System Data on a Mac?
The primary function of the system data on Mac is keeping backups, cached files, temporary files, and essential macOS operating files. When your Mac is overfilled with these files, the storage space decreases respectively. Generally, the Mac system is designed in such a way that it can automatically delete temporary files. However, other useless files aren’t always deleted. This could be a reason for the system overload.
How to Check System Data Storage on Mac?
Let’s say you’ve already tried to delete your unnecessary personal files. So, how do you check system storage on Mac?
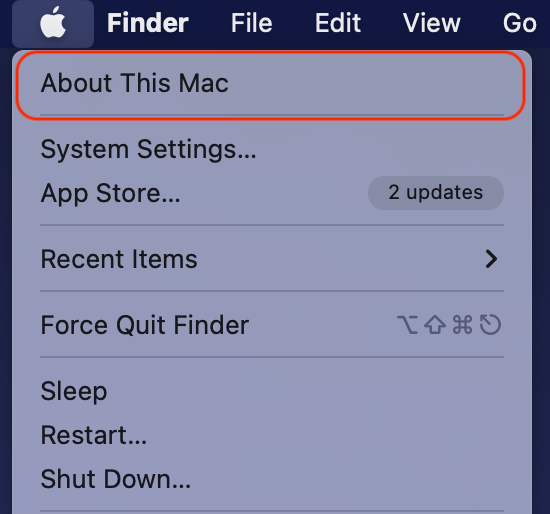
Here are steps to check the storage usage on your Mac:
- Click on the Apple logo > Choose About This Mac.


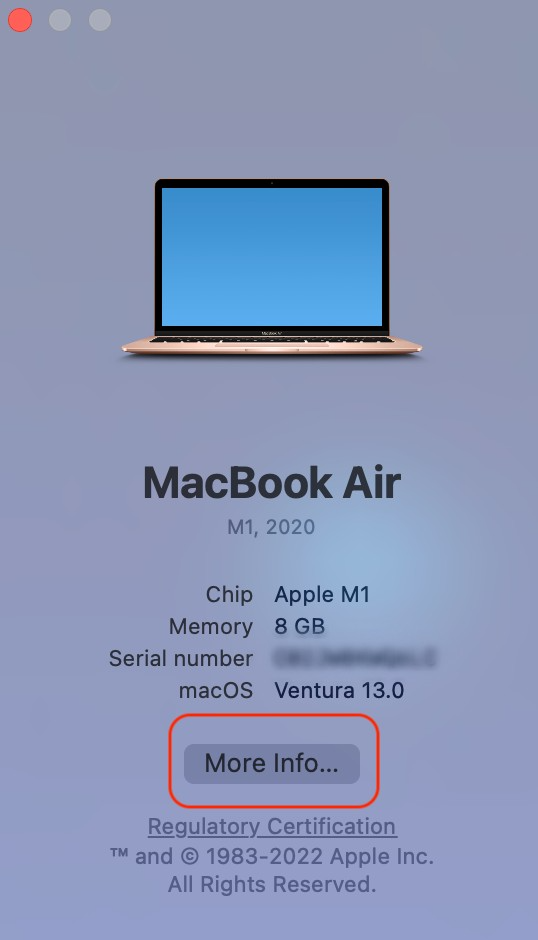
- Click on the More Info button.


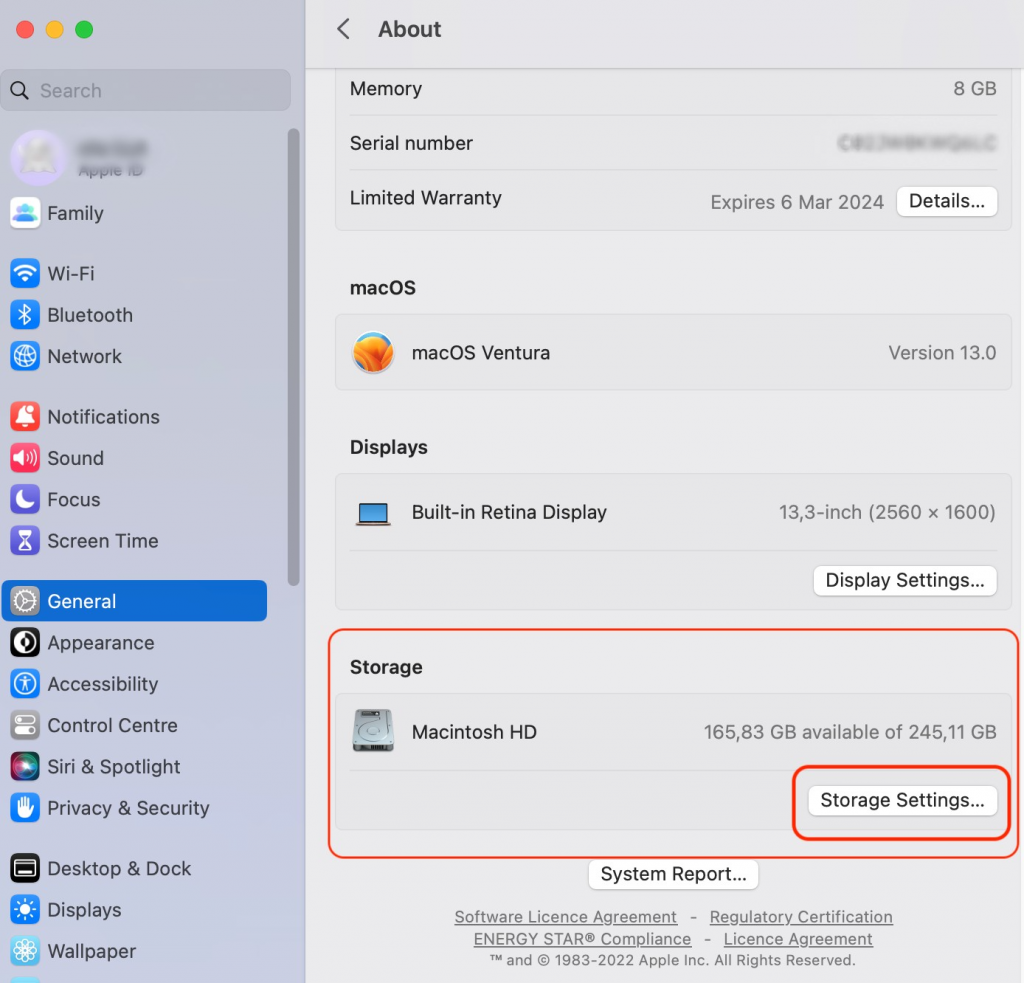
- Scroll down to see the Storage option and select Storage Settings.


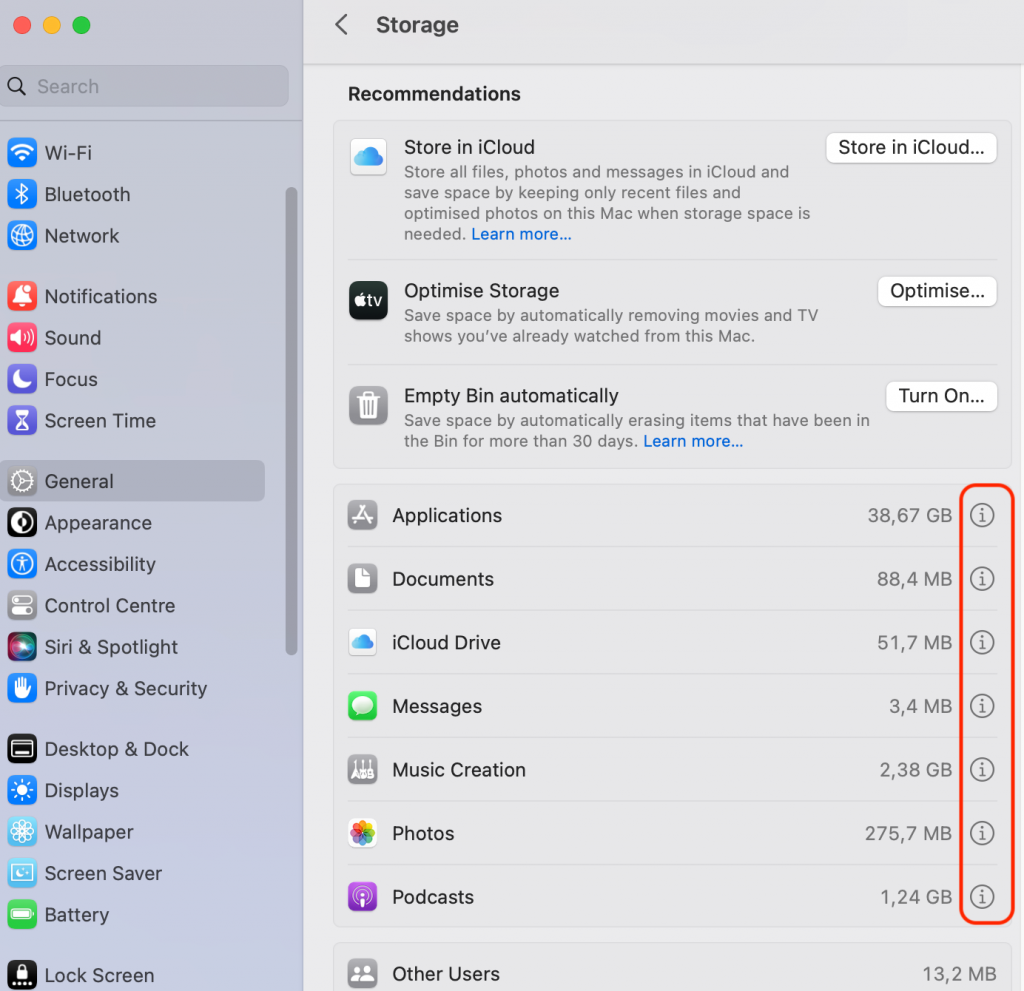
- Move your pointer to the colored sections and look for the System Data.

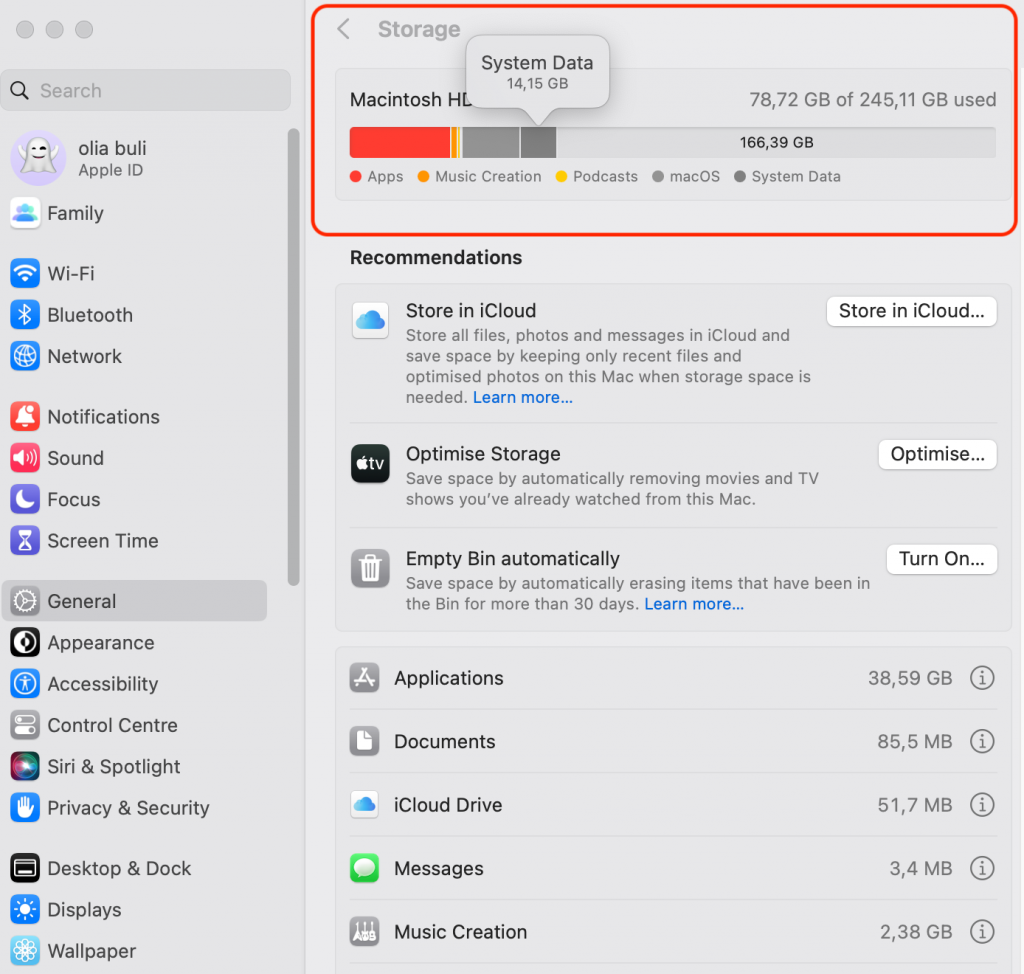
- This partition shows how much storage is taken by certain types of files.
In most cases, the system section takes up approximately 10 GB. However, you may find that system storage shows 100GB or even more on your device.
Please note that the categories columns are labeled differently in some macOS versions (you may see system or macOS instead of system data, for example).
Steps on How to Clear System Data on Mac
Okay, now you’ve figured out that your system storage takes over 10 GB. How to fix that? Managing storage space is a manual process.
macOS system usually automatically cleans up memory used for the system tasks. Though sometimes, this doesn’t happen, which could be a reason for the increase in the system data category. Let’s learn how to reduce system storage on Mac using different methods.
I. How to Clear System Data on Mac by Deleting Cache Files
Generally, caches accumulate when using applications on your Mac or visiting websites. Too much cache will cause an overload on the system storage.
Follow these steps to clear the system cache on your Mac:
- Open Finder > click the Go menu > choose Go to Folder.

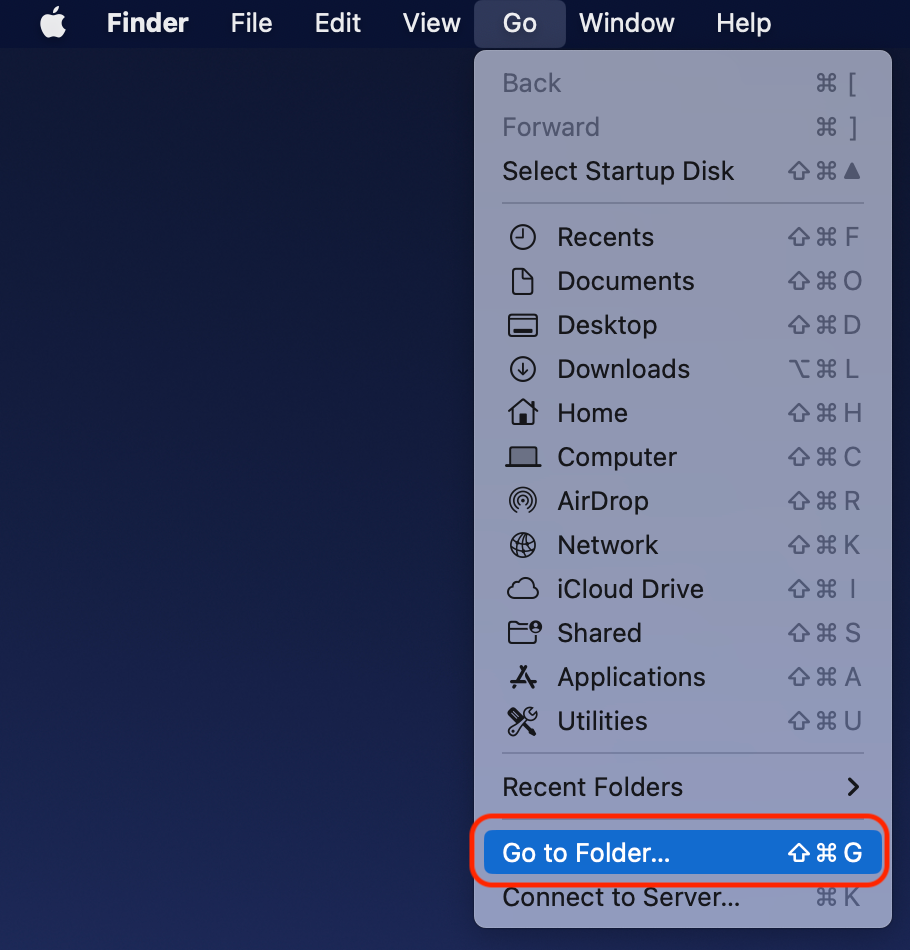
- Type in ~/Library/Caches/ > click Go.


- You should see a folder with your cached files. If you want to delete all files, press CMD+A on your keyboard and right-click on the highlighted section. However, it is recommended to do a clean-up manually to avoid losing important files. Just right-click on the particular file.

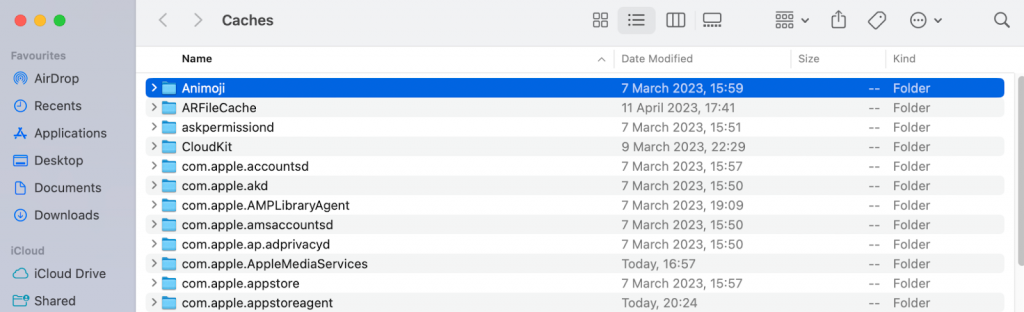
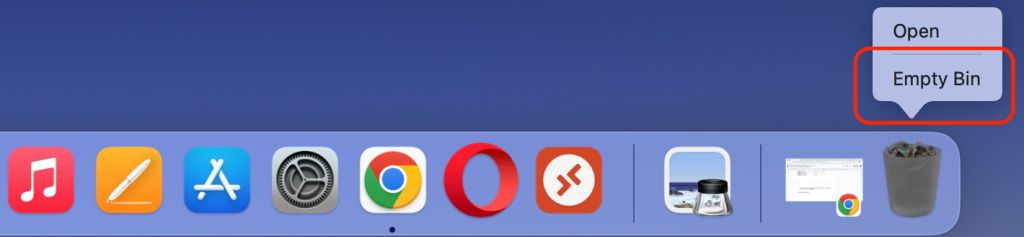
- Regardless of your choice, click Move to Trash (or Move to Bin). Now, you can click the Trash icon on your dock and hit Empty Bin.

II. How to Delete System Data on Mac by Removing Old iOS Backups
Another reason for the overload of system space is old backups of your iPhone or iPad.
Mac system disposes of accumulating iOS backups, which can lead to ample system storage. There are several ways to check and delete backups.
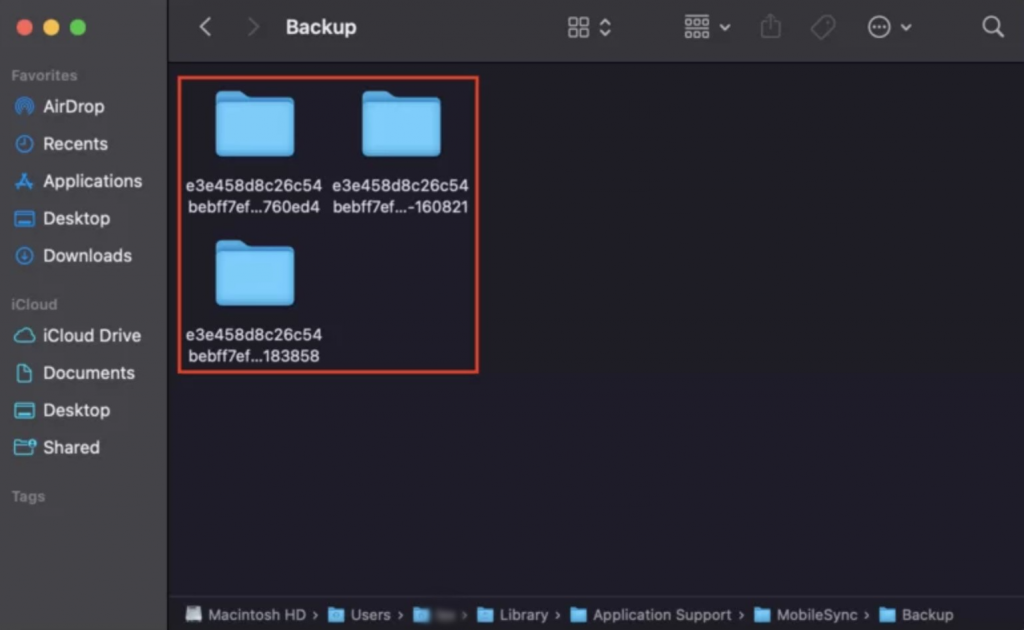
a. Delete Backups via Spotlight
- Enter this path in the Spotlight: ~/Library/Application Support/MobileSync/Backup/.


- Choose the Backup folder and delete unneeded ones.

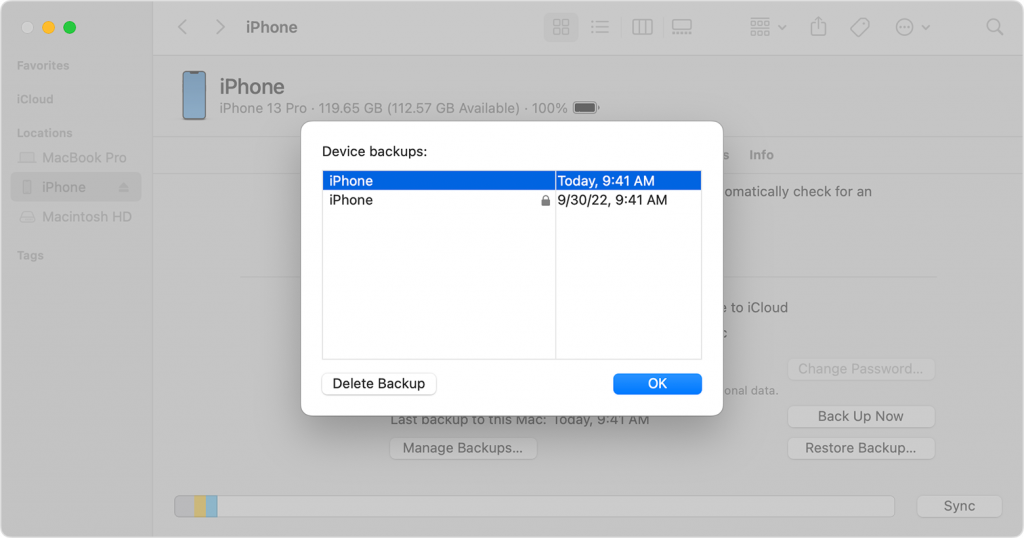
b. Delete Backups via Finder
On a Mac with macOS Catalina or later, do the following steps:
- Open Finder on your Mac.
- From the sidebar, select your device under the Locations section.
- In the device window, navigate to the General tab.
- Locate the Backups section and click on the Manage Backups option. This will display a list of your backups.
- Right-click on the specific backup that you wish to remove.
- From the context menu that appears, choose the Delete option.

By removing iOS backup, you eliminate unnecessary files and reduce system storage on Mac.
III. Manage Time Machine Backups
Typically, Time Machine regularly backs up your Mac to an external drive. If your Mac isn’t connected to a backup drive, it stores snapshots in your system storage.
If you made a backup long ago, the accumulation of Time Machine snapshots could take up a lot of system storage on your Mac. To fix this, plug in an external drive and use Time Machine to back up your Mac.
You can easily remove local snapshots from your hard drive. Simply turn off the Time Machine feature itself. With this maneuver, you will remove all local snapshots stored on your Mac.
Follow these detailed steps:
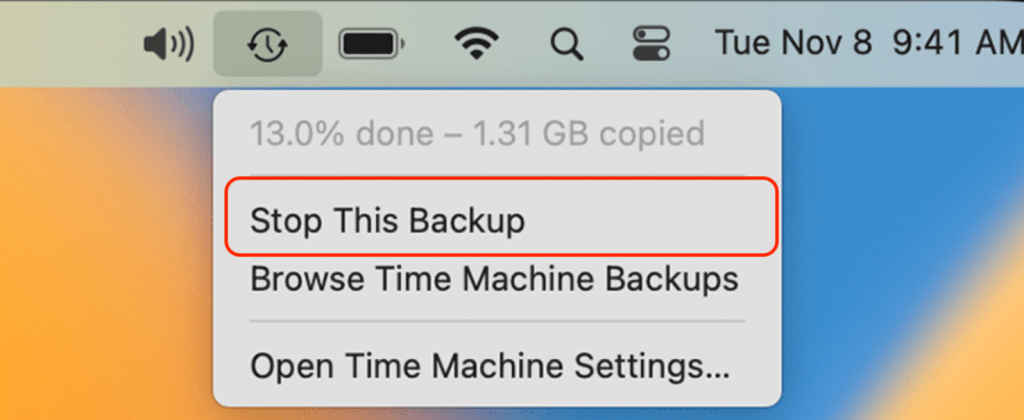
- Click on Time Machine from your Menu Bar.
- Select Stop This Backup.

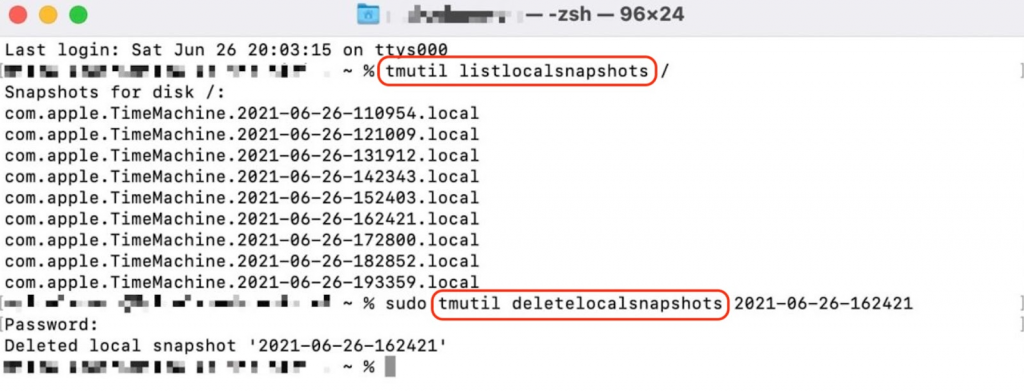
You can also remove backups using the Terminal. Here is how:
- Launch Terminal from Spotlight.
- Type tmutil listlocalsnapshotdates and hit Enter.
- Review the list of backup files and choose the ones to delete.
- Type tmutil deletelocalsnapshots in the Terminal to delete the selected backup files.

Managing Time Machine backup prevents local backups from occupying valuable storage space.
IV. Optimize your Storage
Last but not least. Apple has a built-in Optimization method, which can help you as well.
Follow the instructions below to optimize the Storage on Mac:
- Click on the Apple logo > Choose About This Mac.
- Click on the More Info button.
- Scroll down to see the Storage option and select Storage Settings.
- You will see the Recommendations to reduce space on Mac. You will be given hints on what you may delete from your computer by clicking on the info icon.

V. Update macOS
Updating your macOS is crucial for maintaining a well-functioning Mac and optimizing system storage.
Here’s why you should prioritize updating your Mac:
- Prevent Storage Consumption: When you download an update but fail to install it, the update files can occupy significant storage space on your hard disk. By promptly installing updates, you can reclaim this storage and ensure efficient usage of your system resources.
- Resolve macOS Bugs: Sometimes, macOS bugs can unintentionally consume a large amount of storage. Updating your Mac to the latest version often includes bug fixes and addressing known issues that may be causing unnecessary storage usage. Keeping your macOS updated helps eliminate these bugs and frees up storage space.
How to Recover Accidentally Deleted Files?
Before proceeding with any of the changes mentioned, it’s always a good idea to back up your data. This way, you can always restore them in an emergency.
To ensure your files are safe, we recommend using specific software. You can download Stellar Data Recovery for Mac software to recover deleted data. With this app, you can restore even those files that have been removed or emptied from the Trash. Try to launch Stellar Data Recovery software to scan your start-up disk and recover deleted files.
Here is how you may recover data with Stellar Data Recovery Professional:
1. Download and install Stellar Data Recovery Professional for Mac software.


2. Launch the software once the installation is complete.
3. Select the specific file types you want to recover and click Next.


4. Select the location from where the data was originally stored or lost.


5. Initiate the scanning process by clicking the Scan button.
6. After the scan is finished, you’ll be presented with a list of recoverable files. Preview the files to ensure they can be successfully recovered.


7. Choose the files you wish to recover by selecting the corresponding checkboxes or opt to recover entire folders.
8. Click on the Recover button to start the recovery process.
9. Once the recovery is finished, navigate to the chosen storage location and verify that the recovered files are there.
Wrapping Up
System storage overload could be a headache, but now you know how to clear system data on Mac and quickly fix this problem with one of the methods we described. Try to delete cache files, remove old iOS backups, manage your backups with Time Machine, or optimize your storage. Don’t forget to ensure your data are safe and sound; use Stellar Data Recovery software for file protection.
Read more:


