Even though Macs are considered reliable operating systems, no Mac is immune to memory issues. Numerous applications running in the background, resource-hungry browsers, and video games consume much of the system’s memory.
In this guide, we’ll cover:
- What is RAM?
- How to find RAM on your Mac
- Signs your Mac is running out of RAM
- How to reset RAM on Mac
- Restore missing files after RAM Reset
Mac RAM and the Role it Plays
In this section, we’ll briefly define RAM and describe its role. RAM or random access memory is the computer’s short-term memory. It’s responsible for your Mac’s current session. None of the apps, files, or websites with streaming video will work without RAM. It allows your Mac to multitask:
- Open webpages;
- Load apps;
- Switch quickly between the numerous tasks;
- Respond to the commands.
How Much RAM is There on Your Mac
Before resetting your Mac’s RAM you can check how much RAM there’s on your computer.
To find RAM on your Mac:
- Click the Apple logo > About This Mac.
- In the Overview tab, you’ll see how much RAM is on your computer.
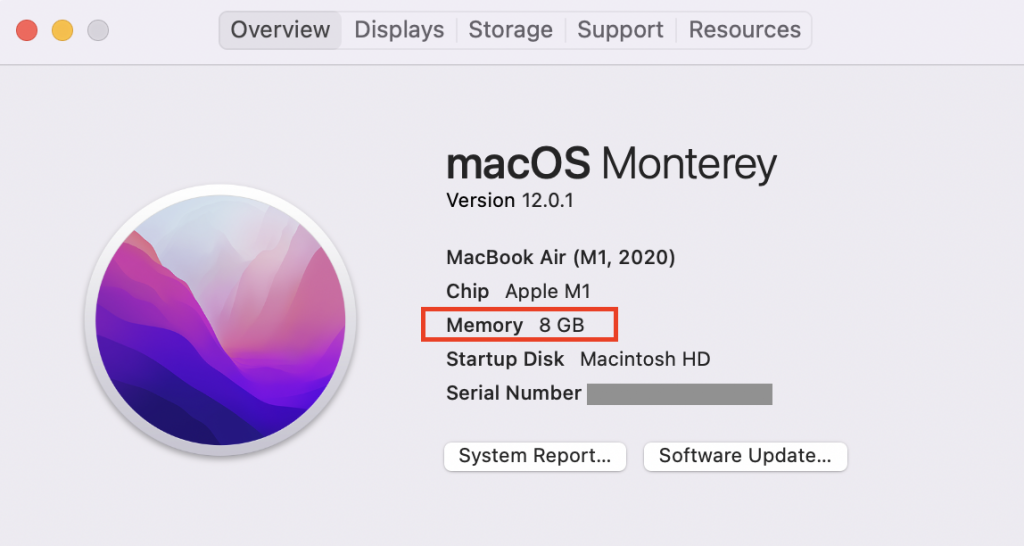 About This Mac > Overview tab
 Pro tip: When in the Overview tab > click System Report. Look for the Memory tab in the left side panel. This will open the system information window with more detail.
Signs Your Mac is Running Out of RAM
Here are the main signs that your Mac is running low on RAM:
- Mouse pointer turned into the spinning wheel with your desktop freezing;
- The system starts up and shuts down slowly;
- Apps running slow and not responding;
- Your Mac’s fans are making noise, and your computer overheats.
How to Reset RAM on Your Mac
Before you start. Make sure that you have disconnected all USB devices from your Mac since it can prevent the proper registering of the keypresses in the system. The same problem may take place if you use a Bluetooth keyboard. So, if you need one, it is still better to opt for using a wired keyboard when resetting RAM on Mac.
Also, freeing up RAM on Mac may result in losing some of the settings (time zone, startup volume, display features). However, all of these are easily restored afterward.
Clearing RAM on Mac suggests resetting NVRAM, which is responsible for storing basic settings of your Mac.
To reset NVRAM on Intel-based Macs:
1. Begin with shutting down the system. In order to do this, you have to go to the Apple menu and click Shut Down.
2. Next, turn the Mac on by pressing the Power button.
3. Next, press the key combination CMD + Option + P + R. You will see an Apple logo and a progress bar on your screen.
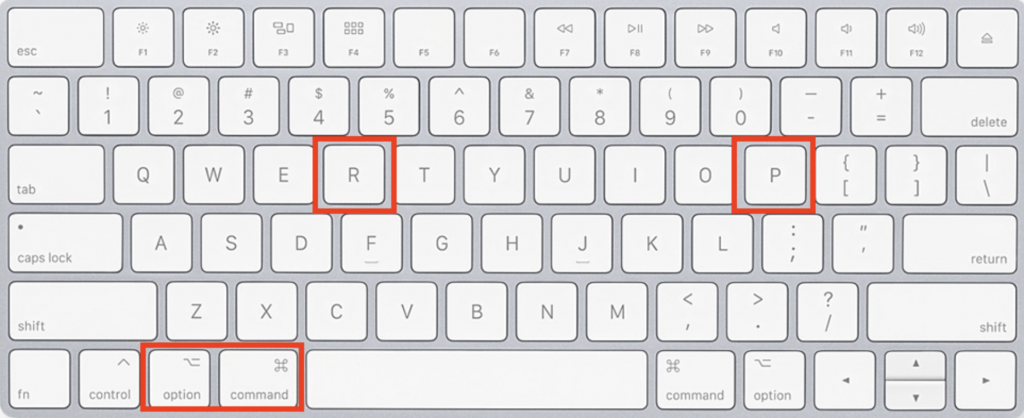 Command + Option + P + R
 4. Hold the key combination until you hear the second sound signal (as a rule, the process takes about 20 seconds).
5. Finally, you can release the combination once you hear the sound for the second time, which indicates the completion of the Mac RAM reset process.
For M1 Mac owners: If you have an M1 Mac — resetting NVRAM won’t work on Apple Silicone. In this case, you can try restarting your Mac and try the tips below.
How to Reduce Mac’s RAM Usage
Now that you’ve discovered how to reset RAM on MacBook Pro/Air and other Mac models, let’s do some tricks that will prevent RAM from reaching its limits on your Mac.
1. Declutter Your Desktop
Let’s admit it. The Desktop is the most cluttered place on Mac. However, keeping loads of files there leads to the excessive use of RAM.
- You can either delete unneeded files or move them to other folders like Documents.
- Use Stacks — a cool feature that will sort files for you. To use it: control-click a blank space somewhere on your Desktop > from the drop-down menu choose the Use Stacks option.
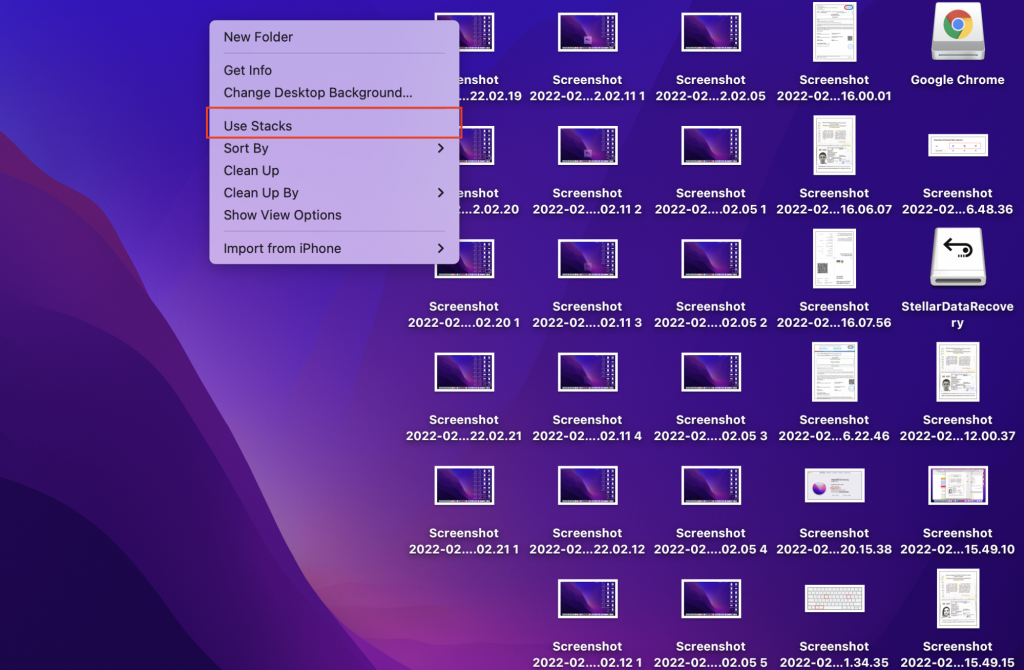 Desktop macOS Monterey
 Here’s what happened after I used Stacks — it sorted all screenshots and now the Desktop is decluttered.
 Desktop macOS Monterey
 2. Use Google Chrome Task Manager
If you work intensively in Google Chrome, as I do, consider this tip.
The browser processes, especially the ones that involve the use of GPU (graphic processor unit), are often memory-consuming. It is possible to free some amount of RAM on your Mac by means of reducing GPU usage.
You can do it directly in your Chrome settings:
- Find More Tools option (three vertical dots) > choose Task Manager.
- Choose the GPU Process among the options in the window, click on it and press the button End Process in the right bottom corner of the window.
 Chrome Tasks Manager > End GPU Process
 3. Free Up Space on Your Mac
When the system runs out of hard drive memory, RAM is under pressure. Perhaps, there are some large files occupying hard drive memory and you might not need them anymore.
To check available disk space:
- Click the Apple logo > About This Mac.
- Go to the Storage tab.
 About This Mac > Storage tab
 3. From this tab click the Manage… button. Look through the left panel and define which files take a lot of space. For instance, go to the Documents tab > click the Large files tab > delete the files in this category if you don’t need them.
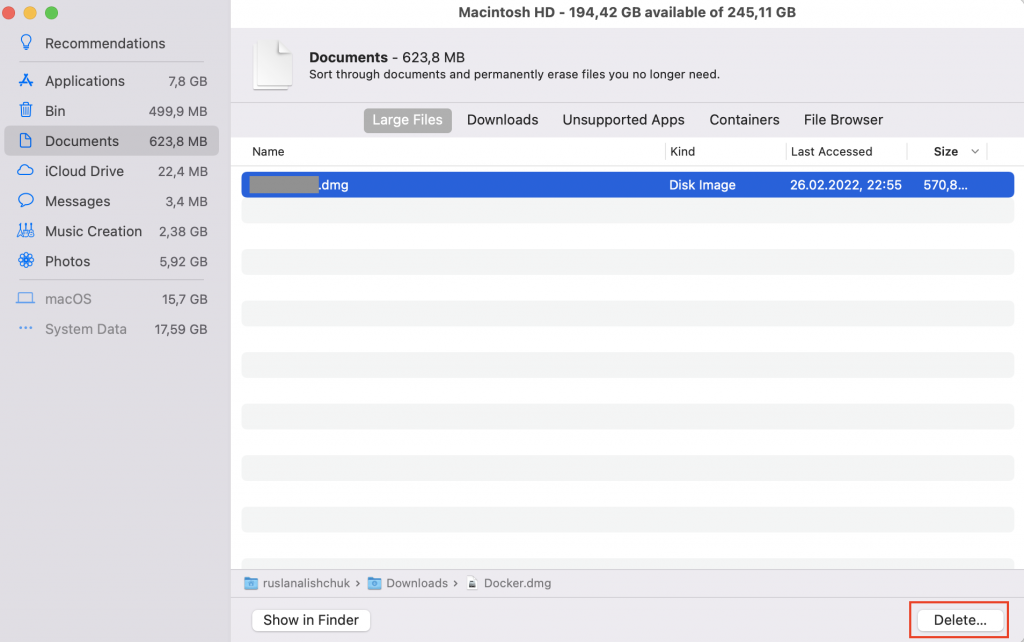 Delete large files on macOS Monterey
 4. Minimize the number of Finder windows
Another problem associated with the increased use of RAM is the amount of Finder windows opened at once. Do not forget to quit apps you won’t be using during your session. Another possible option is merging them.
This can be done from the menu bar:
- Click the Finder icon in the Dock.
- In the menu bar > click on Windows and then choose Merge All Windows.
 Finder > Merge All Windows
 Restore Missing Files After RAM Reset
Can’t find the files after you’ve cleared up Mac’s RAM? Use the Stellar Data Recovery app to automatically recover missing files.
Here’s how:
1. Download and install the Stellar Data Recovery for Mac app.
2. Choose what file types to scan.
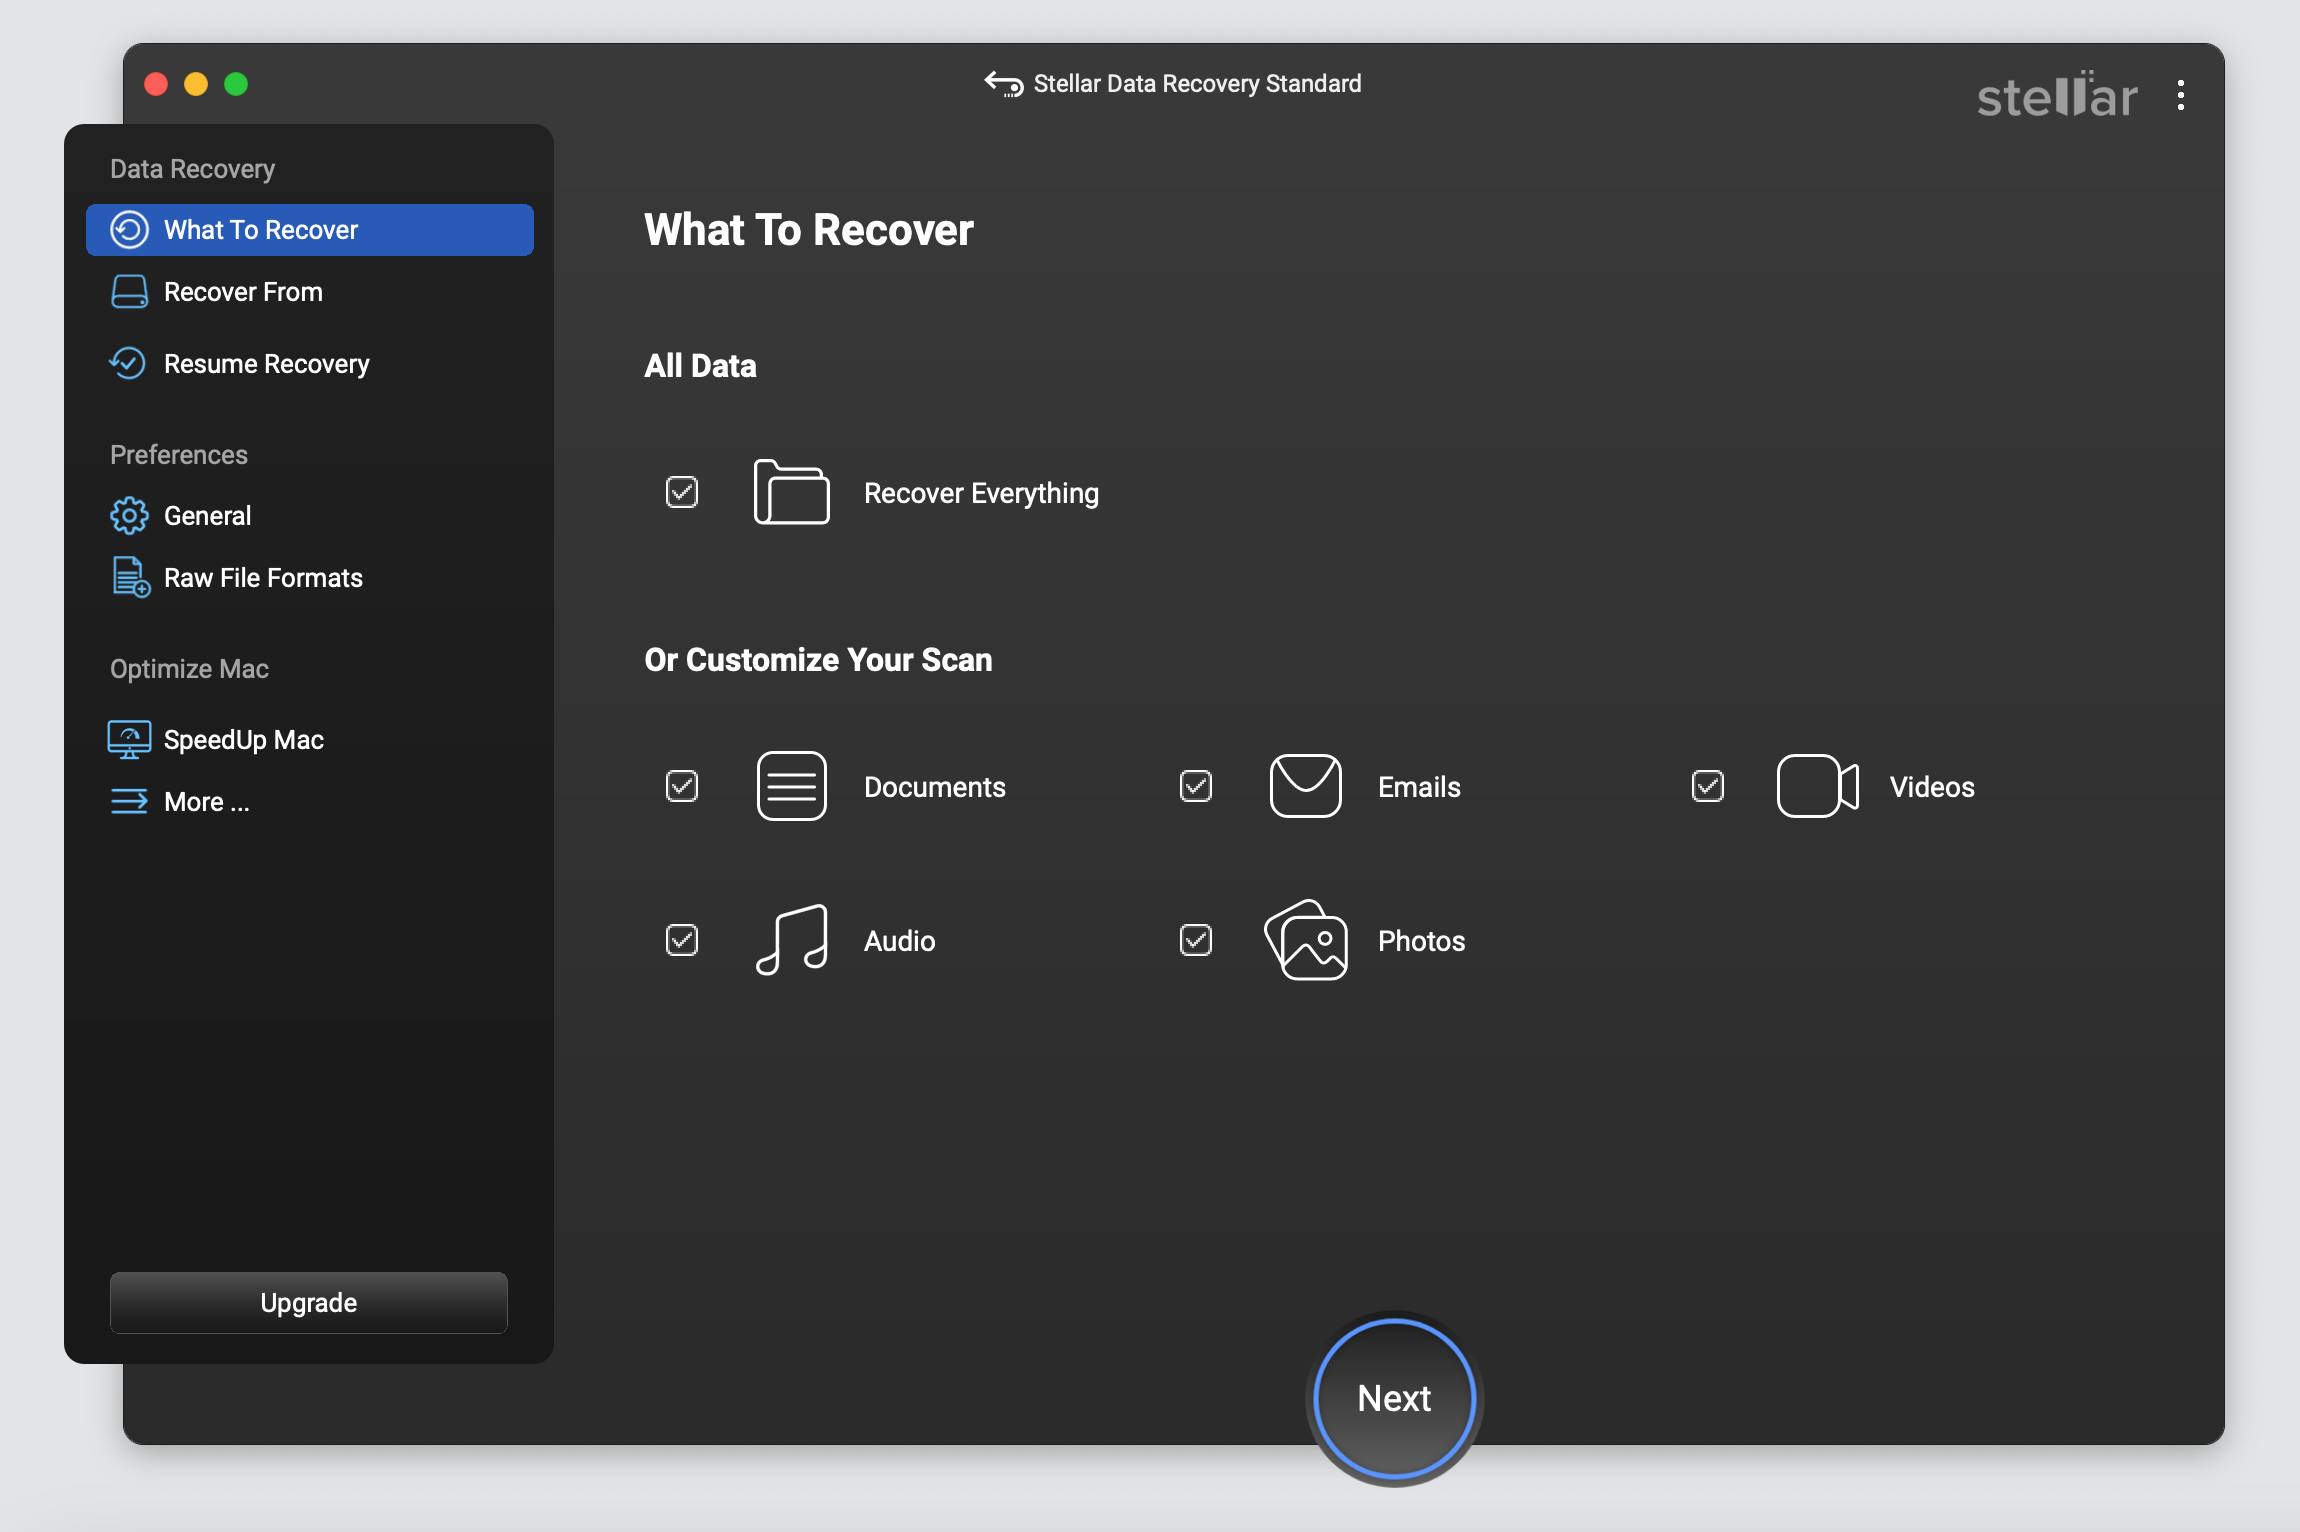 Stellar Data Recovery > Select What to Recover window
 3. Select the volume to recover files from and start the scan.
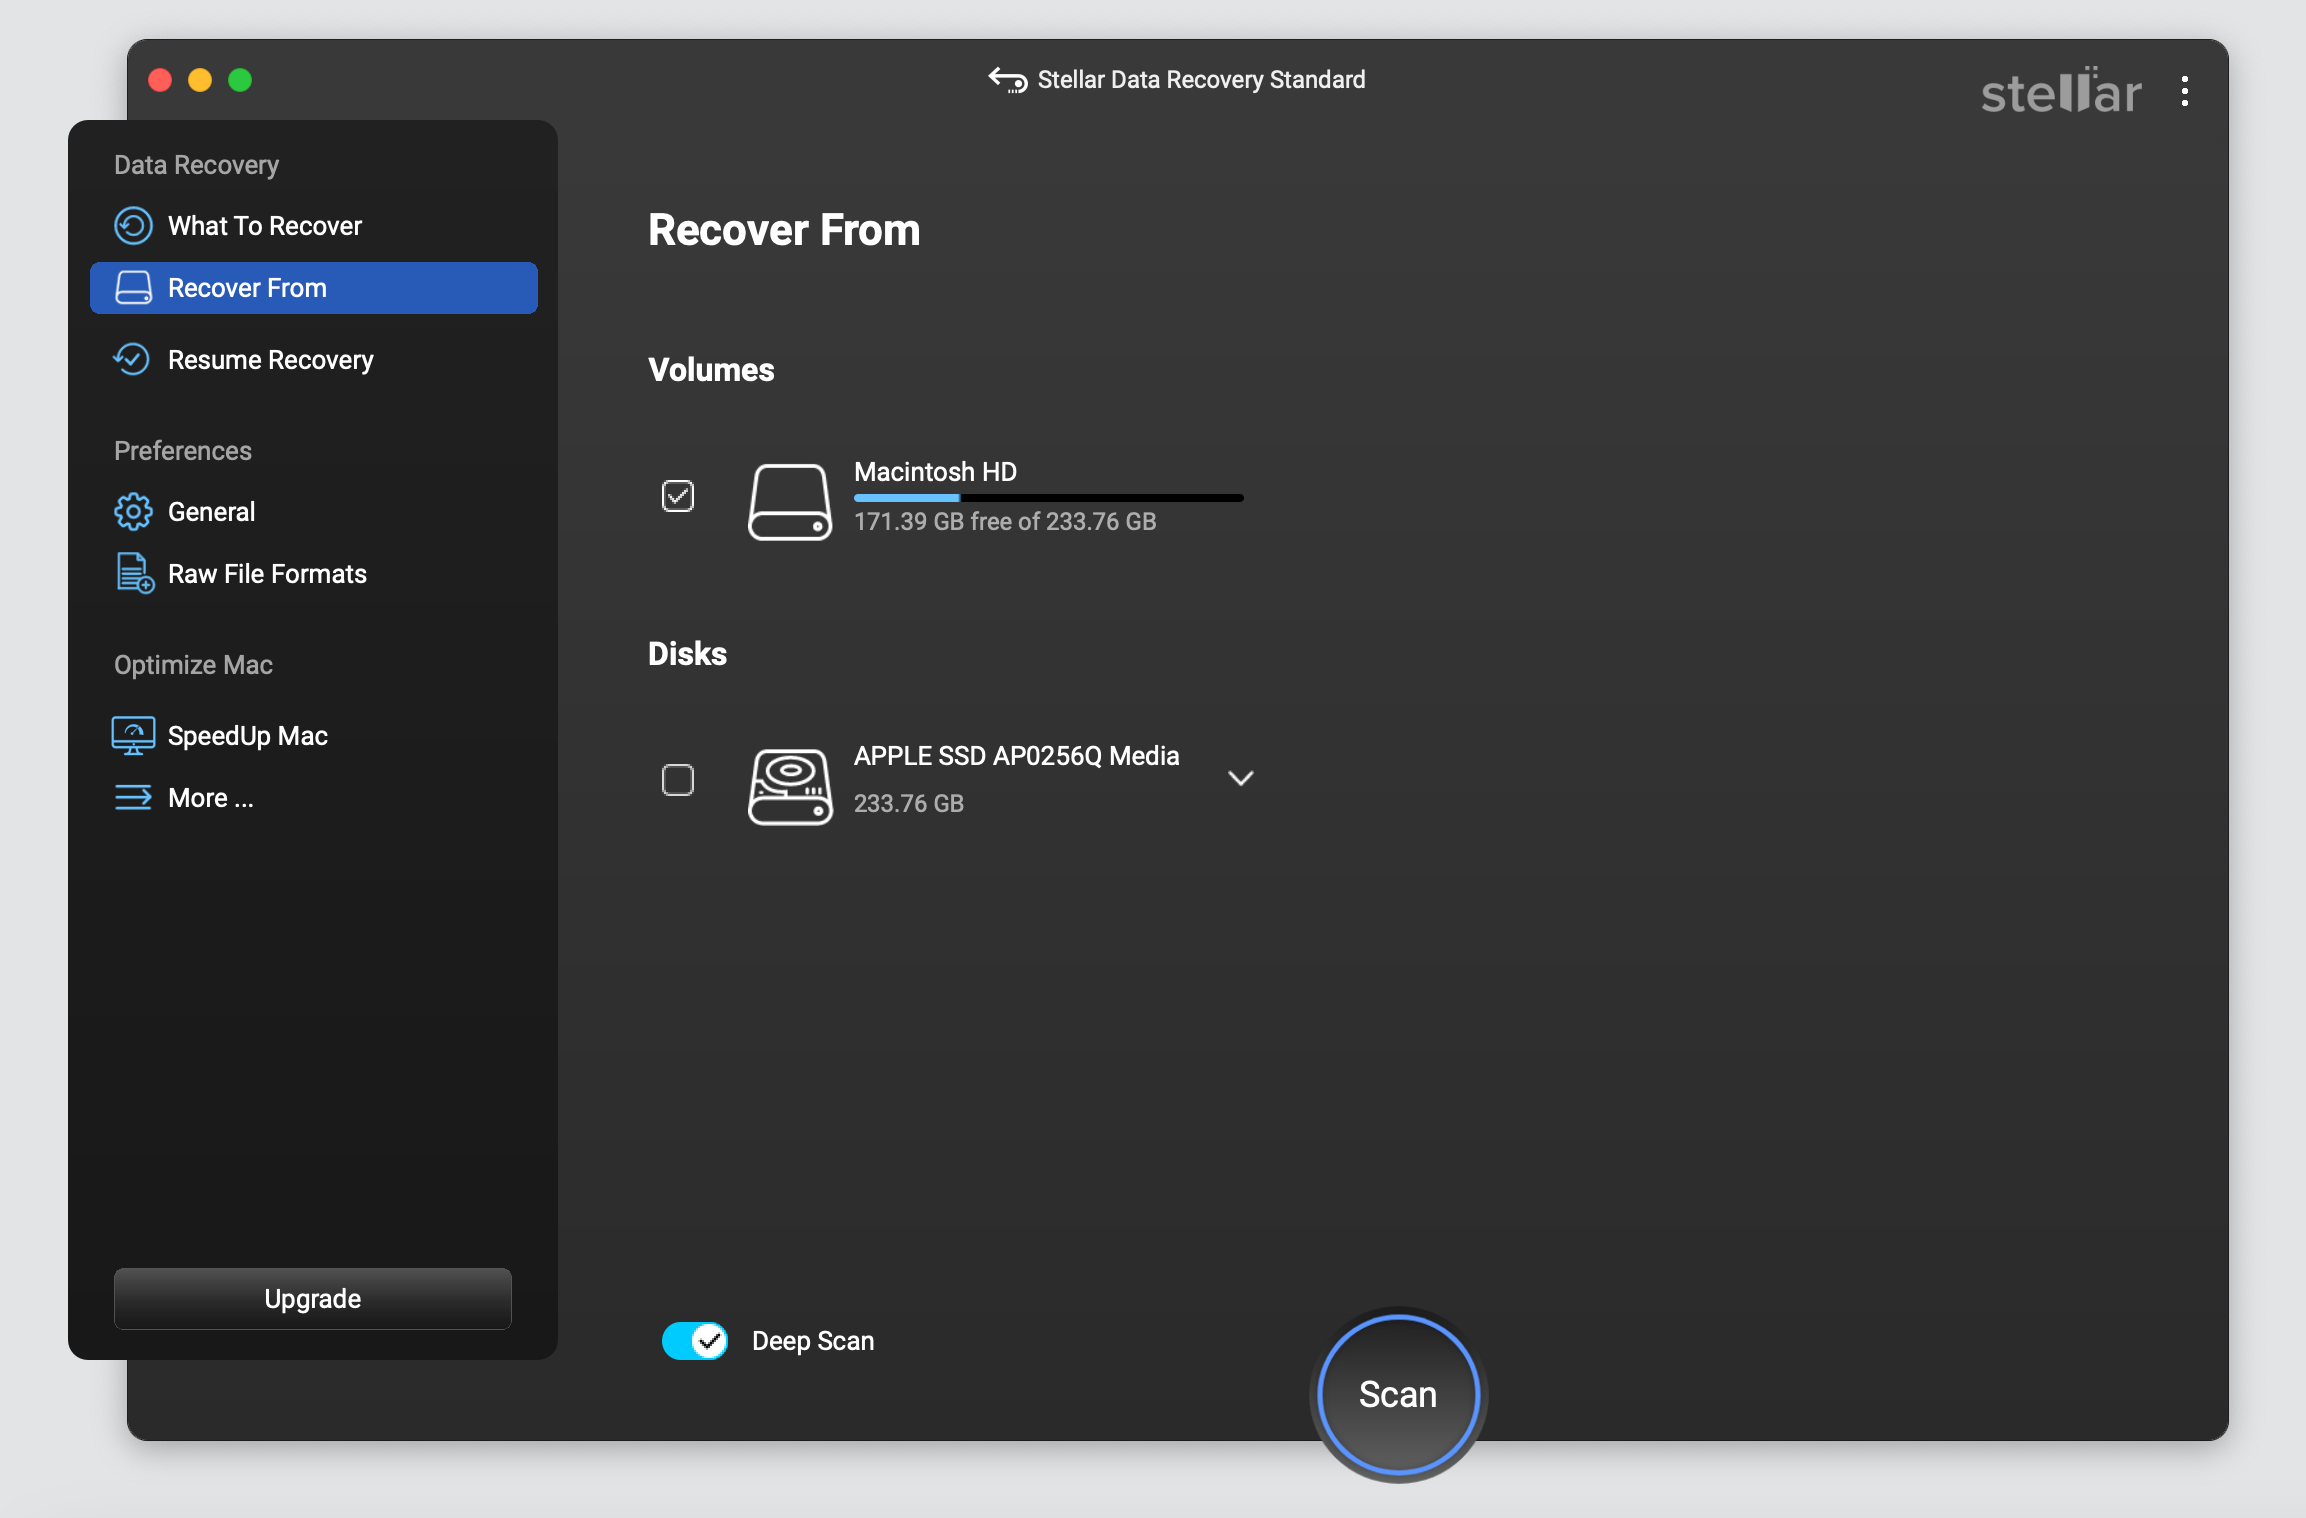 Stellar Data Recovery > Recover From
 4. Look for the missing files once the scan is complete > click Recover.
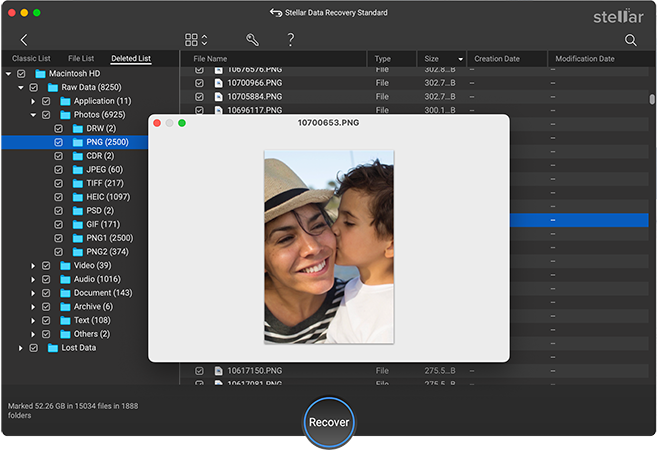 Stellar Data Recovery > Preview
 Summing Up
RAM is one of the key elements to keep your Mac’s system on the go. Try resetting RAM and using the tips to keep your Mac and the RAM in tip-top condition. Now you may enjoy using a fast and responsive system!
Was this article helpful?