HDMI or High Definition Multimedia Interface includes two parts – (i) the port that establishes the connection and (ii) the connector cable that transmits the data. HDMI ports act as an all-digital interface that receives and transmits audio and video output signals between two devices.
Using these ports, you can project HQ videos and audios onto HD-capable devices, like TVs and audio receivers. Additionally, you can convert devices into a powerful multimedia hub using these ports. The ability to identify and communicate media and devices is called ‘HDMI handshake.’ But when this handshake faces any interruption, the HDMI port stops working, and you may encounter different problems, including:
- Television fails to recognize the laptop
- Video plays but there is no audio
- The image appears too big on the screen
- Video seems choppy
Why is HDMI not working on the Laptop/PC?
There are multiple reasons that may lead to problems with your HDMI port. However, the most common causes include:
- Incompatible or faulty drivers
- Corrupted registry
- Incompatible or corrupted apps installed on your system
- Temporary files and folders
How to Fix HDMI not working on PC/Laptop Issue?
We’ve shared some quick fixes and troubleshooting methods below to fix the issue.
Quick Fixes
Let’s start with some quick solutions.
Fix 1: Check HDMI Cable Connection
The issue could occur due to a simple hardware problem. Check if your HDMI cable is in good condition and properly connected to both ends, i.e., Windows and HDMI devices.
Sometimes, damaged HDMI ports might restrict your HDMI device from working on your Windows system properly. Hence, change the HDMI port and see if the problem resolves.
Fix 3: Restart and Reconnect your Devices
The PC HDMI not working issue can also occur due to improper bootup error with the devices. If your system or HDMI device doesn’t boot properly and results in error, you may face issues with the video or audio output. You can try rebooting your laptop or PC and re-plug your devices with HDMI. Follow the below steps carefully to reboot and reconnect the devices:
- Turn on your HDMI device (Speaker, TV, etc.) and then turn on your PC/laptop.
- Now, turn off the HDMI devices but keep the Windows system on.
- Now, unplug all the HDMI connections and plug them again with your HDMI device and your system.
It will refresh the HDMI connection and may fix the problem.
Troubleshooting Methods to Fix HDMI not working on Laptop or PC
If the above fixes fail to solve the problem, follow the given methods to fix the issue.
Method 1: Set HDMI Device as Default Device
Check if the HDMI is set as the default device. Many users reported that HDMI not working on laptop problem occurred when the HDMI device was not selected as the default one. Follow the given steps to set HDMI as the default device:
- Open Control Panel and then go to Sound.
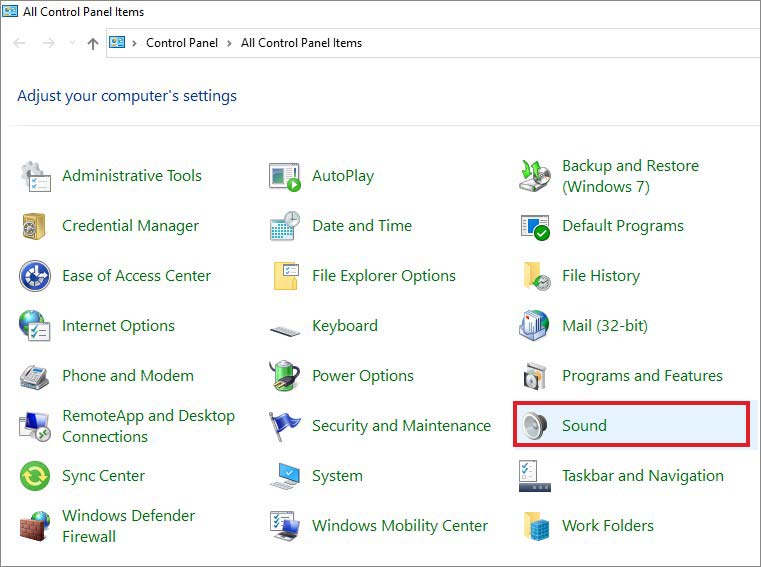
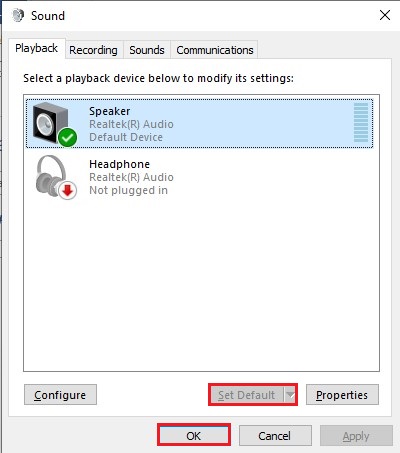
- Now, the sound window will open. Next, navigate to the Playback tab to see the default audio devices.
- Choose the HDMI device and click Set Default and then click OK.
It will set the HDMI device as the default device for your system. Complete the process and check if this method works for you.
Method 2: Uninstall Recently Installed App/Software
Sometimes, a recently installed application/software or program may cause problems with the HDMI connection. If the application is buggy or incompatible with your system, you may face the HDMI not working on a laptop or PC issue. You can try uninstalling the app/program and check if the problem gets solved. Follow these steps:
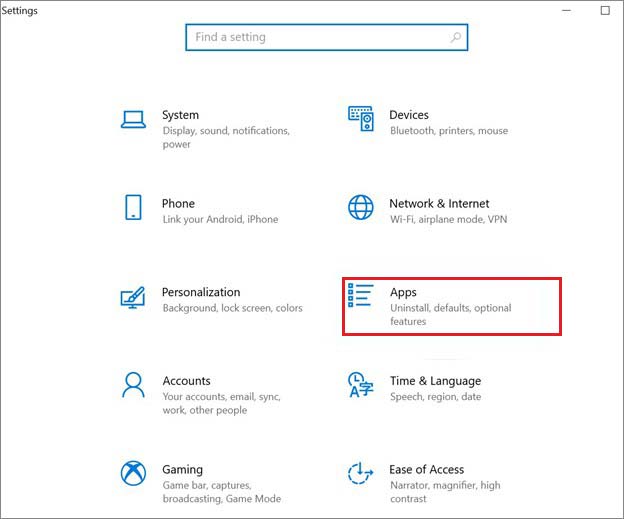
- Press Windows + I to open system Settings and then go to Apps.
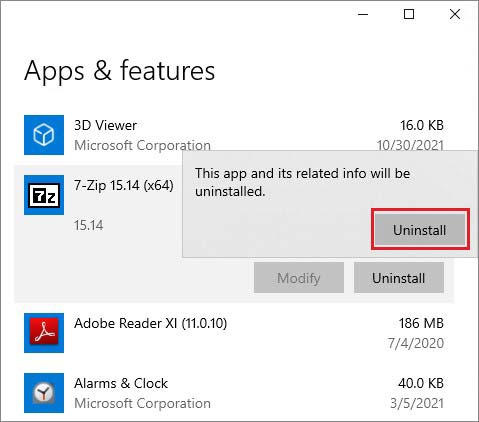
- In the Apps & features window, choose the application/program or software, click on it and click Uninstall.
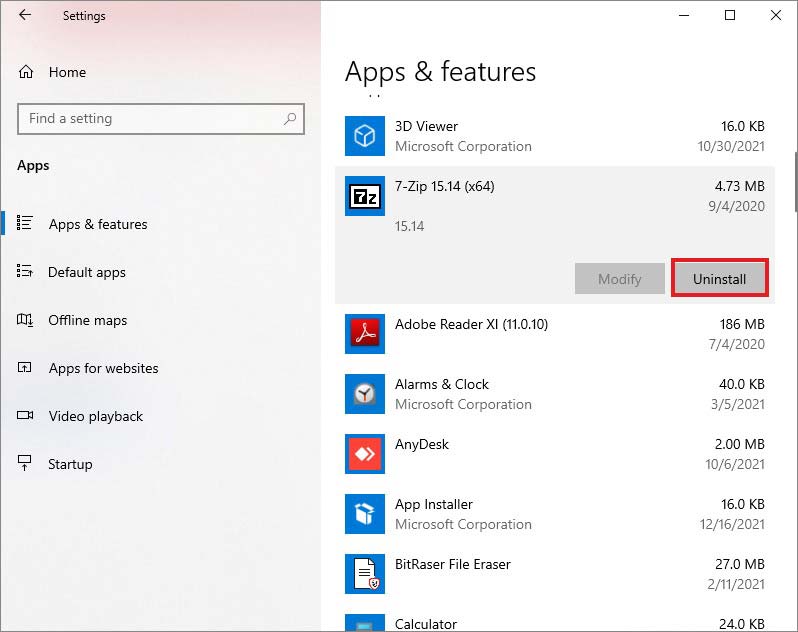
- A pop-up will appear on the screen, stating that the app and its related information will be uninstalled. Click Uninstall to confirm the action.
- Once you’re done with the process, check if the problem is resolved.
The PC HDMI not working problem may also occur when your PC's display settings are not properly configured. As a result, the content may fail to appear on the screen. Hence, try to configure the Display Settings of your Windows system. To do so, follow the given steps:
- Press Windows + P to open Display Settings.
- You’ll see the following options:
PC Screen Only – You can choose this option when you want your video/audio to be displayed only on 1st computer display.
Duplicate – This option lets you see the same content on the connected monitors (your PC monitor and another monitor connected via HDMI or other sources).
Extend – This option enables developing the content between two or more displays, including the PC display and other displays connected to HDMI or other sources.
Second Screen Only – This option helps you show content on the Secondary Display.
Now, choose the appropriate option and see if it fixes the HDMI port not working on the laptop issue.
Method 4: Update, Roll Back, or Uninstall Graphic Drivers
Graphic device drivers play a major role in displaying content on your system. Any problem with the graphic drivers may not only cause HDMI not working on PC or laptop error but also cause multiple system errors, including:
Hence first, try updating the graphic drivers. If the device drivers are already updated, then roll back or uninstall the drivers.
Follow the given steps:
A. Update Device Driver
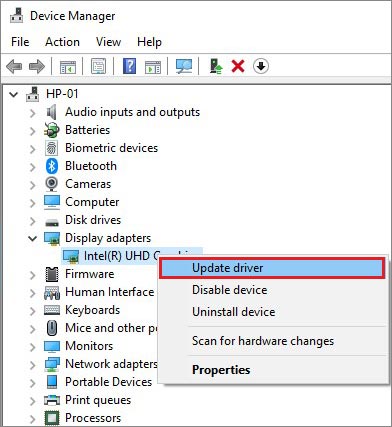
- Open Device Manager by pressing Windows + X and navigate to Display adapters.
- Then choose the driver, right-click on the driver, and click Update driver.
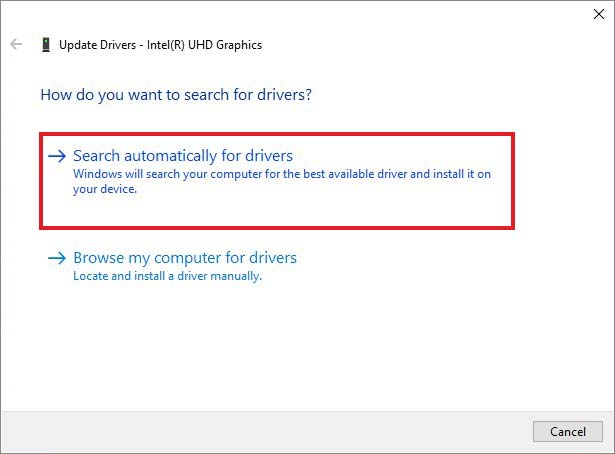
- On the next prompt, click Search automatically for drivers.
- Now, reboot your system and check if the error is fixed.
B. Roll Back Device Driver
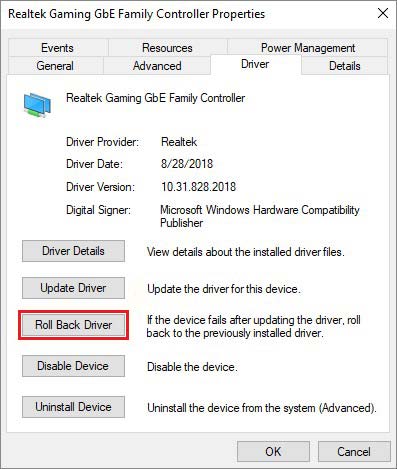
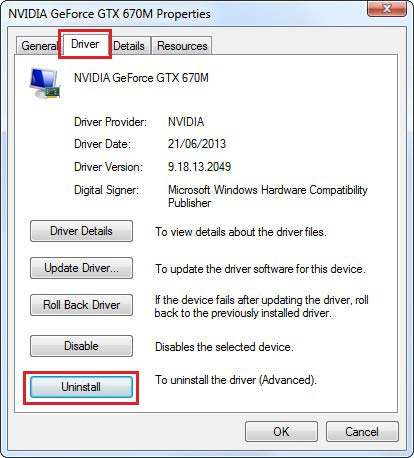
- Open Device Manager, expand Display adapter category, right-click on it, and open Properties.
- Next, select the Driver tab, click Roll Back Driver, and click OK.
C. Uninstall Graphics Driver
- Open Device Manager, expand Display adapter category, right-click on the graphic driver that seems problematic, and click Uninstall Device.
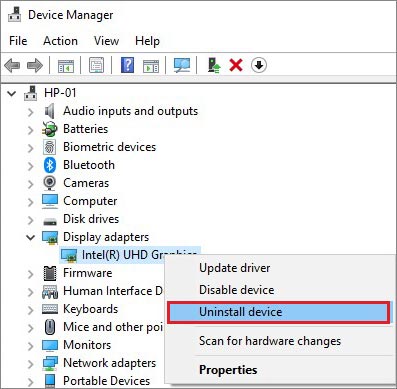
- If you don’t find the ‘Uninstall’ option there, click Properties, select the Driver tab, and click Uninstall Device.
- Now, a confirmation box will appear. Click Delete to proceed with the uninstallation process.
- On the next prompt, go to the Action menu and click Scan for hardware changes > Reinstall driver.
- Once the driver is reinstalled, close the window and restart your system.
- Finally, check if the HDMI not working on the laptop/ PC issue has been resolved.
Method 5: Clean Temporary Files and Folders
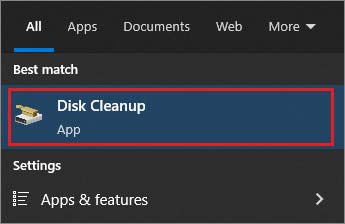
The temporary and junk files stored on your system may affect your system’s processing speed, causing apps to respond very slowly and even sometimes may cause HDMI audio and video issues. To fix the problem, you can delete your temporary files and folders using Disk Cleanup. Follow the given steps:
- You can directly go to Windows Search Box and type Disk Cleanup to open this utility.
- Else, you can open File Explorer, go to This PC.
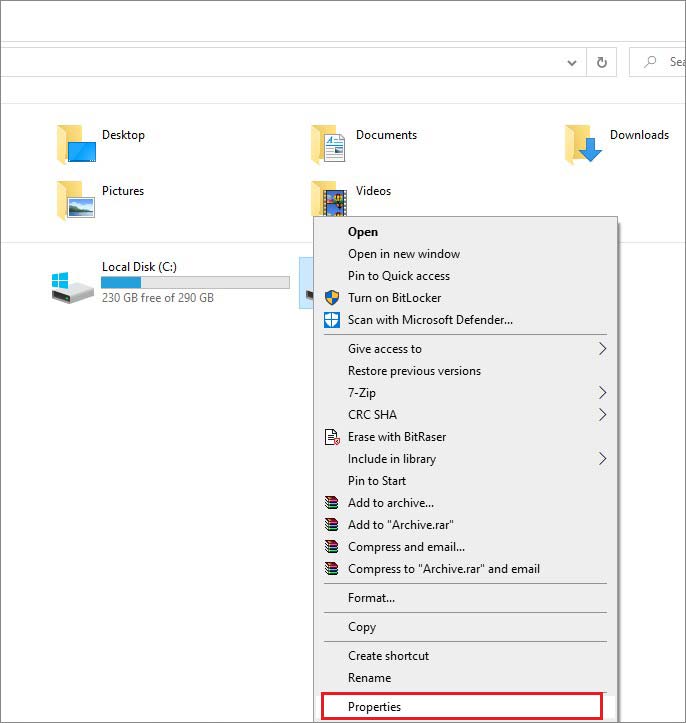
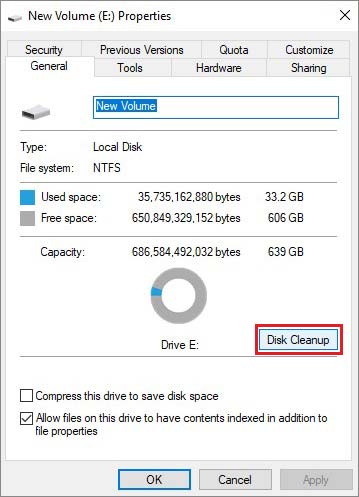
- Choose files you want to remove and click OK.
- You can also proceed with the Clean up system files option.
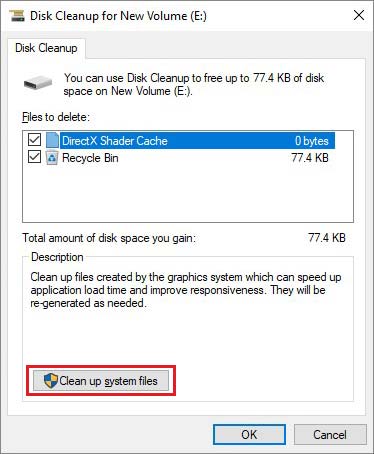
- Delete the files. Once done, close the window, reboot the system, and see if the problem is resolved.
Method 6: Run SFC Scan
You can check for system file corruption which may also cause the HDMI port not working on laptop issue. Run the SFC scan with the following steps:
- Open Command Prompt (CMD) and run it as an administrator.
- In the elevated window, type SFC/scannow and press Enter.
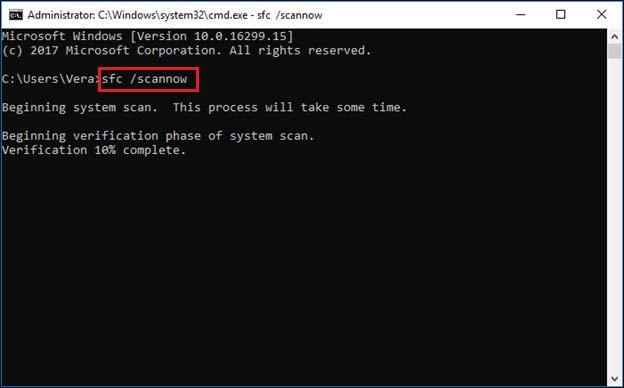
- Wait until the process completes. Once done, close the window and reboot your system.
If none of the methods helps resolve the error, you can perform a system restore. To run System Restore, follow the given steps:
- If your system is on, turn it off. Now, reboot it, and the moment it starts showing you the Windows logo, forcefully shut it down with the POWER button.
- Repeat this thrice. It will interrupt the normal booting process and take you to the Windows recovery environment – Windows Automatic Repair.
- On the Windows Automatic Repair screen, click Advanced options.
- Next, choose Troubleshoot and then go to Advanced options > System Restore.
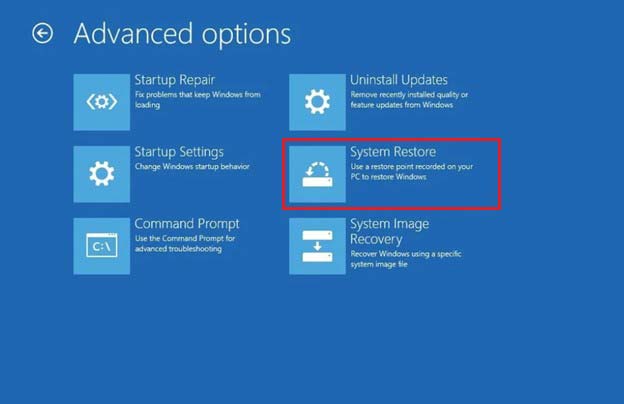
- Click Next to proceed and choose a restore point from the available options.
- Click Scan for affected programs to check which system apps/programs are going to be affected due to this method.
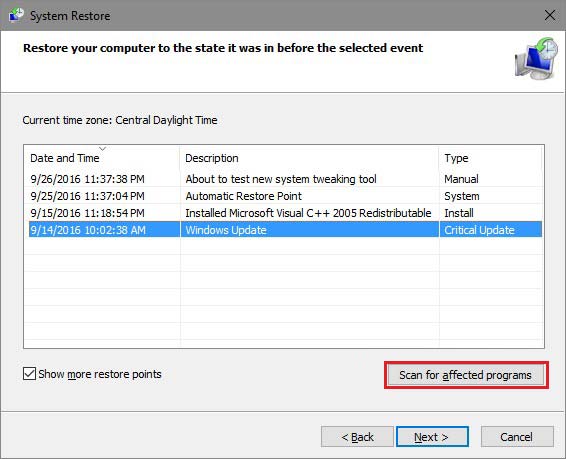
- Click Next and then click Finish on the next prompt.

| Note: You may lose some essential files, folders, and programs during this process. |
Hence, we’d suggest taking a backup of your system data before performing System Restore. Or, if you forgot to take backup, you may recover the data using a reliable data recovery tool, such as Stellar Data Recovery for Windows.
This DIY data recovery software supports recovery of almost all file types, including photos, videos, documents, audio files, excel, PDFs, etc. In addition, you can restore data lost due to deletion, drive formatting, corruption, or even malware attack. This Windows-supported tool also lets you retrieve files from BitLocker-encrypted storage drives, such as HDD, SSD, USB drive, and more.
Hope you found this blog useful! In case of any query or suggestion, please let us know in the comment section below.
FAQ
How do I enable my HDMI port on my computer?
You can enable the HDMI port on your PC by opening the Control Panel, navigating to Sound > Playback, clicking the ‘Digital Output Device (HDMI)’ option, and finally, clicking ‘Apply.’
Why does my HDMI say no signal on PC?
If you’re facing
no HDMI signal error on your PC, it could be due to the monitor ignoring the graphics output from your PC. In this case, make sure that the input source on your monitor is correctly set. If not, switch it to the correct source (HDMI) and check if the monitor works again.
Why is my PC on but no display?
The problem may occur when your monitor doesn’t turn on. To fix it, unplug the power adapter of the monitor and then plug it in again. If it doesn’t work, try changing the Power Outlet. If still, the problem doesn’t resolve, you may need to give away your monitor for repair.
Was this article helpful?