Summary: In this blog, we’ll try different methods to fix the error “Windows cannot run disk checking because it is write protected.” You can also try using a professional data recovery software like Stellar Data Recovery Professional to recover your inaccessible data due to this error.
The error message “Windows cannot run disk checking because its write protected” may appear when you’re trying to repair a disk error using the CHKDSK (Check Disk) command in Windows.
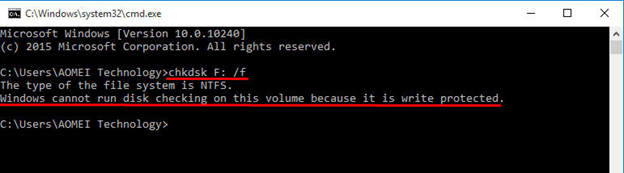 Image 1: The “Windows cannot run disk checking because its write protected” error message
 The error is caused due to corruption in the volume or when the volume appears as “Read Only”. Let’s look at some possible resolutions to fix the error.
Method 1: Remove Write Protection using Command Prompt
This command removes any write protection status by unmounting the drive/volume, USB, or SD card in question.
1. Go to Search box in your Windows and type cmd. A dialog box will open. Choose the option, Run as an administrator.
2. Enter chkdsk E: /f /r /x in the command prompt window and press Enter. Replace “E” with the letter of your specific drive/volume.
Now try to rerun CHKDSK program again to check if the error persists.
Method 2: Use Diskpart to remove Write Protection
Diskpart is a function that can help you remove the “read-only” attribute from your hard drive. Use the steps below to use this feature.
1. Go to Search box in your Windows and type cmd. A dialog box will open. Choose the option, Run as an administrator.
2. A code window will open. Enter the command as stated below
list disk
select disk X (In place of “X”, write the disk letter of the drive/USB/SD card in question)
attributes disk clear read-only
On running the command, you should get a message “Disk message cleared successfully.” If you see that message, then exit the screen and rerun the CHKDSK program.
If this still doesn’t resolve the error, try the next method.
Method 3: Use Registry Editor to clear Read-Only
You can also clear the “Read-only” attribute of the drive by using the Registry Editor. Follow the steps below:
Step 1. Enter Regedit by pressing Windows+R.
Step 2. Navigate to: HKEY_LOCAL_MACHINE\SYSTEM\CurrentControlSet\Control\StorageDevicePolicies.
Step 3. Look for the WriteProtect key. Right-click on it and set the value as “0”.
By using one of the above methods, you should be able to resolve the error. But, there might be cases when the file system is so corrupt that it would be impossible to fix the error. To make the disk reusable again, we recommended to wipe the data from the disk. Before wiping though, you should recover all existing files so that you do not lose any valuable/sensitive information.
This is where a data recovery software comes into the picture.
Recover data from a corrupted drive using a Data Recovery Software
A data recovery software works by recovering your data from various loss scenarios, including from a corrupted drive. One of the prominent data recovery software is Stellar Data Recovery Professional for Windows. It uses advanced techniques to scan and securely extract all your data. In the scenario described in the blog, data recovery software will allow you to recover your valuable data before you wipe the drive clean. These two steps, recovery of data and then wiping the drive will let you reuse your hard drive without losing any data.
How to use Stellar Data Recovery to recover your data from a corrupted drive?
1. Download and install Stellar Data Recovery Professional software.
2. Next, select the type of data you wish to recover.
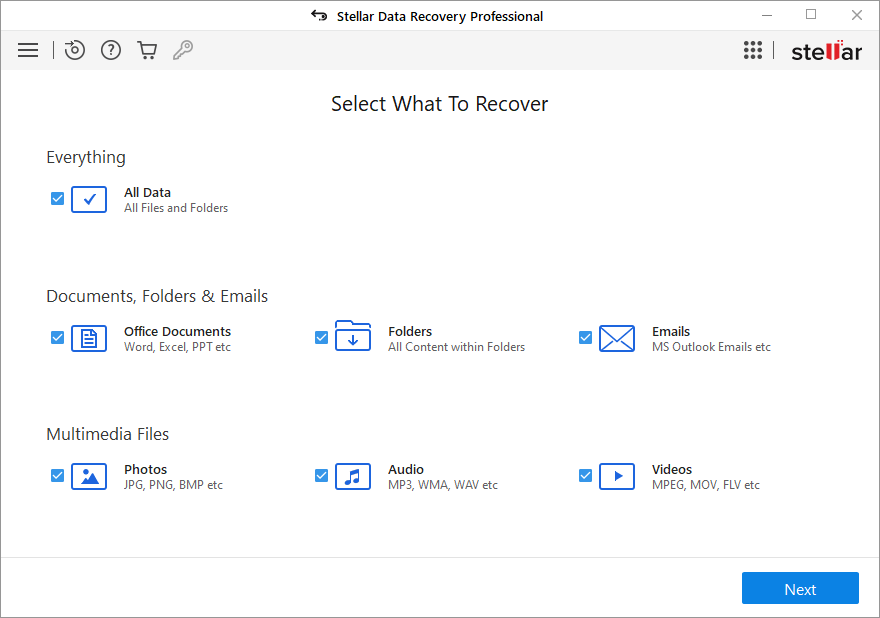 Image 2: Select the lost/deleted files you want to recover
 3. Choose the drive in your PC from where you want to recover the data.
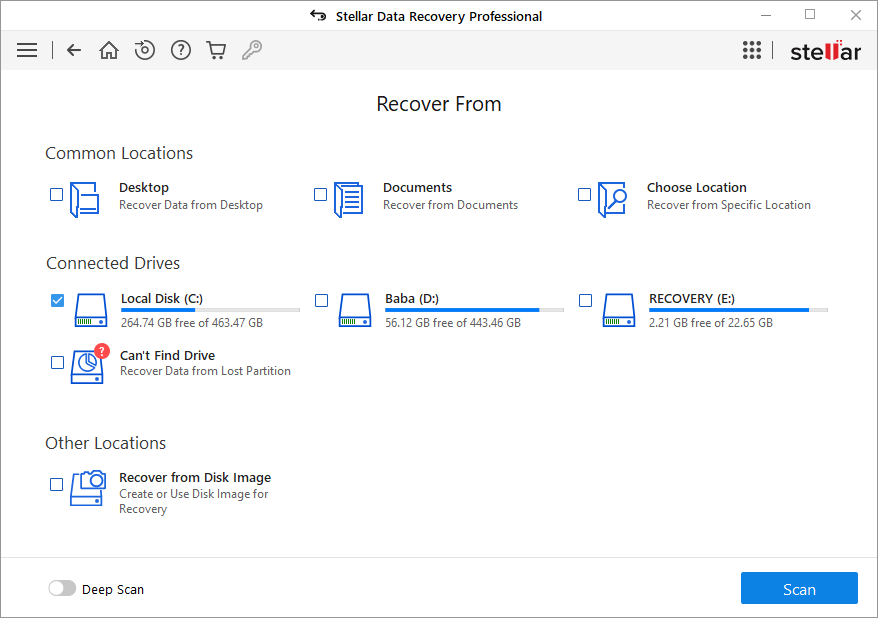 Image 3: Select Where To Recover Data From
 4. Once you have selected the drive, click Scan. You can also preview the files before recovering at the time of scanning.
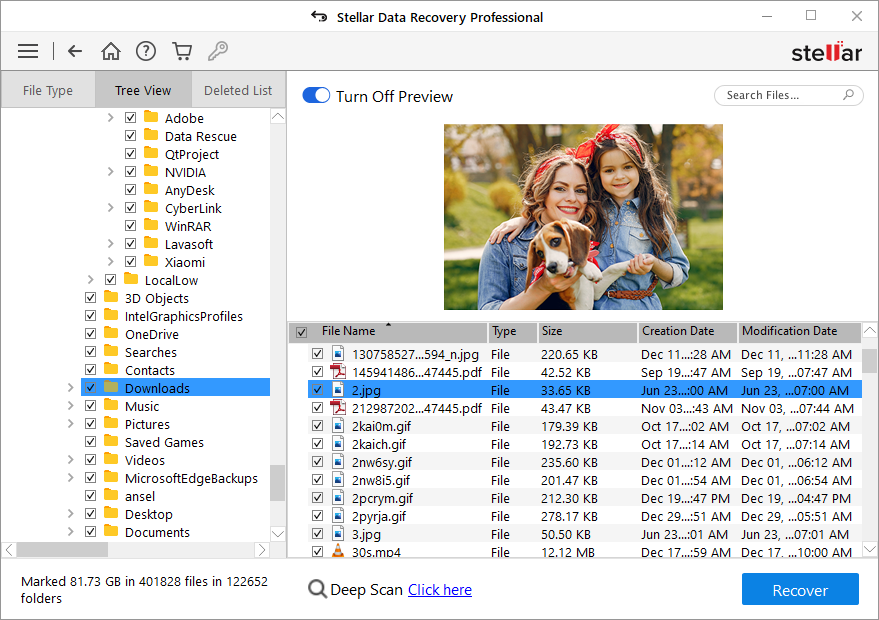 Image 4: Preview of lost/deleted files
 5. After scan completion, click Recover and choose a location to save the recovered files. (See Image 5)
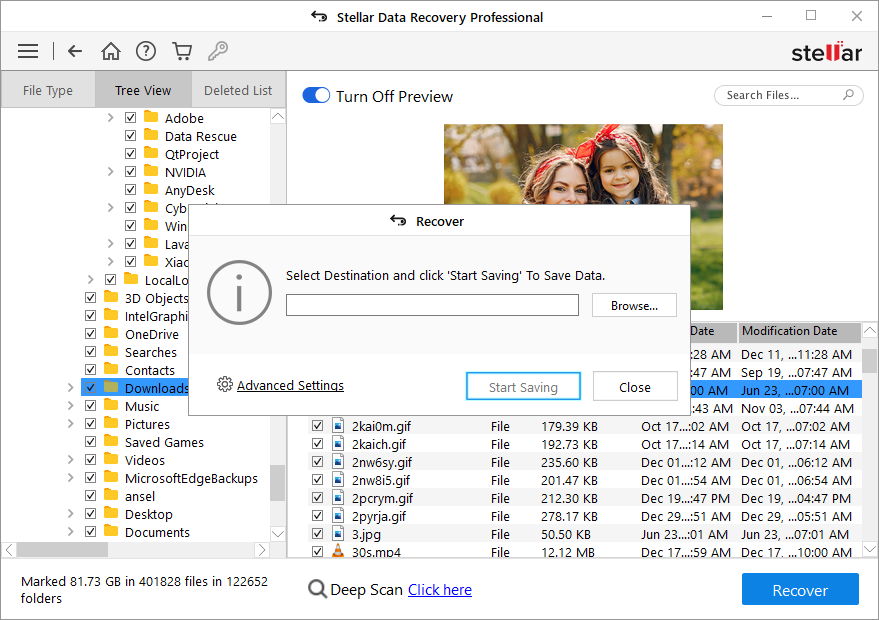 Image 5: Browse the desired location to save the recovered files
 6. Finally, click ‘Start-Saving’ to save the data. (See Image 6)
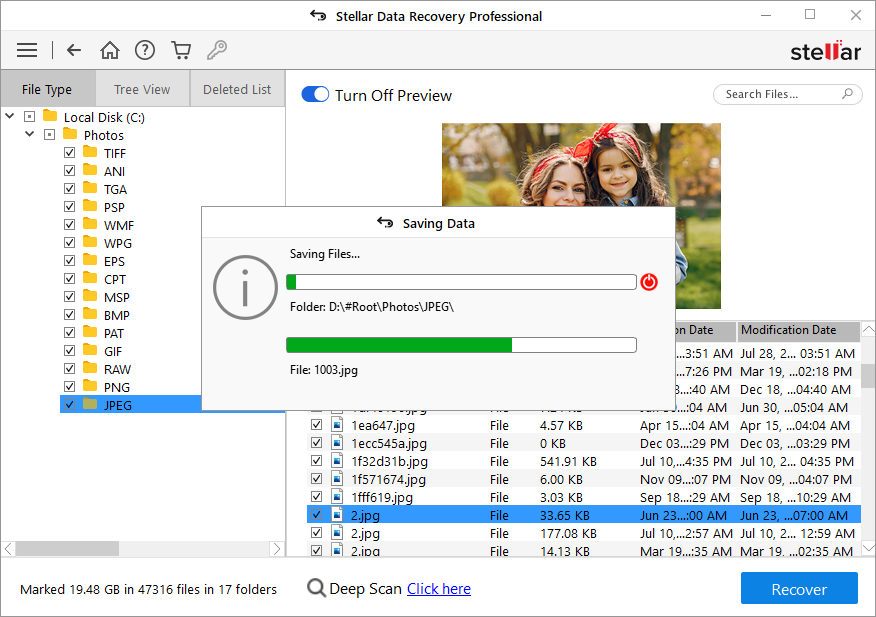 Image 6: Start-saving the recovered data
 Wiping the drive clean
Once you have recovered your data, the next step is to erase your drive to make it reusable again. The most effective way to permanently and securely erase the files is to use a professional file erasure software like Stellar File Eraser. Stellar File Eraser is a professional DIY tool, designed to erase files permanently from your drive.
Read this article for a step-by-step guide on permanently erasing files from a drive using Stellar File Eraser software.
Conclusion
The error “Windows cannot run disk checking on this volume because it is write protected” can occur due to a variety of reasons. We hope that the methods described in the blog help you resolve the error. If the remedies don’t work then it is advisable to use a data recovery software like Stellar Windows Data Recovery Professional and restore the computer to an earlier date.
Was this article helpful?