A blue screen error, also called kernel error, stop code or BSOD, is a common Windows error users experience in different circumstances. It appears with a sad emoji and a message stating, ‘Your PC has run into a problem and needs to restart’ with different error codes. The error may show up on the screen while binge-watching your favorite shows, playing video games, installing Windows updates, or during a simple data-transfer process.
It usually occurs when a hardware component, driver, software, or even a process critical for Windows stops working or gets damaged. As a response, Windows restarts or shuts down unexpectedly to protect the device and its data.
Frequent BSoD errors can be a sign of severe hardware damage. The error may cause repeated system crashes, boot loops, or even make the system completely unbootable, leaving Windows users clueless about how to resolve it. The worst part is DATA LOSS! We can easily lose confidential, important, and private data while facing such a situation.
Here, you will find all the issues that occur due to this kernel error, its causes, and solutions to fix it quickly.
Stop Codes associated with this BSoD error
This blue screen can repeatedly appear with different stop codes. Here’s a list of common stop codes experienced by many users:
What Caused this BSoD Error?
As there could be different stop codes associated with the ‘PC ran into a problem and needs to restart’ error, the reasons may vary. However, the most common ones are given as follows:
- Problematic Windows update
- Corrupt or faulty device drivers
- A corrupted or bad-sectored hard drive
- A faulty RAM
- Malware attack
- Missing or corrupted system files
- Problematic third-party app/software
- Incorrect memory dump settings
Irrespective of the reasons, you can fix the error using the methods shared below. However, some methods themselves might cause data loss if not executed properly.
Part 1: Recover & Protect Your Data
First things first—look for a backup of your data. If one is available, there’s nothing to worry about. However, if the backup folder(s) is unavailable, incomplete, or corrupted, use professional data recovery software, such as Stellar Data Recovery Professional.
The software recovers all types of data in case of deletion, formatting, corruption, and more. Using the “Create Recovery Drive” feature, you can create a bootable media to boot into a crashed or BSoD-affected computer and recover all your important files. Learn more in the video.
Part 2: Fix ‘Your PC has run into problem’ Error
Now that you’ve recovered data, you can start fixing the error using the methods discussed here, considering the scenarios.
Scenario 1: You are able to boot into Safe Mode
If you are able to boot your Windows PC into safe mode, it helps start Windows with limited drivers, services, and apps. If the ‘Your PC has run into problem’ error doesn’t appear in Safe Mode, remove the basic drivers, services, or settings that seem to be causing the error.
Steps to boot into Safe Mode:
Reboot your device if it’s turned on. The moment you see the Windows logo or the brand manufacturer’s logo on the screen, hold the power button until the device shuts down.
- Restart your system and hold the power button to shut down your system thrice. After shutting down the system third time, you will be able to see the Recovery screen. There, choose See advanced repair options.
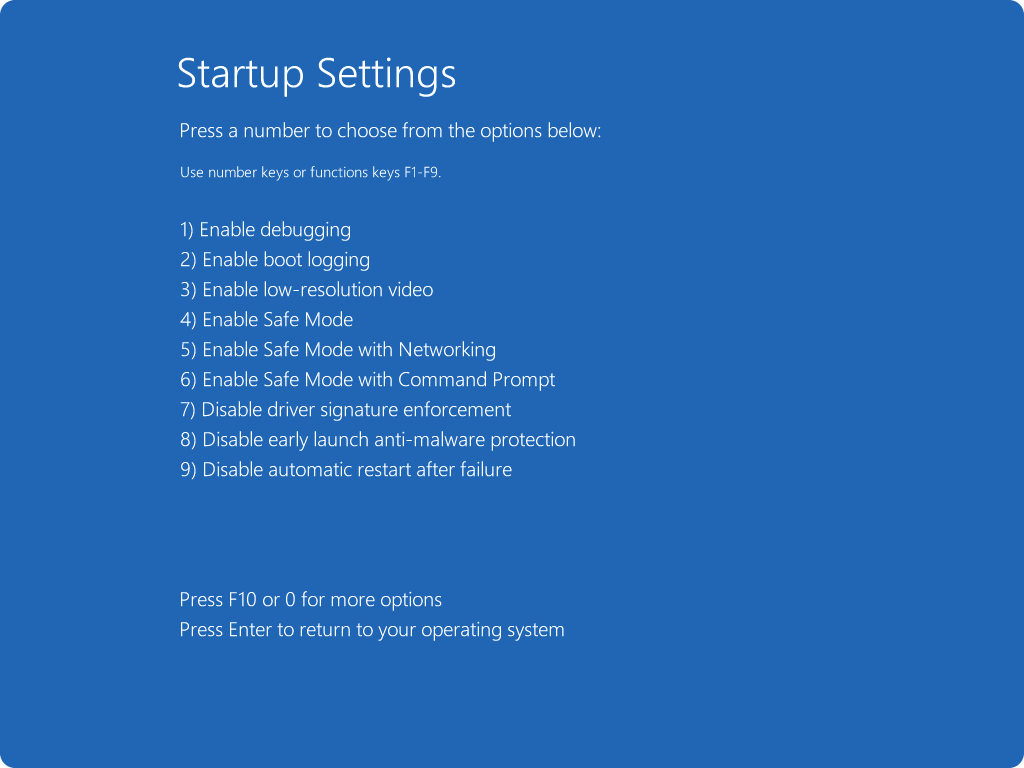
- On the following prompt, follow Troubleshoot > Advanced options > Startup Settings.
- Then, press F4 to Enable Safe Mode and click Restart to boot your system in Safe Mode.
- Once done, proceed with the methods discussed below.
Method 1: Uninstall Problematic Windows Update
Buggy Windows updates are one of the most common reasons behind ‘your device has run into a problem’ error. If you’ve installed any Windows update recently and started facing this error after that, try to uninstall that update with the given steps:
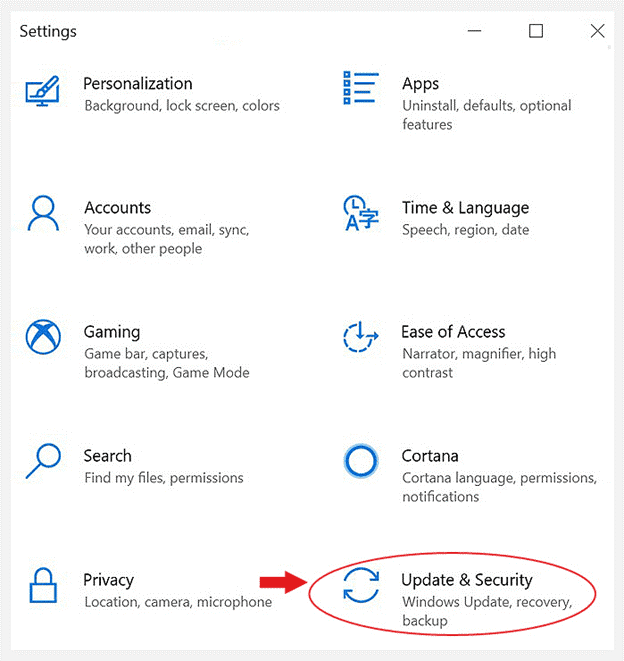
- Press Windows + I to open Settings and navigate to Update & Security.
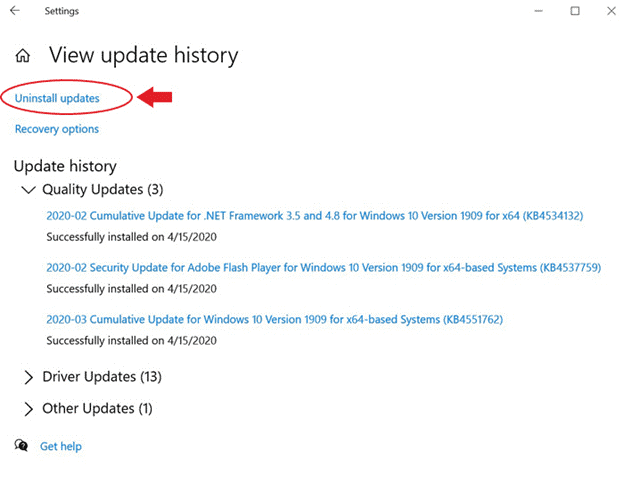
- Follow View update history > Uninstall updates.
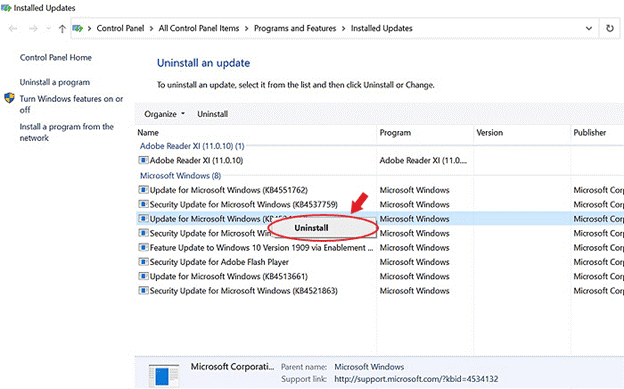
- Locate the recently installed Windows update that seems to be causing the problem.
- Right-click on the update and click Uninstall.
- After uninstalling the Windows update, restart your system normally and check if the error persists.
Method 2: Run CHKDSK Command
A corrupted hard drive or hard drive with bad sectors lead to different types of system errors, such as the above BSoD – “Windows ran into a problem and needs to restart” error.
You can run CHKDSK command through the command prompt utility. The CHKDSK command, when run with /F and /R parameters, checks and fixes hard drive issues, locates the bad sectors, and recovers the readable information. To do so, follow the steps given below:
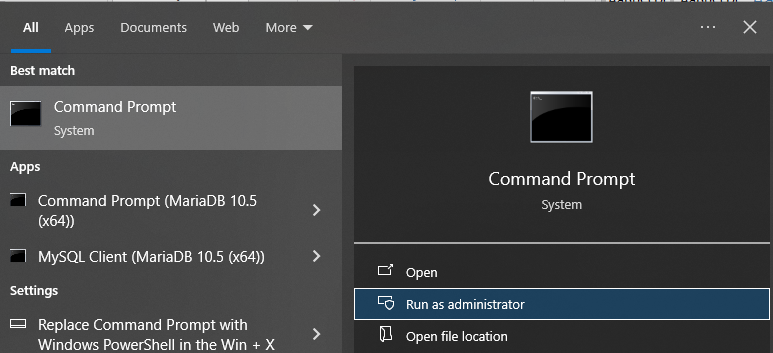
- Go to Windows Search, type cmd, and click Run as administrator when you see Command Prompt in the search result.
- Now, type Chkdsk /f /r D: and hit Enter. (Replace D: with the letter of the drive you want to run the command for.)
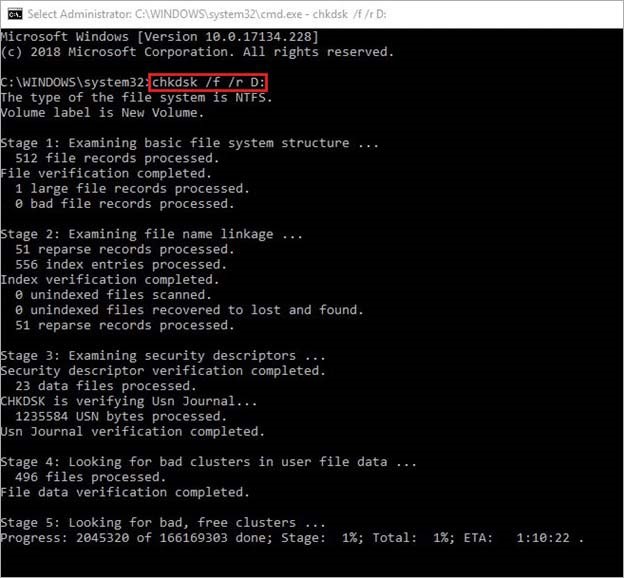
- Let the scan finish. Once completed, check the results.
- If there are no further prompts to follow and the scan results are fine, close the Command Prompt window.
- Reboot your system and check if the problem is now solved.
Read more to learn about the CHKDSK command’s functionality.
Method 3: Update device driver
If a device driver on your system is corrupted or outdated, you may encounter ‘your pc ran into a problem’ error. You may try updating the driver and see if that fixes the problem for good. Do so by following the steps mentioned below:
- Press Windows + X to open Device Manager.
- Select the driver with a yellow exclamatory mark and follow the instructions to Update Driver.
- Select the Search automatically for drivers option.
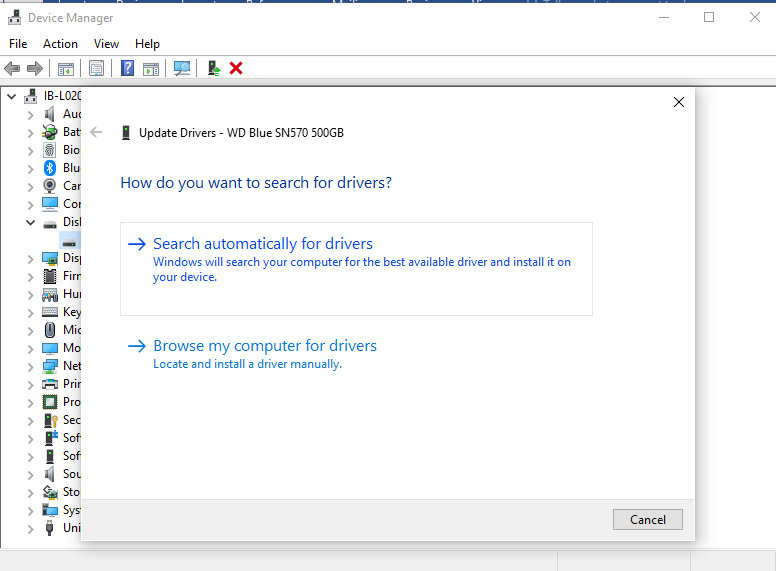
Windows will start finding the latest driver software. If you find the latest version of the device driver, download it, and reboot your system to see if the issue is fixed.
You can also visit the manufacturer’s site to download the latest driver for the respective device. For example, visit the official site if you want to download the Nvidia graphic driver.
Method 4: Run Memory Diagnostic Tool
A faulty RAM can also be a culprit for causing the above error. You can test the RAM for issues using Windows default Memory Diagnostic tool. To do so, below steps are to be followed:
- Open Windows Memory Diagnostic tool from Windows Search.
- On the next prompt, click Restart now and check for problems (recommended) option.
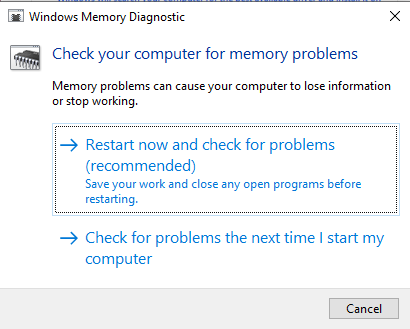
- On restart, the system will boot with a RAM testing window.
- Let the tool test the RAM for issues. If the result shows sign of RAM failure, replace it with a new one and then check if the issue is gone.
You can also run memtest86 to check issues with the RAM.
Method 5: Uninstall Problematic Application/Software
You may sometimes experience this BSoD error after installing a buggy or malicious software or application on your system. This happens when you download a third-party app or program.
If the app code is broken or executable files are missing, the app may not function properly and even cause issues on your system. In such scenario, you can try uninstalling the buggy or broken apps and see if it fixes the problem. To do so, follow the steps given below:
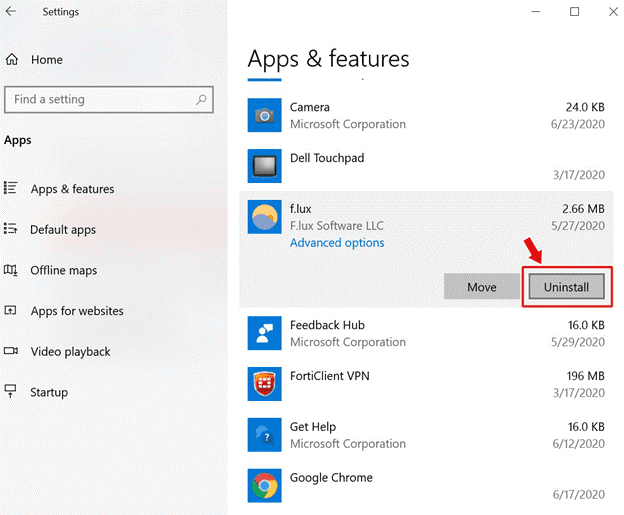
- Open Settings and go to Apps.

- In the Apps & features window, select the application/software that may be causing the problem, click on it, and select Uninstall.
Once this process is completed, restart your system to check if the error is resolved.
Method 6: Run Windows Defender Program
Some users reported that malware on their system was behind this blue screen error. You can also check for malware on your system using the Windows Security feature in Settings. Follow the steps:
- Open Settings, go to Update & Security > Windows Security > Virus & threat protection.
- Check for Scan options there and go for Microsoft Defender Offline Scan.

Let the scan complete. Once done, reboot your system to check if the issues are solved.
Method 7: Modify the Memory Dump Setting
The memory dump in Windows, also called a core dump or crash dump records all useful data that helps identify why the system stopped working unexpectedly. It creates a new file every time the system experiences an issue. You may try modifying the memory dump settings to fix the error message “PC ran into a problem.” To do so, follow the given steps:
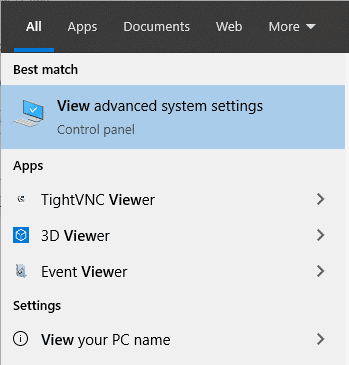
- Click on View advanced system settings.
- Go to the Advanced tab, and under the Start-up and Recovery, click Settings.

- On the next prompt, uncheck Automatically reset.
- Under Write debugging information, select Complete memory dump from the drop-down list.
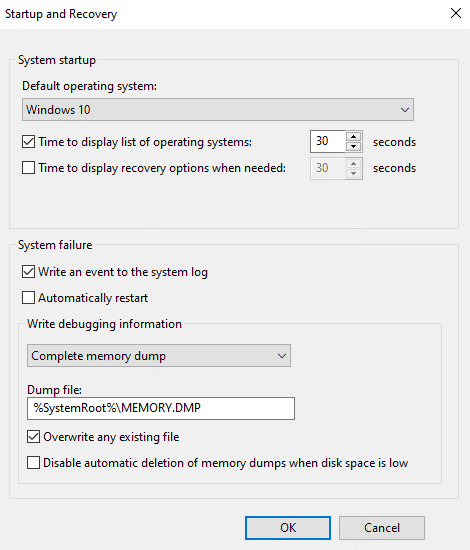
- Save the changes, restart Windows, and see if the error is fixed.
Method 8: Run SFC (System File Checker)
Sometimes, corrupted system files may cause this BSOD and other related errors. To fix it, run the SFC and DISM scans. Follow the below-mentioned steps:
- Press Windows + X and choose Command Prompt (Admin).
- When Command Prompt screen appears, type SFC/scannow command and hit Enter.

- Once the process is done, check if the issue got fixed.
- If the error is still there, you may run the DISM command.
- Open Command Prompt, run it as an administrator, and type the following commands:
DISM /Online /Cleanup-Image /CheckHealth
DISM /Online /Cleanup-Image /ScanHealth
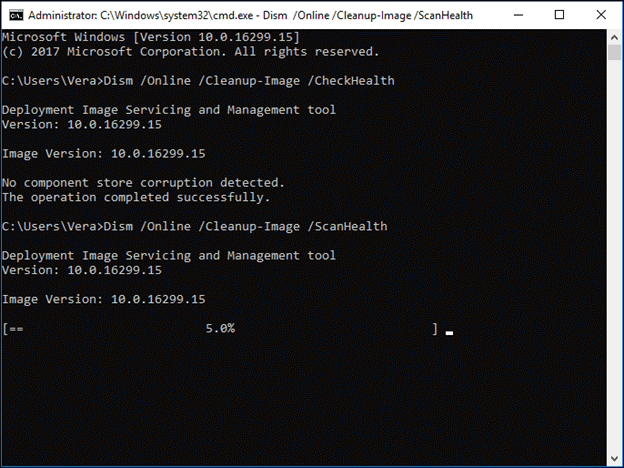
- Once done, check the results and then reboot your PC.
Scenario 2: If you can’t boot into Safe Mode
Method 9: Perform Startup Repair
If you cannot boot into Safe mode due to the “your PC ran into a problem and needs to restart Windows 10” error, you can simply perform a Startup Repair:
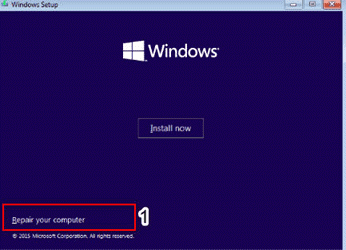
- Boot your system using a USB installation media (created using Windows’ media creation tool).
- When you see the Windows Setup screen, click Repair your computer.
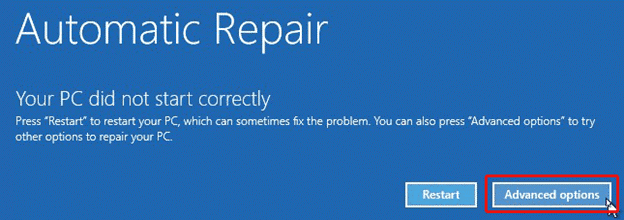
- While you enter in Automatic Repair environment, click Advanced options.
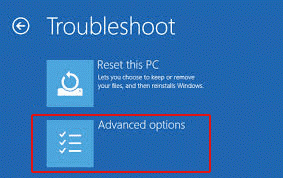
- Follow Troubleshoot > Advanced options.
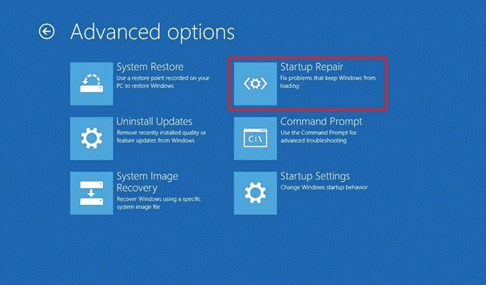
- From the Advanced options screen, click Startup Repair, and proceed.
- Select your account and enter the password.
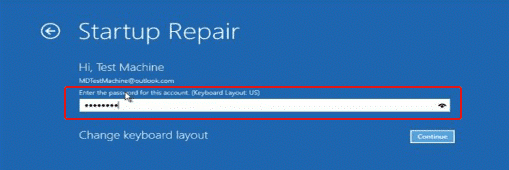
- Click Continue and follow the instructions given on-screen to complete the Startup Repair procedure. Now check if the problem is fixed.
Method 10: Perform System Restore
You may also perform System Restore to fix the “your PC ran into a problem” error. This restores the system to its default or chosen restore point settings and configuration, resolving the error if it was caused by a system file, driver, etc.
To perform System Restore, follow the given steps:
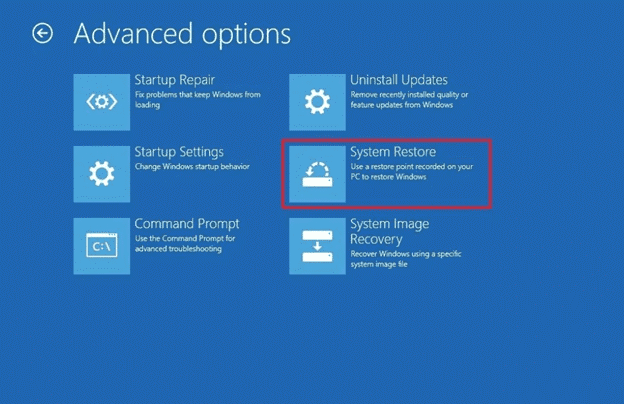
- Enter in Automatic Repair environment and choose Advanced options as explained above.
- Go to Troubleshoot > Advanced options > System Restore.
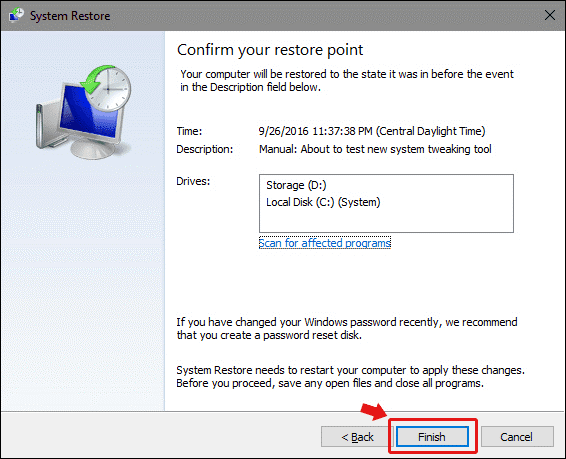
- Click Next. On the next prompt, click Scan for affected programs.

- Follow Click > Finish on the next prompt
Method 11: Reset this PC
You may also try resetting the PC to get rid of the error. This method helps you remove unwanted applications, software, programs, settings, drivers, and more, that are causing problems on your system. You may also choose to keep files while resetting the system or delete everything stored on the PC.
Conclusion
A blue screen error like ‘Your device ran into problem’ may seem intimidating at first. However, you can fix it easily with the right solutions. The methods shared above are tried-and-tested by multiple users. You can carefully perform each method and tell us which helped you eliminate the issue. Moreover, if your system encounters frequent boot-loops or BSoD errors, we’d suggest keeping a professional data recovery software handy.
Was this article helpful?