Outlook users sometimes face errors and issues while working on the application. One of the common errors which Outlook users face is “Cannot Display the Folder”. This error usually occurs when there is a problem with the Outlook data file or Outlook configuration. However, there are various other reasons that may also result in this error.
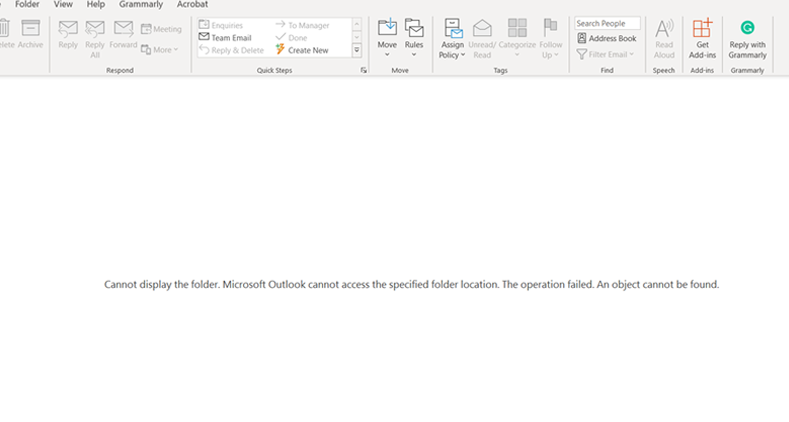
Reasons for ‘Unable to Display the Folder’ Error in Outlook
Some potential causes behind this error are:
- Outlook profile or PST file is damaged.
- Corrupted Outlook data file.
- Outlook account is incorrectly configured.
- Outlook account is disconnected.
- Network connectivity issues.
- Insufficient permissions.
- Outlook is not up-to-date.
- Problem exists with Exchange Server.
- Incorrect account settings.
- Antivirus software.
- Outlook data file is being used by another program or is locked.
- Outlook is not installed correctly.
- The folder may be hidden or have been deleted/moved.
Solutions to Fix the ‘Unable to Display the Folder’ Error
Here are a few potential solutions you can try to resolve the “Unable to display the folder” error in Outlook.
Check your internet connection
If you are using Outlook in online mode, ensure that you have a stable Internet connection. If you are using Outlook in offline mode, ensure that your computer is connected to your network.
Check your Outlook account settings
Make sure that your account settings are correct and you are using the correct server and login information. You can check your account settings by following the below steps:
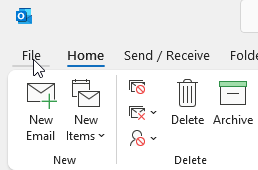
- Open the Outlook application and click on the File menu.
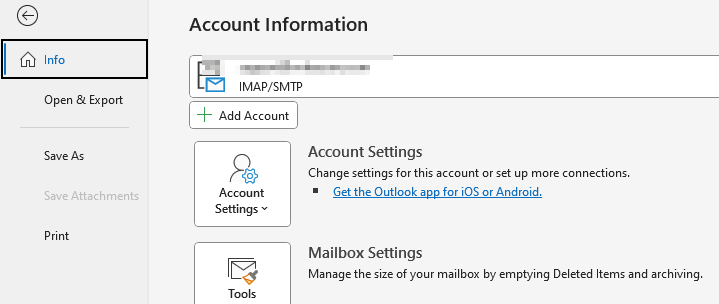
- On Info window, click on Account Settings > Account Settings.
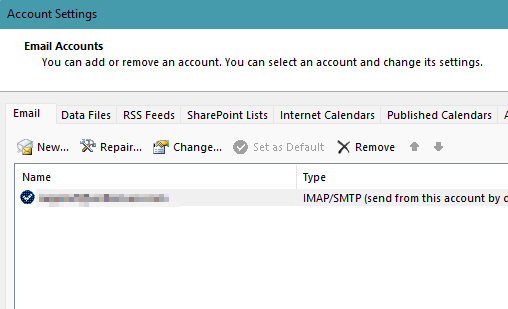
- On Account Settings window, check your account settings details.
Check for Outlook updates
Check that you have the most recent updates installed for Outlook. To check for updates, you can follow the below steps:
- Open Outlook application and click on File menu.
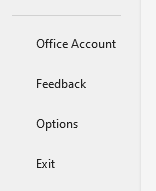
- Click on Office Account option.
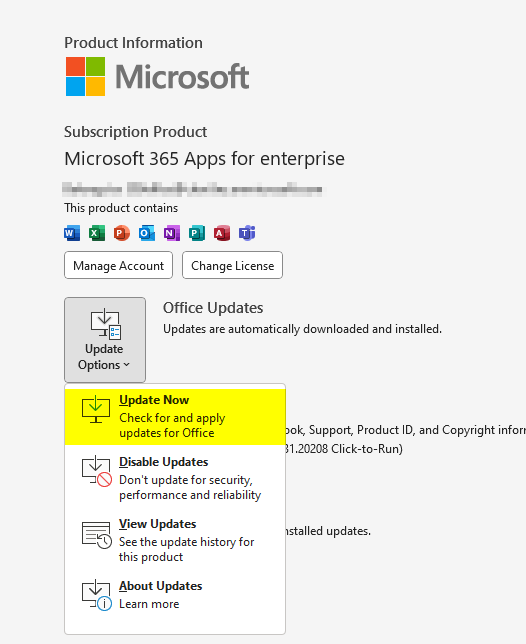
- In Update Options, click Update Now.
Check and disable faulty add-ins
You can launch Microsoft Outlook in Safe Mode to check if any faulty add-ins are causing the problem. The steps are as follows:
- Open the Run application by pressing Windows + R.
- Enter Outlook.exe /safe in the search box and press Enter.
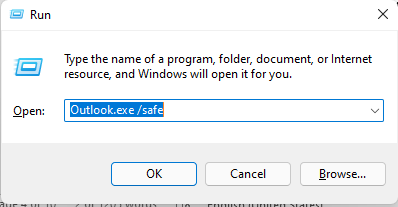
- Click Yes, when the message prompt to launch Outlook in safe mode.
If Outlook functions properly in safe mode, it means some faulty add-ins are causing the problem. You can disable add-ins by performing the below actions:
- Open Outlook in normal mode and click on File.
- In Options, click on Add-ins.
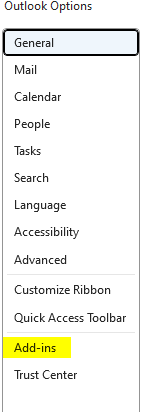
- In Add-ins section, select COM Add-ins from the dropdown at the bottom of the window.
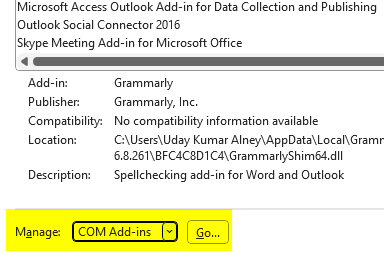
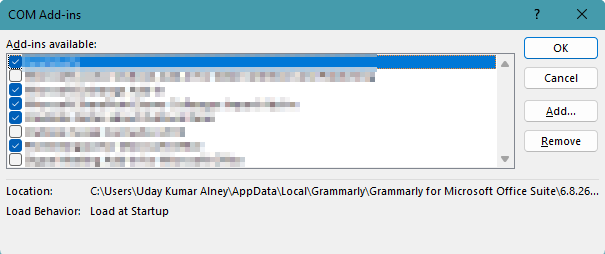
- In COM Add-ins, you can uncheck required add-ins to remove them.
Repair Outlook profile
It’s possible that your Outlook profile is corrupt. To repair the profile, perform the following steps:
- Launch Outlook and click on File.
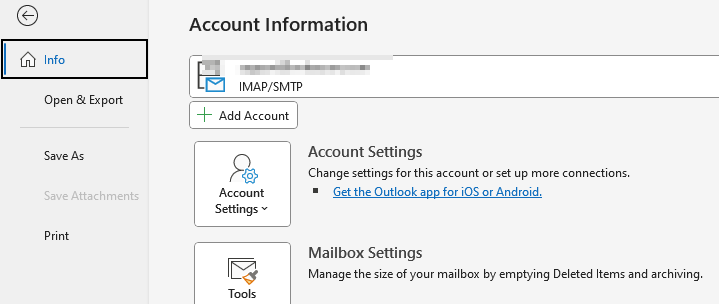
- In the File option, click on Info option.
- Click on Account Settings > Account Settings.
- On the Account Settings page, select the required Outlook profile and then click the Repair option.
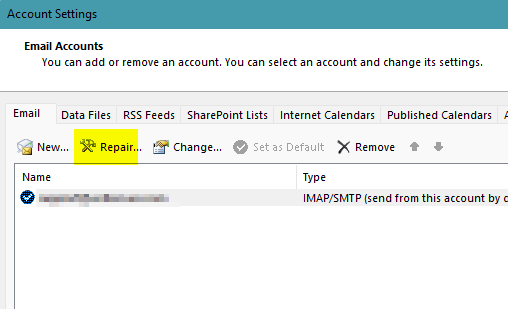
- Follow the wizard to complete the process and then restart Outlook.
Create a new profile
If repairing your Outlook profile does not resolve the issue, you can create a new Outlook profile.
To do so, click Control Panel > Mail > Show Profiles. Click the “Add” button to create a new profile and then follow the prompts to set it up.
Run Outlook with Administrative Privileges
You may not have permissions to access Outlook data file or the particular folder. You can start Outlook with Administrative Privileges to solve this problem.
Follow these steps to run Outlook with administrative privileges:
- Right-click on the Outlook application.
- Select run as administrator.
- Now try to open the folder.
Repair PST file with Inbox Repair Tool
The Scanpst.exe is a utility provided by Microsoft for repairing damaged or corrupted PST files in Outlook. If you are experiencing errors or problems with your PST file, you can use the Inbox Repair Tool to fix them.
Here’s how to use the Inbox Repair Tool (ScanPST.exe) to fix PST file errors:
- Close Outlook.
- Open the Inbox Repair Tool. You can check the location of scanPST.exe or Inbox Repair Tool based on your Outlook version.
- In the Inbox Repair Tool, click “Browse” and select the PST file you want to repair.
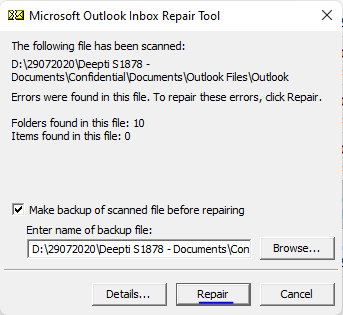
- Click “Start” to begin the scan.
- If the Inbox Repair Tool finds errors, it will prompt you to select whether you want to repair the file or create a new one. Choose the option that you prefer.
- Click “Repair” to begin the repair process.
- When the repair process is complete, the Inbox Repair Tool will display a report.
Read more , Find the location of PST file?
Repair PST file using Stellar Repair for Outlook
If none of these solutions resolves the issue or ScanPST fails to repair the file, then you can install and run an advanced and powerful Outlook PST file repair software, such as Stellar Repair for Outlook. The software can easily repair severely corrupt Microsoft Outlook PST files of any size.
To use Stellar Repair for Outlook to repair PST file, follow these steps:
- Download Stellar Repair for Outlook and install it.

- Launch the software and click on the “Select File” button.
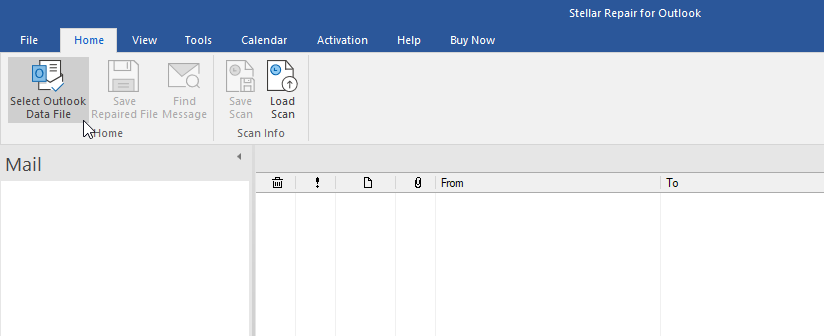
- Navigate to the location of the damaged PST file on your computer and select it. You can also click on the “Find PST File” button to search for the file if you are not sure of its location.
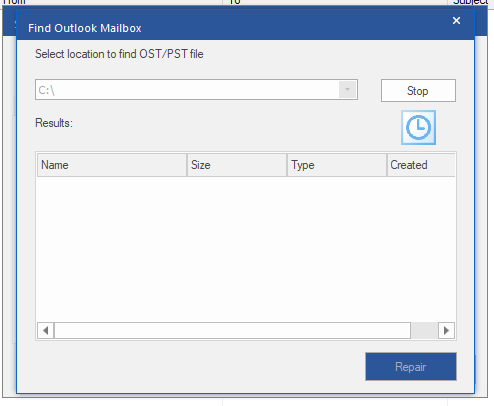
- Click on the “Repair” button to start the repair process. The software will scan the PST file and try to repair it.
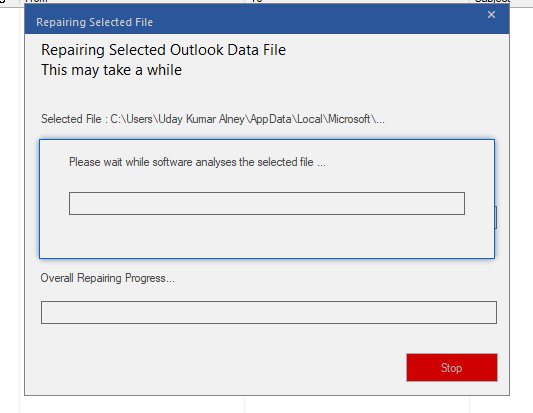
- After the scan is complete, you will see a list of the items that have been recovered from the PST file. You can preview any item by clicking on it.
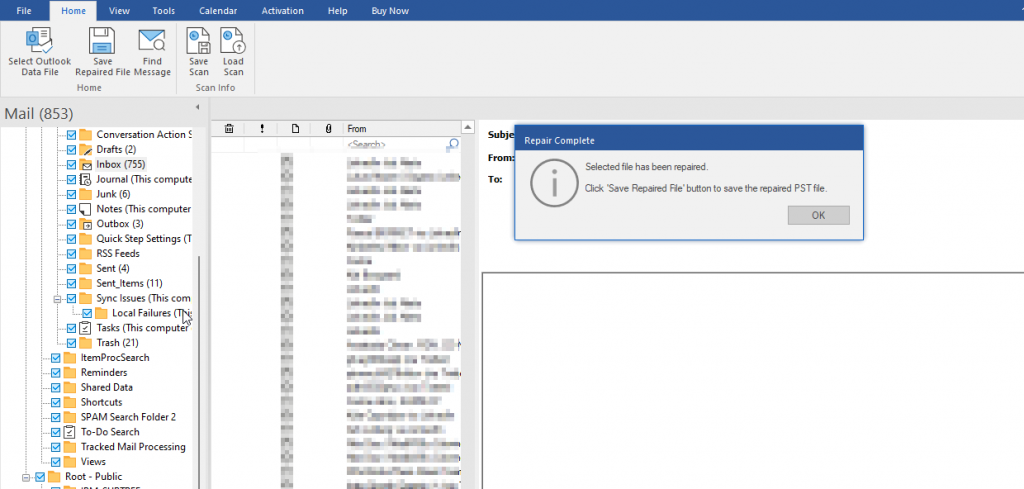
- When you are satisfied with the recovered data, click on the “Save Repaired File” button.
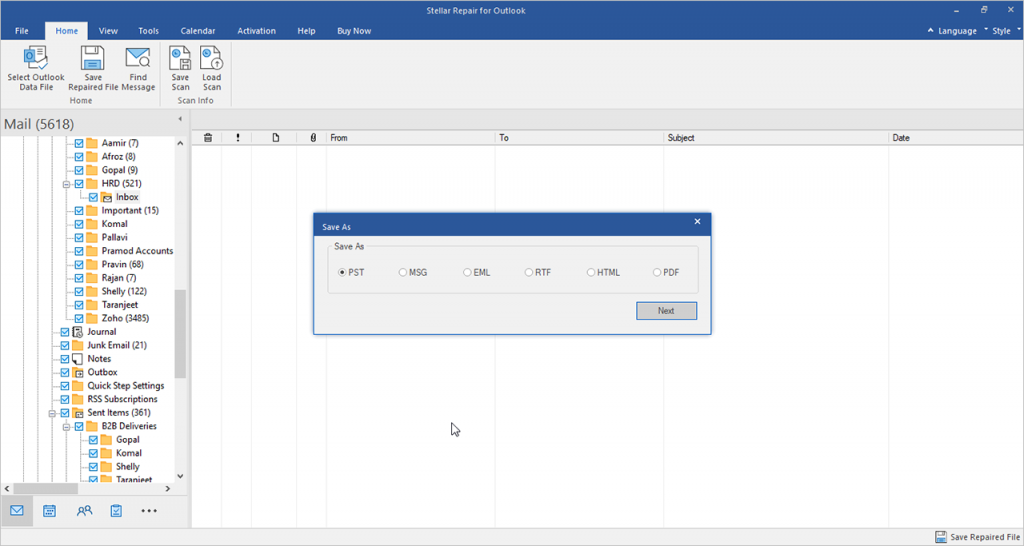
- Select the desired saving option. You can save the repaired file to a new PST file or any other given format. Then, select the location where you want to save the repaired PST file.
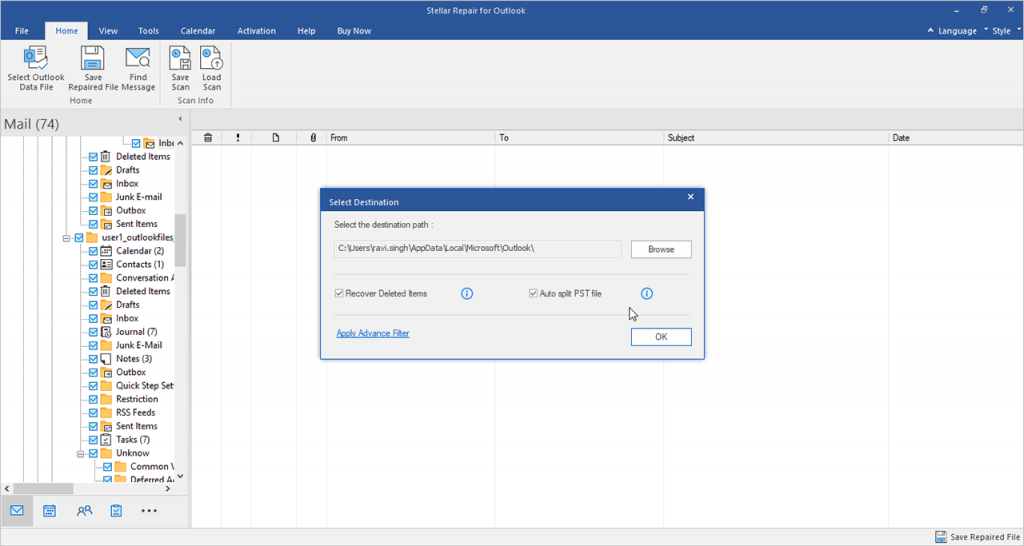
- When the saving process is complete, you can close the software and open the repaired PST file in Microsoft Outlook to access your data.
Conclusion
In this article, we’ve shared different ways to fix the error “Unable to display the folder” in Outlook. However, if the error has occurred due to corruption in PST file, you can try to repair the file by using the Inbox Repair Tool or a more advanced PST repair software, like Stellar Repair for Outlook.
Was this article helpful?