Summary: Cached Exchange Mode is an exclusive feature available in Outlook which, when enabled, stores a copy of your server mailbox data on the local system. Sometimes, you find that this option is grayed out or not working. In this post, you will learn the reasons why Cached Exchange Mode is grayed out in Outlook and the solutions to fix the issue.


Cached Exchange Mode is enabled by default in Microsoft Outlook when you configure or add an Exchange, Outlook.com, or Office 365 (Microsoft 365) email account. In this mode, all the Outlook mail items are stored in a local cached copy (OST), which is frequently synchronized with the server. This feature allows offline access to mail items and helps improve performance. However, sometimes, users find that the Cached Exchange Mode option is grayed out and the checkbox against this option is disabled in the Outlook settings.
Some users have reported about missing or grayed Outlook Cached Exchange mode option. Even after trying several solutions, they were not able to fix it. This not only prevents them from enabling the Cached Exchange Mode but also affects their Outlook performance. In this post, we will look into the reasons behind the Cached Exchange Mode is grayed out issue and see how to fix this issue.


Reasons for Cached Exchange Mode is Grayed Out Issue
There are several factors that can lead to the Cached Exchange Mode option is unavailable or grayed out issue in Outlook. These include:
- Group policies set by the administrator
- Corrupt Outlook Profile
- Altered registry keys
- Outdated Outlook
- Account does not support Cached Exchange Mode
- Faulty or incompatible add-ins
- Trial or cracked/nulled Outlook version
Solutions to Fix the Cached Exchange Mode is Grayed Out Issue in Outlook
Follow these solutions to fix the issues and enable Cached Exchange Mode in Outlook.
1. Check and Edit the Registry
Sometimes, the Cached Exchange Mode gets disabled due to altered registry keys. By editing the registry keys, you can enable or disable the Cached Exchange Mode. To check and modify the registry keys to enable Cached Exchange Mode, follow these steps:
Note: To perform these steps,you need admin rights on your computer or laptop.
- Press the Windows + R keys, type regedit, and press the Enter key or click OK to open the Registry Editor.
- Then, go to the following key location: HKEY_CURRENT_USER\Software\Policies\Microsoft\Office\x.0\Outlook\Cached Mode.
- Search or look for a DWORD value, named Enable or Disable Cached Exchange Mode.

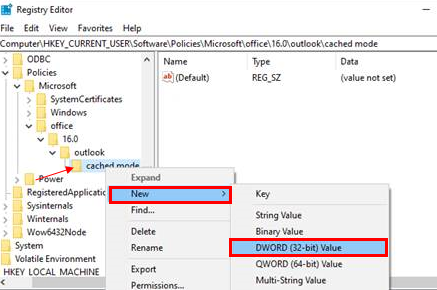
- If it exists, double-click on it and check if it is set to 0. If yes, change it to 1.

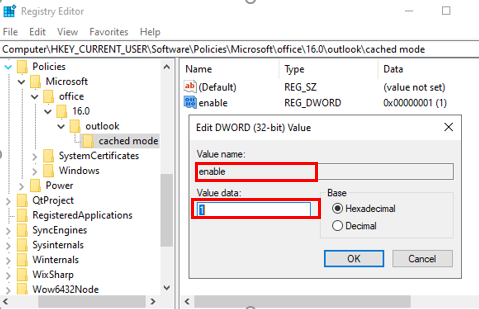
- In case it doesn’t exist, you can create a new one to enable the Cached Exchange Mode option in Outlook.
2. Create a New Outlook Profile
A corrupt or damaged Outlook profile can lead to issues, including cached mode disabled or grayed out. To fix this, you can simply recreate your Outlook profile to resolve the issue. Here are the steps:
- Go to Control Panel and click User Accounts > Mail.
- Tap on Show Profiles and add Outlook.


- Enter or type the Profile Name (you can name it anything) and click OK.
- Complete the account sign-in process by entering your email credentials. After signing in, open Outlook.
- You will see a dropdown. Choose your new profile from the dropdown and click OK.
Now, check and enable the Cached Exchange Mode. For this,
- Go to File > Info > Account Settings > Account Settings.
- Select your email account and click Change.
- Check or tick the Cached Exchange Mode and click Next > Finish.
- Restart Outlook.
3. Check Group Policy Settings
Admin or IT team of your organization may enable or disable the Cached Exchange Mode feature through group policies. If you’re in a managed IT environment, you can check if the Cached Exchange Mode is disabled due to the Group Policy. In such a situation, you can’t do much as a user. However, you can:
- Connect with your IT department or the administrator and ask them to check and verify if a Group Policy is enforcing this setting.
- Also, ask the administrator to adjust this policy with the help of the Group Policy Management Console (GPMC).
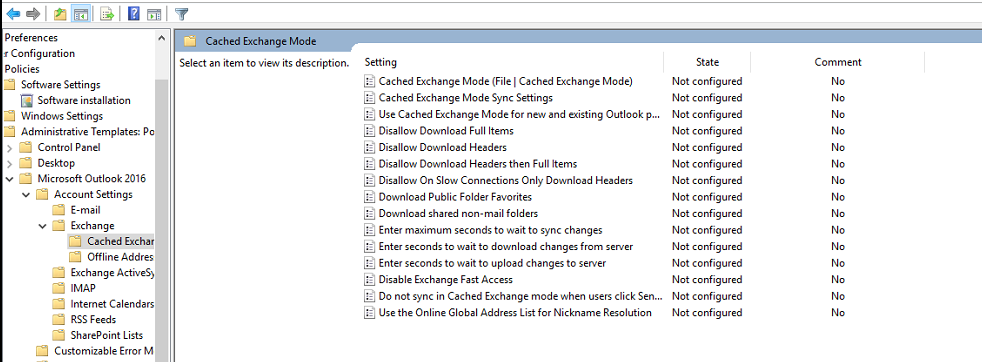
- In case you have access, you can go to User Configuration > Administrative Templates > Microsoft Outlook 20XX > Account Settings > Exchange > Cached Exchange Mode.
- You need to enable the setting – “Use Cached Exchange Mode for new and existing Outlook profiles.”

- Then, restart Outlook and check if the Cached Exchange Mode setting is available.
4. Repair Microsoft Office
Damaged or missing program files of MS Office or Outlook can also lead to Cached Exchange mode grayed out issue. By repairing the MS Office, you can restore missing program files or repair the damaged one. The steps are as follows:
- Go to Control Panel > Programs > Programs and Features.
- Click on Outlook or Microsoft Office and then click on the ‘Change’ button at the top.

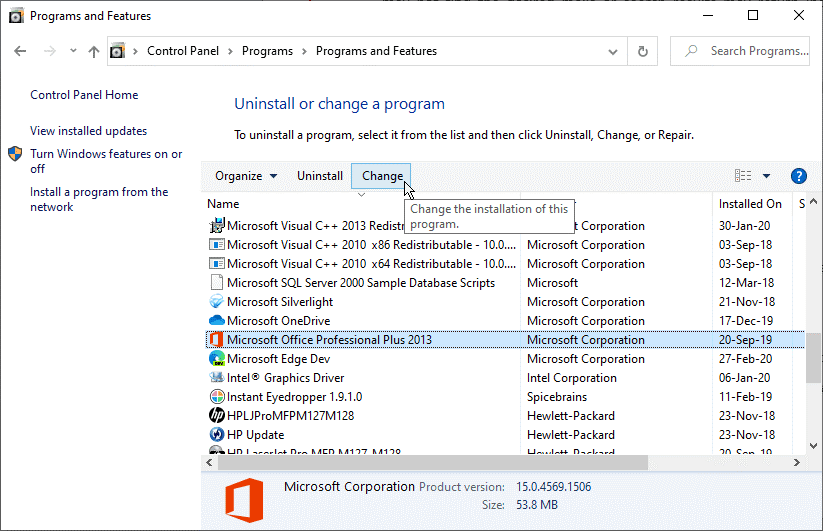
- From the available options, choose ‘Repair’ and then click ‘Continue’.

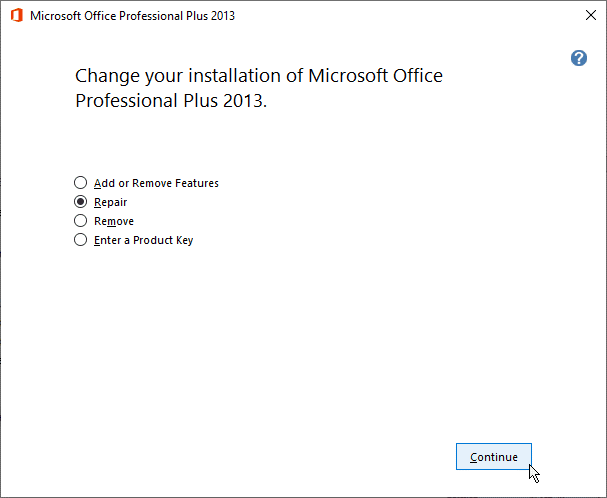
- This will begin repairing MS Office or Outlook installation. After repair, check if the grayed-out Cached Exchange Mode issue is fixed.
5. Update Outlook and Windows
Outdated Outlook can cause compatibility issues, preventing you from enabling Cached Exchange Mode. To fix this, check and install the latest Outlook updates. The steps are as follows:
- Open Outlook and go to File > Office Account.
- Click Update options and choose Update Now.

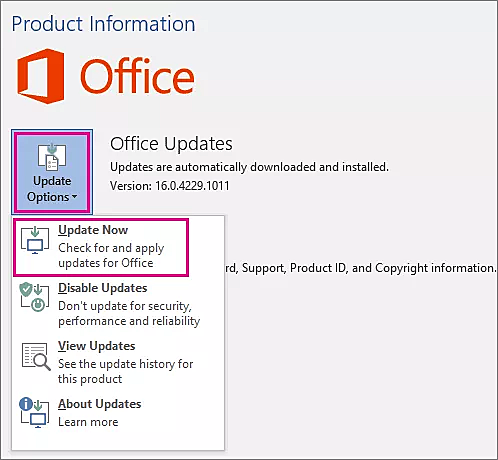
- If a new update is available, it will start downloading.
- Complete the Outlook update and then restart the application.
6. Activate Outlook
If you are running a trial version or cracked version of Outlook, you may find the Cached Exchange Mode as grayed out. So, it’s recommended to download the Outlook or Office suite from the official website and get the license keys to activate the software. Once the Outlook is activated using genuine keys, you can enable the Cached Exchange Mode.
7. Remove Faulty Add-ins
Faulty Outlook add-ins could also be a reason for the Cached Exchange Mode grayed out issue. Below are the steps to identify and remove faulty add-ins:
- Press Windows + R keys.
- Type Outlook.exe /safe and press the Enter key.

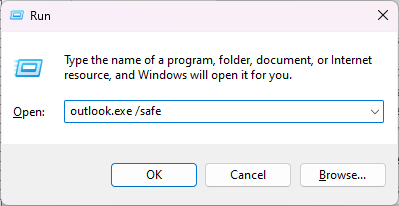
- This opens Outlook in Safe Mode.
- Navigate to File > Options > Add-ins.
- Go to the Manage COM Add-Ins section and click Go.
- Uncheck all add-ins and click OK to disable all the add-ins.
- Restart Outlook normally.
- Check if you can enable the Cached Exchange Mode.
- If yes, enable one add-in at a time and restart Outlook to see which add-in is causing the problem.
- Remove it from Outlook to fix this issue permanently.
Conclusion
By following the solutions discussed above, Outlook users can resolve the Cached Exchange Mode grayed mode issue and enable the Cached Exchange Mode in Outlook. Sometimes, issues with the Outlook data file (.ost) can also cause issues with the Cached Exchange Mode. By recreating the OST file, you can resolve the issue. However, after recreating the OST file check for any missing mail items in new OST file.
If there are any missing items, use an OST to PST converter software, such as Stellar Converter for OST, to extract and restore mail items from the OST file and save them to local PST. You can then import this PST file into your Outlook. You can also export the mail items from OST directly to an Exchange or Microsoft 365 account in a few clicks.


