In a hybrid setup, on-premises Exchange Server and Exchange Online tenant act as one. You can have some of the mailboxes locally or online. You can migrate the mailboxes easily from one side to the other (using a migration batch) via the Exchange Admin Center or the Exchange Management Shell. Sometimes, when moving a mailbox to Exchange Online (Microsoft 365) in a hybrid setup, you might encounter a situation where a mailbox in the value of the mailbox GUID isn’t stamped on the associated mailbox in the on-premises organization. As a result, the move request fails with the error saying, “MigrationPermanentException: Cannot find a recipient that has mailbox.”
Error: MigrationPermanentException: Cannot find a recipient that has mailbox GUID "<GUID value>". –> Cannot find a recipient that has mailbox GUID "<GUID value>"
Usually when an error occurs, it indicates the cause of the issue and helps in the troubleshooting.
As you can see in the error above, it is saying that it cannot find the mailbox with the specific GUID it provides.
To find all the necessary information, along with the report of the mailbox migration batch status in Office 365, follow the below steps:
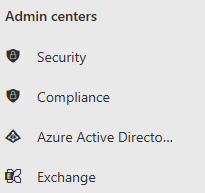
- Open the Microsoft 365 Admin Center and click on Exchange under the Admin Centers.

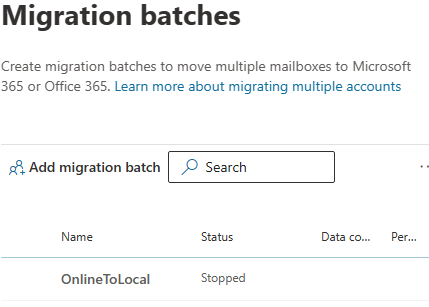
- On the Migration Batches screen, you will see your failed migration batch. You can open it to see the error message and download the user reports.
Why MigrationPermanentException error occurs?
From the error message itself, it seems that there is an issue with the GUID. The GUID is an important component of a user or object in the Active Directory. The GUID is stored in the Active Directory Schema on the Active Directory servers. The GUID is a unique value which associates the Active Directory object to the mailbox in the Exchange Server. The GUID is stored in the object.
Let’s look at the user to investigate the matter.
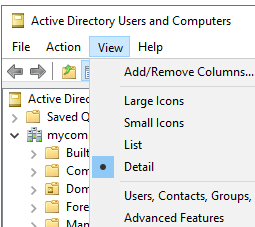
- Open Active Directory Users & Computers from the Administrative Tools on the Active Directory server. Click on View and then click on Advanced Features.
- Open the user and click on the Attribute Editor.
- In the Attributes section, look for the msExchMailboxGuid. You should find it as empty or set as <not set>.
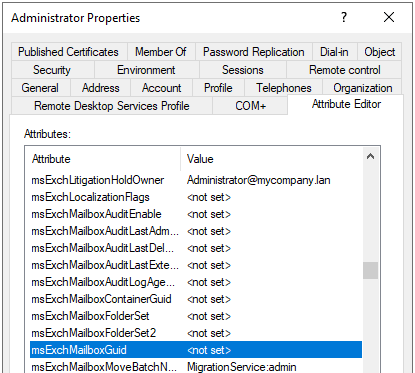
This means that the Exchange Online is trying to move an online mailbox to a local mailbox. It matches the user but the GUID of the mailbox is missing. Due to this, the user is not associated with a mailbox and the migration batch cannot proceed.
Solutions to Resolve the MigrationPermanentException Error
Before proceeding to move the mailbox from Exchange Online to the on-premises Exchange Server, you need to resolve the issue and populate the GUID.
Open the Exchange Management Shell (EMS) on the local server and enter the following command to check if the GUID is set or not.
Get-RemoteMailbox <mailbox name> | Format-list ExchangeGUID

If the result of this command is zero, it means the GUID is not set for the user.
Open the PowerShell window and connect to the Exchange Online. Run the above command again against the online counterpart of the user. In this case, the GUID will also show as zero.
Now, you need to set the GUID for the remote mailbox by running the following command.
Set-RemoteMailbox <name of mailbox> | -ExchangeGUID "<guid number from the error>"

When this is complete, it is recommended to perform the directory synchronization using the Azure Active Directory Sync tool to ensure that all the necessary changes are replicated.
To do this, open the server where the Azure AD Sync tool is located, open the PowerShell window as Administrator and run the following commands.
Import-Module -Name ADSync
Start-ADSyncSyncCycle

This will ensure that any changes done locally are replicated to the Exchange Online and confirm that the local identity is matched with the cloud identity. You can see the change in the user in the Synchronization Service Manager application, where the exports and imports processes can be found.
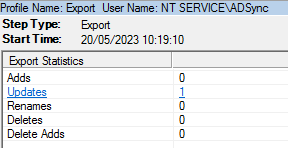
Here, you will see that the updates have been detected. If you click on it, it will show the changes on that particular user. Under the Changes column, look for the “add” entry. This will show the changes.
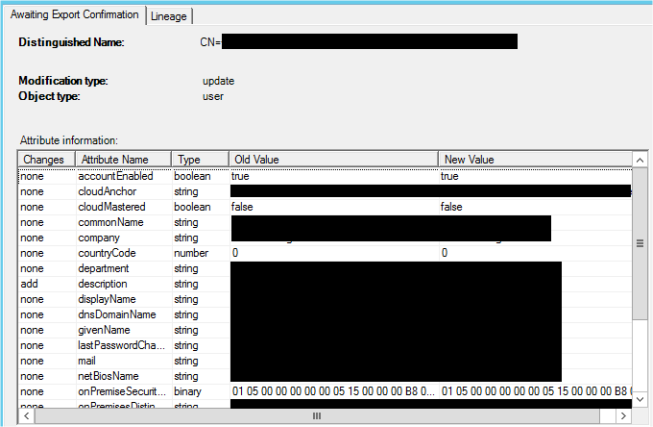
Once this is completed with no errors, you can go ahead and start the migration batch. It should now work with no issues.
What if something goes wrong?
There are many things that could go wrong when moving mailboxes from the local Exchange Server. For this reason, you need the right tool besides you to ensure that no data is lost and also to migrate or move data with ease and no complexity. One such tool is Stellar Converter for EDB. With this EDB to PST Converter tool, you can open multiple EDB files of any size from any version of Exchange Server, without having an active Exchange Server. You can granularly export to PST and other file formats. You can export directly to a live Exchange Server or an Exchange Online, using features such as automatic mailbox matching, parallel and priority exports, and continuation in case of interruption. You can export user mailboxes, user archives, shared mailboxes, disabled mailboxes, and even public folders.
Was this article helpful?