‘Hard Drive is not accessible. Access is denied’ is one of the most common errors that make the hard drives inaccessible and in the worst case, it could also lead to data loss. Here in this blog you will find the solutions to fix the issue. We will also share an easy, DIY method to recover your lost data stored on inaccessible hard drive using Stellar Data Recovery tool.
The hard drive is one of the major storage components of a computer system. It stores various kinds of data like text, pictures, audios, videos, etc. Any problem arising in such hard drives could lead to inaccessibility of the data present in it. Such inaccessibility is often supported by various error messages. One of the most common error messages that make the hard drives inaccessible is “Hard Drive is not accessible. Access is denied“.
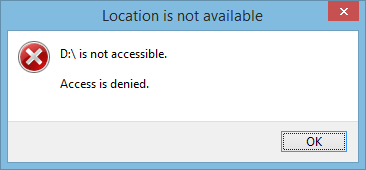 Figure 1: Access is Denied Error
 What is this “Access is Denied” error?
The error message indicates that there is some problem with the hard drive, which has made the hard drive inaccessible. In the worst case, it could also lead to data loss.
Why do we face it?
The issues mentioned above can be experienced in many different situations as well as different versions of operating systems. The error message indicates that the hard drive has gone corrupt.
To get over from the situation, you can follow any of the two solutions mentioned below:
- Automatic Method
- and, Manual Method.
1. How to Automatically Fix this Error?
To solve hard drive inaccessibility issues, formatting will be the sure shot way. However, the stored data may be compromised, and you may permanently lose access to it. To avoid losing data, you can use data recovery programs that can recover data from the inaccessible hard drive without altering the file attributes.
Use Stellar Data Recovery Professional for Windows to recover files from the inaccessible hard drive or any other storage media with similar issues. You can free download this data recovery software on any latest Windows machine and begin scanning the formatted or erased hard drive for your data.
You can select specific volume giving you access denied error. Once you select the volume, click on Scan button to initiate scanning process. Here is the video to show how you can recover the lost data:
2. How to Fix this Error via Manual Ways?
a) For Windows 10
If you are running Windows 10 then follow below steps to access your inaccessible drive:
- Right-click on the inaccessible drive.
- Now go to the ‘Properties’ section.
- Select the ‘Security’ and click on the ‘Edit’ button.
- The “Permissions for New Volume (E:)” dialog box appears, as shown in the figure below. Click the ‘Add’ button to continue.
- Add a new user named ‘Authenticated User’ and Click ‘OK’.
- From the permission section, give ‘full control’ to newly added user and click ‘OK’.
- The dialog box will show two options: ‘Continue’ or ‘Cancel’.
- Press Continue… and Cancel at last.
- Now, you are done.
b) For Windows 7
In the case of Windows 7, you might get that error if you are running HomeGroup and have shared a root drive E:\, and finally, you have left the HomeGroup. This situation would deny you any access to the drive that was shared and would give you the following error message.
To resolve this issue, go to the Windows Explorer and follow the below mentioned steps:
- Right-click on the inaccessible hard drive.
- Click Properties.
- Go to the Security tab, and then click Advanced.
- Click ‘Edit’ by going to the Owner tab.
- Modify the ownership of the desired account.
Alternatively, you can also try the following option if you are not able to access any file or folder on a Windows 7 drive.
- Right-click on the inaccessible file or folder.
- Click Properties.
- Select the Security tab.
- Click your name Under Group or username. This would show you the permissions you have to access the file and folder.
You can also try the following method:
- Change the drive letter for an inaccessible hard drive.
- Run the following command: chkdsk /r I:
- Try to boot into the safe mode and access the HDD.
- Try accessing the HDD in Windows 7 Ultimate and Home Premium.
- You will be able to access the drive, as chkdsk command would have deleted the files that were causing the problem.
c) For Windows Vista
You can also face a similar kind of situation while working with Windows Vista.
Like Windows 7, you can also check the permissions of the file or folder in Windows Vista.
- Go to the Properties by right-clicking the file or folder.
- Click the Security tab.
- From usernames or Group, check the permissions you have by clicking your name.
You can also check if the problem is due to an encrypted file or not, by following the below mentioned steps.
- Right-click on the inaccessible hard drive.
- Click Properties.
- Click the General tab-> Advanced.
- See the checkbox encrypt is selected or not.
- If yes, then get the certificate used for encryption to open the file. The encryption certificate lies with the person who creates the file.
You need to have an encryption key or certificates for those Windows edition in which the Encrypting File System (EFS) is not fully supported. For example, Windows Vista Starter, Windows Vista Home Basic, and Windows Vista Home Premium do not support it so that you can follow the below mentioned steps.
- Open the Command Prompt.
- Type Cipher.exe /d on the command prompt to decrypt the file.
- Change the encrypted file.
- Copy the decrypted file on your computer’s hard disk.
- Import keys and EFS certificates.
- Open the Command Prompt.
- Type Cipher.exe /r to back up EFS certificates and keys.
d) For Windows XP
In the case of Windows XP, you might face the “Access is denied” issue if you have used an earlier version of Windows to create a volume based on NTFS file system and then installed Windows XP.
A change in the version of the operating system changes the security ID of the user. As the security ID of the person who created the folder was different on an earlier version of the Windows, in spite of the same username and password you do not have the permission to open the folder after you perform the following steps.
- The actual location of the ‘My Documents’ folder has been changed before installing Windows XP professional.
- Install Windows XP Professional, by formatting the primary partition.
For resolution turn off the Simple File Sharing option and take ownership of the folder.
- Open ‘My Computer’.
- Go to Tools->Folder->View.
- Go to Advanced Settings and clear the Use simple file sharing checkbox.
- Click OK.
- Right-click the desired folder for ownership and click Properties.
- Click the Security tab.
- Click OK on the Security message if any.
- Click Advanced->Owner tab.
- Click your username in the Name list.
- Click OK.
- In case you get an error message, click ‘Yes’.
- Click OK.
- Reapply the permissions and security settings.
Was this article helpful?