Usually, folders on Mac are blue-colored, and once you click on them, they open up, showing what is inside. However, sometimes, you may see your folders greyed out, which means they can’t be opened. So, what do you do in this case? What may be the problem? In this article, we will answer these questions and explain how to manage a greyed-out folder on Mac.
Why Folders Are Greyed Out on Mac?
If you notice a greyed-out folder on your Mac, then something must have gone wrong. Let’s see the probable reasons behind the problem.
- Incorrect permissions. Different permissions are associated with folders that can determine who can read, write, or execute them. A folder may appear grayed out if the currently logged-in user doesn’t have permission to access it or when the folder belongs to another system or network.
- Interrupted copying or downloading process. When you’re attempting to copy or download a folder from an external drive or the internet, and the process is interrupted, the folder may become corrupted. As a result, it is a greyed-out folder and doesn’t respond.
- Corrupted creation date. In some cases, a folder may maintain a corrupted creation date or corrupted attributes of files that can damage the system.
- Faulty external drive. You may not be able to access the folder if it is on an external drive that is incompatible with your Mac or is damaged or incorrectly connected to your computer. The folder can be greyed out on Mac or even become invisible.
- Finder glitches. Sometimes, there can be issues with the Finder due to software bugs, low-memory space, violated preferences, or other faults. This may affect how folders are displayed and accessed on your Mac.
How to Fix Greyed-Out Folder on Mac?
Fixing greyed-out folders on Mac can be done using various solutions. Here are some of the most effective methods you can try.
1. Check Connections
If you’re trying to open the files from the external drive and you see the greyed-out folder on your Mac, we recommend checking the physical connections on your computer. Loose or broken USB sockets, malfunctioning cables, and port malfunction can interfere with smooth data transfer, resulting in the greyed-out folder on Mac. Therefore, try to use all the ports or open the external drive on any other Mac to confirm if the ports are a real problem.
2. Check Permissions
Make sure that you are logged in with an account that has administrative privileges. To check and change the permissions of a folder, do the following:
- Open Finder > right-click the needed folder > select Get Info.
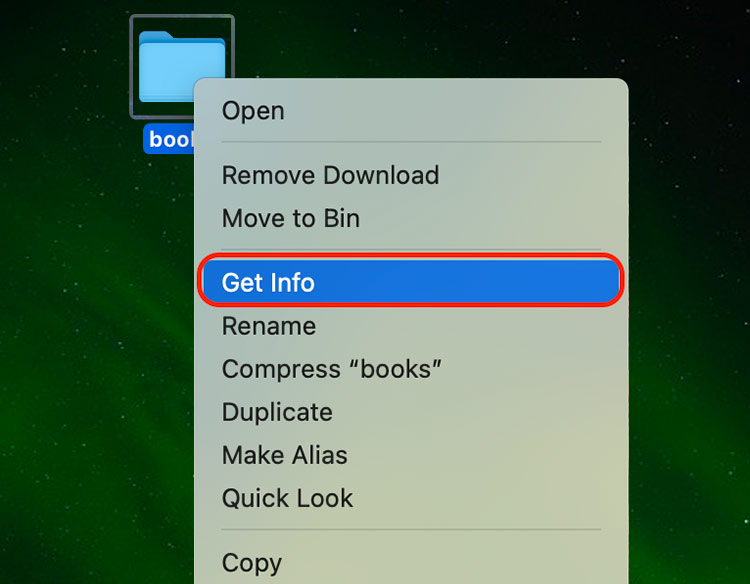 Right-click the folder > Get Info
- To expand these settings, scroll down to the bottom of this new window and click the switch next to Sharing & Permissions.
 Click on Sharing & Permissions
- From the bottom of the window, check whether it shows you can Read only or Read & Write.
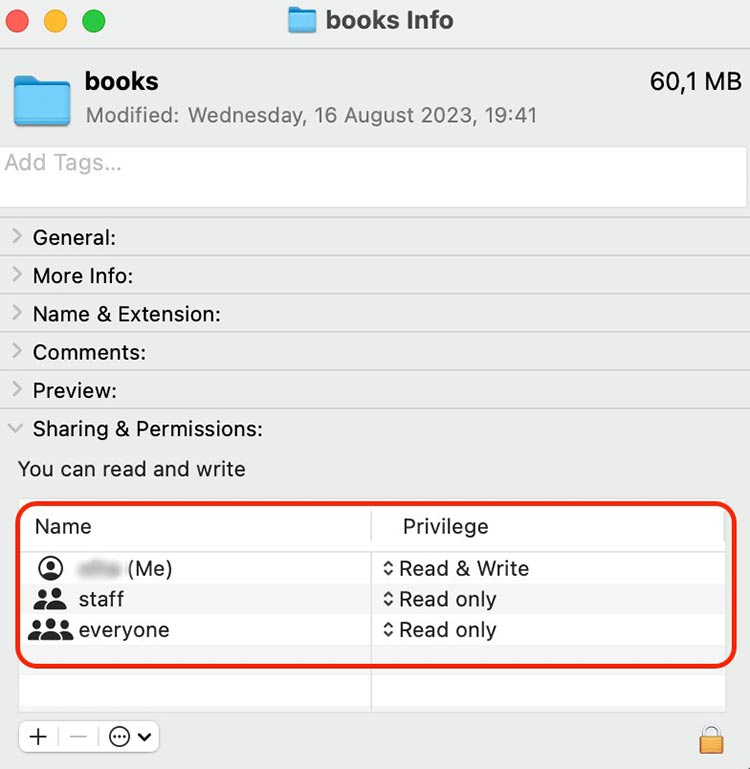 Check the permissions
3. Use Disk Utility
Built-in Disk Utility can be used to repair disk errors and fix corrupt folders. You can try to repair the permissions of the disk the greyed-out folder is in.
- Go to Applications > Utilities and open Disk Utility.
 Open Disk Utility
- Select the disk where the folder is located and click on First Aid.
 Choose the disk > Run the First Aid
- Then, follow the on-screen instructions to scan and repair the disk.
4. Use Terminal
Terminal is a command line interface on your Mac through which you can perform advanced tasks. It may also help to open the greyed-out folder on Mac and access it.
To do this, follow these steps:
- Open Terminal.
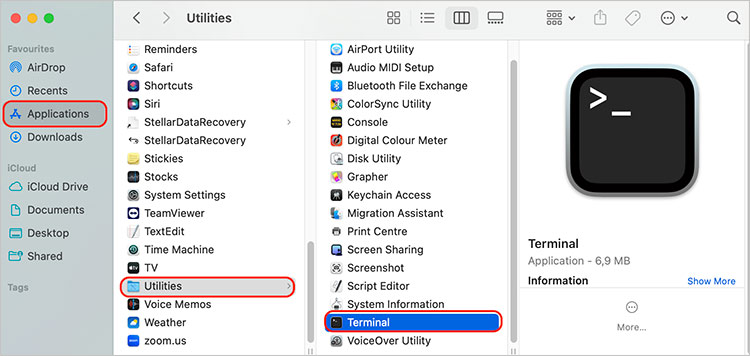 Open Terminal
- In the Terminal window, type open, then drag the folder into the Terminal window and hit Return.
 Run the Terminal command
5. Restart Finder
Sometimes, greyed-out folder on Mac can be fixed by restarting Finder, which is usually a result of some glitches. To do it, follow the steps below.
- Open the Force Quit Applications window by pressing Option + Command + Esc.
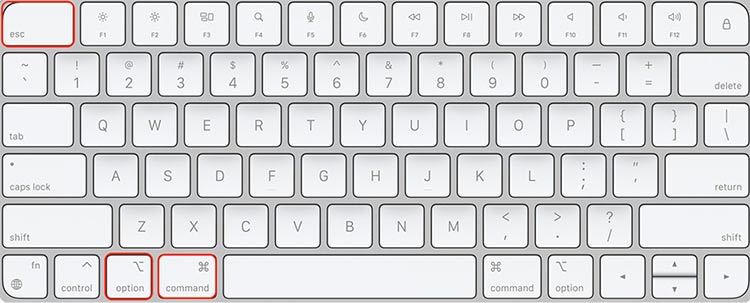 Press Option + Command + Esc to open the Force Quit Applications window
- Choose Finder and click Relaunch.
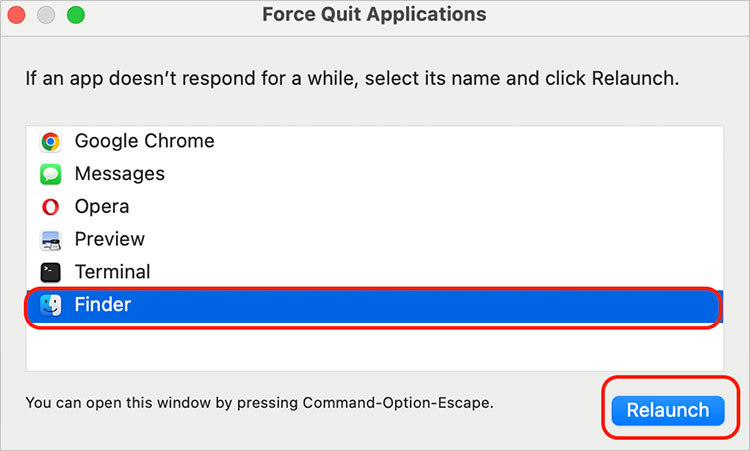 Select Finder > click Relaunch
6. Update macOS
Updating your macOS is crucial for optimal performance. Make sure you update your macOS to benefit from those bug fixes and improvements in compatibility.
To check if your macOS is up-to-date, do the following:
- Open System Settings from the Apple menu.
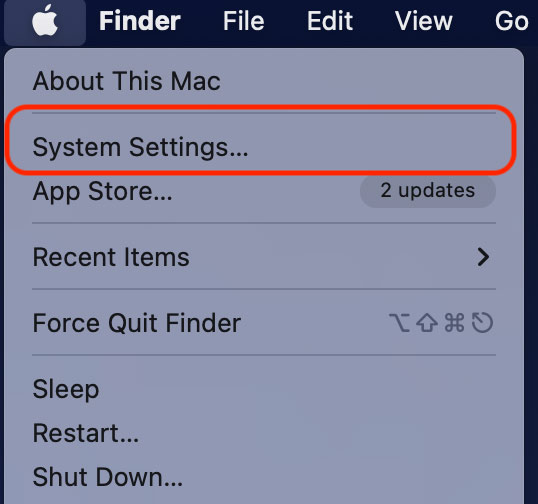 Apple menu > System Settings
- Then, go to General > Software Update.
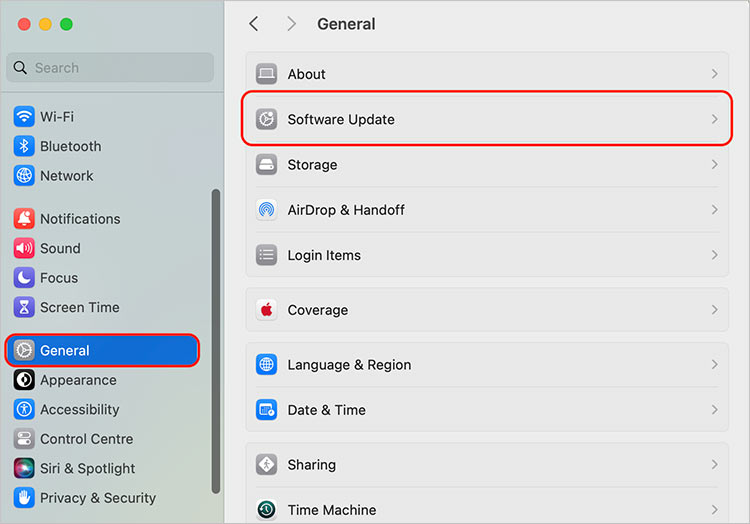 General > Software Update
- If there are any updates, click on Upgrade Now.
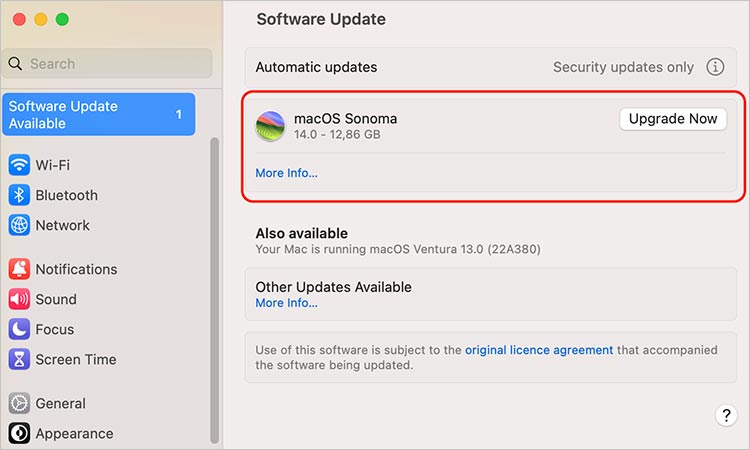 Check for updates > Upgrade now
7. Ask for Professional Help
When all the steps offered above seem not to be working, and you can still not open the greyed-out folder on your Mac, we recommend getting in touch with Apple Support or going to an Apple Store close by or a certified service provider.
 Contact Apple support
How to Recover Data From Greyed-Out Folders on Mac?
In case you lost some of the files from the greyed-out folder on Mac or not all of them are opening after the fix, one of the solutions may be the use of data recovery software that will help you recover your files.
Stellar Data Recovery Professional for Mac is one of the top software in this field. With this tool, you will be able to recover lost or deleted data on your Mac or external storage. Stellar Data Recovery for Mac recovers data after accidental deletion, drive formatting, partition loss, and other scenarios.
Here are the steps to follow to recover data from greyed-out folders using Stellar Data Recovery Professional.
- Go to the official website, download, and install Stellar Data Recovery Professional on your Mac.
 Stellar Data Recovery official website
- Launch the software and select file recovery types. You can choose betweenAll Data or specified file types, such as Documents, Photos, Videos, etc. Click on Next after you have made a choice.
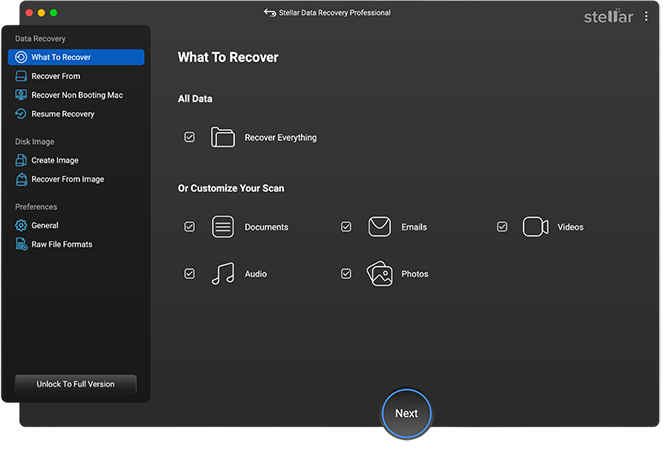 Select what to recover > click Next
- The next step is to choose a location you wish to recover data from and click Scan.
- Wait for the software to present the results with the preview of the files before recovery.
- Choose the files you wish to recover, then press on Recover.
- Select a save path location for the recovered files and click on Save.
Wrapping Up
There are several reasons your folders on your Mac can be greyed out, including unfinished data transfers, disk errors, or problems with connection to external volumes. Now, you have several strategies to resolve the issue. Always remember to back up your data before starting any fix, and if you cannot fix the problem by yourself, visit a tech specialist.
Read more:
Was this article helpful?