Experiencing errors or glitches while playing games is a common pet peeve of all gamers. However, sometimes an error while gaming goes extreme and crashes the entire system, resulting in a blue screen.
One such error is the “Dump file creation failed.” Many users have reported this error on Microsoft, Reddit, and other tech forums. The error is causing PCs to crash and reboot repeatedly and on many occasions, showing a Blue Screen of Death (BSoD). Frequent crashes like that end up causing severe data loss in most scenarios and call for immediate action.
Even though you can use professional data recovery software to recover your lost data, fixing the error is necessary since it exposes the system to further vulnerabilities. Continue reading this blog to find out more about the Dump File Creation Failed error, its causes, and solutions!
More about Dump File Creation Failed Error
The error completely reads as ‘Dump file creation failed due to error during dump creation.’ It mainly occurs while playing or launching games on a computer. Either way, it starts crashing the PC or puts it in a reboot loop.
Reportedly, the crashes start with a WHEA_UNCORRECTABLE_ERROR (a blue screen error), typically a hardware issue. It further continues the vicious cycle of buggy events that included information similar to below messages:
- The previous system shutdown at___ time on __date was unexpected.
- Dump file creation failed due to an error during dump creation at __ time and date.
The error also causes random system restarts, breakdowns, and shutdowns with different error messages.
What Causes Dump File Creation Failed?
Many possible reasons for this error include overheating, disk errors, buggy graphic drivers, and memory issues. Sometimes, corrupted system files and various third-party cleanup apps also cause this problem. Irrespective of the reasons, you can solve the error using the solutions given below.
Before Moving Further, Recover Your Data with Stellar Data Recovery Professional
Since the Dump File Creation Failed error can cause BSoDs, frequent system crashes, and unexpected data loss, it’s better to recover your data before you move on to solving this error. You can use the powerful Stellar Data Recovery Professional to recover images, documents, PDFs, email files, etc., from an error-riddled computer. To use the software—
- Download Stellar Data Recovery Professional on your computer. Connect an external hard drive to your system and then launch the software.
- Select the data type, choose the location or drive from where you want to recover your data, and start scanning it.
- After completing the scanning process, select the files, recover them, and finally select an external hard drive as the destination to store the recovered files.
Here’s how the software works:

Now that you’ve recovered your data fix the error using the following methods!
Methods to Fix Dump File Creation Failed Error
Several methods exist to fix a Dump File Creation Failed BSoD Error. Here, we’ve shared proven methods that have helped many users overcome this issue.
1. Reinstall Windows
Although used as a last resort, many users have reported that reinstalling Windows and performing the following methods have helped them overcome the “Dump File Creation” error.
Reinstalling Windows removes old files or applications, fixes issues, and returns your system to a cleaner state, free from all errors and bugs. You can refer to this guide to learn how to reinstall Windows 11.
2. Run Driver Verifier
Running Driver Verifier has helped users discover which driver is causing the issue. You can also run this tool to diagnose and troubleshoot multiple driver problems that may cause system failures, corruption, etc. Below are the steps to run Driver Verifier:
- Open Command Prompt and run as administrator.
- In the open window, type verifier. It will open Driver Verifier Manager.
- Afterward, select Create standard settings (the default task) and click Next.
- If you move forward with the Select driver names from a list, click Next, and choose the specific driver(s) that might be causing the issue.
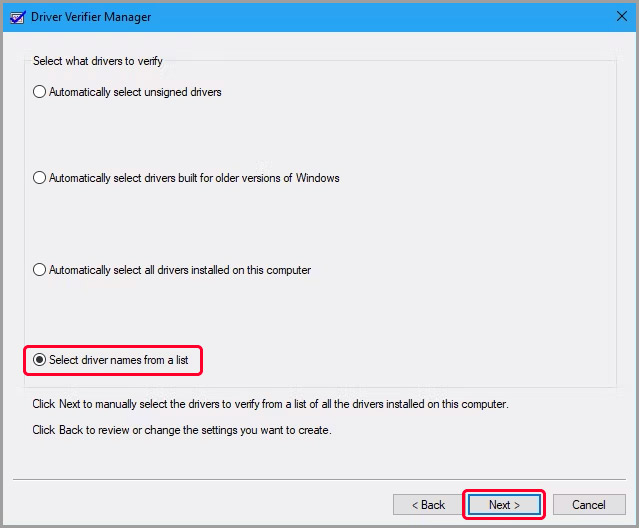
- The graphic drivers will probably be on your radar since the error occurs while playing games.
- Finally, select Finish and reboot your system. Check if the issue has been resolved.
3. Update Graphic Drivers
After running Driver Verifier, if you find that the Graphic driver is at fault, try updating it with the following steps:
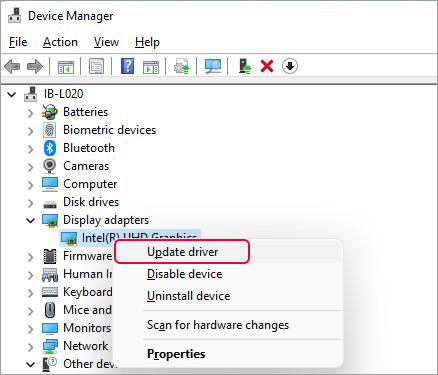
- Open Device Manager (Windows + X) to the Display adapters category.
- Expand it and right-click on the driver; select Update driver option.
- Click Search automatically for drivers on the following prompt.
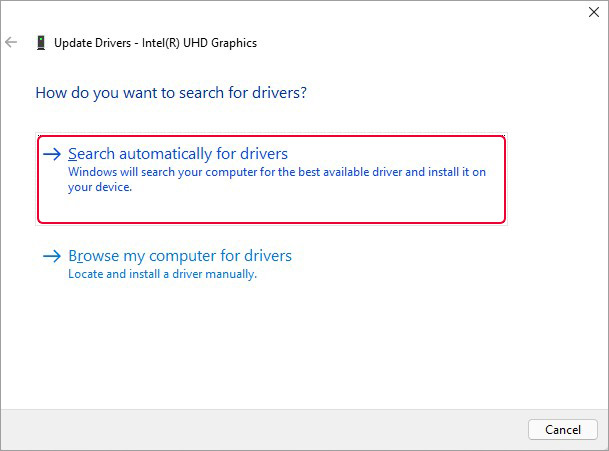
Windows will start looking for the latest driver software available. If you see any recommended driver, download it and reboot your system. It will solve your issue.
| Important Note: Users who have installed Nvidia GPU drivers in their PCs for a better gaming experience can download the NVIDIA drivers from the official site. |
Other Methods You Can Try
If you fail to solve the Dump File Creation Failed BSoD error with the aforementioned methods, try giving a shot at the quick fixes shared below. However, these fixes may not work in all scenarios.
#Uninstall Cleanup App
Some third-party cleanup apps contain bugs and cause your system to malfunction. You can try uninstalling these apps by accessing the Programs and Features section of the Control Panel.
#Run SFC Scan
Some corrupted system files can also lead to Dump File Creation, Failed errors, and related issues. Run the SFC (System File Checker) utility on Windows to scan and replace the damaged versions of the files with the correct ones.
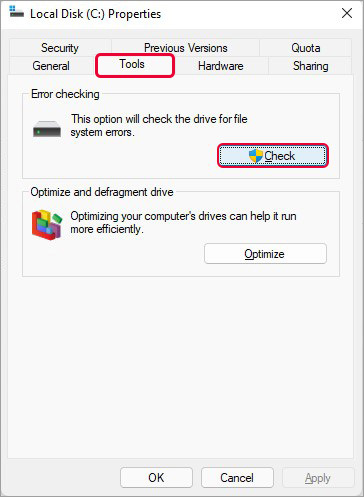
#Scan Drive for Errors
BSoD errors are usually the result of a drive error. Hence, scan your drive for any problematic issues accessing Windows Explorer > This PC > C: > Properties > Tools > Error Checking > Check > Scan.
If your system has memory or RAM issues, they may also cause a Dump File Creation Failed error. To test your RAM, run the Windows Memory Diagnostic tool.
Wrapping Up
Dump File Creation Failed is a critical Windows error that, if not solved on time, can cause further damage to your system and its data. To protect your data, you can use professional data recovery software. However, try the methods mentioned in this blog to fix the error. It’s unlikely, but you might need to update your BIOS to eliminate this Windows bug.
I hope you were able to resolve the Dump File Creation error with the above methods. Share your thoughts in the comments below!
People Also Ask
What is a Qt platform?
Qt is an open-source cross-platform software used for building GUI (Graphical User-Interface) and cross-platform applications. It allows staff members to manage the code versions, debug applications, build C++ widget-based apps, accelerate UI performance, and more.
How to install the Qt plugin in Visual Studio?
Run Qt Installer and once the installation is complete, open Microsoft Visual Studio and follow Extensions > Manage Extensions > Online. There, search for Qt Visual Studio Tools to install or update Qt VS Tools.
Was this article helpful?