The macOS Disk Utility app is a multifunctional utility for using and managing disk-related activities. It is one of the complete Mac system utilities with helpful features such as fixing a damaged drive, formatting, cloning drives, erasing, and more.
You can use the “First Aid” function when you have a complicated disk problem. However, sometimes you can see the “Disk Utility First Aid failed” error or similar errors like
- com.apple.DiskManagement.disenter error 49221 – happens when users manually mount the NTFS drive in Disk Utility.
- com.apple.DiskManagement.disenter error 49153 – occurs when there was a glitch during partition.
- com.apple.DiskManagement.disenter error 49223 occurs when users manually mount the ExFAT drive in Disk Utility.
- com.apple.DiskManagement.disenter error 49244 – wrongly reformatted volume.
- com.apple.DiskManagement.disenter error 49180 – a user uses an incompatible file system to make a partition.
It can be pretty annoying if they are showing up out of nowhere.
Reasons for the “Disk Utility’s First Aid Repairing Process Has Failed”
Disk Utility usually doesn’t crash. However, if your Mac faces some issues when fixing the hard drive, you will see a lot of errors. Before solving these problems, let’s find out why this might happen.
Possible reasons for the problem that says “Disk Utility’s First Aid Failed” are as follows:
- Your firmware is corrupted.
- Your hard drive may have been wrecked or damaged.
- The data stored on the disk may have been corrupted.
Now when you know the whys, let’s look at solutions to fix Disk Utility errors.
Steps before Fixing “Disk Utility’s First Aid Repairing Process Has Failed” Appear
Before you start to perform a fix of the problem, start backing up your important data to make sure you will be able to restore your files if some of the steps fail.
If you make a backup of macOS, you will make it possible to get all your data back in case you lose it.
Here is how to make a backup of your Mac using Time Machine:
1. Connect an external HD or AirPort Time Capsule to your Mac.
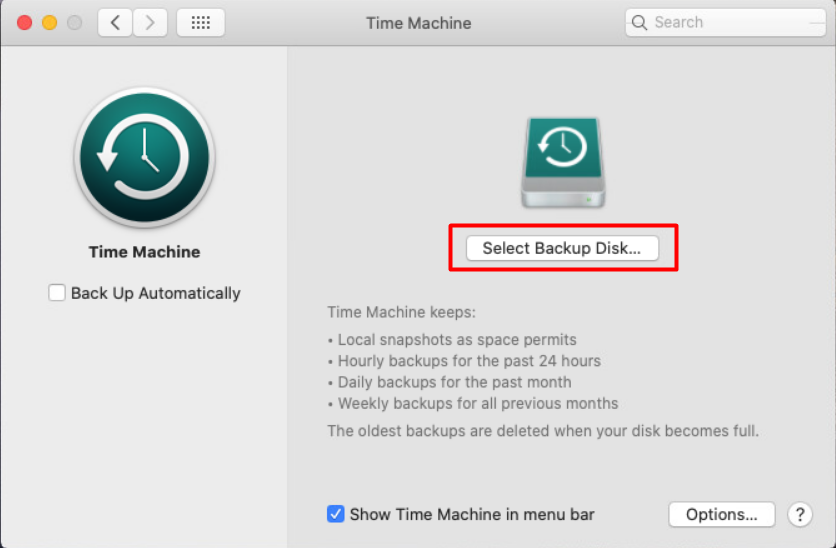
2. Now, you need to open Time Machine. Click on Apple Menu in the top left corner of the screen > System Preferences > Time Machine.


3. Then click on Select Backup Disk.

4. Select the needed disk to upload a backup and click the Use Disk button.

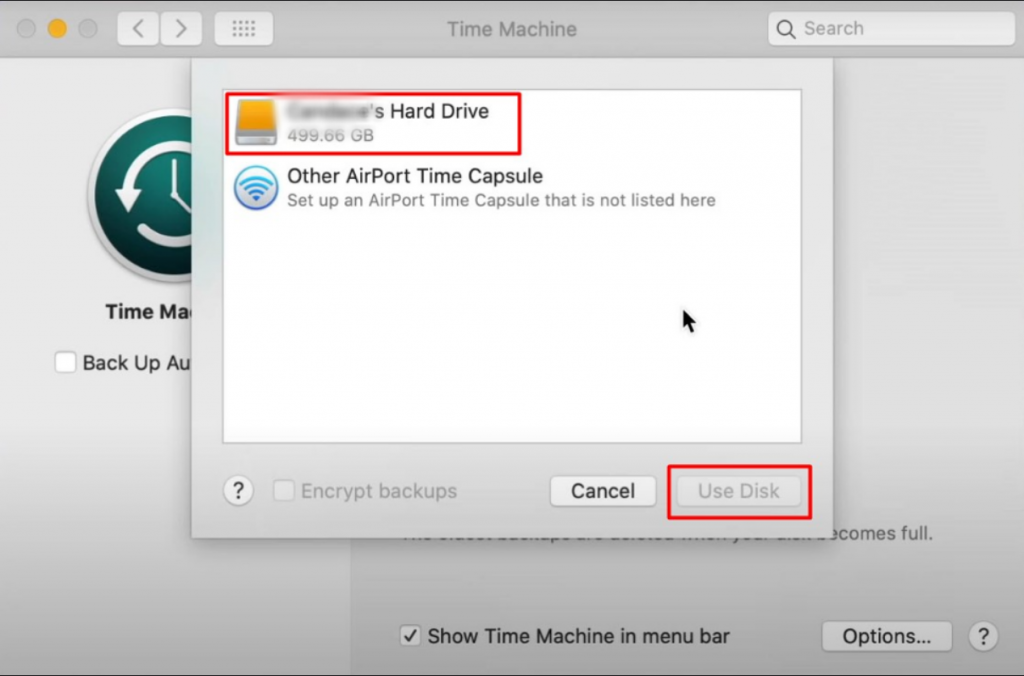
When the process is done, you will have the backup of your Mac available on the external drive.
How to Fix “Disk Utility’s First Aid Repairing Process Has Failed”
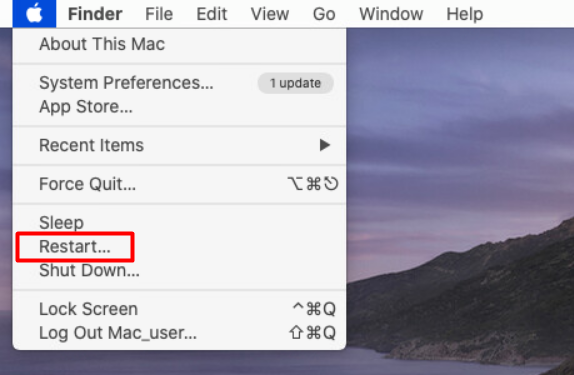
A. Restart your Mac
Some problems in macOS sometimes cause failure when mounting the disk. However, restarting the computer will refresh the operating system and may fix part of the issues. To do that, navigate to the Apple logo in the toolbar and click on Restart.

B. Check If the File System Is Compatible with macOS
Apple devices are compatible with three different file system types:
- Apple File System (APFS) is a default system used by macOS 10.13 or later. The improvements of this system focus on security and safe encryption.
- Mac OS Extended, or HFS Plus (HFS +). It is a file system that supports macOS High Sierra and earlier OS versions.
- ExFAT is a cross-platform file system that works for external drives connected to both Windows and macOS.
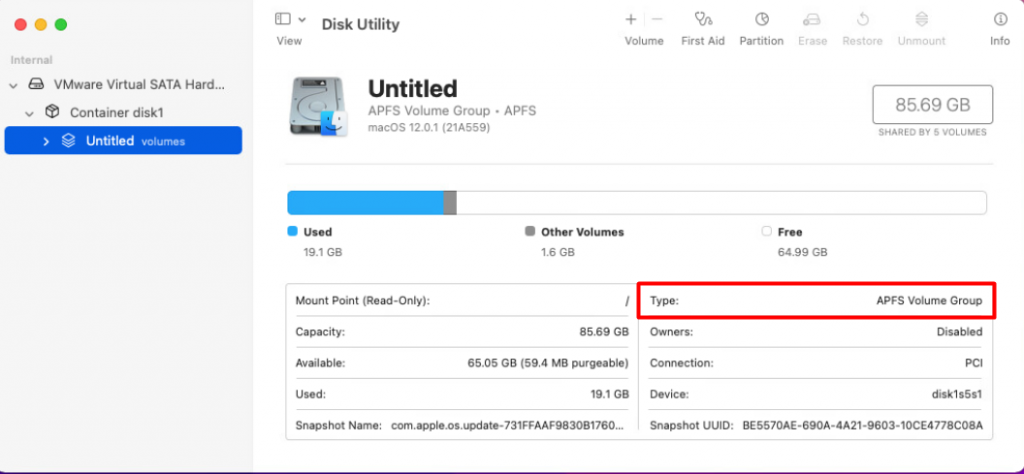
To check the drive’s extension, do the following:
- Open Disk Utility.
- Select the needed hard drive.
- Check the Type at the bottom.

C. Check the Connections
Running the Disk Utility functions on an external hard drive involves automatic communication between the macOS and the device’s file system via a USB connector. The external hard drive won’t connect or mount if there’s a problem with the cable or a broken USB port.
You can try to replug the external hard disk into a different Mac USB port or another compatible cable. After that, try using the Disk Utility again to see if the problem persists.
D. Run First Aid in Disk Utility
On a Mac, First Aid is a disk checkup program. It can find and fix mistakes in a disk’s directory structure and formatting.
You will need to open Disk Utility in Recovery Mode. Please follow the next steps:
For Intel-based Mac:
- Restart your Mac and click and hold the Command + R keys.
- Select the Disk Utility after the macOS utility window opens.
For M1-based Mac:
- Restart your Mac and press and hold the Power key on your Mac until you see the Loading Startup Options.
- Choose the Gear icon and select the Disk Utility.
If everything was done correctly, you are in the Disk Utility Application.
Then run Fist Aid to repair the unmounted drive:
1. In the Disk Utility, choose View on the menu bar > Show All Devices.

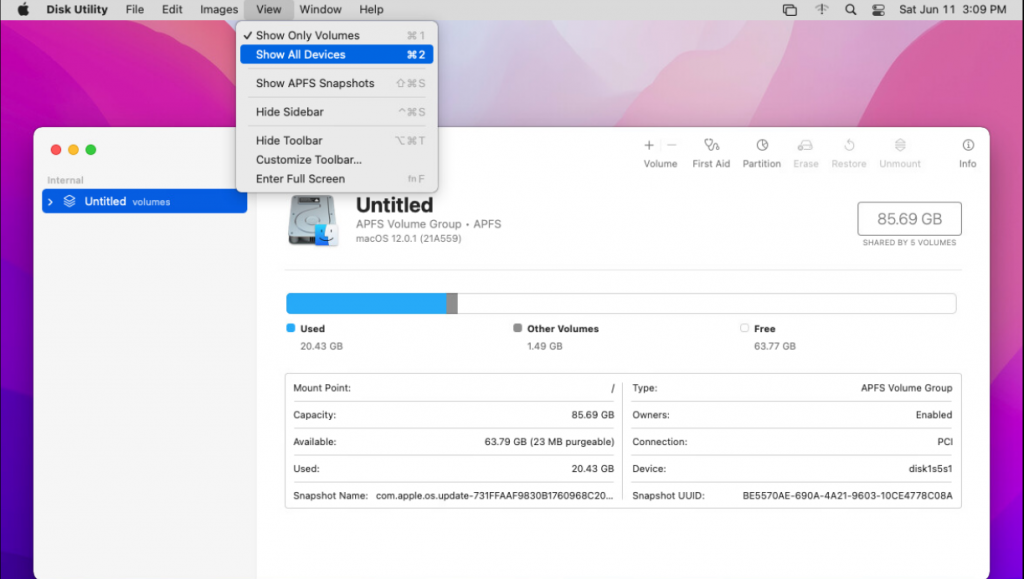
2. Select the unmounted disk > click the First Aid button > choose Run.
3. Restart your Mac and check if the problem is still there.
E. Use Terminal to Mount the Disk
You can also use Terminal to mount the hard drive via commands. To do that:
1. Open Finder > Applications > Utilities > Terminal.
2. Type the command diskutil list to show all the disks on Mac. Then, find the identifier of the needed drive.

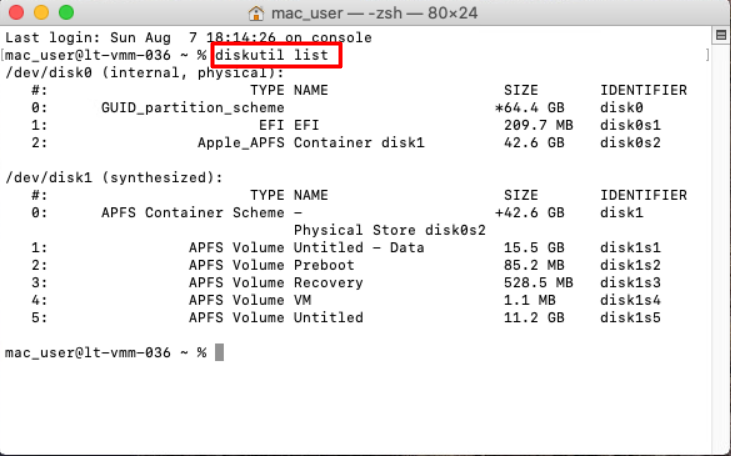
3. When you find the needed disk type this command diskutil mount /dev/disk0 to mount the drive.
Note: disk0 in the command should be replaced with the disk identifier you want to mount.
F. Reformat the Hard Drive
The final solution is to remove the hard drive and restore the macOS. Please note that Macintosh HD contains all of your data from your Mac.
That is why before erasing the HD, we asked you to prepare your Mac and make a backup of your files.
To delete the disk, follow these steps:
1. Open Disk Utility from the Recovery Mode again.
2. Select the needed disk.
3. Click on Erase.
4. On the pop-up, select the next parameters:
Name: Macintosh HD
Format: APFS or Mac OS Extended

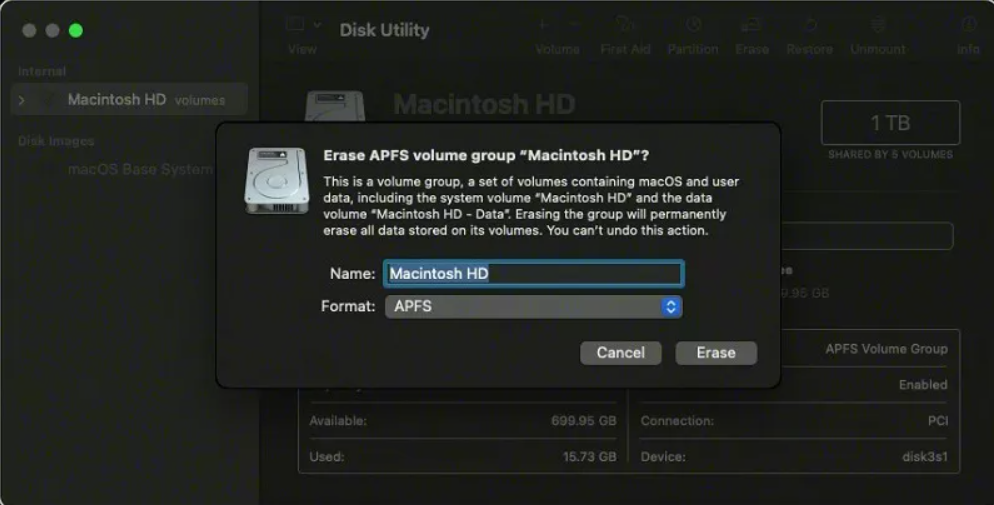
5. Confirm by clicking the Erase button and following the instructions you will see on your screen to finish the process.
You will need to recover your Mac from the backup when it is done. To do that:
1. Open the Utility window. The instructions differ depending on the Mac type. Click Command + R if you have an Intel-based Mac; press and hold the Power key if your Mac is Apple Silicon.
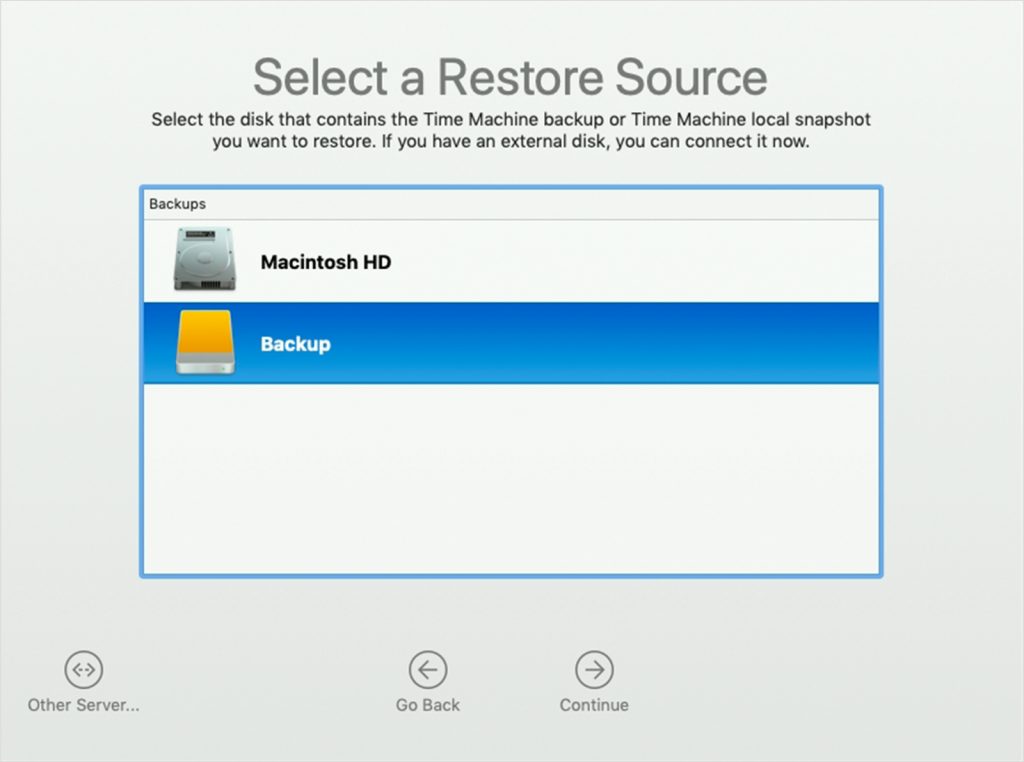
2. Choose Restore from Time Machine backup > Continue.
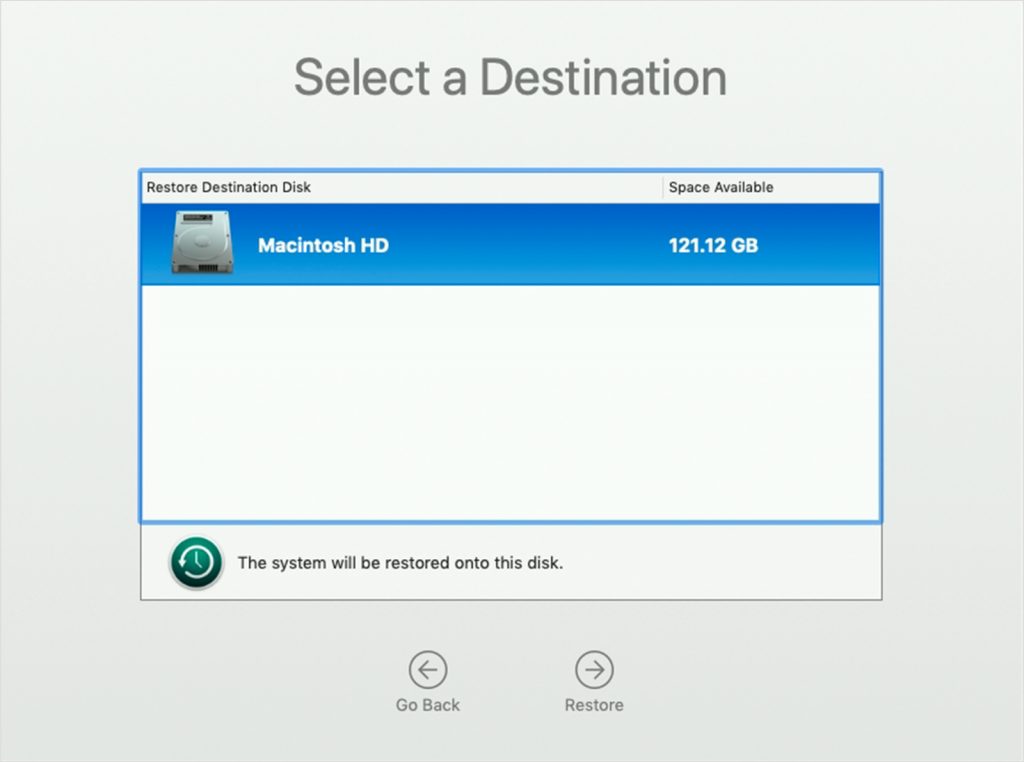
3. Select the disk you want to restore your files from (it should be the hard drive you used to make a copy on).

4. Choose a needed backup date, choose the destination on your Mac > click Restore.
5. Finally, restart your Mac.
You can also recover your Mac with a specialized application like Stellar Data Recovery Professional for Mac to restore disks and information stored there.
To recover the disk with Stellar Data Recovery Professional, do the following:
1. Download and install Stellar Data Recovery Professional for Mac.


2. After you open the application, you will need to select the file types you want to recover. You may choose the specific files or just recover everything.


3. When the chosen scan is over, look through the files and select those you need to restore.
4. Click on Recover to finish.
Wrapping Up
The macOS issue “Disk Utility first aid failed” is a common and easy-to-solve error. Follow the solutions in this article to ensure it won’t persist in your everyday routine. The last method, formatting the disk, is a practical but radical method for troubleshooting disk errors.
Read more:

