You often feel the urge to tweak the colors in your photos – either to align with your brand’s voice or just to add a dash of creativity. Other times, you might want to correct a few things that didn’t quite pan out the way you wanted during the shoot.
Whatever the reason, there are tools with handy features that can fix color shift in your photos. This guide will walk you through the steps to fix color shift in images using various tools to breathe new life into your photographs.
But let’s understand the basics first.
What is Color Shift in Images?
The change or distortion in an image’s color balance due to different temperatures of light, also known as “Kelvin temperatures,” causes color shifts. For example, a photo shot under fluorescent lighting may appear greenish without adjusting the white balance. Similarly, photographs taken under shade may appear bluer than usual.
Color shift may occur for various reasons, such as incorrect white balance settings, lighting conditions, or the camera sensor. It can also happen during photo processing if the color channels need to be balanced or if you overapply certain filters and effects. Correcting color shift require adjusting the hue, saturation, individual colors, and lightness values to enhance the image’s overall appearance.
Vibrance
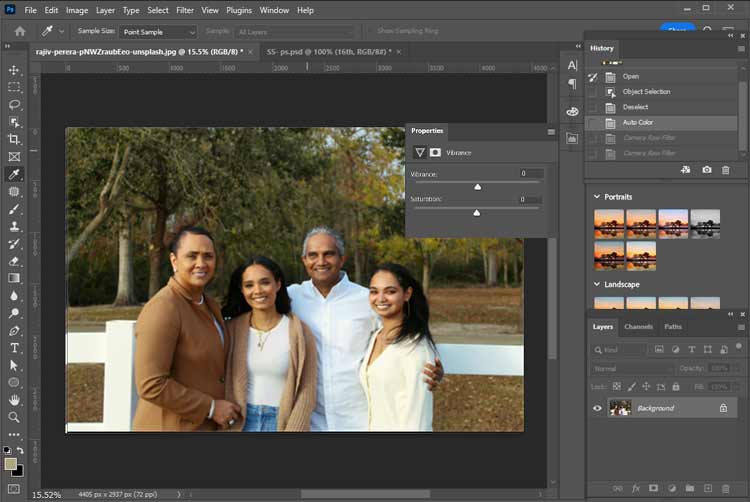
Vibrance is a popular photo-editing feature in Adobe Lightroom and Photoshop. Adjusting the Vibrance slider to the right enhances the muted colors in your image, while sliding it to the left does the opposite. In Photoshop, find this tool under Images > Adjustments > Vibrance.
You’ll also find the Saturation slider here, which works similarly. Use the Preview option to check your edits in real time.
Saturation
If you’re familiar with tweaking photos in Adobe Lightroom, you’ll feel right at home with Photoshop’s Hue/Saturation tool. It’s your go-to tool for tweaking image colors. Plus, there’s a Lightness slider to dial up that trendy matte look. Here’s how to use it:
Step 1: Pick the photo part you want to recolor—Quick Selection is the best tool for this.
Step 2: After you’ve chosen the area you want to work on, head to Image > Adjustments > Hue/Saturation (shortcut: Ctrl + U).
Step 3: When you open the application, a window will appear where you can tweak the Hue, pump up the color Saturation, or adjust Lightness. Happy with the results? Hit OK.
If you want to adjust your image’s overall color tone and intensity, there’s no need to select anything. Simply go to the ‘Image‘ menu, choose ‘Adjustments‘, and then Hue/Saturation.
Photo Filter
Adopt a photography style that reflects your personal touch to give your photographs a unique flair. Think about the effect you wish to create; using photo filters in Photoshop is a quick and easy method to achieve this. Filters can warm your images with yellows and oranges or cool them down with blues.
Go to Image > Adjustments > Photo Filter in Photoshop to experiment with different filters. There, a drop-down menu presents various options, and the Density slider lets you control their intensity. For a custom hue, click the Color circle, check the box, and pick your desired filter color.
If you’re getting to grips with fixing color shift in Photoshop, don’t overlook the Replace Color tool. It’s a handy feature that can make a big difference in your editing. Here, are the basic steps to leverage this tool effectively and bring out the best in your images:
Step 1: To change the color of your chosen photo in Photoshop, simply open the image and then go to the Image menu. From there, select Adjustments and click on Replace Color to start tweaking the colors to your liking.
Step 2: Grab the eyedropper tool to pick the color that’s catching your eye. Want to include more spots? Just hit the Add to Sample button or give a quick Shift + left-click on those extra bits. And if you’re looking to trim down some areas, the Subtract From Sample option has got you covered, or you can Alt + left-click to deselect.
Step 3: Remember to tick the box for Localized Color Clusters to get more precise masks. It’s also a good idea to keep the Preview option on to watch the magic happen in real time as you adjust things.
Step 4: Tweak the Hue, Saturation, and Lightness settings to your heart’s content. Once you’ve got it right and it brings a smile, hit that OK button.
Looking to remove some color from certain spots? No problem. Just grab the History Brush tool from the toolbar on the left. It’s the perfect fix for that!
Match Color
Photoshop excels at bringing a uniform look to your photo collection. Easily resize images for consistency, and use the Match Color tool to harmonize hues across pictures that share visual elements.
Simply open the images, navigate to Image > Adjustments > Match Color, and choose your reference photo from the Source menu. Finalize your edits by clicking OK, and voilà—desired aesthetics are achieved.
Color Balance
Ever looked at your photos and felt the colors were off? It could be a white balance mishap or Lightroom edits that missed the mark. No worries, though. Photoshop’s Color Balance is your friend for fine-tuning. It gives you control over mid-tones, highlights, and shadows with three sliders for each, making sure every photo pops just how you want it to.
The Color Balance tool makes tweaking colors easy. Just follow these quick steps, and you’ll nail the look you aim for in no time!
Step 1: Go to the Image tab, then Adjustments, and pick Color Balance from the list.
Step 2: Feel free to tweak the sliders until you’re happy with the colors. Once you’re all set, just hit OK to apply your changes.
Auto Color
If you’re not keen on spending too much time fine-tuning your Photoshop images or think they don’t need significant edits, the Auto Color option is a go-to. It’s a quick fix that lets Photoshop decide the best color adjustment for your photo, tweaking all parts simultaneously, unlike Color Balance, which is more manual. Just hit Image > Auto Color, and voilà, your photo pops with the right colors instantly.
Remember that Auto Color doesn’t consistently deliver the desired results. Pairing it with Auto Tone can be an excellent initial step, but sometimes, you’ll have to tweak the settings to match your unique style manually. Don’t forget to explore Photoshop’s essential tools for color editing to enhance your images.
Calibration
Camera Raw in Photoshop has a nifty Calibration feature that is perfect for tweaking your photo’s colors. It lets you play with the hue and saturation of the red, blue, and green primary colors, giving your images a whole new vibe. If your photos seem dull, this tool can add that punch of vibrancy they need.
Step 1: Head to the top toolbar in Photoshop and simply select the Filter option.
Step 2: When the drop-down menu pops up, select the Camera Raw Filter option.
Step 3: Go to the Calibration section by scrolling down.
Step 4: Tweak the settings to your preference, and once you’re satisfied with the adjustments, hit OK to proceed.
Desaturate
We’ve explored numerous Photoshop tools to improve your images, but don’t overlook the classic appeal of black-and-white photos. Photoshop simplifies this process, allowing you to convert images to grayscale effortlessly.
The Desaturate tool is your quickest route to stripping color and bathing your photos in monochrome with a single click. Navigate to Image > Adjustments > Desaturate, and watch the transformation unfold instantly.
Presets
In Photoshop, swiftly adjust your image colors by tapping into the built-in presets. Options like ‘Portrait’ or ‘Landscape’ cater to specific scenes, while ‘Color Pop’ enhances your photo’s vibrancy. These presets are a handy shortcut to achieving the desired look for your images.
Step 1: Navigate to the Adjustments section on the right.
Step 2: Select your desired preset listed there. For additional choices, click More.
Remember that the above methods require specific technical expertise to get the desired results. A smart choice would be to use an easy-to-use DIY tool that will save you a lot of time. For this task, a professional photo repair software—Stellar Repair For Photo—will be ideal for most users. It supports RAW file formats of all the popular camera brands and comes with batch repair capabilities to fix color shift issues in multiple images in just one go.
Here’s a rundown on how to go about it:
Step 1: Download, install, and launch the software on your PC.
Step 2: From the main interface, click Add File to add images for fixing the color shift issue.
Step 3: After you’ve added all the images, click Repair to initiate the process.
Step 4: Once the repair process is complete, preview the results and proceed.
Step 5: Finally, click Save Repaired Files to save the images to your desired location.
Summing Up
After reading this guide, you’re now equipped with a sound comprehension of the color editing possibilities. There are many options, each capable of enhancing your editing process. But if you’re a beginner with little to no technical expertise, we recommend using a specialized photo repair software like Stellar Repair for Photo. This easy-to-use DIY tool can help you get the job done quickly without wasting extra time or effort.
What is the color shift in photography?
The change in colors due to different temperatures of light, also known as “Kelvin temperatures,” causes color shift. It may require adjusting the hue, saturation, individual colors and lightness values to enhance the image’s overall appearance.
How do I fix the color of a picture?
To fix the color of a picture:
- Balance the mid-tones and highlights.
- Boost the color intensity of the main subject to make it stand out.
- Tone down the shadows to add depth and contrast.
- Use Waveform and Histogram to balance the tonal range.
- Use masks and vignettes to draw attention to the important parts.
- Use a professional photo repair software like Stellar Repair for Photo.
Was this article helpful?