If you can hear your desktop or laptop fan running at full speed, you know that’s not a good sound. When it doesn’t stop after a minute, you click alt ctrl del and review your usage. It’s at 100%, and everything is in the red. Ouch! You need a quick fix and not one that requires closing out half the programs you need to work or game.
Check this video to learn how to fix 100% Disk Usage in Windows 10/11
Here are 11 ways to get your PC back on track without buying a new one.
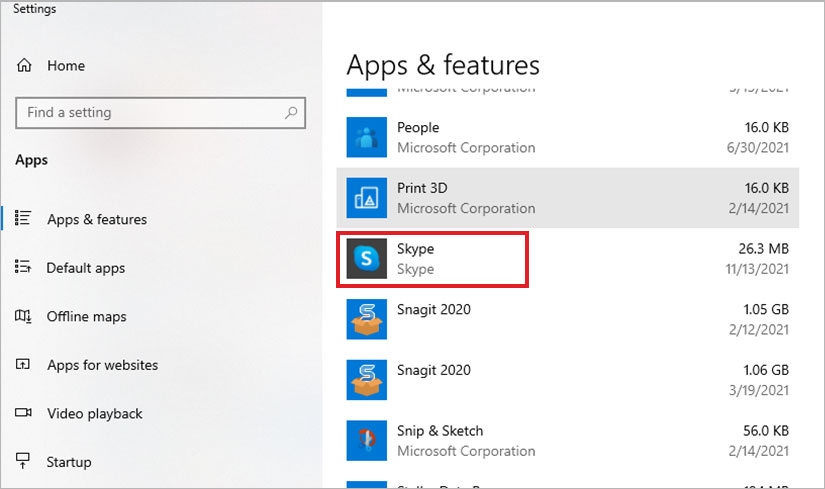
Check Skype
The messaging service from Windows is notorious for causing 100% disk usage. Windows 10 has it integrated with the OS, making it run more often and harder to turn off. If you’re not using it regularly, there’s no reason to keep it active.
- Go to Apps> Apps & features and scroll until you get to Skype to see if it’s the problem.
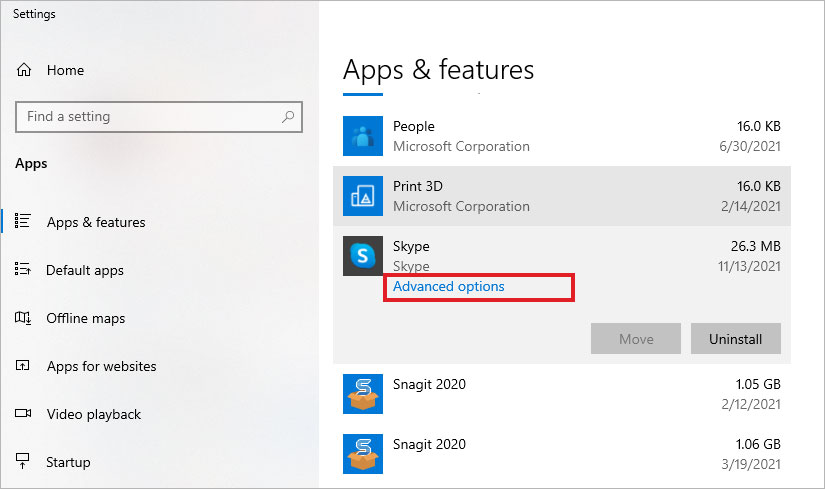
- Click Skype, then Advanced options
- Scroll down to Terminate and click the button
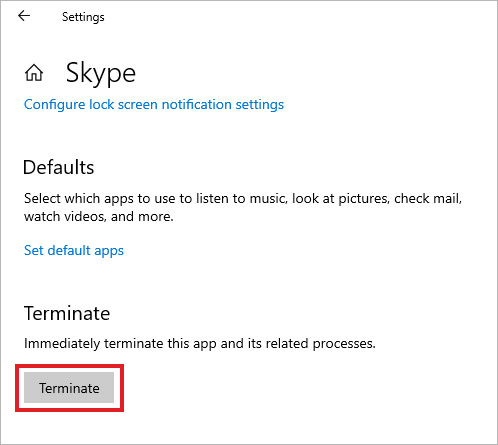
Leave this window open and go to the Task Manager to see if your 100% disk usage in Windows 10 starts falling. When this is the problem, you can stop it from running on start-up and only open it when necessary. If you don’t use it, hit “uninstall.”
Open a Different Web Browser
Are you using Google’s Chrome? While it’s the most used, it also uses the most memory. Although Google’s worked on fixing this problem over the past few years, it still uses more of your hard disk than Bing and Firefox.
If you’re not happy with Chrome, consider switching browsers. Firefox and Opera are good options that don’t hog your resources, plus they’re both free.
Update Your Virus Scan
Malware can be the source of your 100% disk usage in Windows 10, and outdated virus software can’t always detect the latest Trojans, worms, and ransomware.
Make sure your security software is up to date and do a full system scan. If you find something, take care of it right away to free up your disk space. A complete scan could take some time.
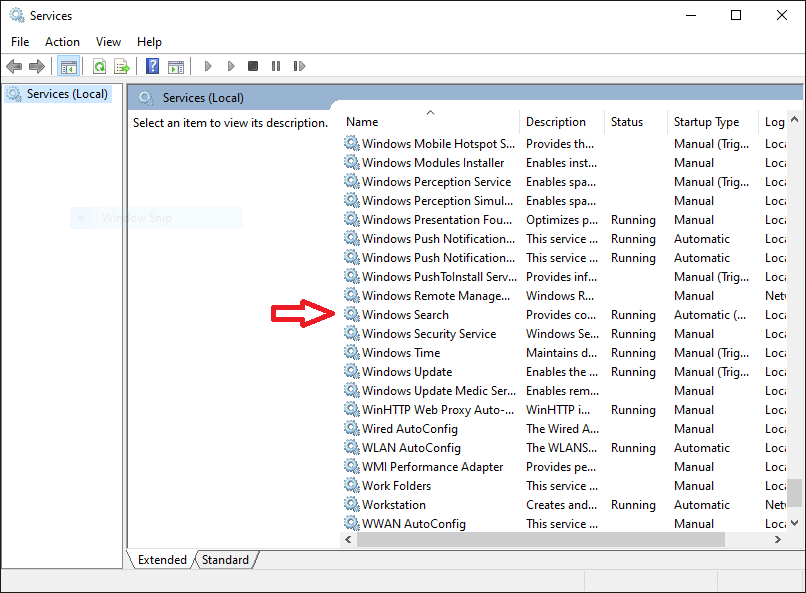
Disable Windows Search
Windows Search is helpful, but it can use up a lot of your disk. If you’re not using it to its full potential, you can turn it entirely off to release resources. A simple way to do this is to
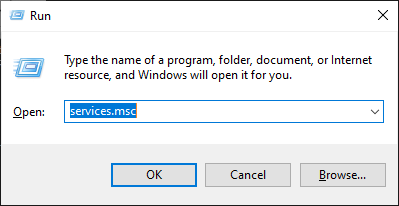
- Press WIN+R, type services. msc in the box, and click OK.
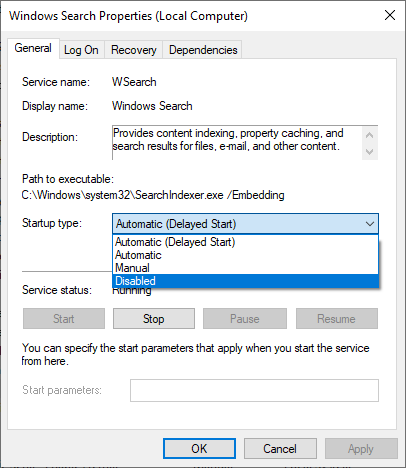
- You’ll have a Windows Search Properties screen open up. Go to the Startup type and choose “Disabled.” Click OK. This should fix your Windows 10 100% disk usage problem.
- In Windows Search Properties find Startup type and select Disable
Run Disk Check
If the Windows Search and Skype problems don’t help, run a disk check. A full scan can take up to several hours, but it may give you a more accurate diagnosis.
The fastest way to do this is to go to Windows Explorer,
- Open Windows Explorer
- Select This PC
- Right-click on the C: drive and select Properties > Tools
- Under Error checking click on Check > Scan drive

This process goes through everything, and after a reboot, fix the error and get you back up and running normally again.
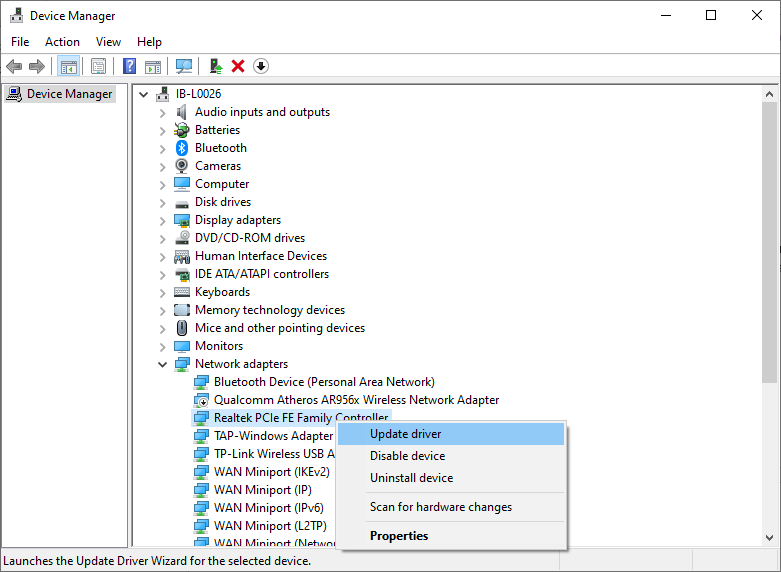
Look For Driver Updates
One of the main reasons for 100% disk usage in Windows may be outdated drivers. You can check for your hardware and network drivers in the Device Manager.
Open it and look at the list on the left to see what you need to update. If you find one, right-click to check for updates and download the newest version directly from Microsoft. You can also check your manufacturer’s website for updates or download new drivers.
Stop Diagnostic Tracking
Windows 10’s Diagnostic Tracking can be a resource hog, and it doesn’t help with the 100% disk usage in Windows problem. If you don’t use it regularly, you can stop it to free up space without much sacrifice.
Access Command Prompt and click on start. Type cmd and run the results as admin. Next type sc config “diagTrack” start = disabled. Next, enter sc stop “diagTrack.”
Are You on Steam?
The excellent gaming system you install on Windows 10 is ideal for any gamer. But it’s taxing on your PC, and this problem could cause your 100% disk usage error with Windows 10.
You can fix this by updating your Steam game to the most recent version. It will automatically download the newest patches and updates to reduce game crashes and optimize your gaming experience. You should also clear your cache to stop it from bogging down your PC.
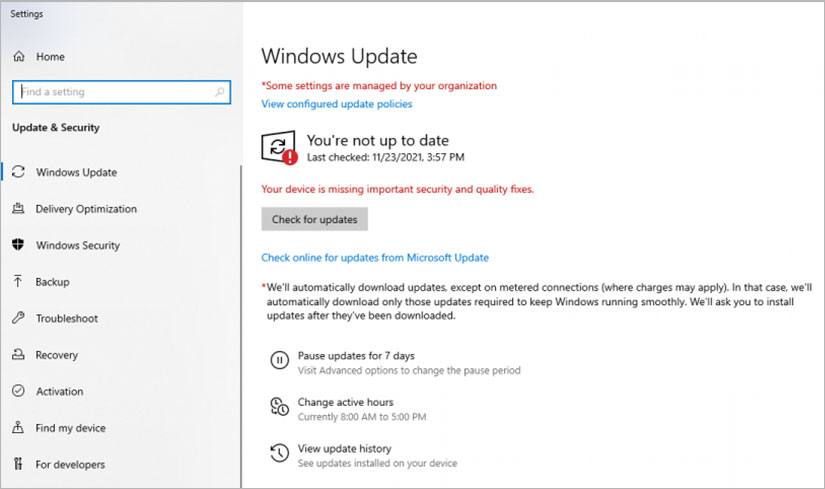
Update Windows
There might be a patch you’re missing that’s causing an error. You can check for updates by going to the Control Panel and selecting Windows Update.
If you’re not getting the automatic updates, ensure that they’re on and click change settings. You can then choose how updates are installed, including the automatic ones. This solution should fix 100% disk usage in Windows 10 and help you get back to the office or the next game.
Stop Superfetch Service
Windows 10’s Superfetch service is designed to help speed up the launch of your apps. But it can hog your disk if you’re not using it.
Go to the Command Prompt again and enter net.exe stop Superfetch to turn it off. You may need to restart your PC for this to take effect.
Windows’ standard power modes are prone to the 100% disk usage bug, but switching to high performance often overcomes the problem. To make the change, hit WIN+X on your keyboard and click Additional power settings and then choose higher performance.
If you’re experiencing 100% disk usage and other Windows 10 issues, it’s time to look at your settings. You can fix the problem by disabling or stopping certain services, adjusting power modes in high performance, updating drivers, and several other options. If none of these steps work, try uninstalling any programs that might conflict with your system before making changes to see if they help reduce this issue.
Was this article helpful?