Organizing and managing an extensive collection of photos on Windows can pose a challenge. As your digital memories rack up, so do their duplicates. These copies aren’t just space hogs; they also mess with your computer’s overall performance.
Duplicate images prolong antivirus scan time; photo syncing and backups take longer than usual and frustrate the end user. To run your PC without any crashes or freezes, you must keep it decluttered. This guide will explore methods to find duplicate photos in Windows 10/11 and remove them promptly.
Ways To Find and Delete Duplicate Photos in Windows 10/11
Although it’s a manual process and can be tedious for some users, the most straightforward way to find and remove duplicate photos in Windows 10 is to use File Explorer. In this method, you simply sort the duplicate photos by name, size, type, or date modifier and delete them manually.
Another way to find and delete duplicate photos in Windows 10 is by using Microsoft’s built-in Photos App. While you won’t be able to see the duplicates inside the Photos app by default, you can still configure it to make them visible.
Method 1: Find and Delete Duplicate Photos Using File Explorer
Although File Explorer doesn’t provide the feature to sort duplicate photos and delete them automatically, you can still use it to get the job done without downloading a third-party tool. Follow the steps below to get on with it:
Step 1: Open File Explorer and enter the folder you want to look for duplicate photos.
Step 2: From the top menu bar, click View and choose either Large Icons or Extra-Large Icons.
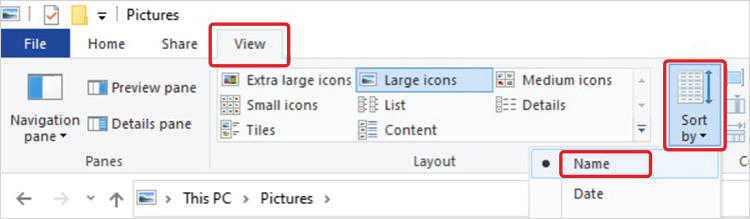
Step 3: Next, enable the Details pane by selecting it.
Step 4: Now click Sort by and select either Name or Size from the drop-down box.
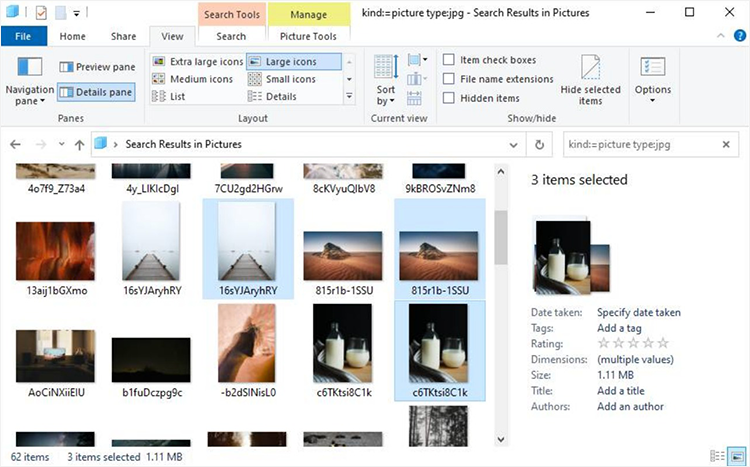
Step 5: Preview photos and compare details to identify the duplicate ones.
Step 6: Select the duplicate photos manually by clicking on them and holding the Ctrl key.
Step 7: Finally, press the Delete key to remove them. You can also use Shift + Delete to remove them permanently.
Method 2: Find and Delete Duplicate Photos Using Microsoft Photos App
Photos app is a built-in image viewer that helps organize and manage your photos on Windows 10. It has a “Linked Duplicates” feature that hides duplicate images for a better user experience. You can turn it off to make duplicate photos visible and delete them afterward. Let’s see how:
Step 1: Launch the Photos app and click the Three-dots icon from the top-right corner.

Step 2: Select Settings in the drop-down menu.
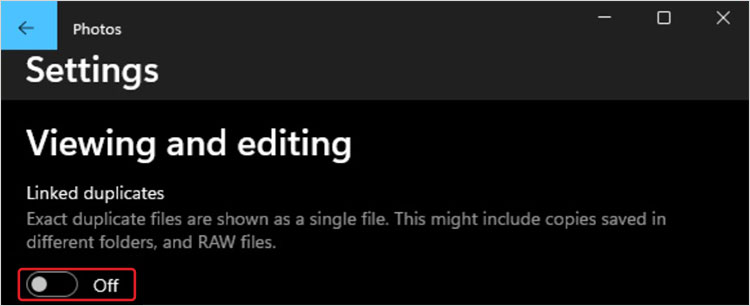
Step 3: Find the Linked Duplicates option under Viewing and Editing and turn the toggle off.
Step 4: Now return to the main window and click on Collections tab at the top menu bar.

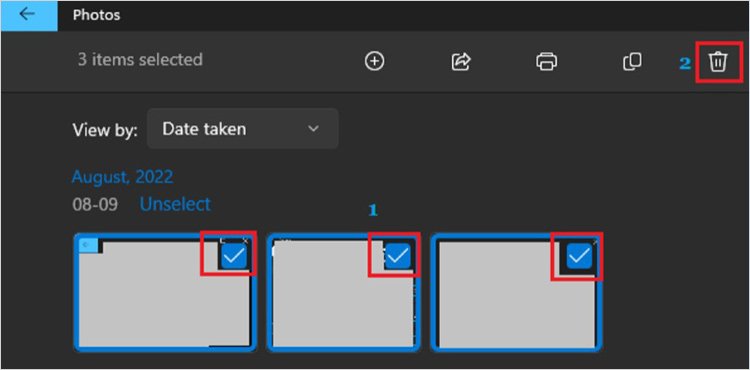
Step 5: Go through the photos and manually select the duplicate ones.
Step 6: Next, click the Trash icon and select Delete to confirm.
Method 3: Find and Delete Duplicate Photos Using Specialized Software
The methods mentioned above can be tedious and practically impossible for someone with an extensive collection of photos. In this situation, you can use a third-party tool to sort and delete duplicate images on your PC quickly.
Apart from the image name, size, and format, these tools can also compare them visually. Here are the top duplicate photo finder Windows 10:
- Duplicate Photo Cleaner
- Quick Photo Finder
- Picture Echo
- Easy Duplicate Finder
- Glary Duplicate Cleaner
What To Do if Photos Are Lost During Duplicate File Removal?
While deleting the duplicates from your PC, you might accidentally delete an original photo and its copy. Luckily, you can still recover it using a professional photo recovery software – Stellar Photo Recovery. This advanced DIY tool can help you recover permanently deleted photos from HDDs, SSDs, memory cards, flash drives, smartphones, etc.
Stellar Photo Recovery has a deep scan feature that allows you to scan any drive or location comprehensively and supports Unicode file recovery. Here’s a step-by-step method to recover deleted photos from your Windows 10 PC:
Step 1: Download and install Stellar Photo Recovery on your PC.
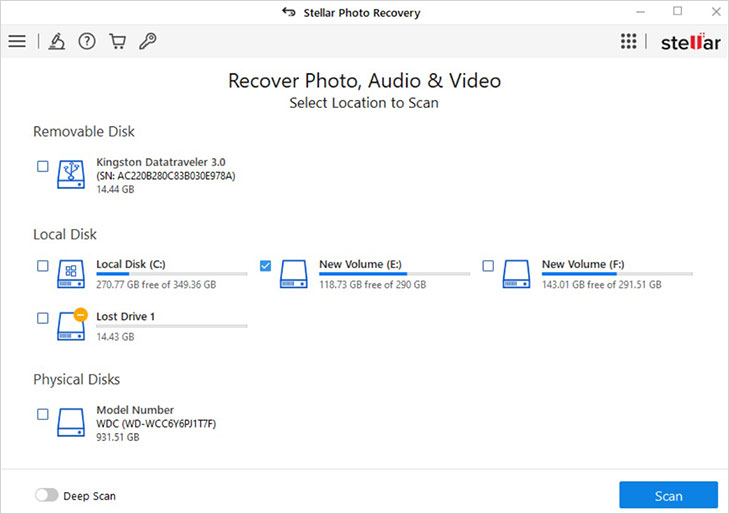
Step 2: Launch the software, select the drive or volume you want to scan for deleted photos, and click Scan. For a thorough scan toggle on the Deep Scan feature.

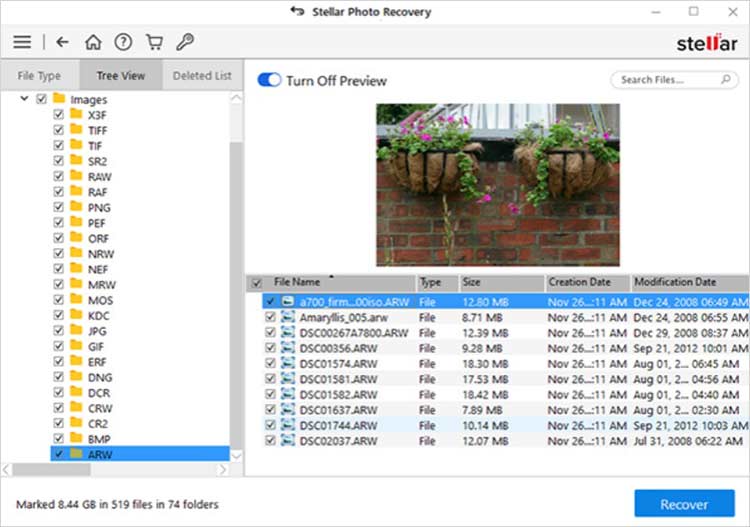
Step 3: After the scan finishes, recovered files are displayed in three different viewing modes. Preview and select the ones you want to restore.
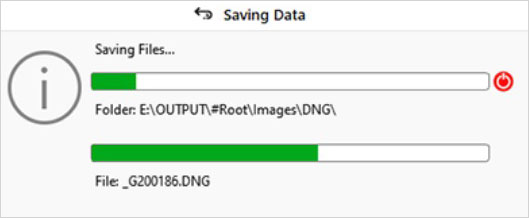
Step 4: Finally, click Recover to save them at a desired location.
Bonus Tips to Minimize Duplicate Photos
- Exercise caution while transferring photos to avoid duplicate image creation.
- Use folders for smart organization so that your computer alerts you to identical copies.
- Spot duplicate photos by their sequential file names, e.g., Img_25(1).jpg, and remove them promptly.
- Be on the lookout for photos with unusually lengthy names and small file sizes, as they may not be original.
- Use cloud services like Google Photos to automatically filter out duplicate photos.
Summing Up
Use the methods outlined in this blog to find and delete duplicate photos on Windows 10. However, if you end up deleting originals and are now looking for ways to recover them, we recommend using a specialized photo recovery tool like Stellar Photo Recovery. This super-efficient and user-friendly DIY tool can help you get back any of your photos lost to unintentional deletion, corruption, inaccessible storage media, or virus attacks.
Does Windows 10 have a duplicate Finder?
Unfortunately, Windows 10 does not include any built-in duplicate file finder utility; you are required to do it manually or with the help of a specialized third-party software.
How do I find duplicate photos in my drive?
To locate duplicate photos in Google Drive:
- Log in your Google account and switch to list view.
- Look for files marked ‘Copy of…’ or with same name followed by a numeral.
- Hold down Ctrl and select these duplicates for deletion.
How do I organize and get rid of duplicate photos?
Use the following strategies to organize and get rid of deleted photos:
- Sort images by name & date and compare folders to identify duplicates.
- Move duplicates to a backup folder to free up space.
- Replace duplicates with a symbolic link to the original file.
- Use photo management software like Google Photos or Mac Photos to organize your photo collection.