When it comes to migrating from on-premises Exchange Server to Office 365 (Exchange Online), there are various methods to choose from. Hybrid migration is one of the methods that offers a seamless experience but is also the lengthy one. However, for small and medium businesses, setting up a hybrid model would be too complex as it involves fulfilling a lot of requirements and configurations.
To facilitate migration to Office 365, Microsoft has added the Express Migration method to Microsoft 365 (Office 365). It uses the Hybrid Configuration Wizard (HCW) and the directory synchronization with Entra ID Connect. It allows to configure the users and migrate mailboxes to Office 365 with minimal impact.
It is to be noted that the Express Migration is intended for setups that want to take the cloud first approach. It requires you to remove all Active Directory server from the IT infrastructure. So, once the migration is ready, keeping the Entra ID Connect will not be an option.
Below, we will see how to use Express Migration method for migrating from live Exchange Server to Office 365.
Process to Migrate from Local Exchange Server to Office 365 using Express Migration Method
Here’s the step-by-step process to use Express Migration method.
Step 1: Create New Domain and Update UPN Suffix
For the Express migration, you need to have a Microsoft 365 tenant with the domain partially setup. This means that the domain can be used to setup the users with email addresses. But it will not be routed from outside since the MX record is still pointing to the local Exchange Server.
You need to have a new domain in the UPN suffix of the local Active Directory. For this,
- Open the Active Directory Domains and Trust from the Administrative Tools.
- In the window that opens, right-click on the top node and click on Properties.
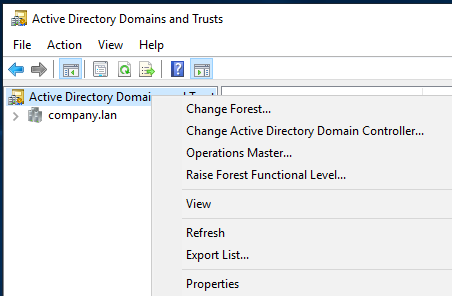
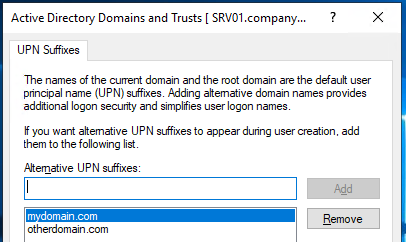
- In Alternative UPN Suffixes, enter the domain name and then click on Add. If you have other domain names which you will use in the Microsoft 365 tenant, add them.
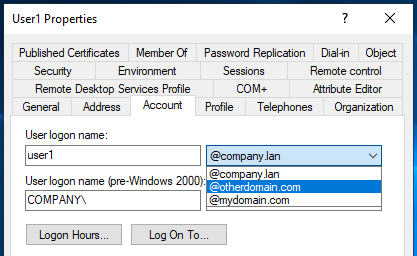
For the users which will be migrated to the cloud, you need to update the UPN Suffix in the Active Directory Users & Computers. For this, you need to right-click on the user and click on Properties.
Then, click on the Account tab, change the local Active Directory domain to the domain name to be migrated, and click OK.
Note: Make sure that the domain name corresponds to the primary email address of the user.
Step 2: Confirm the Entra ID Connect
You need to setup the Entra ID Connect on a non-domain controller server where the local users are synchronized with the Microsoft 365 tenant. Once it’s configured with the password hash synchronization configuration, you should be able to see the local users which are synchronized in the Office 365 tenant.
To confirm this, open the Office 365 portal and try to login with the email address of the user along with the Active Directory password. This will confirm that the Entra ID Connect is working fine and you can configure the Hybrid Configuration Wizard (HCW).
Step 3: Configure the Hybrid Configuration Wizard (HCW)
Now, you need to install the Hybrid Configuration Wizard (HCW) on the local Exchange Server. For this,
- Open the Exchange Admin Center (EAC) and log in.
- Click on Hybrid, click on the link to download the HCW, and start the installation.
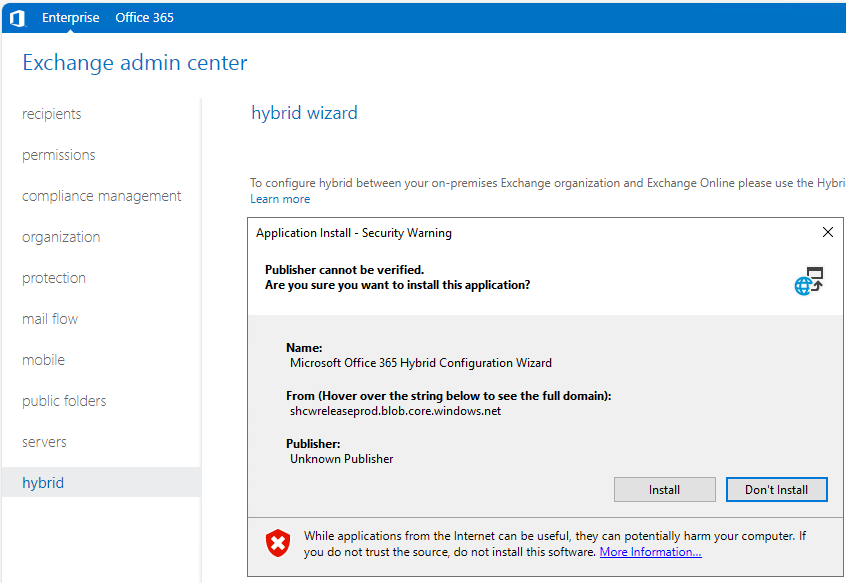
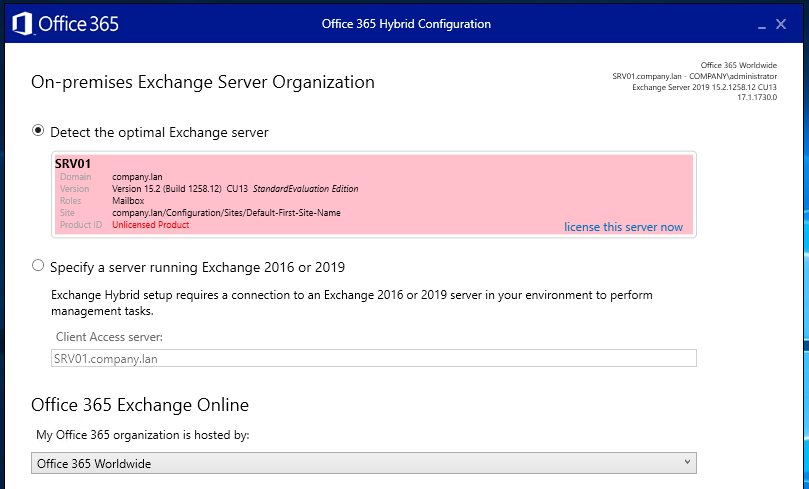
- Once installed, specify the running Exchange Server or let the software detect the server.
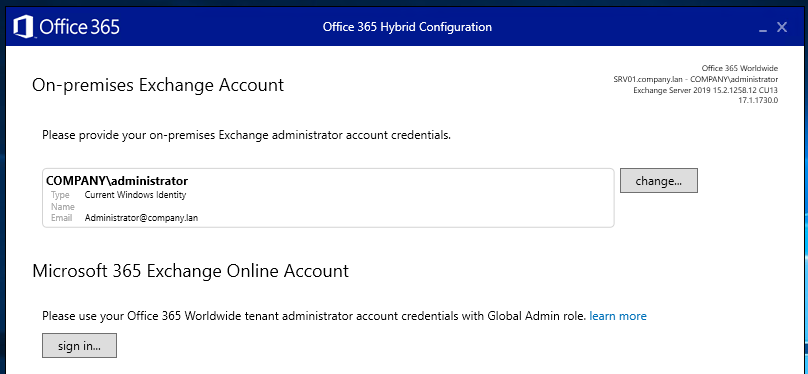
- Set the local Administrator account you want to use to login to the Microsoft 365 tenant so that the Hybrid Configuration Wizard (HCW) can connect the two sources and setup the required connectors.
Once ready, the next step is to start migrating/seeding the data to the Microsoft 365 tenant.
Step 4: Migrate the Data
Now that the Hybrid Configuration Wizard (HCW) is configured, you can move the mailboxes from the local server to Office 365. Here are the steps:
- From the Exchange Admin Center (EAC) of the local server, select Office 365.
- Click Recipients and then click Migration.
- Click on the Add + button and select Migrate to Exchange Online.
- Click on Remote move migration.
- Select the users that will be migrated.
This will create a migration batch and start seeding the data while the users can still use the local mailbox. Once the seeding is complete, you need to complete the migration batch. This will do one last seed and the users will be automatically redirected to the online mailboxes.
Step 5: Decommission the Server
After migration of the data, you should decommission Exchange server. You should not just shut down the server. First, uninstall the Exchange Server from the Control Panel after all the mailboxes have been migrated and then decommission the server.
To Conclude
Above, we have discussed the stepwise procedure of migrating from local Exchange Server to Office 365 (Exchange Online) using the Express Migration method. However, it is a long and tedious process to move mailboxes from local server to Exchange Online. Also, you can only move mailboxes by using this method. As an alternative, you can use an advanced EDB converter tool, such as Stellar Converter for EDB.
With this tool, you can open multiple EDB files from any Exchange Server version, with no size limit. You can browse through the data store in an Outlook-like interface. You can export all the EDB file data, including user mailboxes, archives, shared mailboxes, and even public folders, to a live Exchange Server database or Microsoft 365 tenant. You can also use the application to save the mailboxes in PST and other file formats. This tool helps to simplify the migration of data. It can also help in recovering deleted or purged items from standalone EDB files.
Was this article helpful?