About two decades ago, USB flash drives were considered as a revolutionary portable data storage technique. Nowadays, it’s considered as a significant threat to data security, if not password protected. Although, using a password protected USB flash drive also has grim consequences like losing the key to decrypt it causing permanent data loss.

Flash drive users frequently search for smart ways to recover photos from a password protected USB. Certainly, you are struggling because the photos stored in the flash drive remains inaccessible until you decrypt or unlock the USB drive. Follow the DIY instructions provided in the blog to restore your valuable data from an encrypted or write-protected flash drive using Windows or macOS.
What’s an encrypted USB Drive?
Encryption is a sound choice for protecting your valuable data like personal photographs and videos, stored in a USB or flash drive with an algorithm or code, to prevent unauthorized access. You can’t unlock a password protected USB drive without the secret key used to encrypt it.
How to unlock encrypted USB drive?
To restore the photos stored in an encrypted flash drive, first decrypt it using the key or password, and later open and view the content stored in it. Let’s take a look at the available options:
Unlock the Password Protected flash drive on Windows
Unlocking a password protected USB drive in Windows PC is simple. Decrypt the drive using BitLocker, a renowned encryption tool included with Microsoft Windows versions. Here’s how to do it:
- Insert the flash drive into a USB port on your Windows laptop or computer.
- Open the Start menu and type Control Panel.
- Launch the classic Control Panel and navigate to BitLocker Drive Encryption.
Tip: If you can’t find BitLocker Drive Encryption in Control Panel on your computer, then check it in Systems & Security folder.
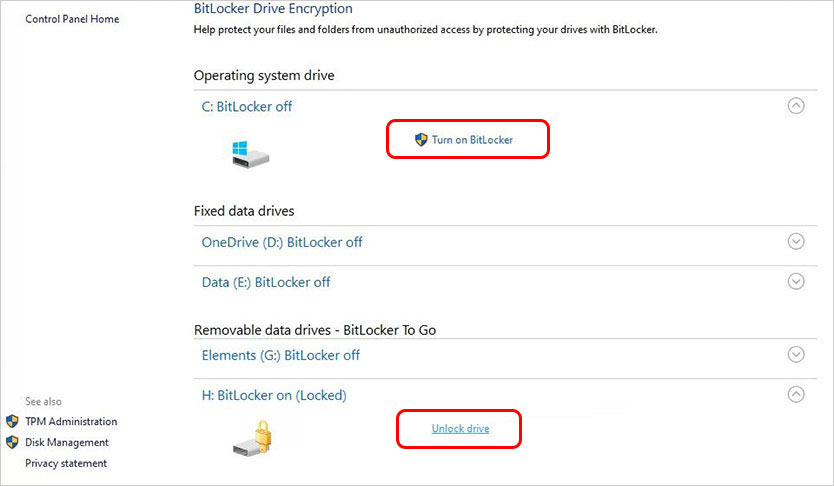
- Select the encrypted flash drive and click the Unlock drive option.
- Enter your password and confirm.
Click on more options to use your 48-digit recovery key if you can’t recall your USB password. You can also decrypt BitLocker-protected USB drives. Follow this KB for step-by-step guide.
Use Administrative Password to Decrypt Flash Drive in Windows
Yet another feasible solution won’t work until you have administrator passwords to unlock the encrypted USB drives, partitions, or write-protected drives. Observe the steps to unlock the USB drive with an administrative password and recover photos from it:
- Connect the USB drive to your laptop or computer and go to This PC/Computer.
- Right-click the drive and select Properties followed by Security option.
- Click Edit to enter your administrator password.
- Select your username in the Group and Usernames option and click the Allow radio button alongside the Full and Write settings in the Permissions for Authenticated Users section.
- Press Apply button followed by OK.
- You can successfully access the encrypted USB drive and restore photos from it.
Decrypt the USB Flash Drive in macOS
FileVault is a built-in disk encryption program of macOS to recover data from an encrypted USB drive. Just enter a valid password to unlock it and follow the process:
- Use the USB connecting socket to insert the flash drive into a USB port on MacBook.
- Launch Finder and right-click on your USB drive to select the Decrypt option.
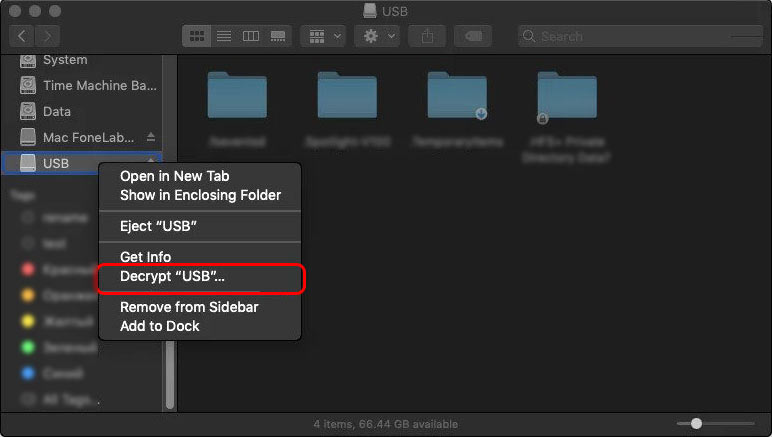
- Enter your password and confirm.
You can also decrypt a hard drive by using Finder without any password. Simply open Finder and from the left pane, secondary-click on the encrypted hard drive. Now, select the Decrypt ‘Drive_Name’ option. Once your Mac decrypts the hard drive, access your flash drive without any password.
Unlock the Physically Locked USB Drive
Some flash drives have a write protection button on the side or bottom, just like SD cards, to avert data overwriting, malware attacks, and accidental erasure. If you plug a physically locked flash drive into a public or virus-infected computer, the content stored in the drive remains unaffected.
Move the lock to turn on or off the drive to make it read-only. Once locked, the USB drive will shut down all the unsolicited entry or data extraction attempts. However, if you want to extract photos from a write-protected USB, you must unlock it first. Since you are looking for options to restore photos from a write protected USB, we suggest Microsoft DiskPart command-line utility to disable read-only settings and restore photos:
- Press Windows and R keys together to open Run prompt on your laptop or PC.
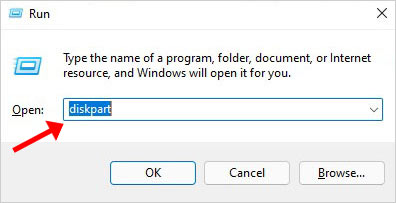
- Type diskpart and hit Enter key.
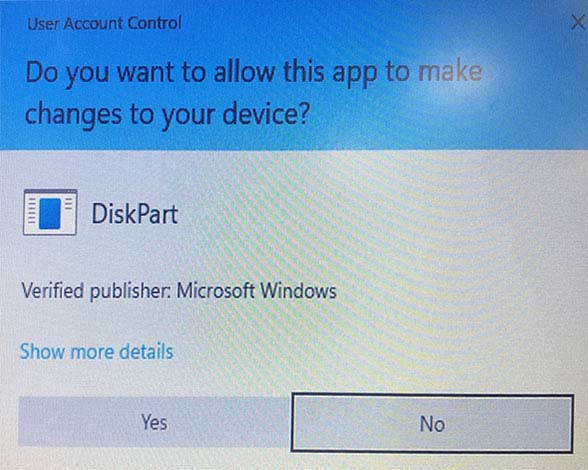
- Click Yes if received a User Account Control prompt, seeking permission to proceed forward.
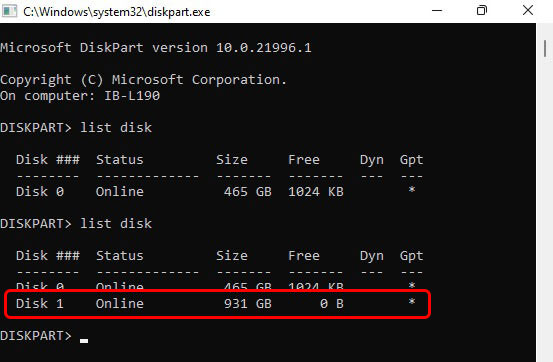
- Type list disk at the DiskPart prompt and hit Enter key.
Identify your USB flash drive with the bigger size appearing on screen like in the below screenshot.
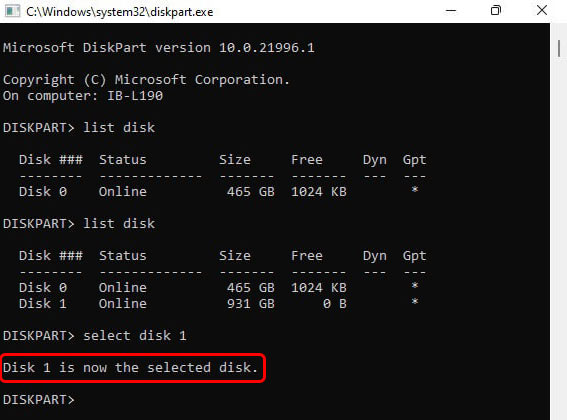
- Use select disk command to choose the flash drive for photos recovery.
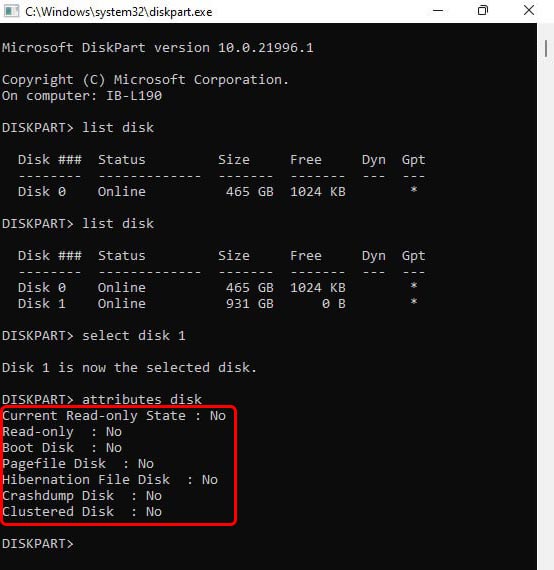
- List out the attributes of the disk with command attributes disk.
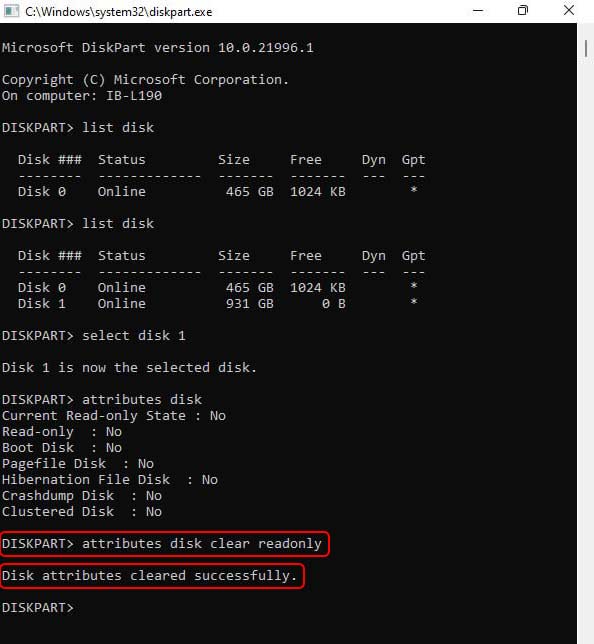
- To restore photos from a write-protected USB, you need to clear the read-only attribute and make the disk readable. Use the command attributes disk clear readonly.
- Once done, type exit to quit DiskPart.
- Further, proceed with the general procedure to access the USB and extract photos from it.
You can refer to this informative article to restore encrypted photos. Also, learn how to recover photos from a corrupt or unresponsive USB drive.
Decrypt the USB flash drive without a password to restore photos
In case you can’t recall the password of your encrypted USB drive, then also you can decrypt the write-protected USB drive. Just locate the StorageDevicePolicies on any version of Windows to change the WriteProtect value as instructed in the steps:
- Press Windows and R keys together to pop the Run prompt.
- Type regedit in the search box and hit the Enter key.
- In the Registry Editor, navigate to the following path: Computer\HKEY_LOCAL_MACHINE\SYSTEM\CurrentControlSet\Control\StorageDevicePolicies
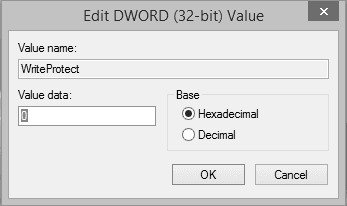
- Double-click on the WriteProtect value on the right-hand pane of Registry Editor.
- Now change the Value data from 1 to 0 and click OK to save the changes.
Note: Follow the Registry Editor with utmost caution as any inaccurate edit may have grim consequences like complete reinstallation of the operating system. This may eventually result in data loss.
Restore Photos with expert photo recovery software
After performing all the methods to decrypt or unlock your password protected USB drive, use a trusted photo recovery software to restore photos. We recommend Stellar Photo Recovery, a software proficient at retrieving photos disappeared, deleted, hidden, or missing from all kinds of flash drives and write protected USB drives. Additionally, the software can recover lost videos, photos, and audio files from BitLocker encrypted drives, volumes, and partitions. Just select the encrypted drive in the software and click Scan to enter the BitLocker password. It will recover photos from the encrypted flash drive. Follow these quick steps to restore photos from a password protected USB drive:
- Download Stellar Photo Recovery on your computer.
- Connect the USB drive to your laptop or computer.
- Launch the software and select the flash drive to click Scan.
- Patiently wait for the scanning process to finish and display a list of recoverable photos.
- Preview the photos you wish to retrieve and select the check box.
- Press Recover button and save the photos on your computer at a specific location.
Note that your photos recovery chances stand high only when you avoid using the USB drive after unlocking it. Any further attempt to save more photos in it or reuse the drive can overwrite or delete the pictures. So, avoid unnecessary actions till our software helps you recover desired number of photographs.
Conclusion:
Restoring a password protected flash drive needs precision and a secret key (password) to decrypt the drive. The solutions suggested in this blog are adequate to help you restore the photos from an encrypted drive, but using a reliable photo recovery tool is equally essential. Stellar Photo Recovery software is compatible with Windows and macOS, enabling users to restore data from an encrypted USB drive after unlocking it. Nonetheless, don’t assume that the photo recovery software can circumvent modern encryption standards like AES-256. So, keep your USB password handy and secure. Certainly, the risk of data loss remains in both encrypted and non-encrypted drives. Also, encryption makes the process of photo recovery complex. So, maintain a backup of your photos to save time, effort, and money.
Was this article helpful?