In Windows OS, there are two types of disks—Basic and Dynamic. The fundamental difference between the two is that former is the default disk type used by Windows OS while the latter is used (by professional and IT experts) to create volumes that span multiple disks and more complex fault-tolerant (mirrored and RAID-5) volumes.

Most importantly, Windows Home editions do not support dynamic disks. Thus, you cannot access an internal or external hard drive that has turned into a dynamic disk volume.
You can revert and convert dynamic hard drive to basic, but the conversion process erases all the data permanently from the drive, which leads to data loss.
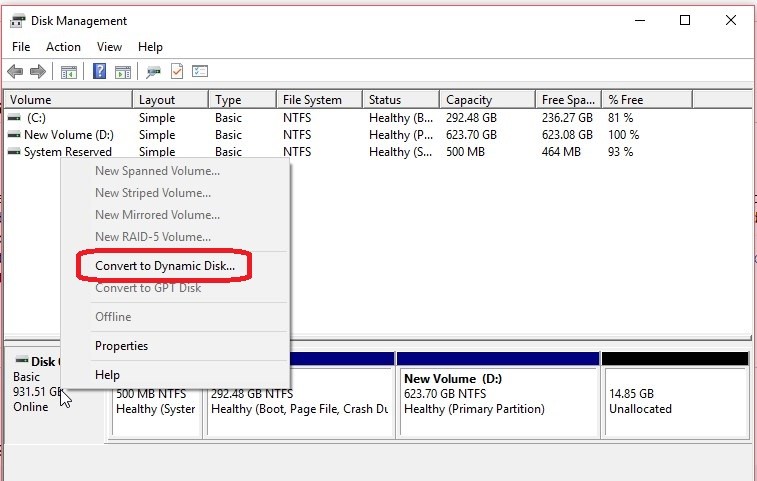
So in this post, we have explained how to convert dynamic disk to basic disk, without losing the data in Window 10/8/7. The process is quick, easy, and anyone can follow it with the help of step-by-step instructions given below.
How to Convert Dynamic Disk to Basic Disk without Losing Data?
It is a two-step process to convert dynamic disk to basic without losing your critical (and inaccessible) data—
- Recover data from a dynamic disk
- Convert dynamic disk to basic with Disk Management tool
Step 1: Restore Data from a Dynamic Disk
As the dynamic disk is inaccessible, you need a software that can restore data from such drive partition(s). This should be done before converting dynamic disk to basic, as it involves deletion of a dynamic disk volume that results in permanent data loss.
So before you convert dynamic disk to basic, recover data by following these steps:

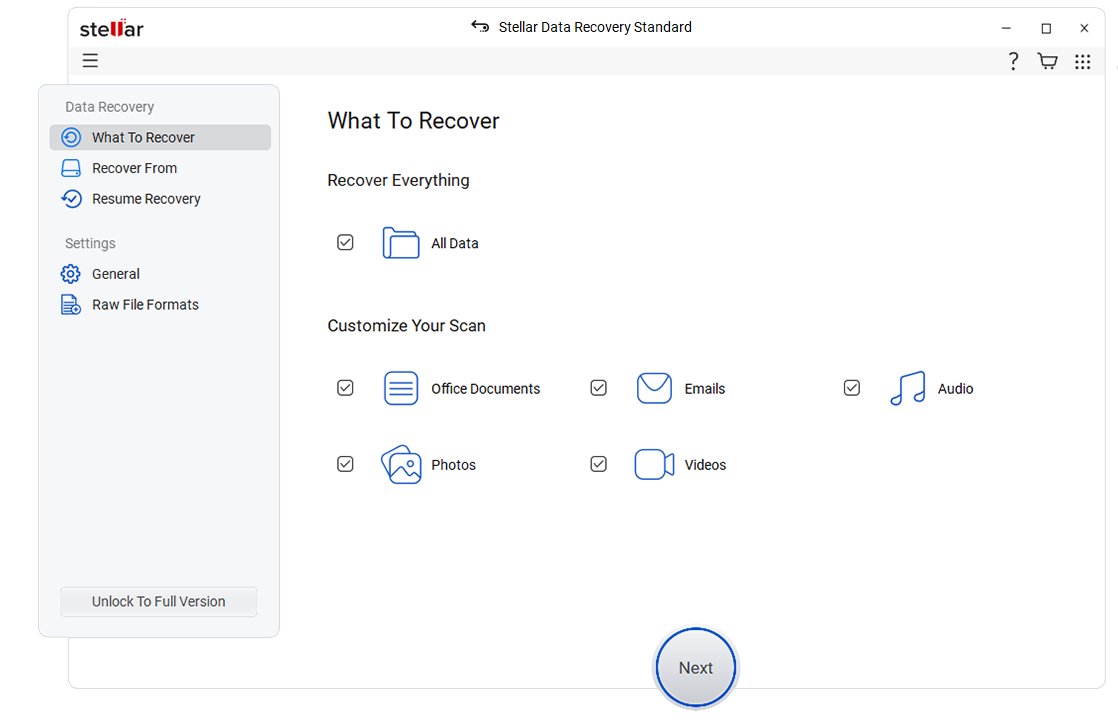
- Select the ‘All Data’ under Everything or select the specific file type(s) and click ‘Next.’
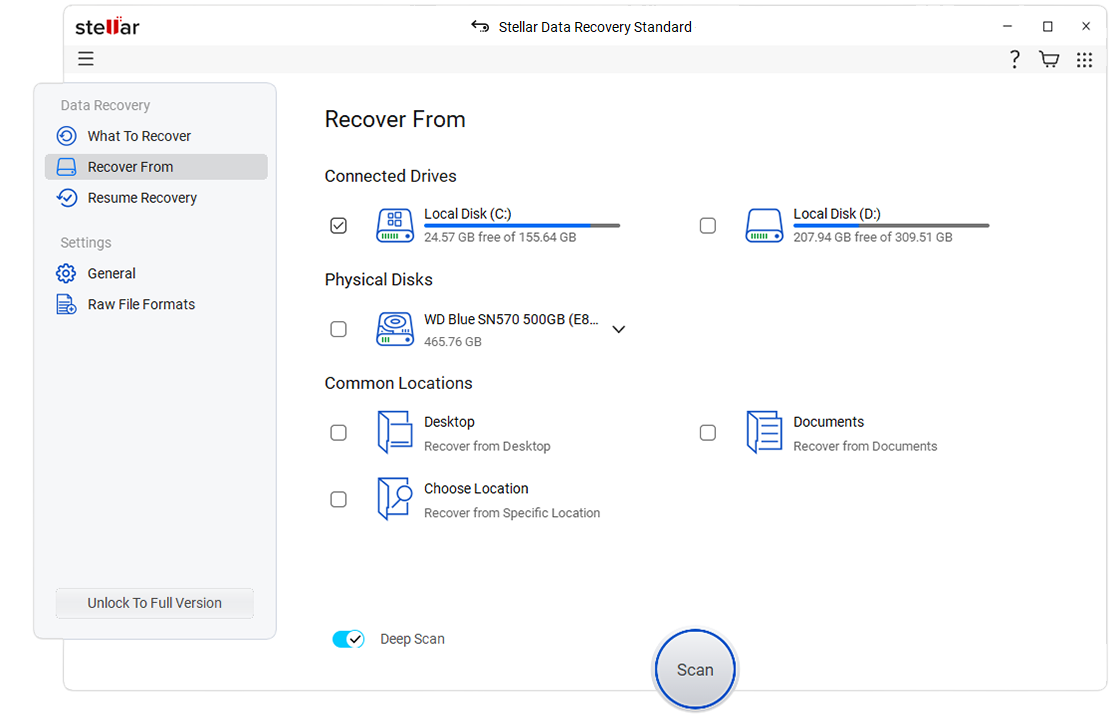
- Choose Location from where you want to recover data

- After the scan, results are displayed in the left ‘Tree view’ pane. Click on a folder to display recovered files and sub-folders
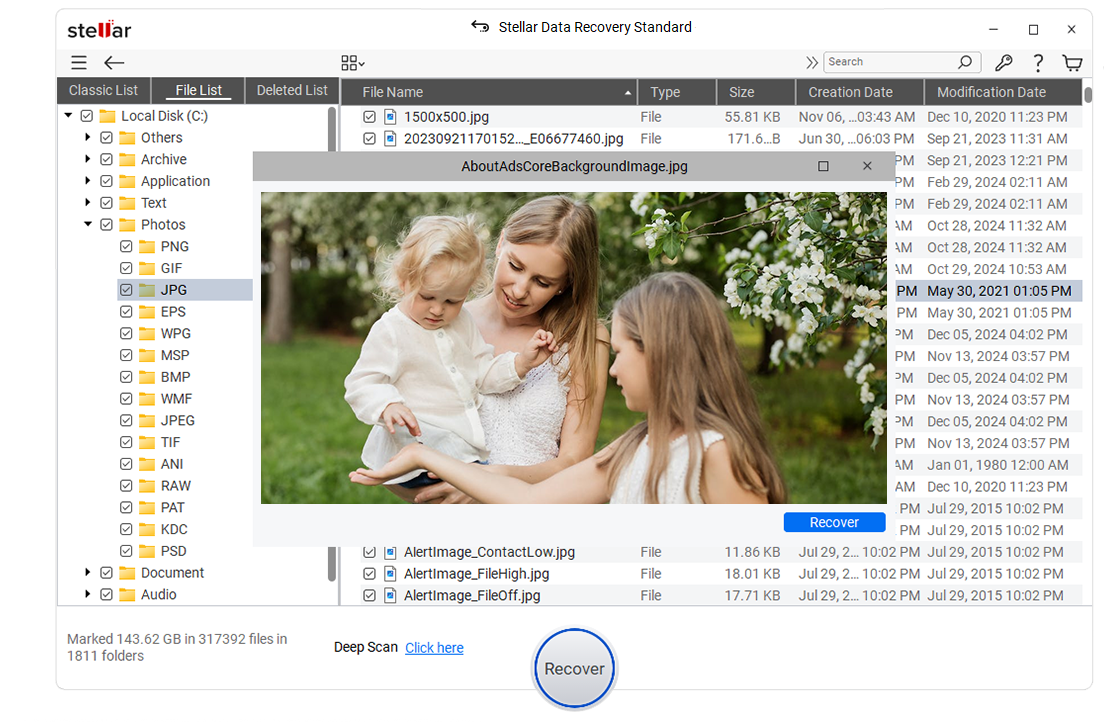
- Click on a file to preview it or click the file check box to select it. Use the search box to locate critical files quickly
- After selecting the necessary files, click ‘Recover’. A new dialog box appears
- Click ‘Browse’ and choose a save location on a different drive
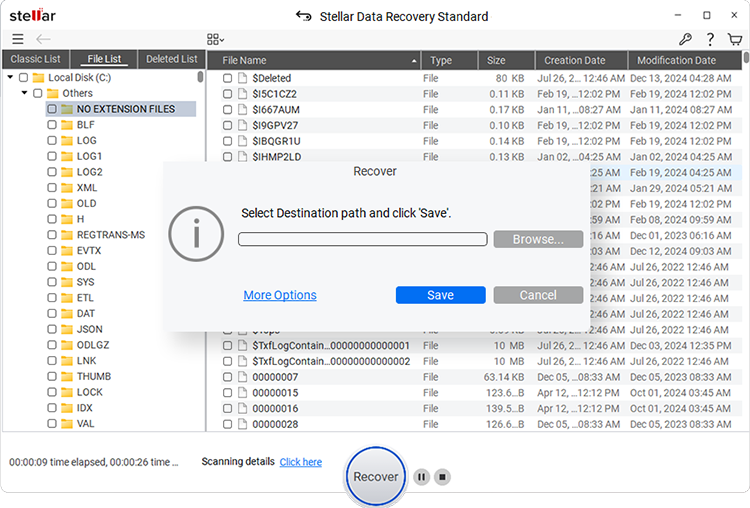
- Click ‘Start Saving’ to save the recovered files.
After the data is restored from the dynamic disk, head to the next step, and convert dynamic disk to basic without data loss.
Step 2: Convert Dynamic Disk to Basic
There are two different ways to convert a dynamic disk into a basic disk. Use either the Disk Management tool (UI tool) or Command Prompt (command line—DiskPart) in case the Disk Management tool fails. We have discussed both ways down below.
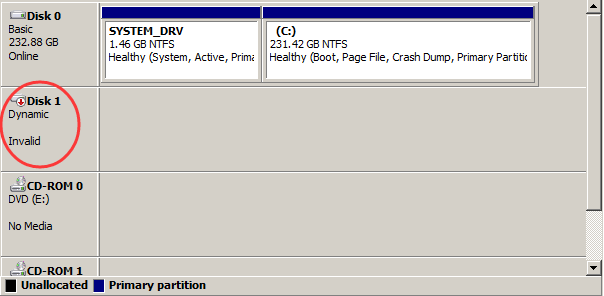
#Way 1: Convert Invalid Dynamic Disk to Basic Disk by using Disk Management
- Press Win + R and type diskmgmt.msc
- Click OK
- Right click on Dynamic volumes and delete all the dynamic volumes one by one
- After all dynamic volumes are deleted, right-click on the Invalid Dynamic Disk and choose ‘Convert to Basic Disk. ‘
#Way 2: Convert Dynamic Disk to Basic by using Command Prompt
- Run command prompt, type diskpart and hit the ‘Enter’ key
- Click ‘Yes’ to grant admin privilege when prompted. A new command prompt window appears
- In the new diskpart command prompt window, type list disk and press ‘Enter.’
- Note the disk number of the dynamic disk you want to convert to basic.
- Now type the following command suffixed with disk number (in sequence) and hit ‘Enter’ after each command
select disk <disknumber>
details disk <disknumber>
- Then select volumes by typing
select volume= <volumenumber>
delete volume
- After deleting volumes, again type
select disk <disknumber>
- Specify the disk number of the disk that you want to convert to a basic disk and finally, type
convert basic
- Hit the ‘Enter’ key. The dynamic disk will be converted back to basic.
Final Thoughts
We discussed basic and dynamic disks, their usage, and the two-step process to convert dynamic disk to basic in Windows 10/8/7 without losing the data. To use a dynamic disk, get Windows Pro/Enterprise/Ultimate edition, as Windows Home editions do not support dynamic disk.
Also, the two-step process we illustrated uses a Windows data recovery software, i.e. Stellar Data Recovery which comes handy in most common data loss situations. The software can restore accidentally deleted data and files from a corrupt or formatted drive.
Was this article helpful?