Time Machine is a reliable built-in macOS backup application. However, nobody’s immune to backup problems even when using this handy tool. And when a backup issue occurs, Time Machine displays error messages or visually indicates them. One of these problems is that the Restore button is greyed out and not clickable.
It’s natural for you to think that your backups are at risk, but usually, they are not. Let’s see what can cause this problem and how to fix it.
The Time Machine Restore button may be greyed out because:
Time Machine backup was formatted.
Time Machine might be giving you hard times if your external drive has been formatted wrongly. Therefore, make sure the external disk you’re using is compatible with macOS. The support file system for Mac computers is Apple File System (APFS).
- Time Machine backup was incomplete.
The cause could be a third-party application interfering with Time Machine, corrupted files, a system freeze, or one or more HDs that weren’t ejected correctly.
- Time Machine backup was corrupted.
If you accidentally disconnect a Time Machine external drive or shut down the computer while in use, the HDD with a backup may be corrupted.
The Time Machine Restore button may be greyed out because you didn’t use the correct method to enter it. Let’s find out how to do this the right way.
Here is a possible way to enter Time Machine:
1. Open the Time Machine from the Menu Bar.
 Open Time Machine from the menu bar
 2. Click Enter Time Machine.
 Enter Time Machine
 3. Choose the needed backup folder and click on Restore.
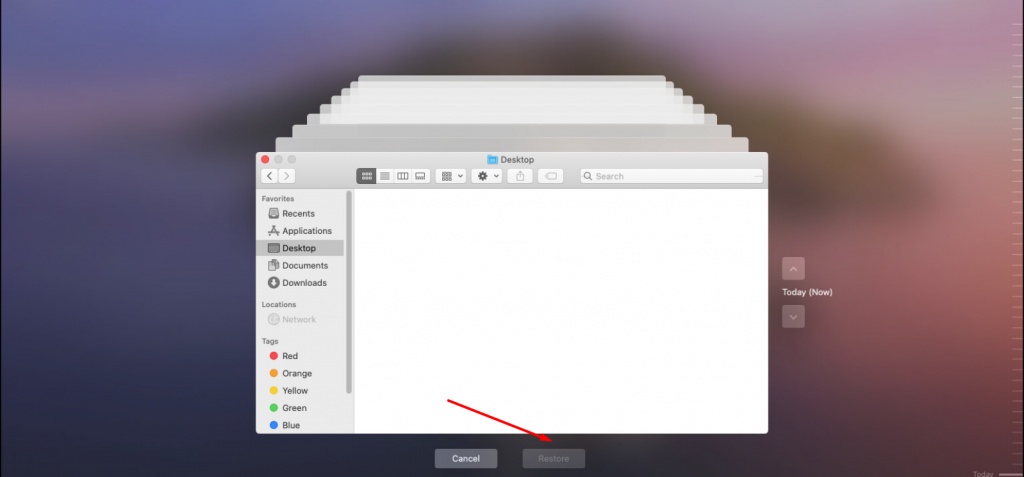 Time Machine backup folders
 Restore Mac from Time Machine in Recovery Mode
Another way to bypass the issue is using the Recovery Mode. You may fully restore your macOS using the recovery mode, including all the applications and files.
Note: Entering the Recovery Mode is different for M1 and Intel-based Macs. Use the first instruction for Intel-based Macs and the second one if you own an Apple Silicone model.
Here are the steps to restore your macOS via Recovery Mode on an Intel-based Mac:
1. Connect your Time Machine backup disk to your computer.
2. Restart your Mac.
3. To start your Mac in recovery mode, click and hold the Command + R keys.
4. Release the keys when the Apple logo appears on your screen. You will see the disk utility menu when your Mac boots in Recovery Mode.
5. Choose Restore from Time Machine backup, and click Continue.
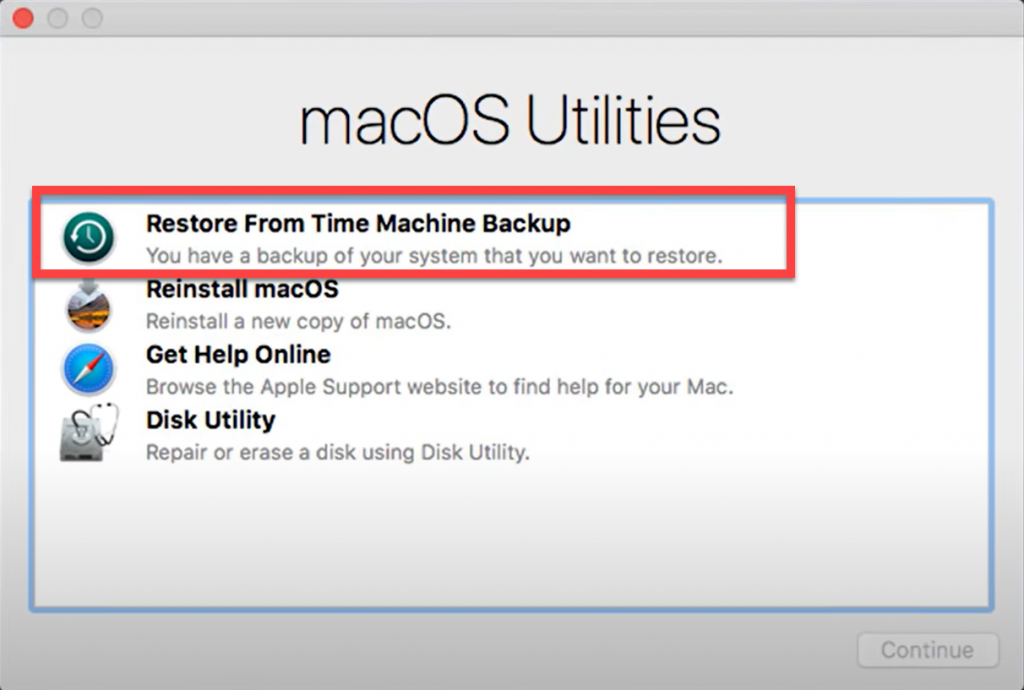 macOS Utilities window
 6. Select the needed Time Machine backup disk and click Continue. Enter the admin password if prompted.
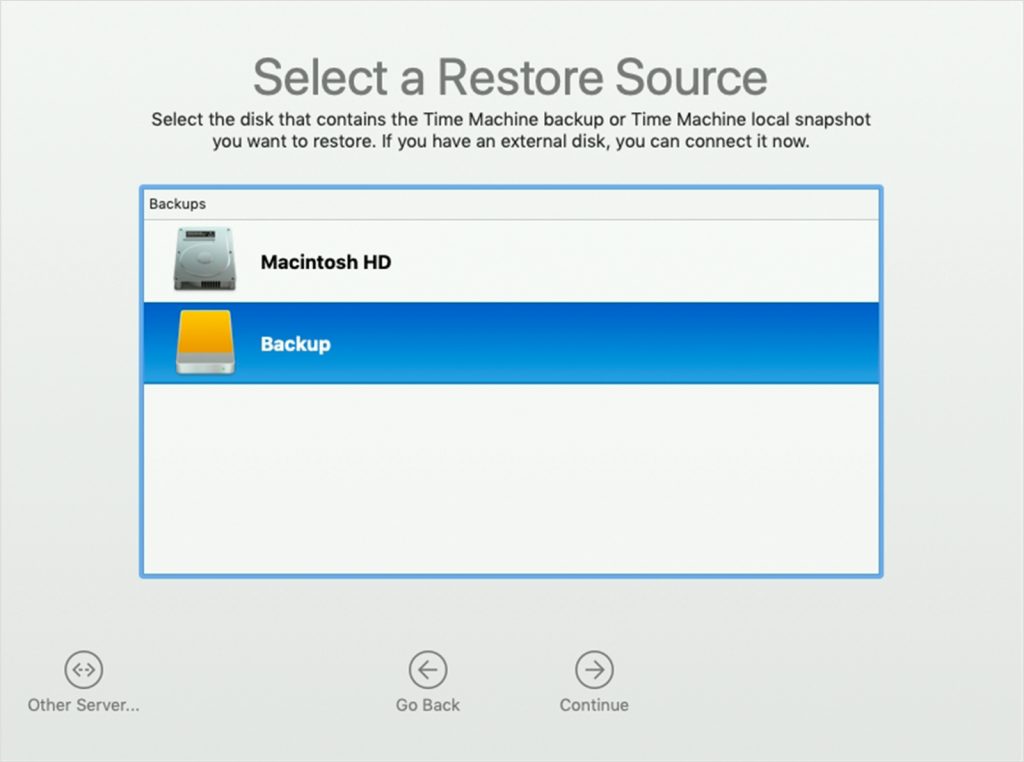 macOS Utilities – Select the backup folder
 7. Select a backup by date, then click Continue.
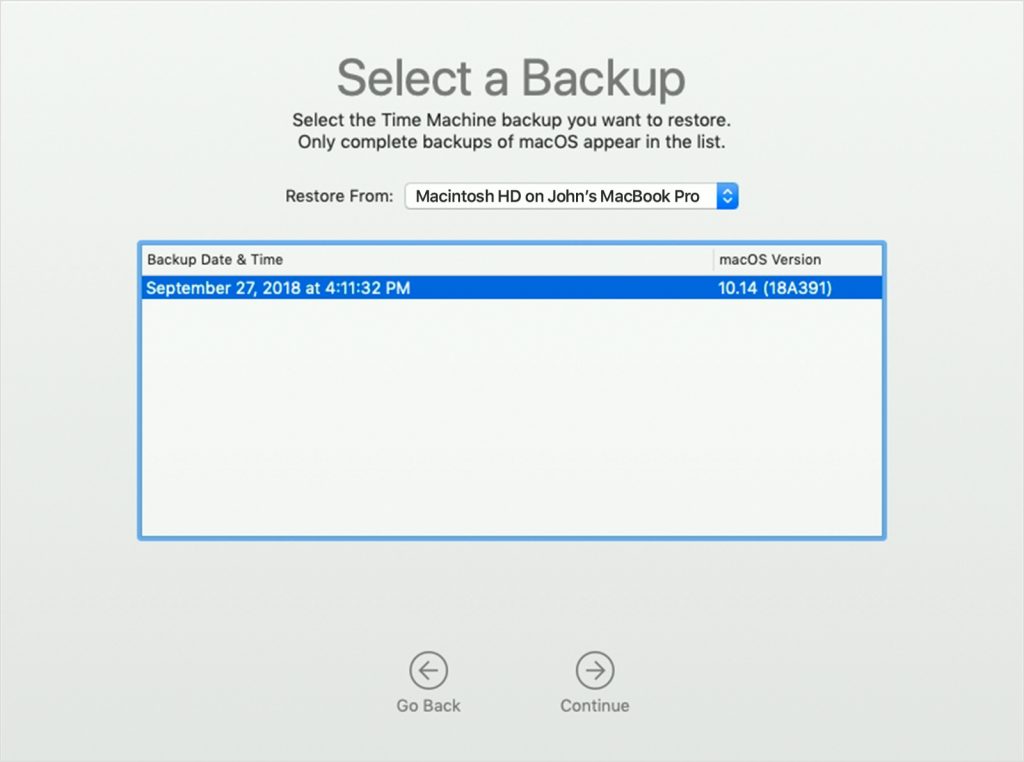 macOS Utilities – Select backup folder by date
 8. Choose the HD on your Mac and click Restore.
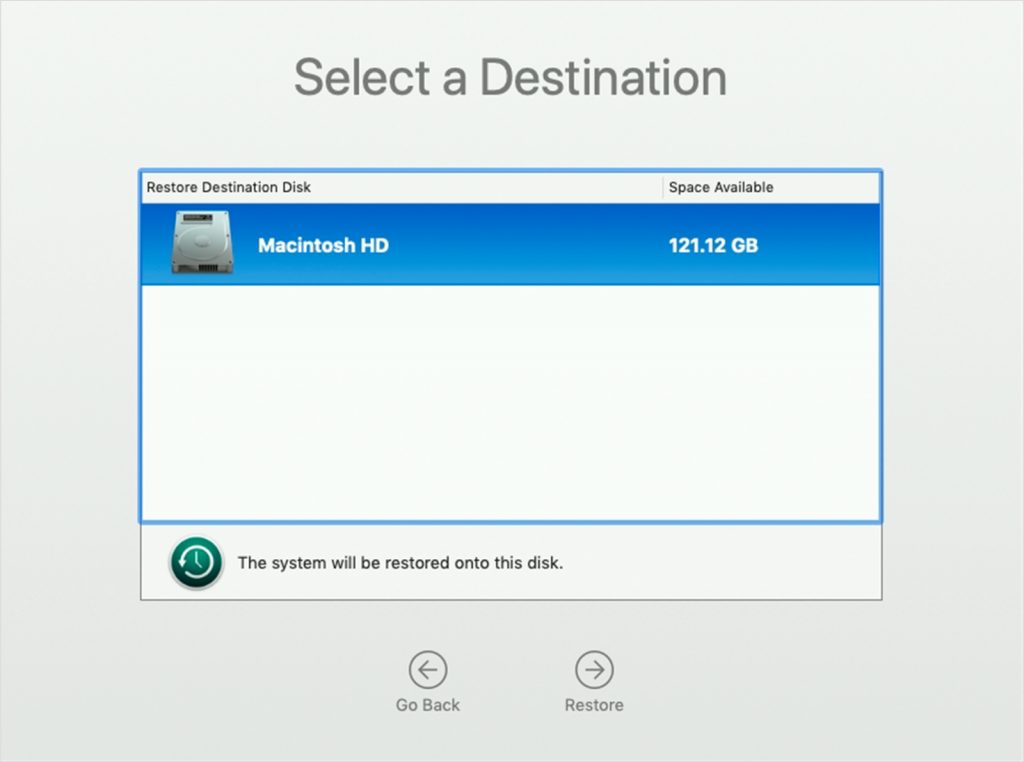 macOS Utilities – Select a Destination
 9. Restart your Mac when all steps are done.
If you’re using Mac with Apple silicon, follow the next steps:
1. Restart your Mac.
2. When the screen goes black, press and hold the Power button.
3. You’ll see two icons: a hard disk and a gear. You will need to click on the Gear icon
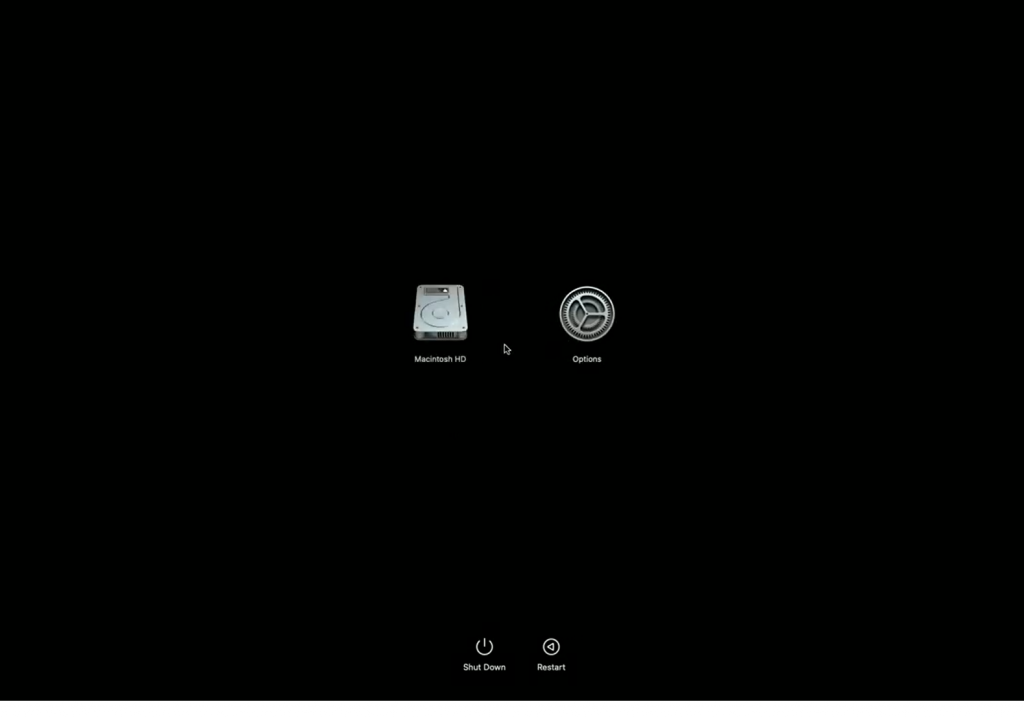 Recovery Mode on M1 Mac
 4. Click on Restore from Time Machine button and follow the onscreen instructions.
If none of the previous options worked, you should consider expert assistance. We recommend contacting Apple online, visiting the Apple Store (if you have one in the vicinity), or using another fix-it service to remedy the issue. Choose which option suits you best.
How to Restore Possibly Deleted Files with the Stellar Data Recovery App
If you tried the possible solutions above, but the Time Machine Restore button remains greyed out, and you still need the lost files, you should use a Mac data recovery software to restore your missing data. You can recover lost files on your Mac by using professional data recovery software such as Stellar Data Recovery. It’s a helpful tool that will help you bring back your files no matter when you’ve lost them.
Follow the steps below to recover lost data:
1. Download and install Stellar Data Recovery from its official website.
2. After installing, you will be prompted to select the data you want to recover (photos, videos, documents, etc.). You can choose specific or all suggested file types.
 Stellar Data Recovery – Select What To Recover
 3. Then, you’ll need to choose where you want to recover the selected files from.
 Stellar Data Recovery – Recover From
 4. After the Stellar Data Recovery scan, you will see the files that can be retrieved and select which ones you need.
 Stellar Data Recovery – Preview
 5. Finally, choose the destination folder on your Mac and start the recovery process.
Related reading: 10 Best Mac Data Recovery Software
Wrapping Up
Suppose the Restore button in the Time Machine is greyed out when trying to recover your lost data from a backup drive. In that case, you can try to repair it by using the solutions above: restore from Time Machine using Recovery Mode or contact professional help.
If the Time Machine backup is damaged or the problem isn’t fixed, you can download Stellar Data Recovery for Mac to get your lost or deleted files directly from your Mac without restoring them from Time Machine.
Read more guides:
Was this article helpful?