A hard drive error like ‘restart to repair drive errors’ is as annoying as any other system error, especially if you’ve no idea why it occurred in the first place. It appears while accessing the hard drive, installing Windows updates, or making some changes in the registry editor. This error may cause your system to malfunction or not boot up normally. The error may occur because of issues with the hard drive, bloated registry entries, or problematic system updates.
Here are some tried-and-tested troubleshooting methods to resolve this error. However, before that, let’s start with the quick fixes.
Quick Fixes
The first and the basic step is to restart your system. Sometimes, rebooting your system can fix ‘Restart to repair drive errors’. But if you reboot your system and still get the same error message popping up on your system screen, proceed with the next fix.
- Check your hard drive status
Sometimes, your system does not identify the hard drive, due to which you may encounter ‘Restart to repair drive errors.’ You can try connecting the hard drive to another PC. If it’s working, then it might be your SATA/PATA cable that would be at fault. Replace the SATA/PATA cables and then check your hard drive again.
If the hard drive shows up an error while accessing it, there may be corruption and bad sectors on your drive. You may run SMART Drive Monitor to check for the bad sectors.
Troubleshooting Methods to Fix ‘Restart to Repair Drive Errors’
If the above fixes don’t resolve your problem, perform the following troubleshooting methods to fix ‘restart to repair drive errors.’ But before that, boot your PC in Safe Mode.
Follow the given steps:
- If your system is ON, turn it OFF. Then, restart your system. When it starts showing the Windows logo on the screen, turn it off forcefully using the Power button.
- Repeat this step three times, after which you should reach the Automatic Repair environment.
- In Windows Automatic Repair environment, select Advanced options > Troubleshoot > Startup Settings > Restart.
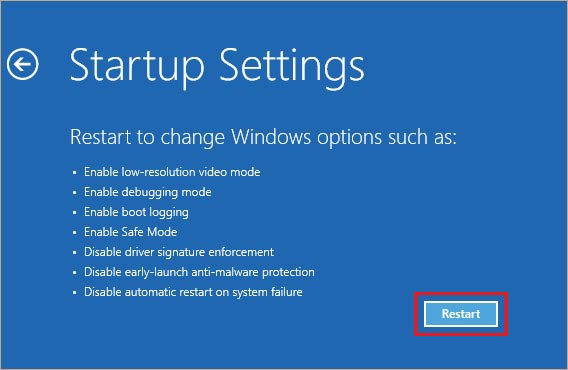
- Once the system reboots, press F4 to enable the Safe Mode.
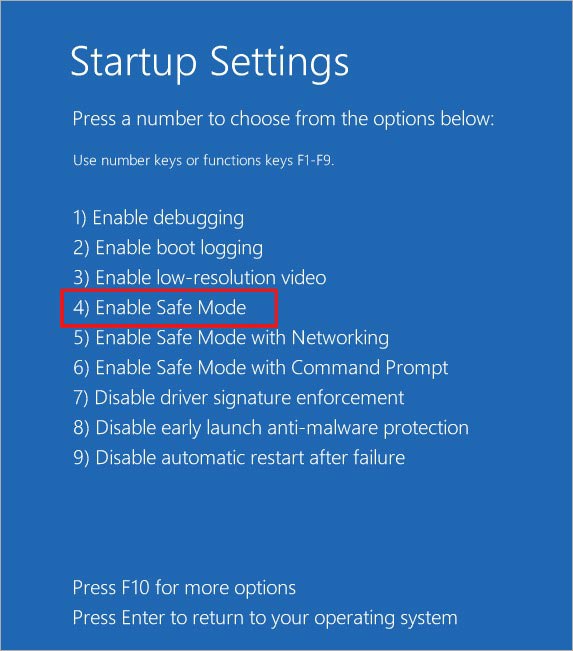
Now, you can try the below-mentioned troubleshooting methods.
Method 1: Run DISM and SFC Scan
DISM (Deployment Image Servicing and Management) is a command-line utility that helps you fix corrupt system images. The SFC tool checks for the corruption in system files and replaces the corrupted or damaged versions with the right ones.
If you have Windows 7 or older versions on your system, you can run an SFC scan directly. However, if you’re running Windows 10, 8, or 8.1, run DISM and then SFC scan. To do so, follow the given steps:
- Open Command Prompt, run it as administrator, and type DISM.exe /Online /Cleanup-image /Restorehealth. Press Enter to proceed.
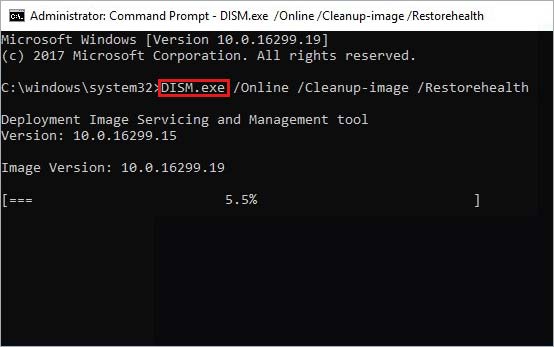
- Let the process complete. Once done, type the sfc/scannow command and hit Enter.
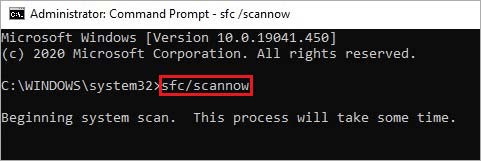
- Now, wait for a while as it may take some time to fix corrupted or damaged system files.
- Once done, close the window and reboot your system to see if the error is resolved.
Method 2: Run CHKDSK Command
The ‘restart to repair drive errors’ is a disk drive-related error. If there are bad sectors on your hard drive or the drive is infected with malware, you may encounter such an error. Running CHKDSK utility may help you fix the error.
However, the CHKDSK command scans the hard drive and marks the bad sectors on it, due to which Windows doesn’t read the data from the bad sectors, eventually causing permanent data loss. So, if you have a backup, you can run the CHKDSK command without any second thoughts. Here are the steps:
- Open Command Prompt, run it as administrator, type chkdsk /f /r D: and hit Enter.
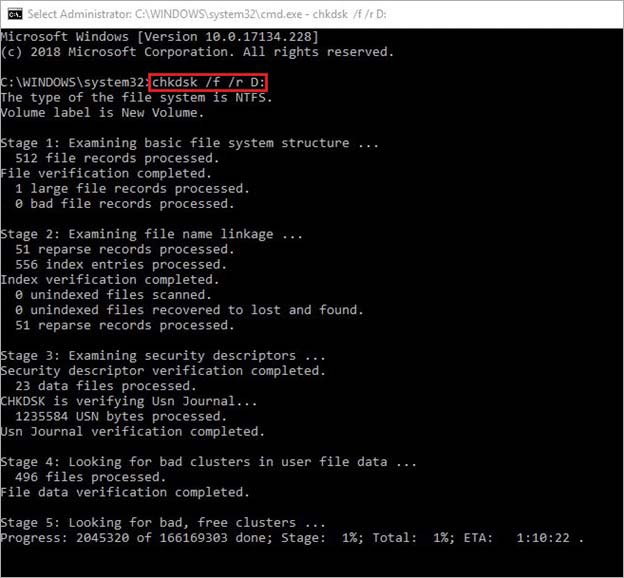
- It will take some time. Wait until the process is complete. Then, close the window, reboot your system, and check if the error is fixed.
Some users said they tried running CHKDSK, but it led to the same ‘restart to repair drive errors.’ On the other hand, some users reported that they received a different error message – “Access Denied as you do not have sufficient privileges. You have to invoke this utility running in elevated mode.”
If you get the Access Denied error, it means that your hard drive is failing. Back up your drive data or recover data from the hard drive using powerful hard drive recovery software.
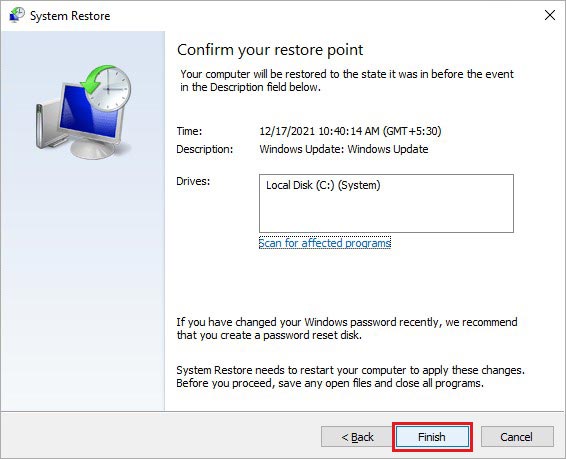
If you’ve enabled the System Restore utility, you’ll be able to choose a restore point and roll back your system to its good functional state to fix restart your PC to repair drive errors. However, rolling back the system to a chosen restore point or default configurations will cause data loss. Therefore, back up your system before performing this method. To perform a system restore, follow the given steps:
- Type ‘Create a restore point’ in the Windows search box to open System Properties.
- Navigate to System Protection and click System Restore.
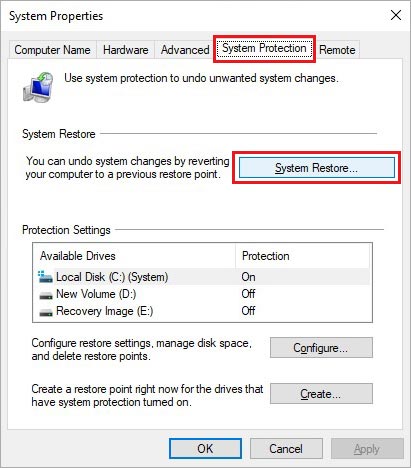
- Click ‘Next’ to proceed further.
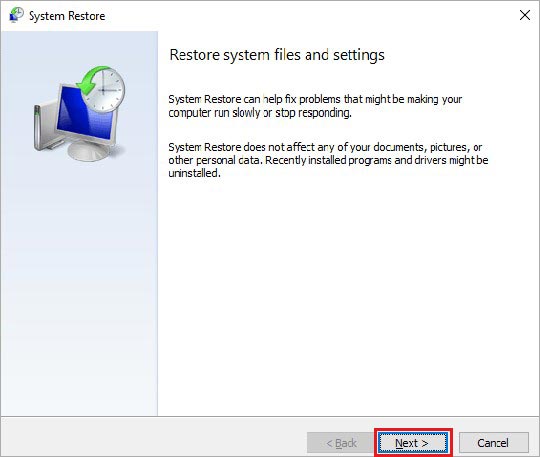
- After that, click Show more restore points and choose one restore point from the available options.
- Click Scan for affected programs > Next.
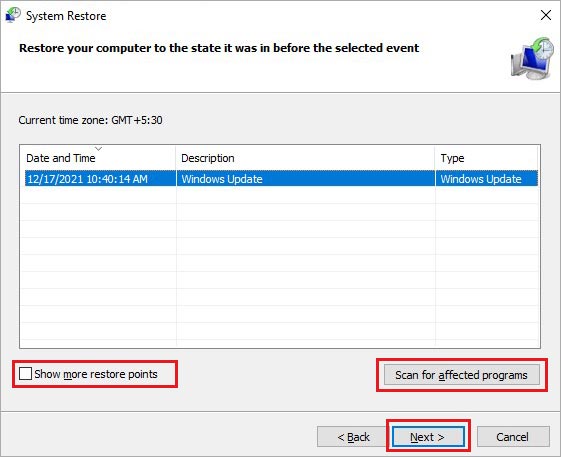
- You’ll see the programs that will be affected during the process.
- Click Close to close the window and then follow Next > Finish.
Method 4: Run Startup Repair
Startup Repair is one of the System Recovery Options that help you recover your system from errors, such as System Won’t Boot error, Reboot and Select Proper Boot Device error, and more.
You can run Startup Repair to fix ‘restart your PC to repair drive errors.’ You need to have Windows installation media to perform Startup Repair. Follow the given steps:
- Shut down your system. Connect the Windows 10 installation media (USB drive recommended).
- Reboot your system with the system’s Power key.
- When prompted, press any key, select your language, and click Next.
- Click Repair your computer on the next prompt.
- In the Automatic Repair environment, click Advanced options.
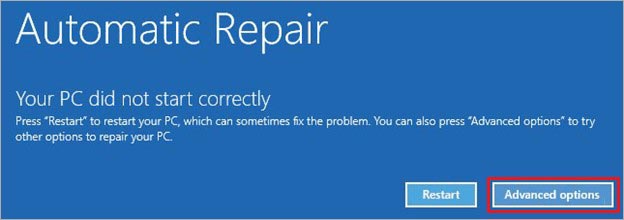
- On the next prompt, click Troubleshoot > Advanced options.
- After that, click Startup Repair on the Advanced options screen.
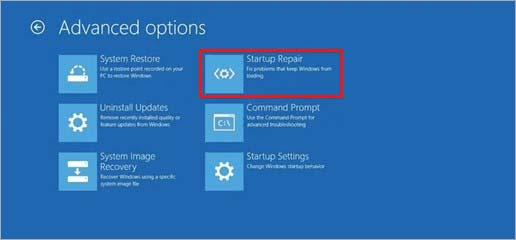
- Now, choose the admin account and enter the password. Click Continue to proceed.

- Once done, restart your system and check if the error is fixed.
Method 5: Replace your Hard Drive
A physically damaged hard drive may be the reason behind the issue. When the hard drive is physically broken or damaged, you may hear some tingling voice coming from your system. In such a scenario, the only solution is replacing the hard drive with a new one. But before that, take the help of a reliable hard drive recovery service provider such as Stellar Data Recovery Services to recover the data from the damaged hard drives. The experts at Stellar perform the recovery process in a Class100 Clean Room that contains the same temperature in which the hard drive is built.
FAQ
Why do I keep getting hard drive errors?
Hard drives errors usually occur due to hardware failure, power outages, poor system maintenance, malware attacks, or even human errors. You can run the CHKDSK command to fix the corrupted or faulty hard drive.
Was this article helpful?