Ever since Instagram launched its 15-second video feature called Reels, the platform became even more sought after. The Reels feature lets users upload quick-view entertaining content, quite similar to the random short videos that are posted on TikTok every second.
However, there are instances reported by various users where they couldn’t record and upload their content. Several underlying issues could be at the core of the problem.
If you’re among the users who’ve tried multiple solutions and still face the same problem, you shouldn’t worry. In this post, we will provide ways to repair Instagram Reels. But before we discuss the fixes, let’s begin with understanding why Instagram Reels feature doesn’t work sometimes.
Reasons behind Instagram Reels not Working
There could be a number of reasons why you’re not able to create Instagram Reels:
- Your account doesn’t support the Reels feature
- The “something went wrong” message is preventing you from accessing Reels
- You’re unable to post or upload anything on Instagram
- Reels continue to buffer or freeze because of a pending update
- Technical issues with Instagram Reels, for e.g., broken audio
- Too much content in the cache
Let’s now proceed with exploring the possible solutions.
Solutions to Fix Instagram Reels
Depending on the reason behind the issue, you can use one or more of the below-mentioned fixes to repair Instagram Reels.
1. Update to the most recent version of Instagram
Nearly all mobile applications are prone to bugs or technical errors, and the same goes with Instagram. For fixing these bugs, developers upload the latest version of the app on Play Store from time-to-time. If you haven’t updated your Instagram application in a long time, this could be the potential cause for the Reels not working issue. So go to Google Play Store and update your Instagram application. Thereafter, check if the issue is resolved.
2. Try locating Instagram Reels at following places
- Open Instagram and look for the Add Stories button on the top-left hand corner of the screen. Click on it and a camera will open with various options at the bottom of the screen, such as Post, Story, and Reels.
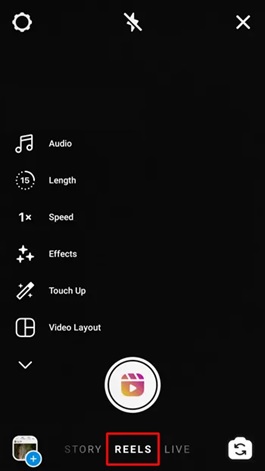 Image – Reels can be accessed from the Add Stories button
- Right next to the Home button located at the bottom of the screen, you can see the Search and Reels buttons. Click on the Reels button. This will take you to all the trending Reels in your location. Look for the Camera button on the top-right hand side of the screen. Click on it to open the Reels menu.
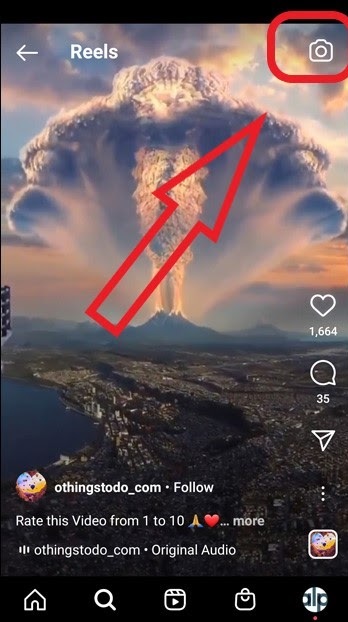 Image – Click on the camera button to make your own reels
3. Sign out of your Instagram account
If you’re still unable to locate the Instagram Reels, you can try signing out of your Instagram account and then re-signing in once again. This step is incredibly useful if you use your Instagram app to manage numerous accounts.
4. Reinstall the Instagram app
If Instagram Reels aren’t working on your smartphone, regardless of the operating system, it’s possible that the application’s file system has gone rogue due to a bug. This can be easily repaired by correctly uninstalling and reinstalling the Instagram app.
5. Clear the cache
Many Instagram users have stated that deleting the application cache allowed them to find the Instagram Reels option and use it without any difficulty.
If you’re an Android user, use these steps to delete your cookies and cache:
- Go to Settings > Apps on your Android smartphone.
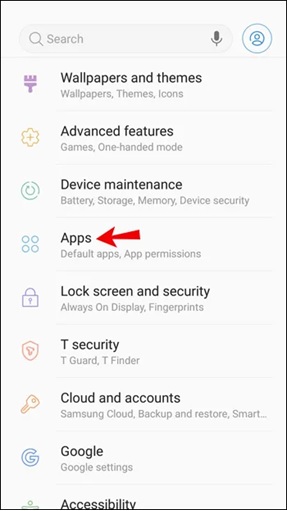 Image – Go to the installed Apps on your smartphone
- Now open the Search bar and type Instagram. Then locate the Storage option from the Usage menu.
- Finally, click on the Clear Cache option to clear the cache.
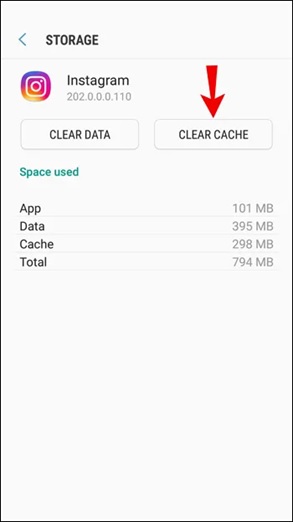 Image – Access the app’s Storage and use the Clear Cache button to clear the cache
Now check if the Instagram Reels option is available or not.
6. Make sure your operating system is up-to-date
An outdated operating system could also be the cause for Instagram Reels not working.
To confirm if that’s the case, follow these steps:
- Launch your Instagram application.
- Logout and login again into your account.
- If you aren’t able to find the Reels option, navigate to your device’s system settings and hit the Update button. Wait until the update completes. It will take a few minutes.
7. Report the issue
If you’ve already upgraded your Instagram and the Reels option is still not working or showing, the issue isn’t with your phone or app version. It could be happening because the Reels function isn’t enabled for your account. In this case, you must contact Instagram to report the problem.
Here are the steps to be followed:
- Go to your Instagram account and log in.
- In the top left corner of the screen, tap the three horizontal lines (hamburger icon).
- Navigate to the Settings option and select Help.
- A prompt will appear that says Report a Problem. Tap on it to report it.
- Type the issue you are facing, for instance, “unable to see the Instagram Reels option”. There’s also an option for capturing the screenshot of the problem. This can help the developers understand the problem better. You can use that too.
- Finally tap on the Submit button to finish the process.
Although reporting the issue is sure to resolve the problem in 99% of the cases, if it still doesn’t work, proceed to the next section to discover the ultimate solution to repair Instagram Reels.
The ultimate solution – Use Stellar Repair for Video
If you’re not able to upload your video content to Instagram Reels or facing random errors while doing so, there may be an issue with the video file you’re trying to upload. In such a case, you can use Stellar Repair for Video to fix the faulty file.
Stellar Repair for Video is a powerful video repair tool that can repair corrupt, broken, or damaged video files on any device or storage media. It supports all types of file formats, such as MP4, AVI, ASF, WMV, MKV, FLV, DIVX, WEBM, MJPEG, and MPEG.
Here’s how you can use the software to repair your Instagram Reels:
Note: If the video files to be repaired are not on your computer, make sure you transfer them to your PC beforehand.
- Go to Stellar Data Recovery’s official website and look for Stellar Repair for Video. After you’ve located the right software, click on the Free Download button.
- Once the installation file is downloaded on your computer, use it to install the software through a proprietary installation wizard.
- After the installation is complete, launch the application. You will be greeted with an easy-to-use interface.
- You will notice an Add button. Click on this button to import the damaged files and then click on the Repair button.
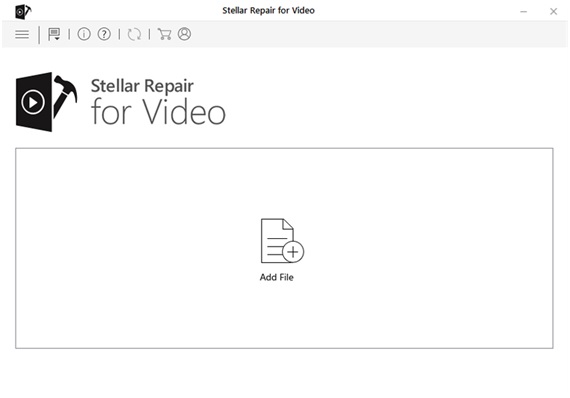 Image – Click on Add button to import damaged files
- After the repair completes, select and preview any repaired file before saving it to the desired location using the Save Repaired Files button.
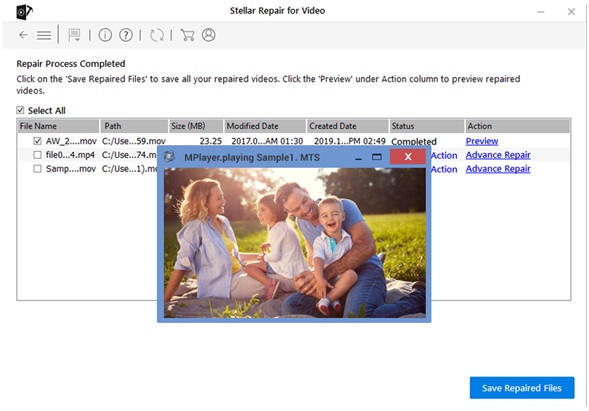 Image – Preview repaired files before saving
Final Word
We’ve put together a list of some fantastic ways to fix the Instagram Reels not working issue. Now, depending on your exact issue, you can use any of them. However, it’s best to start with basic solutions like logging in and out of the application before moving on to more drastic measures, like deleting caches or using a video repair tool.
Was this article helpful?