Announced at the WWDC 2021 in June, Monterey is the 18th major OS release for Macintosh systems by Apple. This new macOS is equipped with redesigned Safari tabs, Quick note, improved synergy between Mac and iPad, Universal Control, and AirPlay, to name a few.
However, the Mac users have who have upgraded to Monterey reported encountering several problems after the upgrade. In this post, we will discuss some common issues, reported by Mac users on various tech forums. We’ll also provide the solutions to fix the issues.
Common Issues Faced by Monterey Users and their Solutions
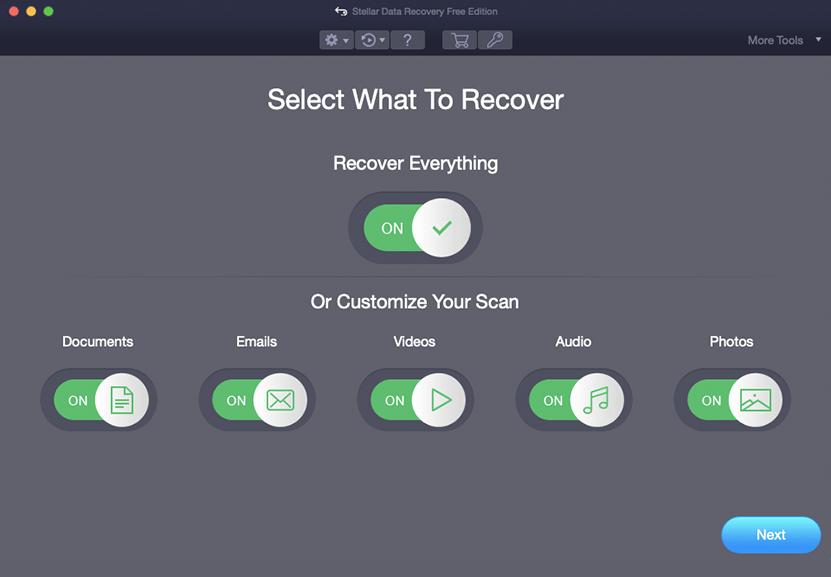
We have listed below some common problems faced by the users of macOS Monterey, along with their solutions. Some of these issues may cause Mac crash, resulting in data loss and corruption of existing files. If you are caught in a data loss scenario, use Stellar Data Recovery Free Edition for Mac to recover all types of data on your Mac.
Issue 1: macOS Monterey Fails to Install on Mac
Many users have reported that they’re not able to install the macOS Monterey on their Mac or have faced issues while doing so. Some users have reported that their Mac crashed and reboots when they forcefully tried to install the updates.
How to Fix it?
Firstly, you must check if your Mac system is compatible with the macOS Monterey. The new macOS 12 Monterey is compatible with the following Mac systems:
- iMac late 2015 and later
- iMac Pro 2017 and later
- MacBook Air early 2015 and later
- MacBook Pro early 2015 and later
- Mac Pro late 2013 and later
- Mac Mini late 2014 and later
- MacBook early 2016 and later
If your Mac is in the above list and you are facing issues with installing the macOS Monterey, then ensure the following:
- There is enough space on the hard disk or volume of your Mac. The free space needed for macOS updates is more than 4.9 GB.
- The startup disk (Macintosh HD) is mounted when installing the macOS Monterey. You can verify this through the Disk Utility by checking the mount status of the Macintosh HD.
If there is enough space and your startup disk is mounted and still you are having problems in macOS installation, then try doing the following:
- Reboot your Mac in Safe Mode by pressing and holding the Shift key.
- Release the Shift key once the login window appears and log in to your Mac.
- Reinstall macOS Monterey when your Mac boots into Safe Mode.
- Restart your Mac.
Issue 2: macOS Monterey could not be Validated
Sometimes, even after re-downloading the installer multiple times, users may not able to install it and get an error showing ‘macOS Monterey could not be validated’. This might be caused due to the mismatch of Date and Time on your Mac.
How to Fix it?
To resolve this issue, follow the steps below:
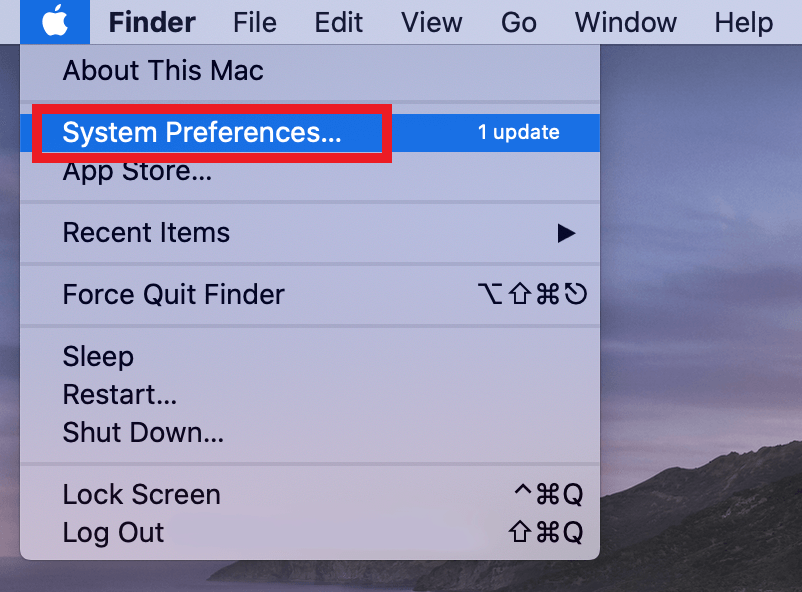
Step 1: Click the Apple menu on the top left and select the System Preferences option from the dropdown list.
Step 2: Search the Date & Time option and open the panel by clicking it.
Step 3: Click on the lock icon on the lower-left corner of the Date & Time panel and insert the correct value for the date and time.
Step 4: Uncheck the box in front of the Set date & time automatically option and recheck it.
Step 5: Click the lock icon to save the changes.
Issue 3: macOS Monterey Stuck on Update
Users have reported that their Mac stuck while installing macOS Monterey at ‘Screen Time’ or ‘Setting up your Mac’. The message would not go away even they have waited for quite a long time.
How to Fix it?
In such a case, you should try backing up the data and rebooting your Mac. Restart your Mac system by pressing and holding the power button until it goes off. Wait for a few seconds and again start it by pressing the power button. Your Mac would boot successfully.
Issue 4: VPN Applications not Functioning Properly
One feature iCloud Private Relay is not allowing VPN applications to function properly after updating to macOS Monterey. The feature generates a new IP address instead of your actual IP address, causing issues with your VPN programs.
How to Fix it?
Here is how you can resolve this issue:
Step 1: Click the Apple menu and select System Preferences.
Step 2: Select the Apple ID.
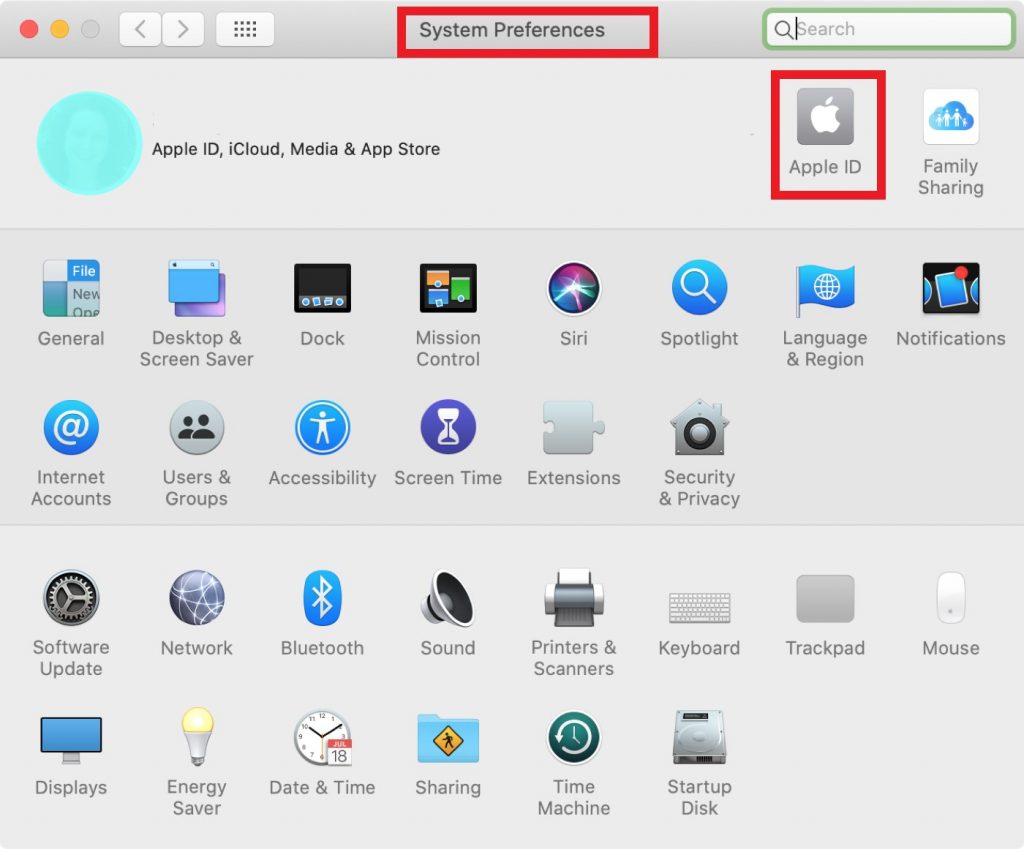
Step 3: Select the iCloud option from the sidebar on the left.
Step 4: From the dropdown menu, select the Private Relay option and then select Options.
Step 5: Click Turn off and exit.
Now check the VPN Applications and see if they are working properly.
Issue 5: AirPlay not Working Properly
Some users reported that after updating to macOS Monterey, AirPlay freezes, operates slowly, or is not working altogether. The root cause behind this is not identified but we deduced from various users comments that it might be due to the Firewall settings on Mac.
How to Fix it?
To resolve this issue, follow the steps below:
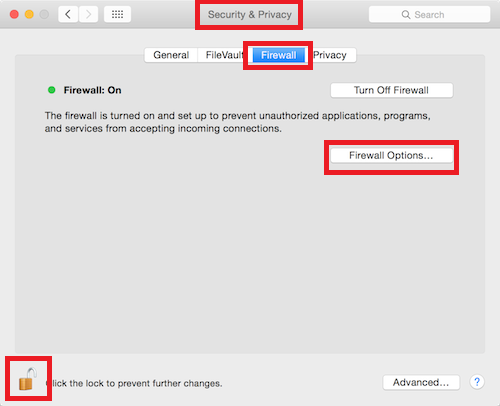
Step 1: From the System Preferences window, click and open the Security & Privacy option.
Step 2: Click to select the Firewall Options.
Step 3: Checkthe ‘Automatically allow built-in software for receiving incoming connections’ and uncheck the ‘Block all incoming connections.
Issue 6: Short Battery Backup after macOS Monterey Upgrade
While working on your Mac on battery power, many users complained of a reduced power backup time when they updated their system to macOS 12. It is because Monterey is embedded with more features and improvements in the existing features. Thus, it may be consuming more battery.
How to Fix it?
You need to optimize your battery settings and apps that are consuming more power. Follow these steps:
Step 1: Click on the battery icon on the menu bar of your Mac.
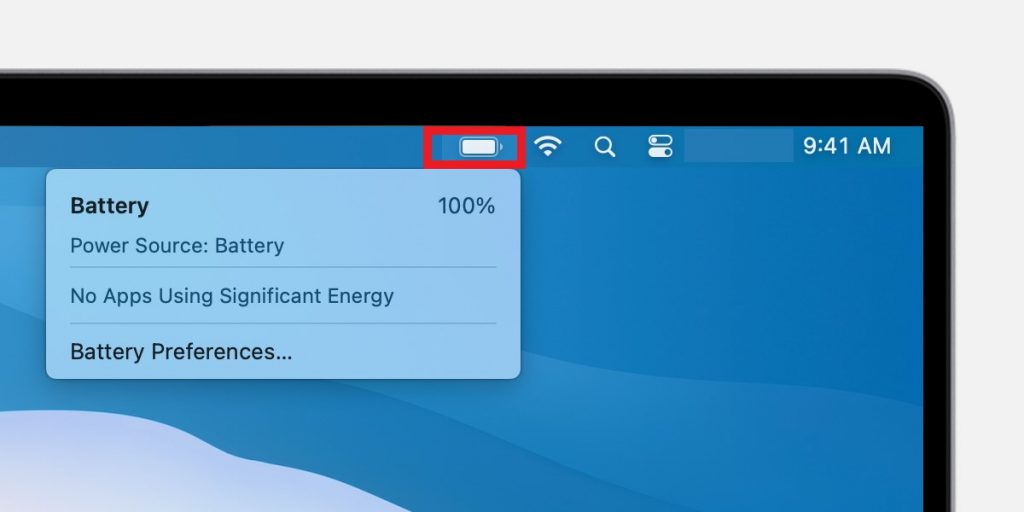
Step 2: Check each of the following one-by-one:
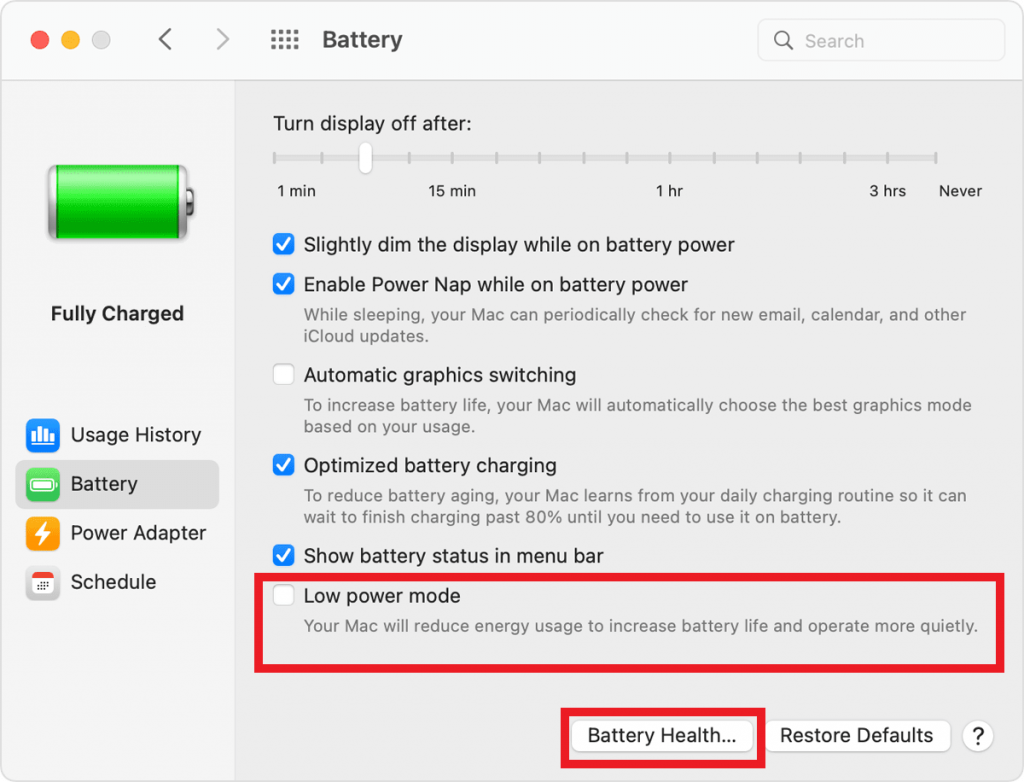
- Which Power Mode is enabled? To enhance the battery backup time, enable the Low Power Mode by clicking Apple Menu > System Preferences > Battery and then clicking the Battery option again.
- Which apps are using a significant amount of energy? If an app is not being used and is still consuming excess power, close the app or Force Quit it if it is not closing normally.
- Check the Display Brightness level and set it to an optimum level of 75% or less.
Note: If the battery backup is still not lasting for long, check your Battery health as it may need replacing.
To Conclude
There are various issues came to light after macOS Monterey update. In this post, we’ve covered some of the common issues and the methods to resolve them. As discussed above, there are some issues that may cause crashing of Mac. Thus, there is a high probability of losing data due to accidental deletion or files getting corrupt. To ensure that your data is not permanently lost, you must backup your data on Time Machine or iCloud.
However, if you forgot to take a backup of your important data and lost it while installing or post-installation of macOS Monterey, you can still retrieve the data using the secure and safe free data recovery software for Mac, like Stellar Data Recovery Free Edition for Mac.
FAQ
1. Why I am not able to install new macOS?
The two most significant reasons may be causing hindrance in the installation of your new macOS. These are:
- Lack of space
- Incompatibility of your Mac system with the system requirements for the macOS you are trying to install.
You can free up the disk space on your Mac by permanently removing unwanted files, cache files, temporary files, traces of uninstalled apps, etc., using a professional eraser software, like Stellar File Eraser.
2. How do you fix a Mac update error?
You can apply the following fixes to resolve the Mac update is not working error:
- Shut down your Mac and then restart it.
- Click on the Apple Menu > System preferences > Software Update and install the available updates.
- Reboot your Mac in Safe Mode and try installing the macOS update.
- Try to clean install the macOS.
- Press Command + L and check the log screen to see if the files are being installed.
3. How do I restart my Mac after it failed to update?
If your Mac has frozen while trying to update the macOS, follow the steps below:
- Press and hold the Power Button till the system shuts down.
- Restart your Mac while pressing and holding the Shift key to boot your Mac in Safe Mode.
- Release the Shift key when the login window appears.
- Login and try to install the macOS in safe mode.
Was this article helpful?