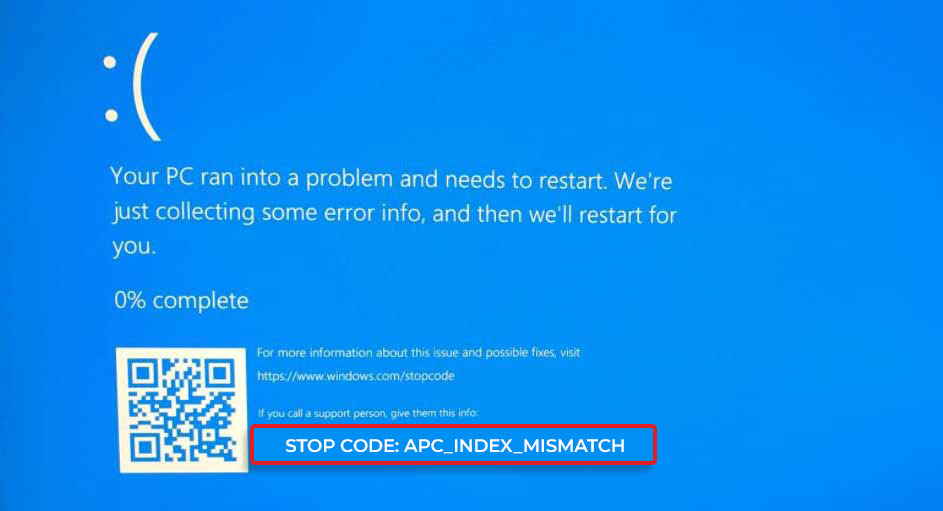
Some users have reported that they have recently experienced a blue screen error on their Windows PC screen with a stop code- APC Index Mismatch. This error may occur at any moment and cause your system to crash every time you try fixing it by rebooting. While it may be understandably frustrating, knowing what this error means and its causes may help you combat the problem and save your precious data.
Part A:
APC Index Mismatch – What does this Error Mean?
Error message – APC_Index_Mismatch shows up with a blue screen on your Windows 10 system. This error may occur right after your system startup or while you’re working on something important. This error may also occur while trying to connect a Webcam during a Skype call. The stop code may lead your system from malfunctioning to a complete crash. Or even, as some users reported, it may get stuck on the booting loop. So, what causes it? Let’s find out.
Why APC Index Mismatch Windows 10 Error Occur?
Usually, Stop Code APC Index Mismatch blue screen error occurs due to incompatible device drivers, problematic Windows updates, corrupt system files, virtualization features in BIOS, or faulty hardware. However, sometimes any third-party software and applications installed on your system may also contribute to this error.
Irrespective of the reasons, you may fix the APC Index Mismatch BSOD error with some efficient troubleshooting methods given in this blog. However, we’d suggest you first boot into safe mode to avoid interruptions while fixing the error.
Boot your Windows 10 in Safe Mode:
- Reboot your system and wait till it starts showing the Windows logo on the screen.
- As soon as it does, press the power key and shut down your system forcefully.
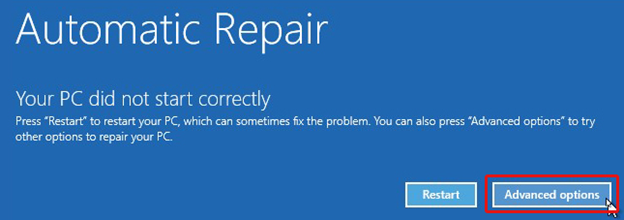
- Repeat this step thrice and once you reach the Automatic Repair environment, select ‘Advanced options.
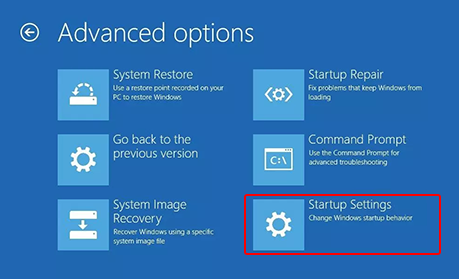
- Follow Troubleshoot on the ‘Choose an option’ screen, and click Advanced options > Startup Settings.
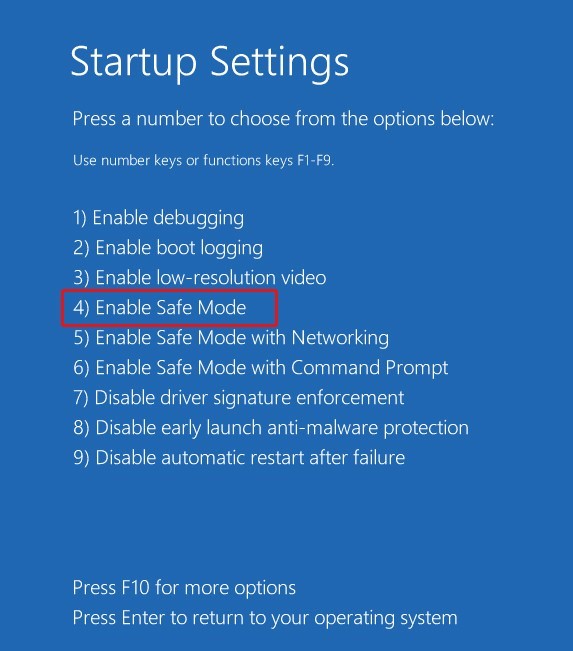
- Click Restart. Once your system reboots, press F4 to enable safe mode.
Now that you’re in safe mode, you may perform the following troubleshooting methods to get rid of Windows stop code APC Index Mismatch.
| Caution: While performing some of the given fixes, you may lose your essential system data. It’s advised to take a backup of your data and then proceed further. |
PART B:
How to Fix APC Index Mismatch Error on Windows 10?
Here, we’ve mentioned the best possible methods to help you get rid of the BSOD error. All fixes can be performed easily by following the steps mentioned against them correctly.
Method 1: Update Drivers
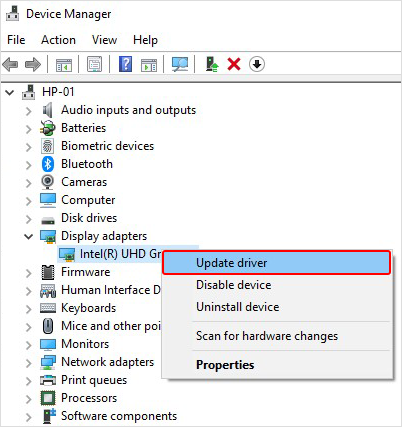
- Go to Device Manager and then choose and expand the device category you want to update the driver.
- Right-click on the driver and select Update driver.
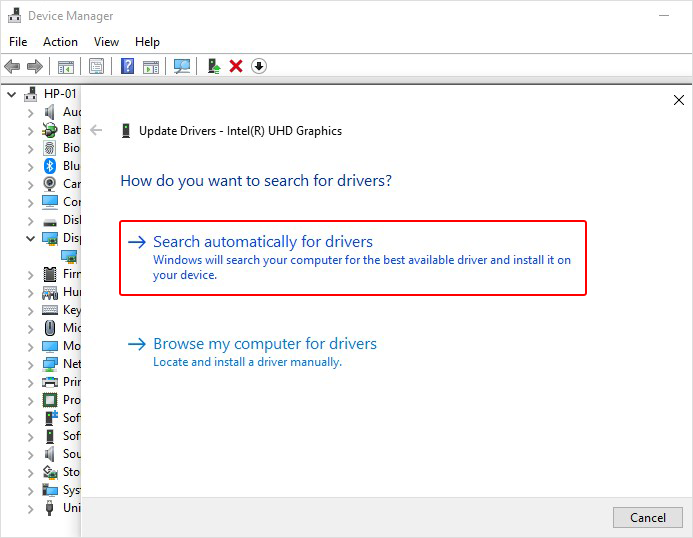
- On the next prompt, select Search automatically for drivers.
- Windows 10 will automatically start searching for the latest driver software.
- If Windows 10 can’t find you any latest driver, you can uninstall the buggy one.
- After that, reinstall the compatible device driver by visiting the device manufacturer’s website or installing Windows Update.
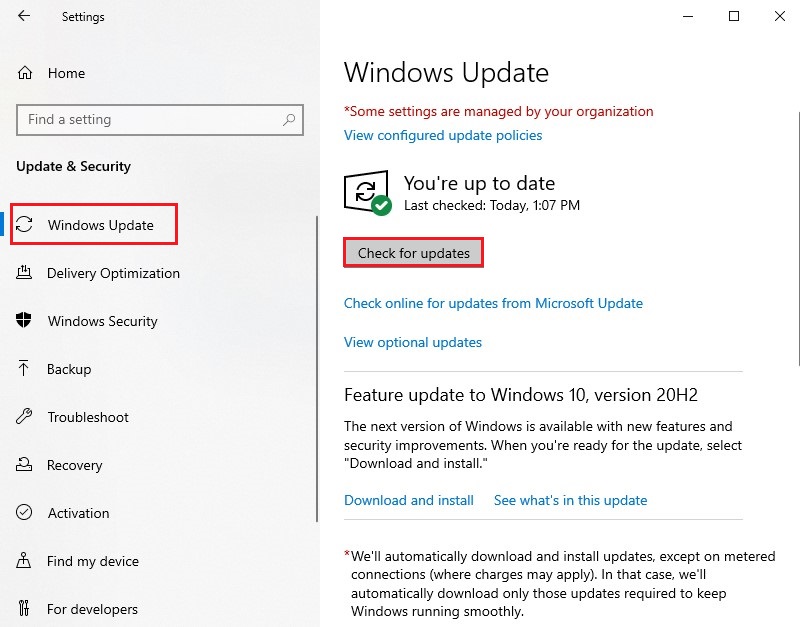
- To install latest Windows update, follow System Settings > Update & Security > Windows Update > Check for updates.
- Finally, reboot your system and check if the Windows 10 APC Index Mismatch error is gone.
Method 2: Change RAM Frequency
Changing the RAM frequency may help you fix this error. However, it is a bit advanced solution, which requires technical skills and knowledge. If not done correctly, this solution may cause system instability, even severely damage it. Hence, we’d suggest you take an expert’s help. Else, if your motherboard can’t handle the current RAM frequency, remove any overclock settings. Alternatively, you can underclock your RAM to check if it matches your system frequency. Reboot your system and check if the APC_Index_Mismatch error is fixed.
Method 3: Disable Realtek HD Audio Manager from Startup Items
Some users have reported that the BSOD APC Index Mismatch error may be attributed to Realtek HD Audio Manager. You can try removing or disabling Realtek HD Audio Manager from the Startup items.
- Press Ctrl + Shift + Esc to open Task Manager.
- Navigate to the Startup tab and locate Realtek HD Audio Manager.
- Right-click on it and select Disable.
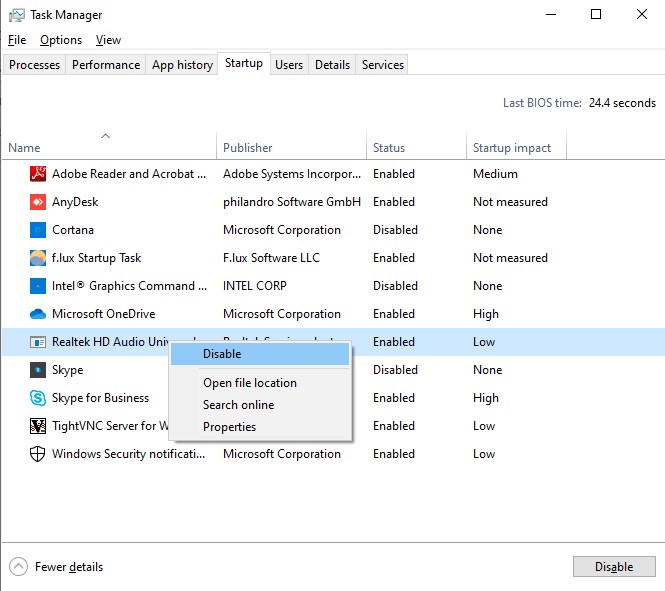
- Now, close the Task Manager and reboot your PC.
Method 4: Run an SFC Scan
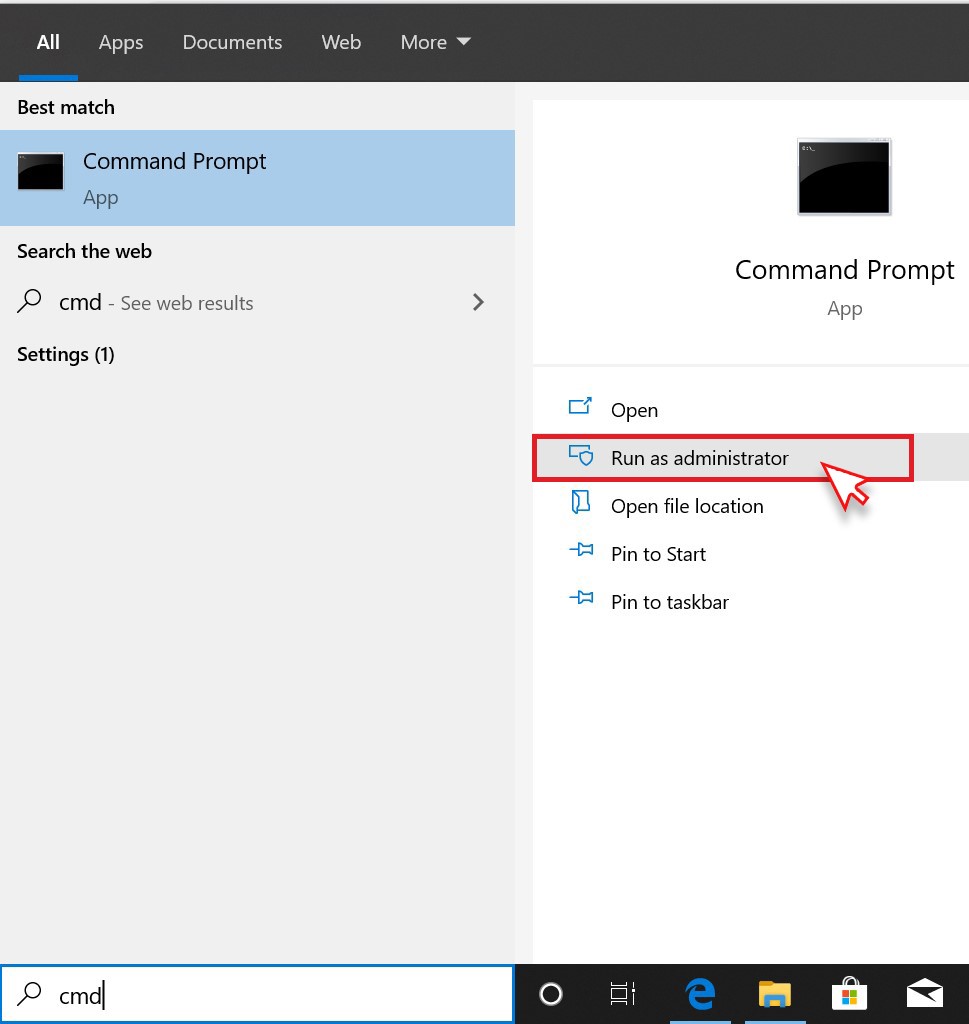
- In the Windows Search box, type cmd to open Command Prompt and Run it as administrator.
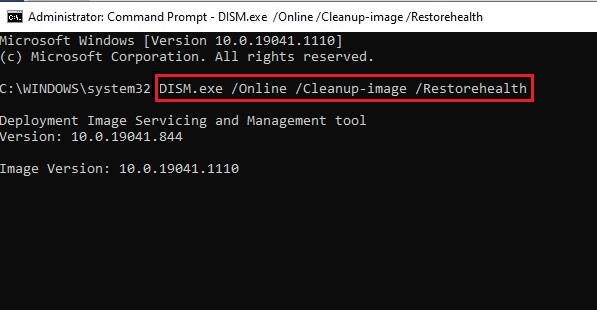
- Type DISM.exe /Online /Cleanup-image /Restorehealthin the command prompt window and hit Enter.
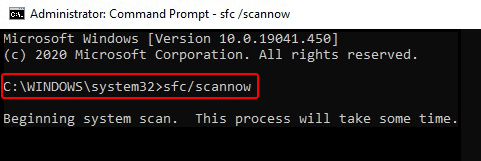
- Let the process run and wait till the system starts showing corrupted/damaged files.
- Afterward, type SFC/Scannow and press Enter.
- Wait until the process is done. Now, close the window and reboot your PC to check if the error is fixed.
Method 5: Uninstall problematic Windows update
- Open System Settings by pressing Windows + I, and navigate to Update & Security.
- Next, visit Windows Update > View Update History > Uninstall updates.
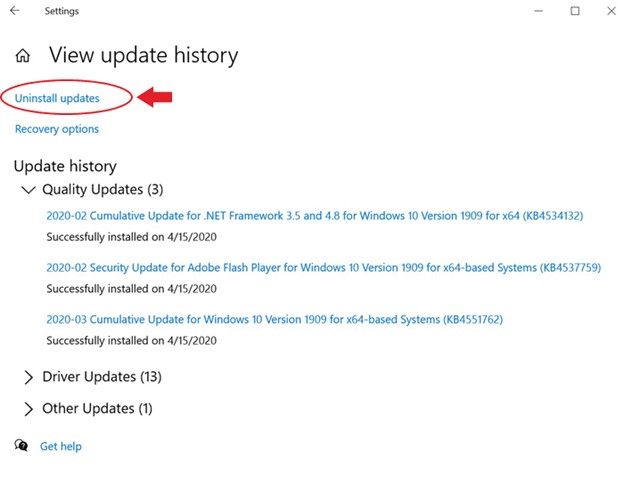
- Find out the recently installed Windows update that seems to be causing the issue.
- Right-click on the update and click Uninstall.
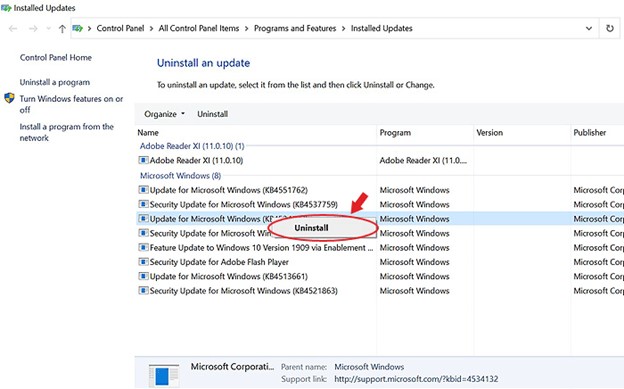
Finally, reboot your system normally and check if the error persists.
Method 6: Uninstall Problematic Third-Party Application/Software
- Open System Settings, go to Apps and then navigate to Apps & features.
- Now, choose the application/software you find problematic, click on it and choose to ‘Uninstall’ it.
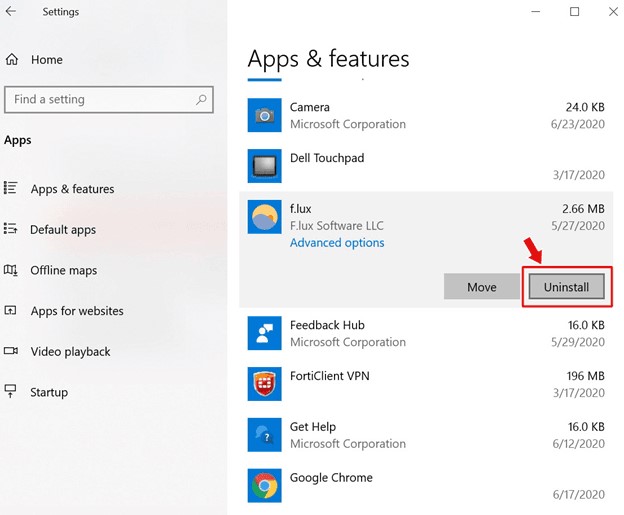
Once your app/software is uninstalled, reboot your PC.
Method 7: Disable Virtualization in BIOS
- Reboot your PC and press the BIOS key (usually Del/ F2/F12) to enter the BIOS setup.
- Once reached BIOS setup, locate and disable the Virtualization feature. (You can check your motherboard user manual to find this feature.
- Once you’re done disabling the virtualization in BIOS, reboot your system and check if the problem is solved.
If you can’t find the Virtualization feature in BIOS, skip this method. Don’t change anything forcefully; else, you may end up causing more damage to your Windows 10 PC and losing all data.
Don’t worry! You can use robust data recovery software, such as Stellar Data Recovery Professional. It is a DIY software that can efficiently restore your lost or deleted data from formatted, corrupted, crashed, or unbootable Windows systems and storage media devices, such as HDDs, SSDs, USB drives, etc.
Method 8: Run Hardware and Devices Troubleshooter
- Press Windows + I to open System Settings and follow Update & Security > Troubleshoot > Hardware and Devices.
- Click Run the troubleshooter given below the Hardware and Devices.
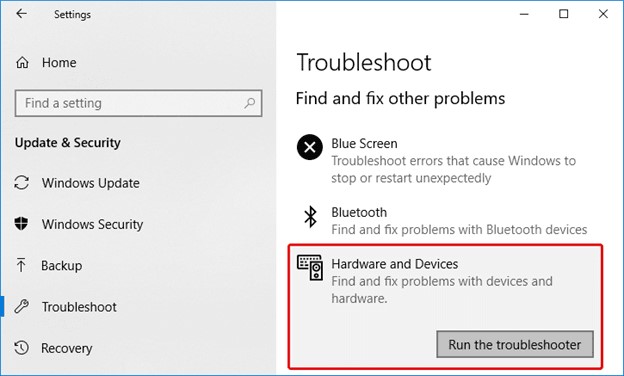
- Let the troubleshooter run and wait until the process is done.
- Once completed, reboot your PC and check if the error is gone.
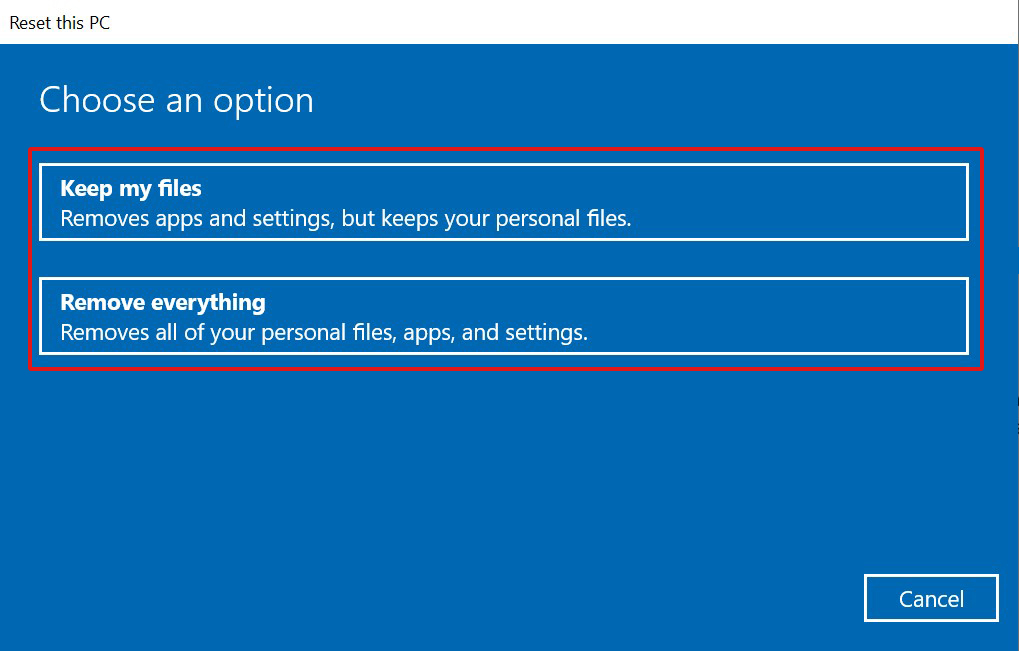
Method 9: Reset Windows 10
- Go to System Settings > Update & Security > Recovery.
- Locate Reset this PC and click Get Started.
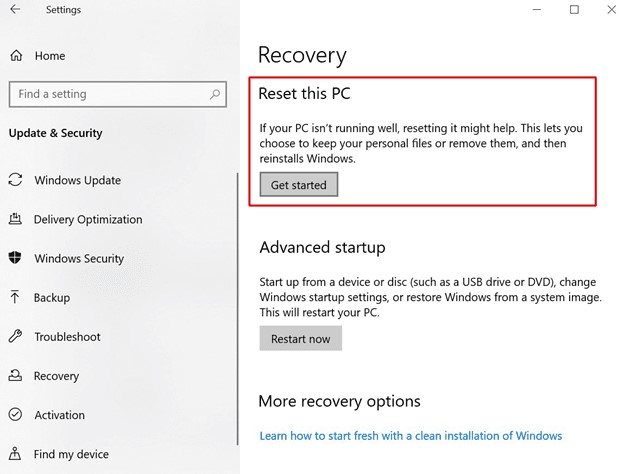
- On the next prompt, you’ll get to see two options – Keep my files and Remove everything.
- If you want to save your important data, choose ‘Keep my files, and if you’ve backed up your data or no longer need it, choose Remove everything.
- Afterward, choose Just remove your files > Next.
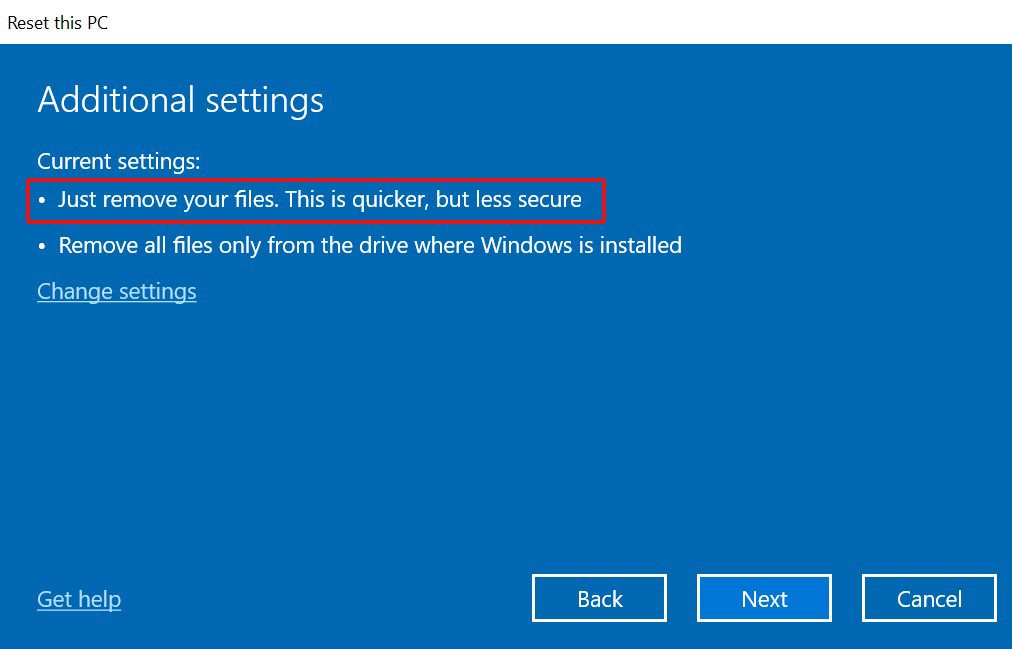
- A warning message will appear; click Next > Reset > Continue.

- Once done, reboot your system.
If you choose to remove everything while resetting Windows 10, which is usually recommended to make this process work, you will end up losing your data. However, you can use robust data recovery software to retrieve your lost data.
As far as APC Index Mismatch stop code is concerned, this blue screen error may be caused due to multiple reasons, such as incompatible RAM frequency, device drivers, damaged system files, hardware changes, etc. You may try out the troubleshooting methods shared in this blog. Hopefully, the fixes can help you solve such blue screen error on Windows 10.
Let us know about your experience!
Also Read: How to Fix PFN_LIST_CORRUPT Error in Windows 10?
Was this article helpful?