Keeping chat conversations and call history on your Windows PC or Mac isn’t a good idea, and that’s for many reasons. Most importantly because it poses a risk of data breach. Skype chats and call history may contain sensitive and confidential information. Anyone with access to your PC that you had used for Skype conversations can get unauthorized access to all your sensitive chat and call history.
However, you can overcome this potential data privacy risk by deleting the Skype conversation and call history, which is quite easy!
In this guide, you will learn how to delete Skype conversations and call history on Windows 10 and Mac systems. You will also learn about secure eraser method and why it is crucial to erase Skype history rather than just clearing or deleting it from your Windows 10 PC or a Mac system.
Steps to Delete Skype Conversation and Call History
These steps will help you clear Skype chat history. However, remember — deletion wouldn’t remove other sensitive data stored by Skype and other chat messenger app, including web browsers. Moreover, cleared and deleted history also remains recoverable. So, if you wish to permanently remove (i.e. erase) your Skype chats and call history, including other sensitive data stored by the app beyond recovery, skip to the secure erase method steps discussed in this post.
On your Windows 10 PC,
- Open Skype and sign in to your user account
- Go to Tools>Options
- Click on the Privacy Settings tab with a padlock icon in the left-pane
- Click ‘Clear History’ listed under the header ‘Keep history for.’
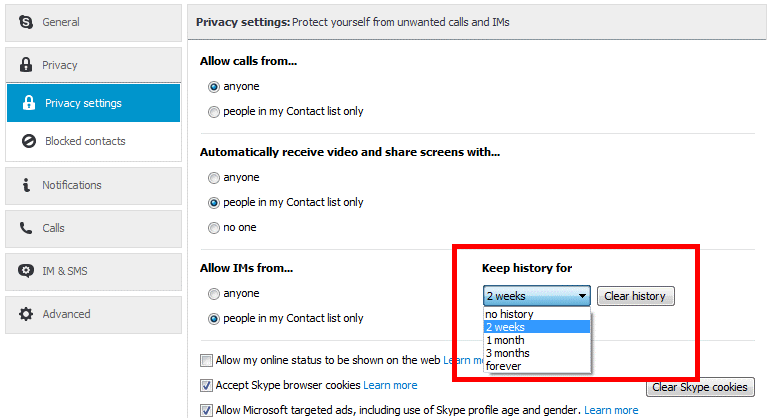
- This opens up a confirmation popup. Click on the ‘Delete’ button to finish deleting your history.
Steps to Remove chat and call history from Skype UWP app
- Navigate to the local Skype UWP profile folder located under C:\Program Files\WindowsApps\Microsoft.SkypeApp_….
- Find and manually delete the main.db database
- In case you get following error, contact system admin or change the user permissions.
NOTE: Next time you start Skype, the app may sync and download about 30 days of recent chat and call history from Skype Cloud servers on your PC.
However, the problem can be resolved by scheduling automatic eraser task. For that, you would need to use a file eraser tool, as discussed below in the secure erase method in this post.
On your Mac
- Open Skype and sign in, if not already, to your user account
- Click ‘Skype’ in the menu bar at the top-left of the screen and choose ‘Preferences’ from the drop-down menu
- Click on the ‘Privacy’ button
- Click ‘Delete All Chat History’
- Click ‘Delete All’ to confirm and finish Skype chat history deletion
Steps to Secure Erase Skype Conversation and Call History
Clearing chat history in Windows 10 or Mac only removes access to the data, but it does not wipe your sensitive chat and call history data from the disk. The information remains on the disk and can be recovered unless overwritten with new data.
Overwriting existing data on the drive completely destroys the information.
But to destroy it and that too beyond the scope of recovery, you would need a secure file eraser and privacy safeguarding tool such as Stellar File Eraser.
The software is available for both Mac and Windows 10 users. It features 17 international data eraser standards such as US DoD 5220.22-M (3 pass/7 passes), NATO, etc.
These secure eraser algorithms securely wipe all your sensitive files such as Skype conversation history and other sensitive data from your Windows or Mac system to an extent where no data recovery software or service, including forensic tools can recover the data.
Besides, you can schedule and automate the task of deleting the chat database stored by Skype UWP app based on system boot status or time.
The steps to securely erase Skype chats and call history with Stellar File Eraser are as follow,
On Windows PC,
- Close Skype app, if running
- Buy and Install Stellar File Eraser on your Windows or Mac system
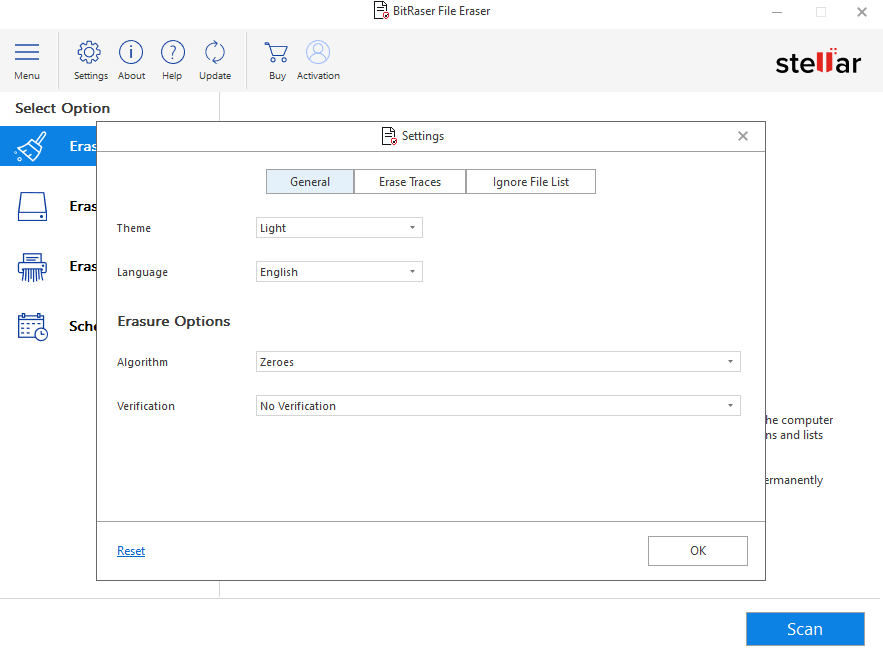
- Go to Setting and choose the Data Erasure algorithm and Verification Method from respective “General” Tab menus
- Click ‘Ok’ after this again click on Setting a d go to “Erase Traces” Tab
- Click ‘Application Traces’ and choose Skype Messenger app
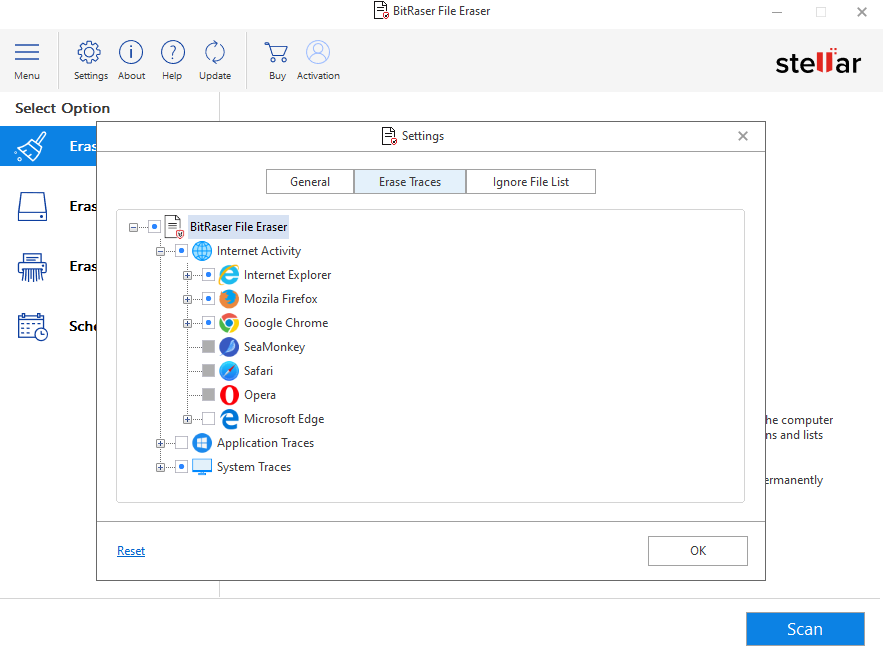
- Click ‘OK‘ to confirm the eraser task
Steps to Schedule Automatic Eraser Task to Wipe Skype UWP app’s Main.db File
- On Stellar File Eraser Software, click ‘Add Erasure List’ in left-pane
- Click ‘Add New List’
- Click ‘Add File’ and navigate to Skype UWP folder
- Choose main.db file and click ‘Open.’
- Click ‘Save List’ and enter a name such as ‘SkypeUWP.’
Tip: You can add multiple files and folder to this list or create more listings for automatic or one-click manual eraser tasks.
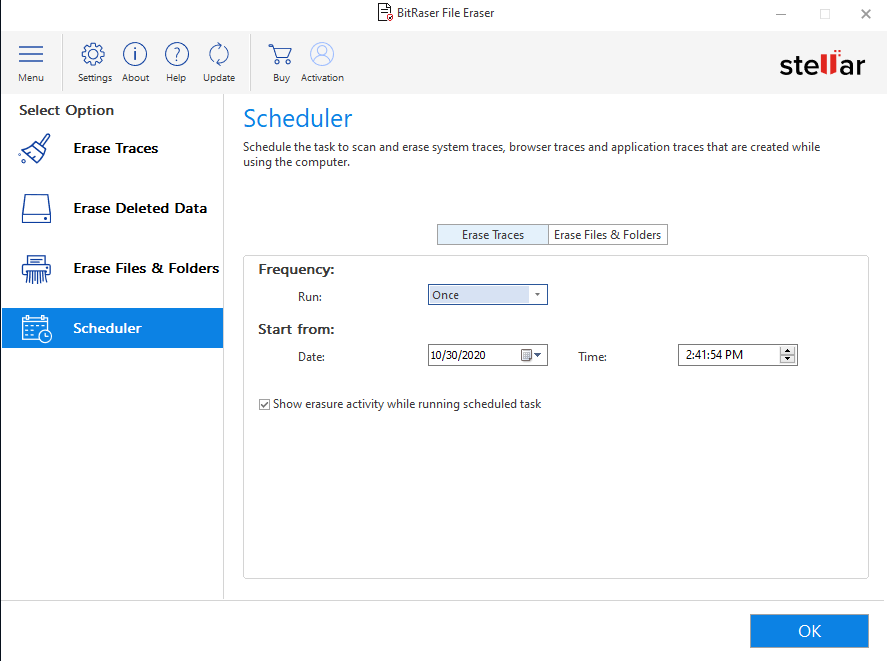
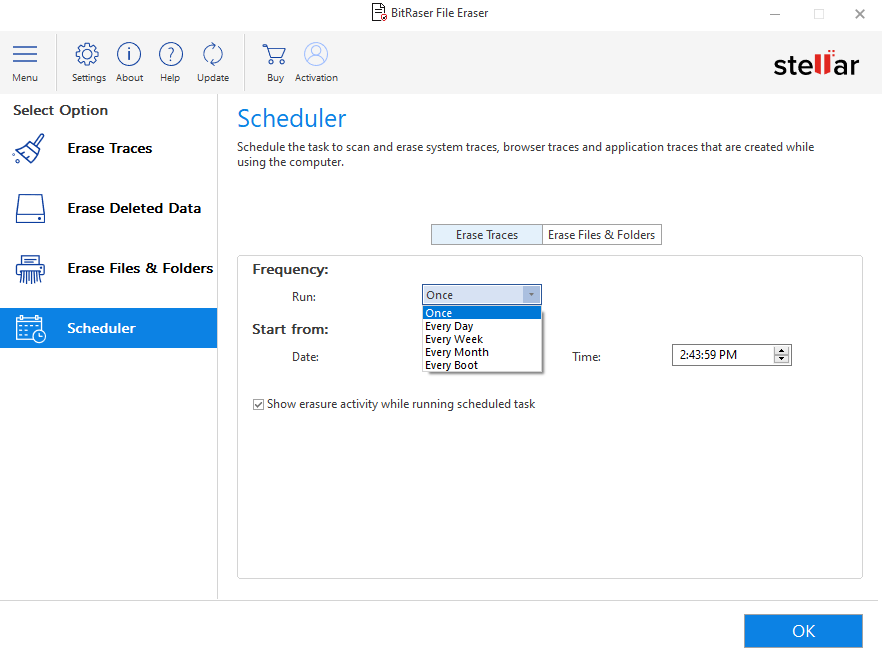
- Now click ‘Schedule’ tab
- Expand ‘Add Erasure List’ and choose ‘SkypeUWP’ list
Tip: You may also select and schedule Application Traces—Skype Chat Erasure Task here.
- Choose the Frequency, Start Date, and Time or boot event
- Choose Show mode, if you want to see the eraser task when it happens or select Hide Mode
- Select a data erasure standard and verification method from respective drop-downs
- Click ‘Apply’
The task will automatically run and securely erase the Skype UWP main.db chat database file based on the selected criteria.
You can schedule multiple tasks and view or delete all your scheduled tasks by clicking on ‘Scheduled Tasks’ button
On Mac systems,
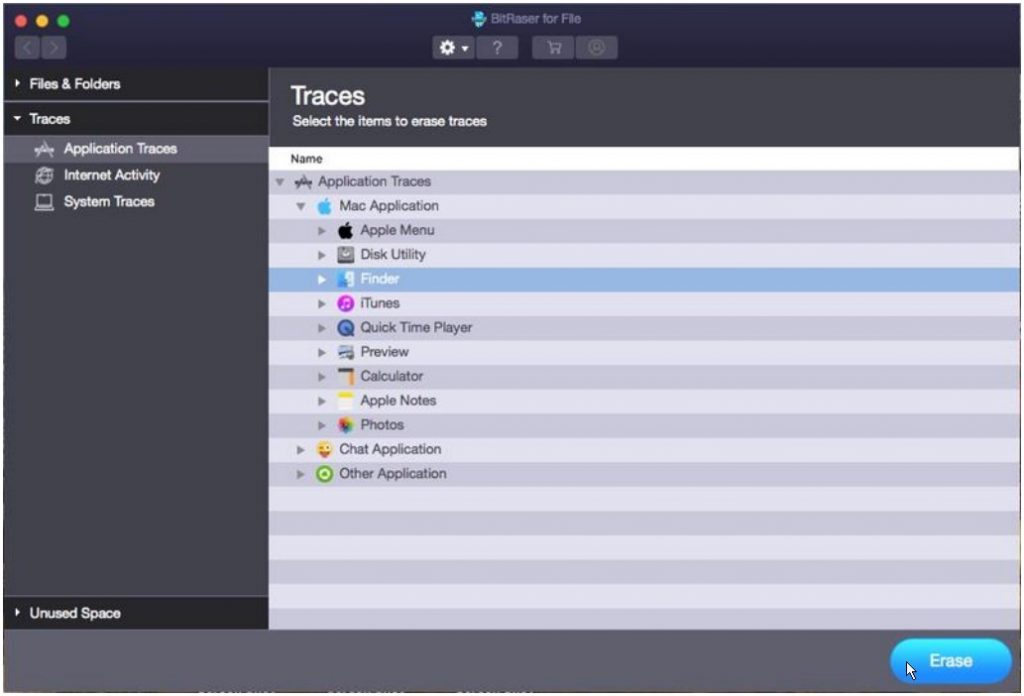
- Click ‘Application Traces’ in left-pane and choose the Skype Messenger from the list
- Click on the Preferences button with a gear icon at the top
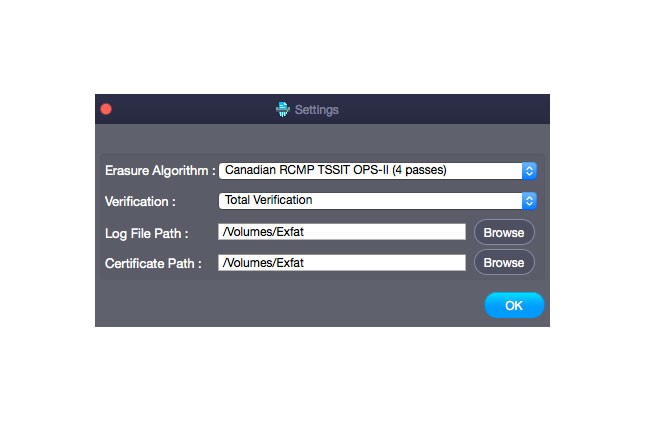
- Choose erasure algorithm and verification method for secure deletion.
- Click ‘OK’ and then click ‘Erase.’
- Click ‘Confirm Erasure’ button to start the erasure process. You can stop or abort the process by clicking on the Stop button
- After erasure, restart the system
You can also use Stellar File Eraser to secure erase internet activities data, system traces, and files from external Windows and Mac storage devices. You may further choose to secure wipe an entire drive volume or secure erase only the empty storage space on media devices to get rid of the previously deleted but recoverable files and folders.
Conclusion
Now that you know how to delete skype conversation and call history from a Windows PC and Mac, go ahead and get rid of all your sensitive chat messages and details. Make sure you always secure erase it and not just delete or clear the history.
For that, use a secure files eraser and a privacy-safeguarding tool such as Bitraser File Eraser. It features 17 international data erasure standards that you can use to get rid of all your sensitive information from your PC. It’s a handy tool, and in a few clicks, you can sanitize any file, folder, or drive volume. It also generates a certificate of erasure and erasure report when you search and erase data by using Bitraser File Eraser. The certificate of erasure and erasure report are tamper-proof and digitally signed documents that help meet regulatory compliance and guarantee data destruction beyond the scope of recovery.
Was this article helpful?