Table of Contents
1. The Need for Apple Disk Image File
2. Create DMG File Using Disk Utility
3. Create DMG File Using a Mac Data Recovery Software
4. Use an Image File on Mac
5. What if the DMG File itself is Deleted or Lost?
Apple disk image file is a particular file with the extension of .DMG that holds the structure and contents of a storage disk or volume. The image file can have multiple file system formats that exist on a storage medium. For instance, if you create disk image of a Mac drive with Boot Camp partition, the disk image file will have two file systems—APFS for macOS and NTFS for Windows.
To create a disk image file for an internal or external Mac device, you can use Disk Utility or a third-party data retrieval software. Also, when you open an image file, it mounts as a volume in Finder. Suppose you want to eject a mounted Apple disk image, then drag and drop the drive icon to Trash. To delete a disk image file, trash the file or use Command + Delete hotkey.
The Need for Apple Disk Image File
Apple disk image file is immensely helpful in creating a clone or backup of a Mac drive or volume. The image file is easy to store and quick to share through the Internet. Further, the image file can be encrypted for added security. So, Mac software products are distributed over the Internet in the .DMG file format. Besides, the Disk image file can help recover data if the source drive is corrupt, damaged, or dead.
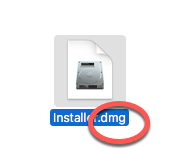 Image: Disk image file
You can create an Apple disk image file for your APFS or HFS storage drive or volume on a larger storage medium through the following methods.

Create DMG File Using Disk Utility
Disk Utility has an option to select a mounted storage drive, be it internal or external SSD or HDD, and create a disk image (.DMG) file to a location other than the source drive.
The steps to create a disk image of a drive using Disk Utility are as follows:
- Open Disk Utility and select the storage drive from the sidebar. Navigate to File > New Image > Image from “Drive Name.”
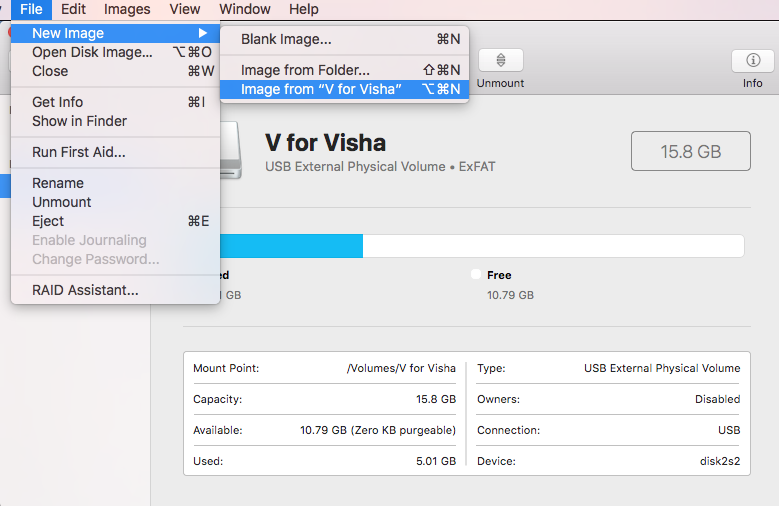 Image: Image from a drive
- Give a name to the Apple Disk Image file and provide a destination to save the file. Click Format, then choose the required option.
- If you want to limit this disk image file access, click Encryption to set a password for its access.
- Click Save to continue the imaging process. Finally, click Done once the imaging process is over.
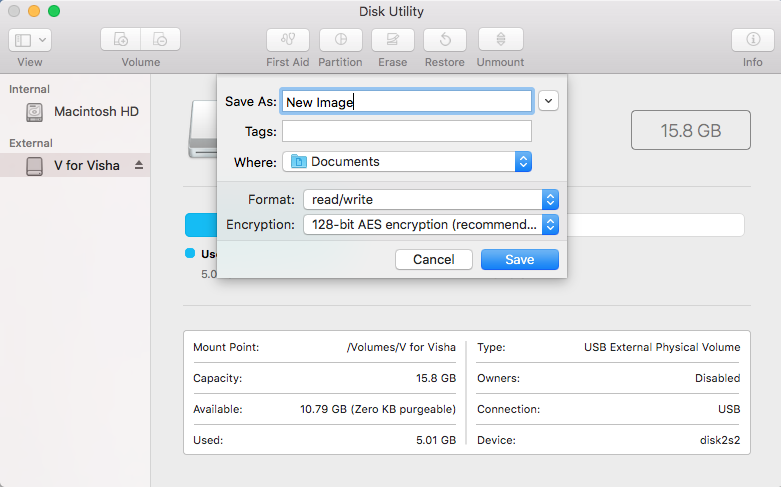 Image: Click Save to apply settings
Disk Utility mounts the image file on the sidebar of Finder and Desktop. You can access the stored content from the mounted disk image file.
Easily Create DMG File Using a Mac Data Recovery Software
You can create a disk image (.DMG) file of your built-in Mac storage drive/volume or an external storage device using a powerful Mac data recovery software. The tutorial video and sequential steps are as follows:
a) Install and launch Stellar Data Recovery Professional for Mac.
b) Click the icon present at the top of the home screen and select “Create Image.”
c) From the “Create Image” screen, select a drive or a volume to create an image file.
d) If you wish to create an image of the entire selected storage drive or volume, click Next.
e) Else, select the range to create an image, click the Advanced Settings.
- On the “Select Range to Create Image” screen, drag the sliders to define the image file’s starting and ending sectors.
- Click Close and then click Next.
f) In the “Creating Media Image to Save” dialog box, locate the destination you wish to save the image file.
g) In the “Save As” text box, type the disk image name, then click Save. Wait till the disk imaging process completes.
The DMG file created using the software can’t be mounted on macOS to access its data. But you can keep the file as a backup and use it to recover data at the time of data loss.
| *Stellar Data Recovery Professional for Mac has unlimited data recovery capability. Plus, you can create a bootable recovery drive to recover data from a crashed MacBook or iMac system. The professional version of the software is available for one year or a lifetime license. Also, you can avail a 30-day money-back guarantee for all the editions. |
Use an Image File on Mac
The .DMG file created using the professional Mac data recovery software helps recover data when the storage drive is severely corrupt, inaccessible, or damaged.
The steps to use the .DMG file for data recovery are as follows:
a) Launch the Stellar Data Recovery Professional for Mac software on your MacBook Pro, MacBook Air, Mac mini, or iMac.
b) Click the icon present at the top of the interface and select “Load Image.”
c) From the “Load Image” screen, select the .DMG file. Or else, click Add to add the image file.
d) Click Scan to start the recovery process using the image file.
e) Once the scan is over, preview and select the required files, then click Recover.
f) Specify the save location and click Save. Once the recovery is over, check the recovered data from the saved location.
What if the DMG File Itself is Deleted or Lost?
A DMG file is a file, so it can get deleted or turn corrupt. You can recover an Apple disk image file using Time Machine if you have a backup of your Mac. Or else, use the above data recovery software to recover even your deleted apple disk image file on your Mac.
Conclusion
We hope the blog helped you understand Apple’s disk image (.DMG) file and how to use it on macOS. By implementing Disk Utility, you can generate a disk image file and open the automatically mounted image file from the saved location. On the contrary, using the third-party Mac data recovery software allows you to create a disk image file and use it to scan and recover lost, deleted, or inaccessible files.
Unlike Disk Utility, the software allows you to select the specific region of the drive for image creation. This method helps recover files from a storage drive that is too big. For instance, if your storage drive has a data storage capacity of 8 TB, you need to recover data in portions. Plus, you can use the software to load the image, scan, and preview files.
Was this article helpful?