HP laptops & computers come with a pre-installed Smart Disk Checker utility that monitors the health and performance of the system’s hard drive. It is a customized Power-On-Self-Test (POST) check that scans hardware for issues. This utility runs the SMART test whenever you turn on your system or bring it out of hibernate mode. If the utility finds any potential hardware or physical issues in the drive during the test, it may throw the SMART Hard Disk Error with ‘Hard Disk 1 (301) in the message with a black/blue screen.
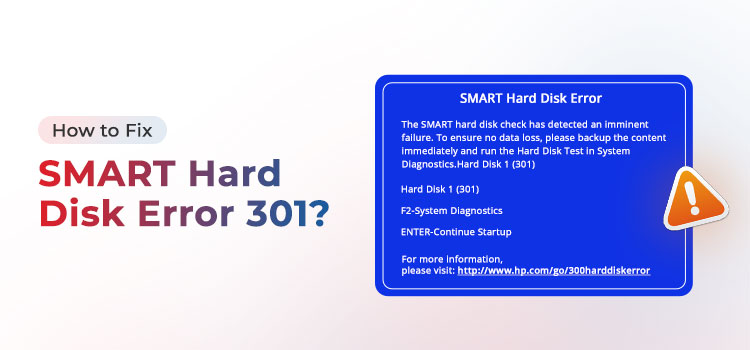
SMART Hard Disk Error 301 is a critical system error, indicating potential hard drive failure that might risk your system and data. Although you can recover data using professional data recovery software, it is crucial to act promptly to fix the error and avoid further damage to your system. Read on to learn the underlying causes and solutions to fix the error.
Why SMART Hard Disk Error 301 Occurs?
SMART Hard Disk Error 301 may occur for various reasons, such as:
Bad sectors:
Over time, a hard disk tends to develop bad blocks/sectors, which may trigger a SMART error. Physical damage to the disk can also cause bad sectors on the drive.
Failing components:
If hard disk components like the head or motor fail, the disk may not function correctly and throw SMART Hard Disk Error 301.
Overheating:
Constant hard disk overheating can cause damage to the components and trigger SMART errors.
Power surges:
Sudden power surges, improper system shutdowns, and power outages can damage hard disks and cause SMART errors.
General wear and tear:
Hard disk drives degrade over time due to general wear and tear.
Other reasons that may contribute to SMART Hard Disk error 301 are an outdated or misconfigured BIOS, a loose connection, application or driver conflicts, virus issues, and file corruption.
Things to do Before Fixing SMART Hard Disk Error 301
SMART Hard Disk 301 error indicates potential hard drive failure, which may even lead your system to become unbootable and make your data inaccessible. Hence, before fixing the problem, protect your data and hard drive from further damage. However, there are two scenarios:
If you can boot into PC:
If you can boot your system in Safe Mode, do the following things:
Back up your Drive Data
Immediately back up your data to prevent permanent data loss. You can use Windows backup utilities such as File History. To do so, follow Settings > Update & Security > Backup > Back up using File History. Add an external drive and back up all your essential data.
Clone Your Hard Disk
There is a chance that your hard drive may crash or fail during the backup process. Hence, it’s better to clone the disk to avoid data loss. Create a clone of your hard drive and perform the methods below to fix the SMART Hard Disk Error 301.
Methods to Solve SMART Hard Disk Error 301
Check if you can boot your PC in safe mode and then promptly follow the methods shared below to solve the error.
1. Change Boot Priority Order
Usually, systems are configured with the HDD as their boot drive. If your system has another hard drive (SSD or USB) installed other than the boot drive, you can change the boot priority order and make your system boot from another drive to solve the error. To do so, follow the given steps:
- If your system is on, turn it off.
- Start the system and simultaneously press the BIOS key (F2, 10, 12, Del) continuously until you enter the BIOS settings menu.
- Use the left/right arrow keys and go to the ‘Advanced’ tab.
- Next, use the up/down arrow key to the boot settings.
- Further, move the selection to ‘Boot Order.’
- Follow the on-screen instructions and move the hard disk to the top in the boot order.

- Press the F10 key to save changes and exit the BIOS.

- Alternatively, you can press the F9 key continuously after pressing the power button to enter the boot priority order. Use the up/down arrow key and select your hard drive to boot Windows. Click Yes to save the changes.
If Windows starts, log in to your system and immediately back up your data. If it doesn’t boot up, proceed to the following troubleshooting method.
2. Reset BIOS
To fix the SMART Hard Disk Error 301, restore or reset your BIOS to its default settings. If you can boot into your system, you can do this internally from your device’s BIOS or UEFI menu. If your system is unbootable, reset the BIOS by removing or replacing the CMOS battery. To do so, follow the given steps carefully.
Reset BIOS through BIOS or UEFI Menu
Unless you face startup issues with the system, resetting BIOS from the BIOS or UEFI menu during startup is the safest and most consistent method. Here’s how to do it:
- Turn on your system and hold down the shift key or BIOS key to enter the BIOS menu.
| Note: The BIOS key could be F2, F8, F10, F11, ESC, or DEL, depending on the model number and system manufacturer. Refer to your system’s manual for more details. |
- After this, you will enter the BIOS menu with advanced troubleshooting options.
- Press F9 to “Load Setup Defaults” or “Load Default Options.” You can also access Load Defaults by going into the Security section.
- The BIOS interface could differ depending on the model number and specifications. However, you can refer to the shortcut keys given below.
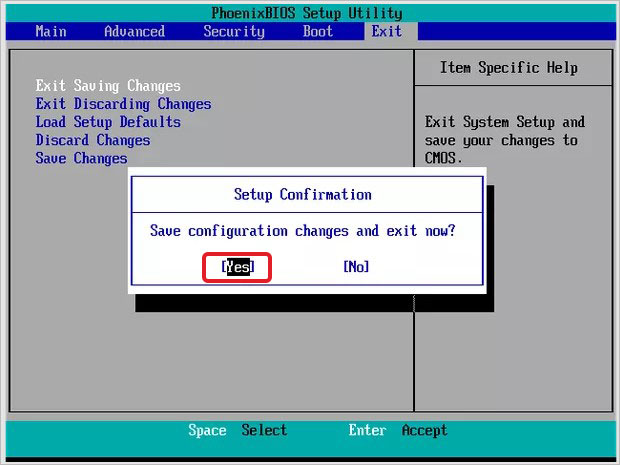
- Next, you’ll be prompted with a Yes or No dialog box. Select Yes to restore/reset BIOS settings.
- Then press F10 to Save the changes and then click Exit.
- Now, reboot your system to check if the error is gone and if you can boot into it.
If you can’t Boot Into Your PC:
Reset BIOS by Removing/Replacing CMOS Battery
If your system is unbootable, try resetting your BIOS by removing and replacing the CMOS battery. However, not every motherboard includes a CMOS battery, which provides the power supply so that the motherboard can save BIOS settings. Hence, check if your system has a CMOS battery; removing or replacing it will automatically reset your BIOS. To do so, follow the given steps:
- Turn off your laptop or PC’s power supply and remove all the connections.
- Ensure that you’re properly grounded to avoid damage to the system.
- Access your system’s interior, locate the motherboard, and recognize the CMOS battery. For help, refer to the user manual or research the specific model with the specifications.
- After removing the battery, wait 15-20 minutes and reattach the battery to your motherboard.
- If you see any physical damage to the battery, replace it and insert a new one.
Remember to be careful while removing the battery if it doesn’t detach easily. Now, check if you can boot your system without any error.
Recover Data From Unbootable Windows PC:
In the worst-case scenario, a SMART Hard Disk Error can lead your hard drive to crash and make your system unbootable. In that case, you can use your backup to recover your data. If the backup is unavailable, download Stellar Data Recovery Professional. Using the bootable media recovery feature, the software restores deleted or lost data from a crashed or unbootable Windows system. Here, you can create a bootable media, use it to boot into a non-bootable system with a failing hard drive and recover your data.
Read more: Create Windows 11 Bootable USB to recover data from an Unbootable system.
How to Prevent SMART Hard Disk Error 301?
A hard disk is prone to errors and corruption due to factors such as aging, bad sectors, and physical damage, which may cause SMART Hard Disk Error 301. While there is no assured way to prevent the error, you can follow the given tips to avoid Hard Disk failure and related errors:
- Regularly back up your hard disk to prevent data loss if your drive runs into an error.
- Use a surge protector (UPS) to protect your PC from sudden power outages or surges.
- Ensure proper ventilation and cooling for your computer/laptop to avoid overheating issues.
- Keep professional data recovery software handy to recover data in case of accidental data loss.
Conclusion
If Smart Disk Error 301 is not solved on time, the issues with your hard disk will remain unattended. Your hard drive may crash or fail, causing permanent data loss. Hence, whenever you encounter this error, you should back up your data or clone your hard disk (if possible). If the system has become unbootable due to this error, you must try to reset the BIOS by removing or replacing the CMOS battery.
If a backup or clone copy of your hard disk is unavailable, you can also use professional data recovery software.
Was this article helpful?