Over time, Macs can accumulate a lot of clutter, including cache and junk files that can take up valuable disk space. If you do not clear these files and the startup disk becomes full, the system may become sluggish or struggle to boot up.
Also, a Mac running on low storage space won’t let you install any latest macOS updates and security patches. Therefore, prioritize regularly checking your Mac for unnecessary items that consume disk space and get rid of them by performing regular cleanups.
Is your Mac experiencing lag due to memory-related issues? It’s time for some spring cleaning. Keep reading to discover some practical Mac clean-up tips and get it running like new.
How to Cleanup Your Mac’s Disk Like a Pro?
There are two ways to clean up your Mac:
- Utilizing built-in features
- Using disk cleanup software for Mac
Below, we will cover both of these in detail and list some of the most effective methods to perform a disk cleanup on your Mac so you never run out of space again.
Delete Temporary Files
Using multiple apps over time generates temporary files that get stored on your computer’s hard disk. Additionally, the macOS itself creates temporary files, such as system logs, error reports, etc., for its operation. Such files can pile up rapidly and occupy significant space in the internal storage. Consider deleting them to free up the much-needed disk space. Here’s how to do it:
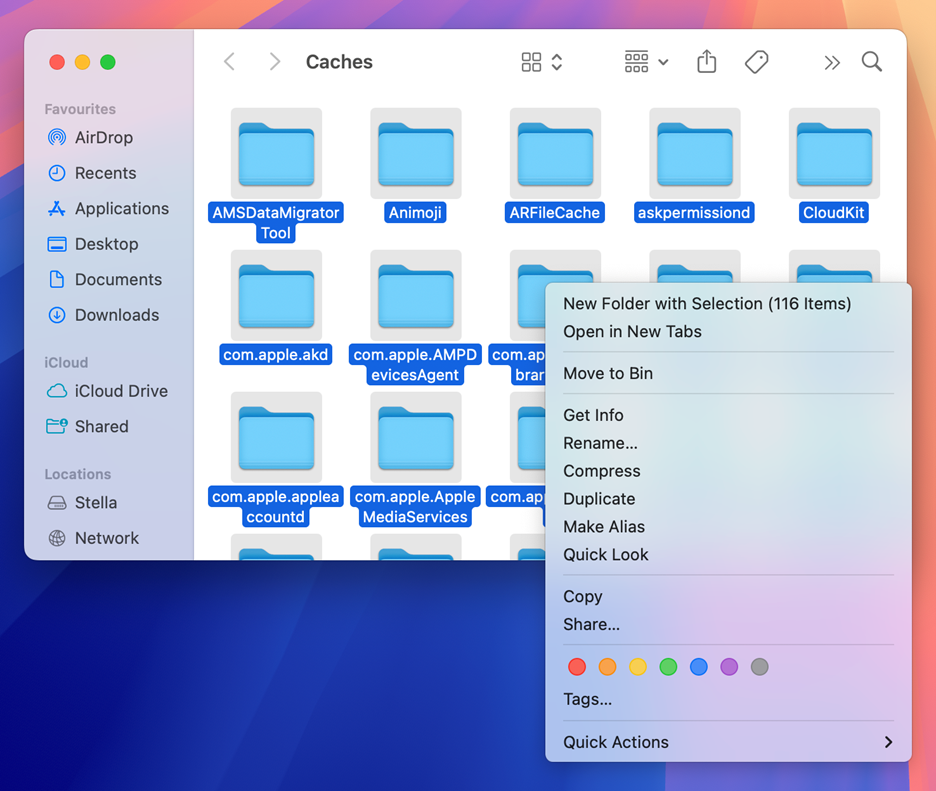
Step 1: Navigate to Finder > Go > Go to Folder.
Step 2: Type the following patch: ~/Library/Caches and press Return.

Step 3: Press Command + A to select all the temporary files.
Step 4: Double-tap the selected files and click Move to Bin.
Uninstall Applications No Longer in Use
Apps take up a significant amount of disk space. Hence, it’s recommended to keep only those which you frequently use. Removing unnecessary apps is a simple yet effective way to free up some space and speed up your Mac. Here’s how to do it:
Step 1: Navigate to Finder > Go > Applications.
Step 2: Select the apps you no longer use and double-tap on them.
Step 3: Click Move to Bin.
Delete Junk Files
Junk Files, such as log files, caches, deleted items, registry data, etc., are unnecessary items you don’t need anymore. Here’s how to get rid of them:
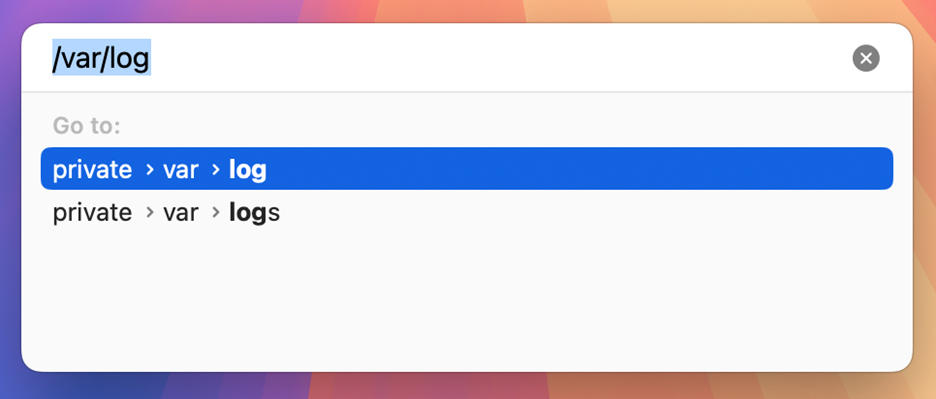
Step 1: Navigate to Finder > Go > Go to Folder.
Step 2: Type the following path: /var/log and press Return.
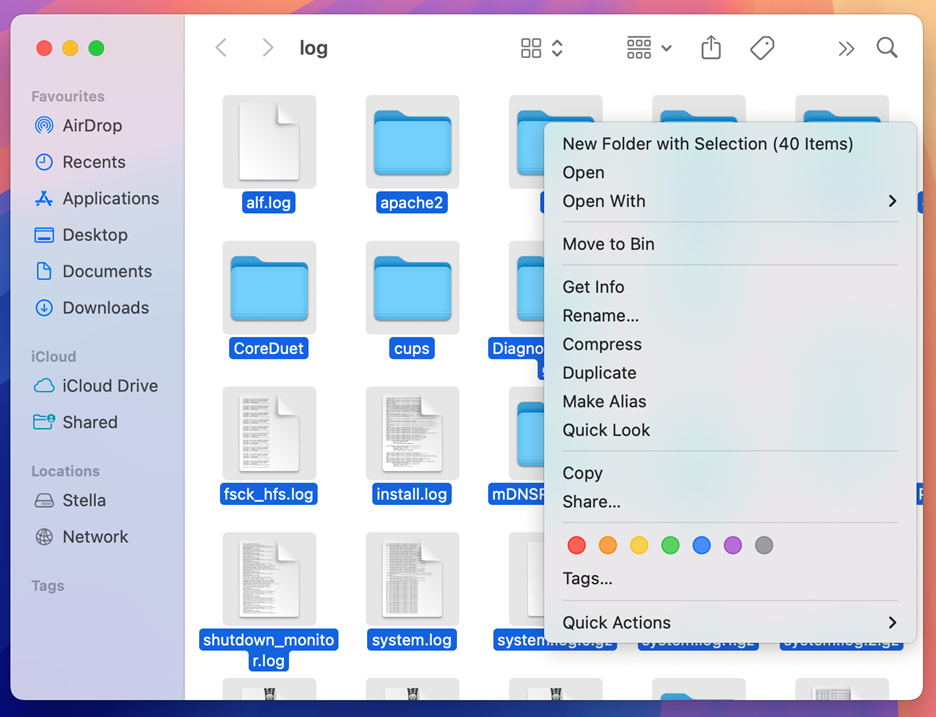
Step 3: Select the unnecessary log files, double-tap, and click Move to Bin.
Remove Startup and Login Items
Login items are services and apps that start automatically when you log into your account. While they can make user experience convenient, they also consume a lot of storage space, sometimes leading to performance issues. Follow the steps below to remove unnecessary login items:
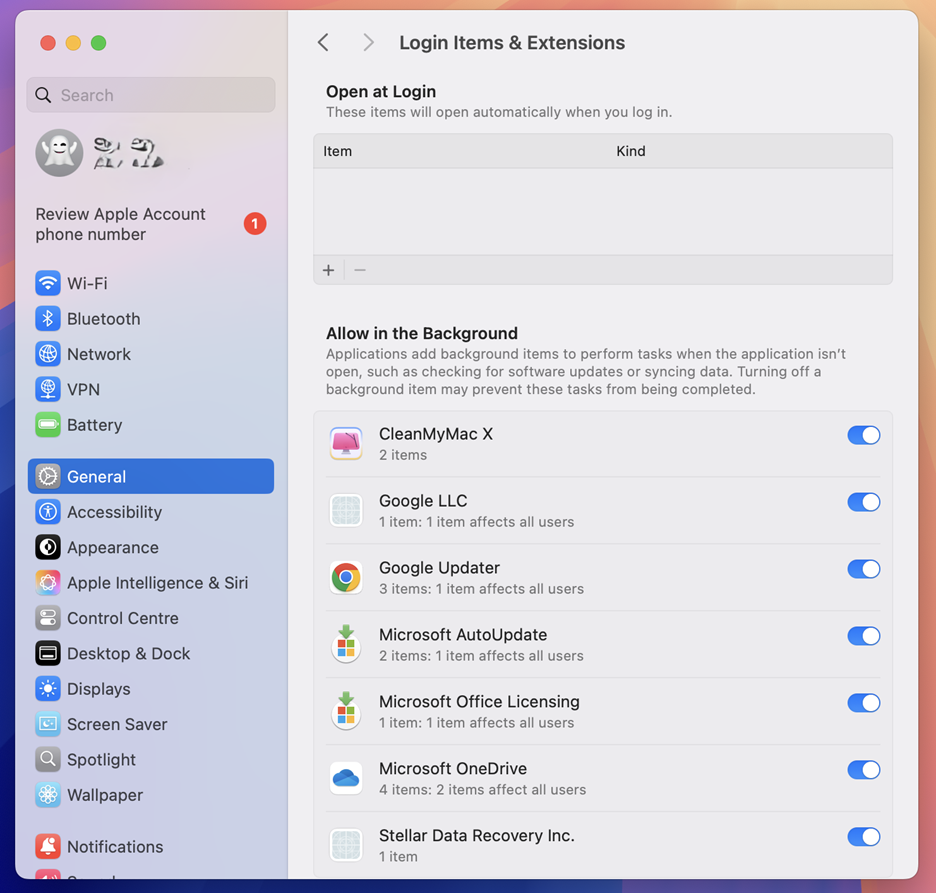
Step 1: Click the Apple logo and open System Settings.
Step 2: Click General in the left sidebar and select Login Items & Extensions.
Step 3: Review the displayed login items and disable the ones you don’t need.
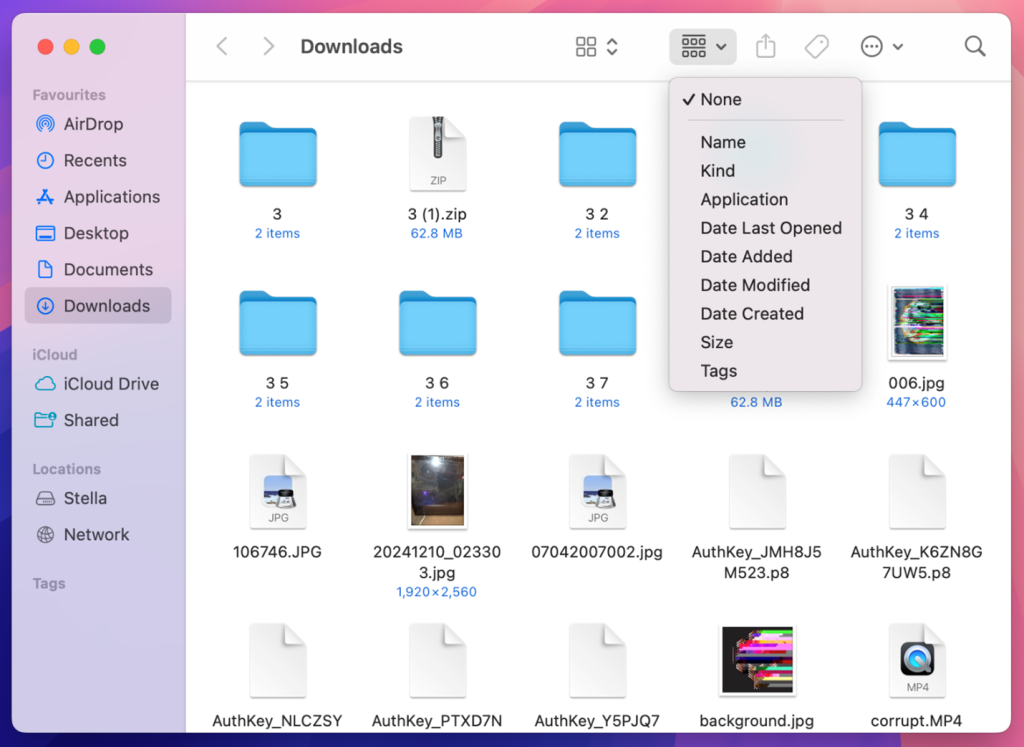
Remove Old Downloads
The Downloads folder on your Mac keeps files saved from your browser or other applications, such as documents, installers, and disk images. This folder can quickly get cluttered and take up a lot of disk space. It’s a good idea to go through your download folder occasionally and remove the items you don’t need. Here’s the rundown:
Step 1: Navigate to Finder > Go > Computer.
Step 2: Click Downloads in the left sidebar.
Step 3: Filter the items by Date Added or Size and delete the files you no longer need.
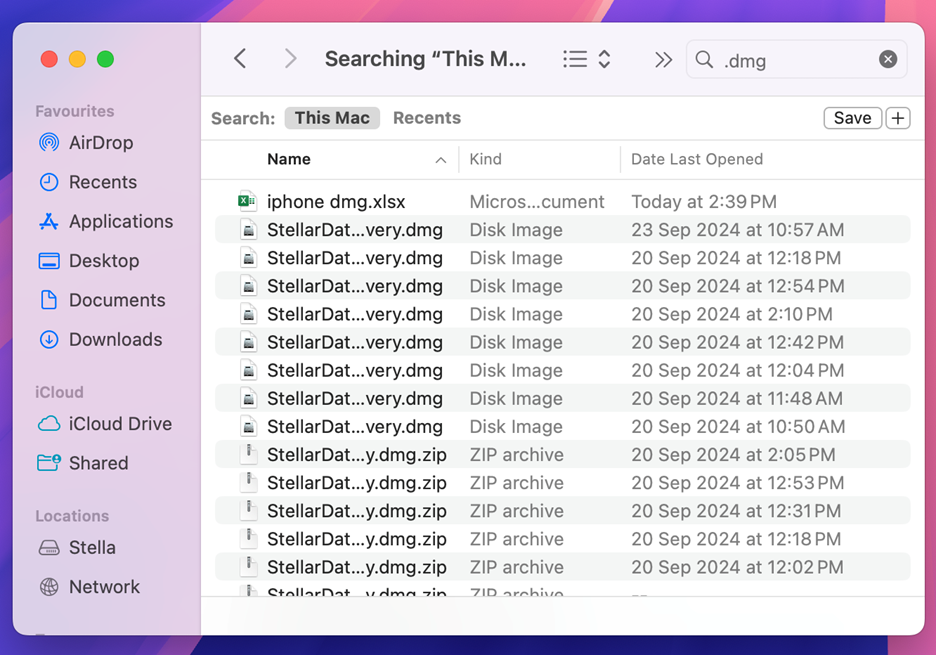
Remove Old DMG Files
When you install a new app on your Mac, the hard disk stores the corresponding DMG files. The installed apps don’t really need these files to run. Hence, you can delete them to save up disk space. Here’s how to delete DMG files on your Mac:
Step 1: Launch Finder and type .dmg in the search bar.
Step 2: Now you can select and delete the files with .dmg extension.
Empty the Trash Folder
This is important – if you’re not emptying the Trash folder on your Mac, the files don’t get cleared properly. After following the steps explained above, you must permanently delete items by emptying the Trash folder to free up the disk space. Here’s the rundown:
Step 1: Open Trash by clicking the Bin icon in the dock.
Step 2: Now you can either select and delete individual items or delete everything in one go by clicking Empty Bin.
Note: While trying to clean up the disk on your Mac, you might accidentally delete some important data. We recommend using a professional Mac data recovery software to reclaim your lost files.
Use a Specialized Disk Cleanup Software for Mac
Although using built-in utilities is a way to get rid of junk on your Mac, it can take up a lot of time and effort, and you might even end up deleting important files. Hence, we recommend using a software solution that does the job for you.
Stellar Data Recovery Professional for Mac is one such tool that comes with advanced features, such as SpeedUp Mac to help you efficiently manage storage and optimize the overall performance of your Mac.
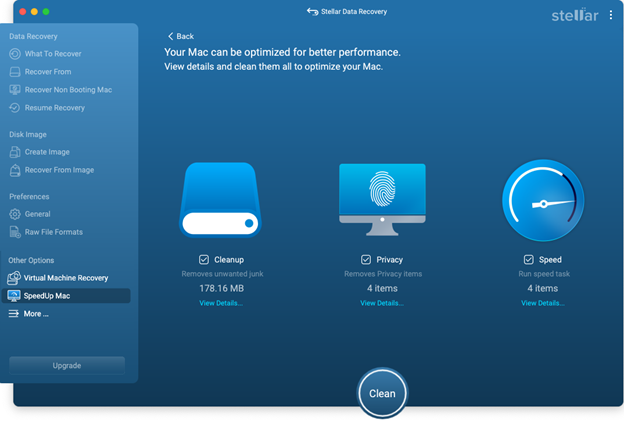
Optimize Your Mac
The “SpeedUp Mac” feature optimizes your Mac for better efficiency. It helps find and delete unnecessary files, such as logs, cache, trash, extension files, etc. Clearing out RAM and getting rid of DNS caches, optimizes your Mac for superior performance.
Manage Your Mac Storage
The “Duplicate Finder” and “Large Files Finder” features help you organize and manage storage. You can use the tool to search for large or duplicate files in a specific location, such as a folder or the entire disk containing all volumes. Once these files are listed, you can remove the unwanted ones with ease.
Bonus tip: Cleaning up your Mac is not a one-time thing; you should do it on a regular basis to get the best results. Plus, consider physically cleaning up your computer to keep it in best shape. Blow out the dust particles from the keyboard, and use a piece of fabric and alcohol-based spray to gently clean the surface and screen area.
How to clear Mac cache?
To clear cache on your Mac:
- Open Finder and use the Shift + Command + G shortcut to access Go to Folder.
- Input ~/Library/Cache and hit Return.
- Select the files you want to remove and delete them.
How to optimize Mac performance?
To optimize Mac performance:
- Remove unused applications.
- Reduce the number of apps in your Dock.
- Upgrade your memory.
- Keep your Mac up-to-date.
How do I clear all cookies and cache on my Mac?
To clear cookies and cache on your Mac:
- Open the Safari browser.
- Go to Safari > Settings and click Privacy.
- Click Manage Website Data.
- Select one or more websites, click Remove or Remove All to clear them.
Was this article helpful?