“I am trying to erase all my iPhone 14 data so I can exchange it to get an iPhone 15. However, every time, I keep getting a ‘Verification Failed’ error. What’s causing this, and how can I fix it?”
Erasing iPhone data before selling, exchanging, or giving away your device is crucial to safeguard your personal data. This prevents your device data from any potential identity theft, making it inaccessible to anyone.
However, Apple users often complain about witnessing the error ‘Verification failed when trying to erase iPhone.’ This error makes it impossible for users to erase their iPhone data. The ‘Verification failed error’ can occur due to a slow or poor internet connection, server-related problems or incorrect Apple ID credentials.
Nevertheless, you can fix the ‘Verification Failed iPhone erase’ error either by resetting the Network Setting or force rebooting your iPhone and more. Read this blog for a detailed guide to each of these steps.
Why Verification Fails When Trying To Erase iPhone?
There can be many reasons for error ‘verification failed when trying to erase the iPhone.’ Some common causes are:
- Poor internet connection.
- Entered incorrect Apple ID credentials.
- Apple ID servers are down.
How to Fix Erase iPhone Verification Failed Issue?
We have mentioned several ways to fix the issue: ‘Verification failed when trying to erase iPhone.’ Follow these solutions one by one to see if the issue at hand is fixed.
Check Your Internet Connection
While trying to erase the iPhone, if verification fails, it can be due to a poor or unstable internet connection. Try to refresh the network connection in the Settings app by putting the iPhone in Airplane Mode and then turning it off.
Check Apple ID’s Status
iPhone won’t erase if it cannot connect to the Apple ID server or when the server is down. Check the Apple ID server status from the Apple System Status page.
Turn Off Find My iPhone
If Find My iPhone is turned on, it will enable the Activation Lock of your device. This means you need to enter your Apple ID and password to erase your iPhone via Erase All Content and Settings options. However, people often enter incorrect credentials when trying to erase their iPhones, and end up getting a verification-failed error.
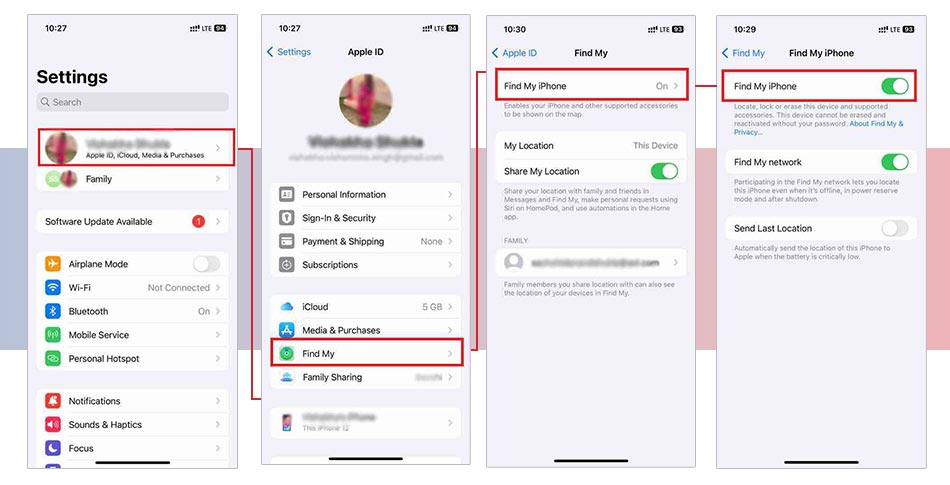
You can try to turn off the Find My iPhone service on your device to disable the activation lock. Here’s how to do it:
- On your iPhone, go to Settings.
- Tap on your profile at the top.
- Scroll down and go to Find My.
- Next, tap on Find My iPhone and toggle off the switch for Find My iPhone.
Sign out of Apple ID
You can even try to sign out of your Apple ID to erase your iPhone without going through the verification process. When you sign out of Apple ID, any data stored in iCloud will remain available in iCloud; however, this data will be removed from your device unless you have a copy of it on the iPhone.
Restart or Force Reset the iPhone.
Turning off your iPhone and back on helps resolve most of the issues. So, if verification fails when trying to erase your iPhone, restart your iPhone.
Hold the Power button to restart your iPhone to get the Power Slider. Then, slide it to turn off your device. Afterward, restart it and try to erase your iPhone again.
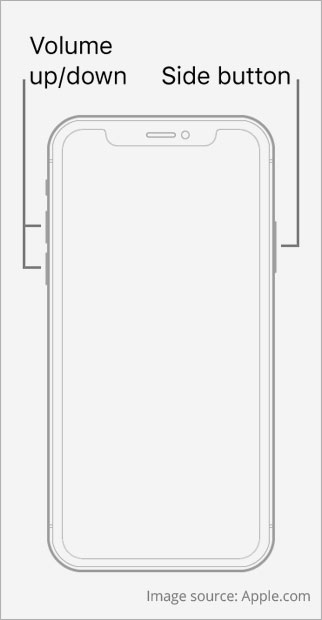
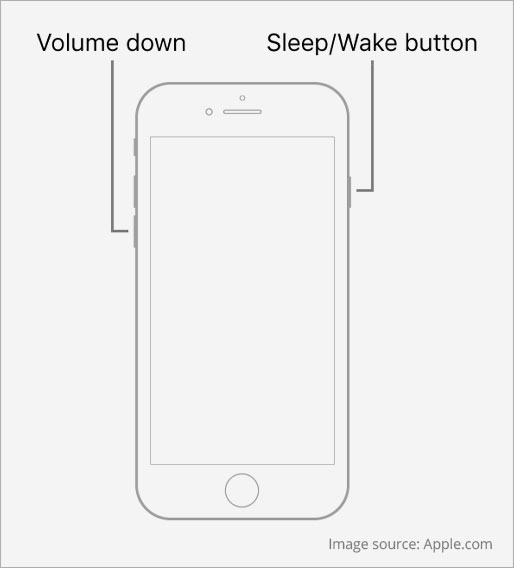
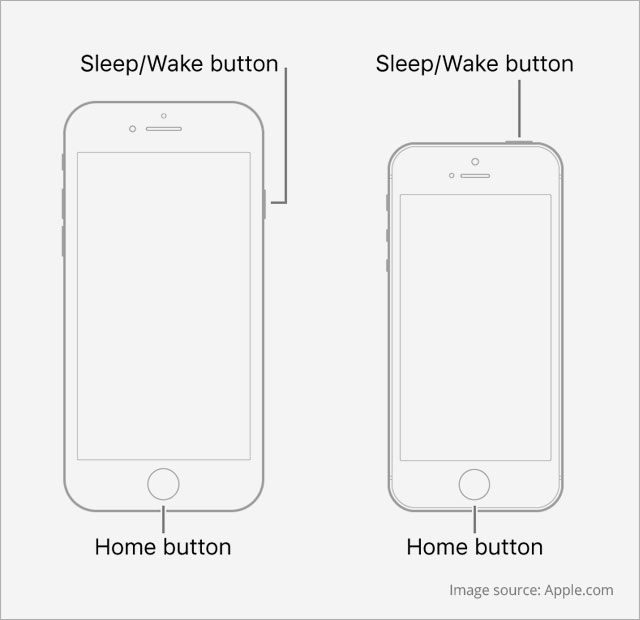
Still getting error verification failed during the iPhone erase process, then go for a hard reset or force restart. Here’s how to do it-
- iPhone 8 and newer models: Press and release the following button in sequence: Volume up and Volume down button. Next, press the side button until the Apple logo appears.
- iPhone 7 and 7 Plus: Press the power and Volume Down buttons till the iPhone screen turns black and the Apple logo appears.
- iPhone SE 2, iPhone 6s, and older models: Long press the Power and Home buttons, and wait until the screen goes black and the Apple logo appears.
Reset Network Settings
Error’ Verification failed when trying to erase iPhone’ can also occur if you have accidentally made changes in your iPhone settings. In such a scenario, you need to Reset the Network Settings of your device. Here is how to do it:
- On iPhone, go to Settings and tap on General.
- Scroll down and click on Transfer or Reset iPhone.
- Then tap Reset and choose Reset Network Settings.

- Enter your iPhone passcode to confirm the reset.
- Once the reset is done, try erasing your iPhone again.
After trying the above troubleshooting methods, if you still get the error verification failed error when trying to erase iPhone, use a professional iPhone Erasure tool. Stellar Eraser for iPhone is a secure and professional tool to erase iPhone beyond the scope of recovery.
This tool protects your privacy by permanently deleting photos, messages, videos, contacts, and other sensitive data from the iPhone. Stellar Eraser for iPhone is the best data erasure tool for all iOS devices before you sell, give away, exchange, or recycle them.
This iPhone erasure tool is compatible with the latest series of iPhone 15, 14, 13, 12, and below. In addition, it is compatible with the latest iOS 17 and below. This tool also erases content from all variants of iPad and iPod touch.
Note:Take a backup of your iPhone data on Cloud service or any other external drive before erasing it.
Steps to Erase iPhone using Stellar Eraser for iPhone software
- Download, install, and launch Stellar Eraser for iPhone, Mac, or Windows PC.
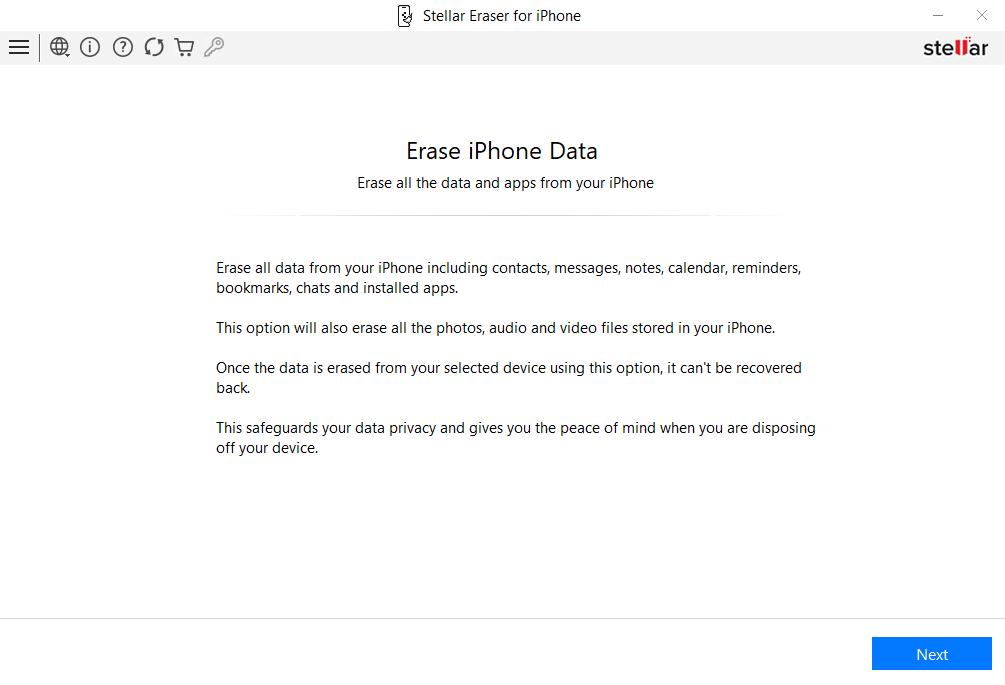
- On the Erase iPhone Data screen, click Next.
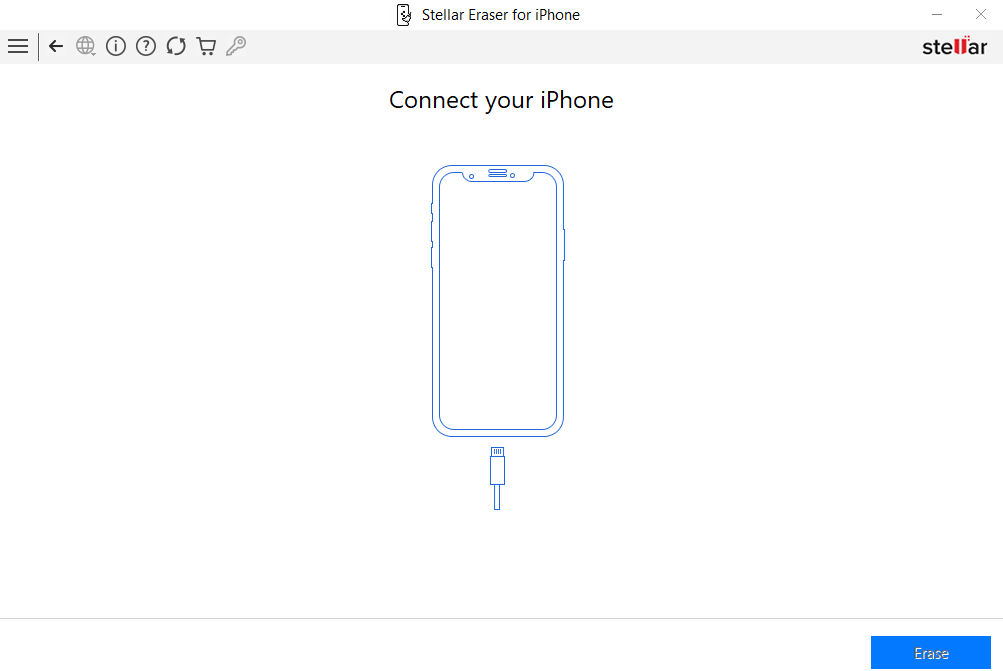
- Connect your iPhone to the computer using a USB cable when prompted.
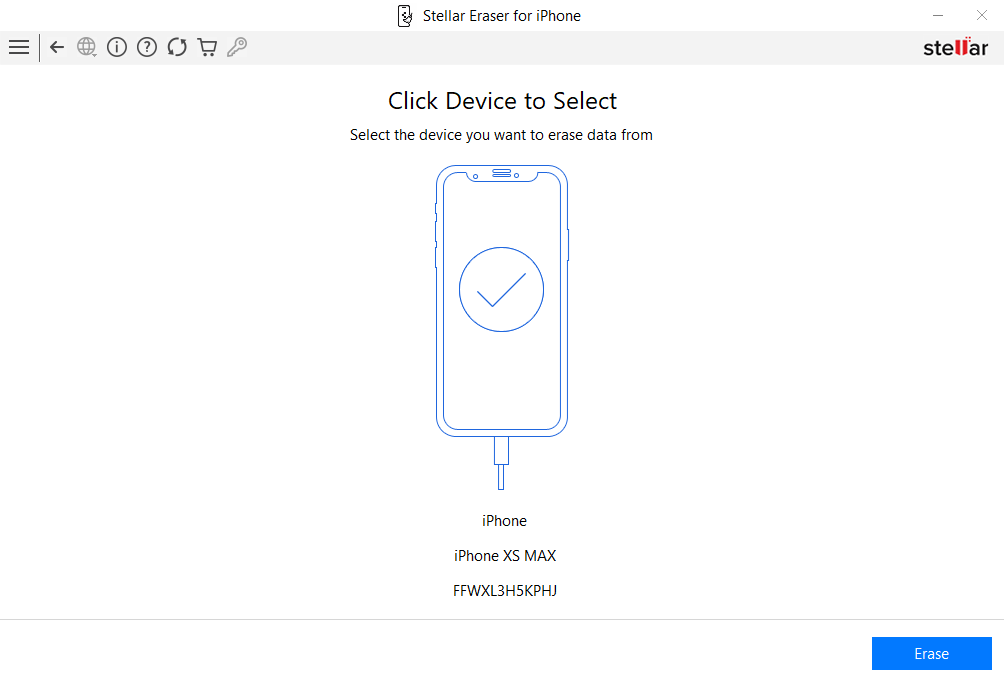
- Select the desired device from ‘Click Device to Select’ screen and click Erase.
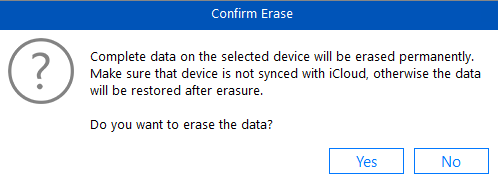
- When the ‘Confirm Erase’ pop-up appears, click Yes to start the erasure process.
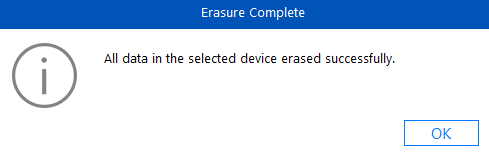
- Once the data stored on the iPhone is successfully erased. Click OK.
Conclusion
When the iPhone doesn’t erase due to a verification failed error, check internet connectivity or restart/force reboot your device to resolve this issue. You can also disable the Find My iPhone service or Reset the Network Settings to resolve this problem.
However, if the manual methods don’t help fix the error’ verification failed when trying to erase the iPhone,’ use the best iPhone erasure software – Stellar Eraser for iPhone to do the task. This secure and easy-to-use software can erase your iPhone and even iPad easily beyond the scope of recovery.
FAQ
1. How do I reset my iPhone without an Apple ID password?
You can put your iPhone into Recovery Mode or DFU Mode to reset the iPhone without an Apple ID password. You can even use Stellar Eraser for iPhone to reset your device without an Apple credential.
2. How to remotely erase iPhone data?
Use the ‘Find My’ app on iCloud or Microsoft Exchange ActiveSync to erase iPhone data remotely.
Was this article helpful?