Microsoft Exchange Online or Microsoft 365 is a powerful cloud-based email and collaboration platform that businesses rely on for their communication needs. However, many organizations use Microsoft Outlook and still have legacy data stored in PST (Personal Storage Table) files.
There are multiple reasons to migrate or import PST into Exchange Online, such as:
- Migrating the user mailboxes from the on-premises mailbox server to Microsoft 365.
- Consolidating all email data into Exchange Online. This allows better management, security, and accessibility.
- By importing PST files, organizations can centralize their data, making it easier to search, back up, and recover.
- Exchange Online offers advanced features like eDiscovery and data loss prevention, which can only be fully utilized when all data is stored within the platform.
Methods to Import PST into Exchange Online
There are four different ways to import PST files into Exchange Online. These includes:
- Network Upload
- Drive Shipping
- Outlook Import Export Wizard
- Third Party Migration Tool
1. Network Upload Method
This method involves uploading the PST files directly to Office 365 over the network and involves multiple steps.
To use the method,
- You must have the Import Export and Mail Recipients roles assigned to the user account.
- You will also require the Azure AzCopy tool.
Step 1: Preparing for the Import Process
Before starting the import process, a few preparations are necessary.
1. Ensure that your Exchange Online environment is properly configured and the role assigned.
- Log in to the Exchange Admin Center and navigate to Roles > Admin Roles.
- Search and click ‘import-export.’
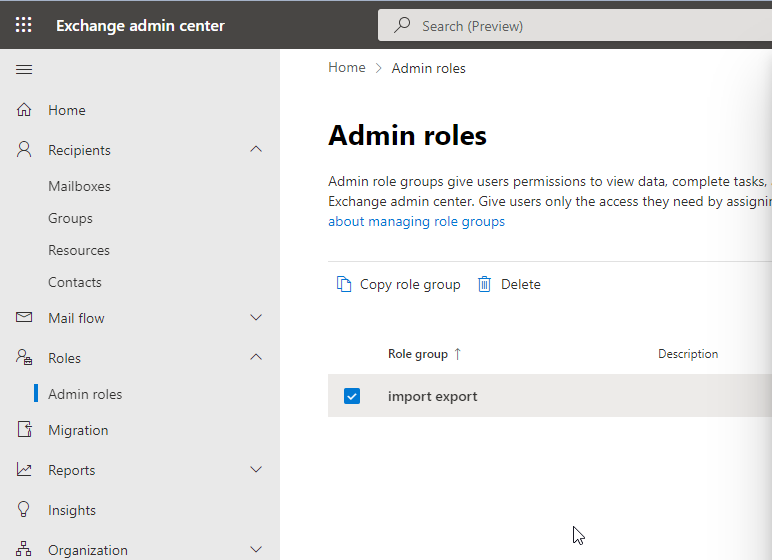
- Click the +Add button under the Assigned tab.
- Choose your user account to assign the role of importing the Outlook PST file.
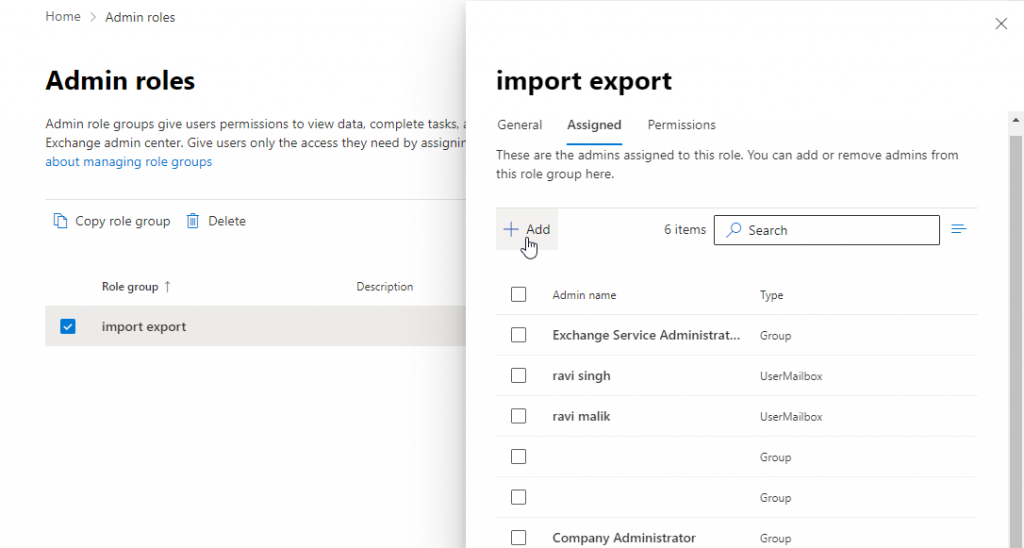
- Search and select users and click Add.
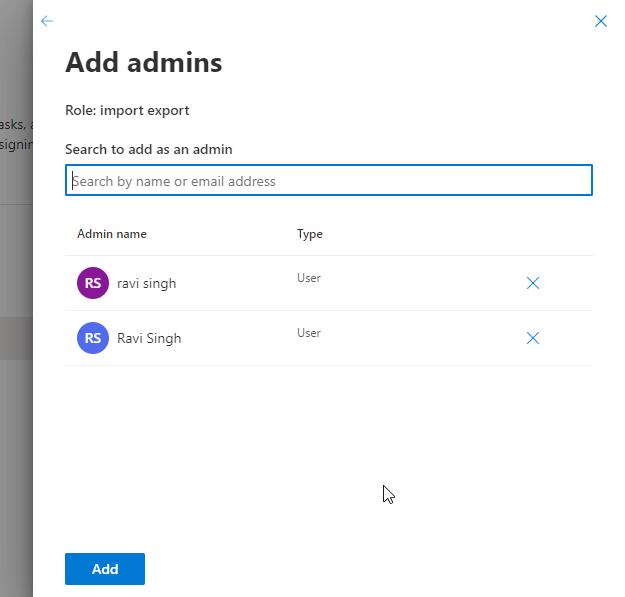
- This will assign the Mailbox Import Export role required for importing PST into Exchange Online.
2. Assess the size and number of PST files you need to import to determine the storage and time required for the process.
3. Ensure a reliable and secure network connection with good bandwidth to avoid any interruptions during the PST upload and import.
4. Copy all the PST files you need to import into Exchange Online into a folder.
Step 2: Creating a New PST Import Job in Exchange Online
To begin the PST import process, create a new PST Import job in Exchange Online. The steps are as follows:
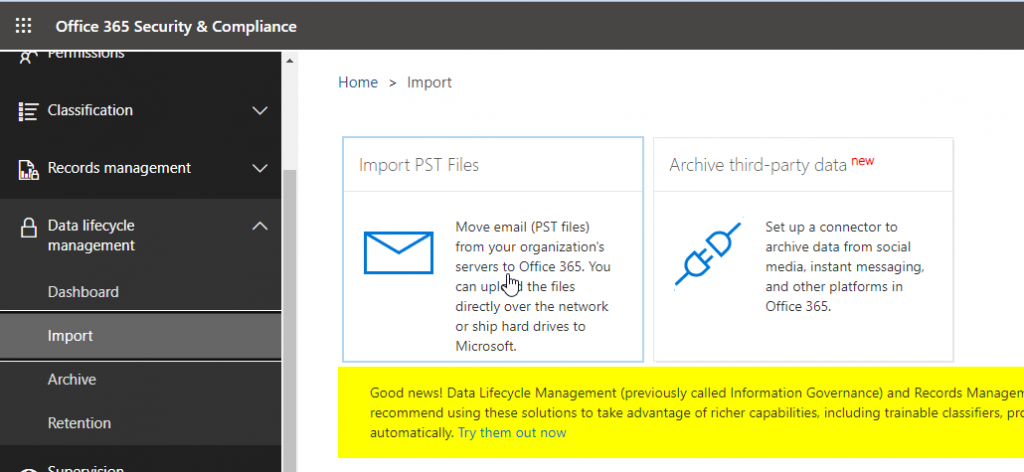
- Open the Exchange Online homepage and click Data lifecycle management > Import.
- Click Import PST Files.
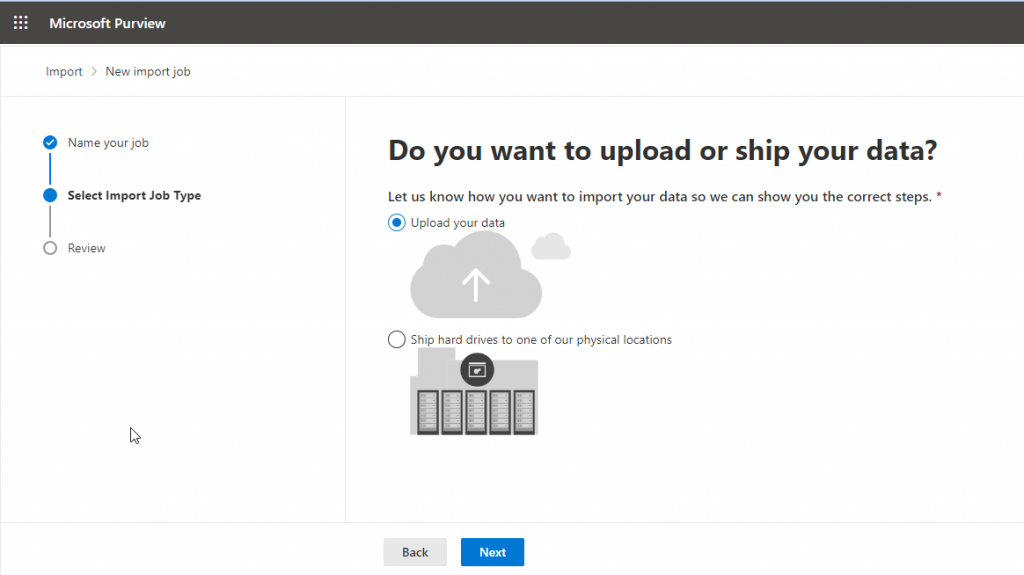
- Click + New import job and type the job name. Click Next.
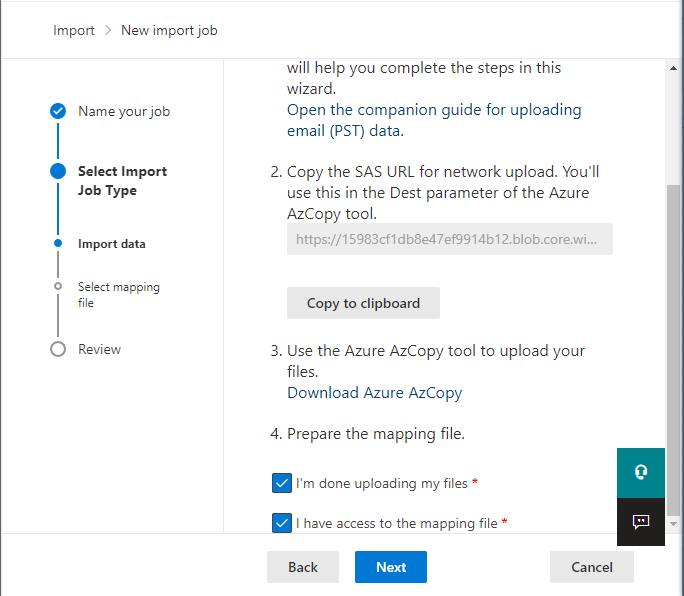
- Select Upload your data in Select Import Job Type > Next.
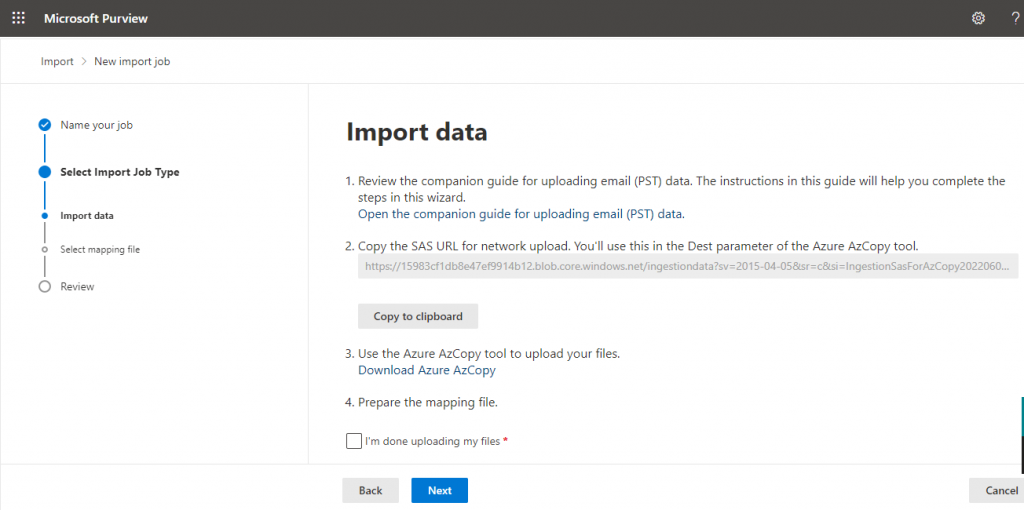
- Click Show network upload SAS URL and then click Copy to clipboard.
- Next, select Download Azure AzCopy. This will download the Azure AzCopy tool, which is available for Windows, Linux, and macOS.
Step 3: Upload the PST Files to Azure Storage
- After downloading the Azure AzCopy tool, extract it in any folder, preferably on the Desktop.
- Copy the folder containing all the PST files on the Desktop.
- Open Command Prompt and use the ‘cd’ command to navigate to the extracted folder on the Desktop where the azcopy.exe file is located.
- Run the below command to start uploading the PST files to Azure Storage.
Azcopy copy “pathToFolder/ContainingPST” “SAS URL” --recursive=true
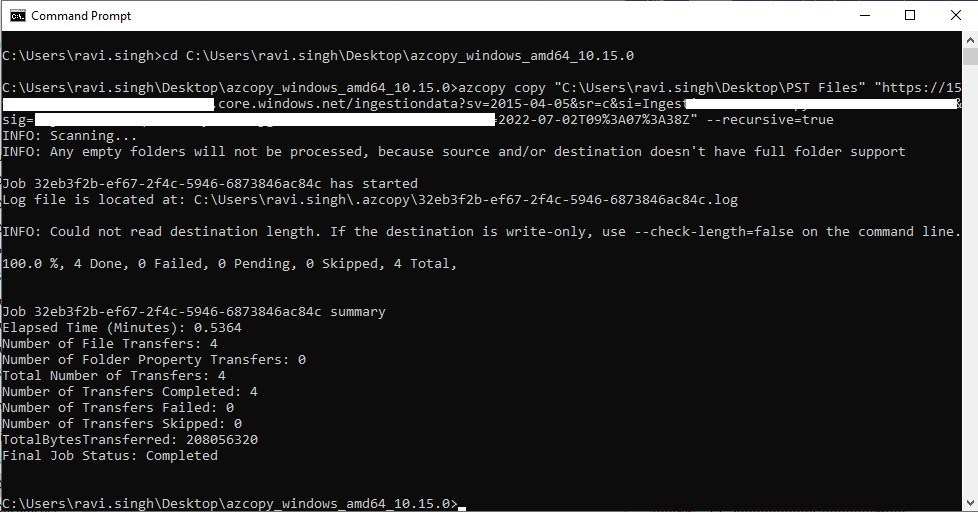
This may take a while to complete based on your network speed and bandwidth. Wait for the PST files to upload.
Notes:
- Ensure that the PST files you are uploading do not exceed the 20 GB (each) limit.
- Scan the PST files with the SCANPST tool to remove bad items and ensure there are no errors in the PST files.
Step 4: Creating a Mapping File for Mailbox Mapping
Mapping the PST files to their respective target mailboxes is a critical step in the import process. This mapping file allows Exchange Online to identify the correct mailbox for each PST file being imported. Create a CSV mapping file that contains the necessary information, such as the PST file name and the corresponding target mailbox. For this, you can use this sample PstImportMappingFile.csv.

- You may leave the Workload field
- Enter the FilePath (folder name)
- Name
- Mailbox
- TargetRootFolder (where mail items will be imported)
You may leave all other fields empty and save the .CSV file.
Step 5: Starting the PST Import Process
With all the necessary preparations and configurations in place, it’s time to initiate the actual PST import process.
- Check I’m done uploading my files and that I have access to the mapping file checkboxes. Click Next.

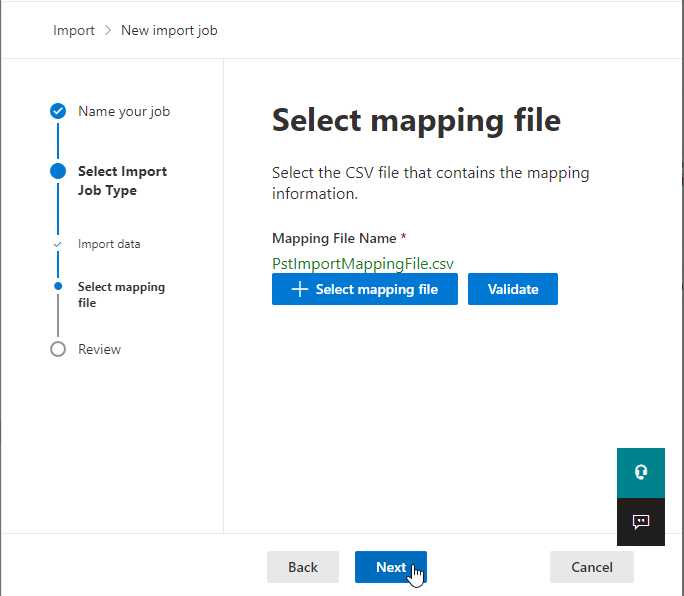
- Select +Select mapping file, upload the CSV mapping file, and then click Validate.
- Once validated, click Next.

- Once imported, the message will change to Import completed.

After the import is finished, users can access their old mail items in the Exchange Online account.
2. Drive Shipping Method
In this method, you need to copy the PST files to a BitLocker-encrypted hard drive and physically ship it to one of the Microsoft data centers for uploading to Exchange Online. Once the PST files are uploaded, you can continue to follow Steps 4 and Step 5 in the Network Upload method to import the PST files into Exchange Online. Additionally, this costs $2/GB or $2000/1000GB PST file.
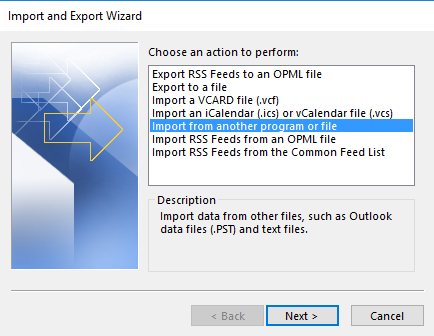
3. Import Outlook PST via Outlook Import Export Wizard
This method is recommended to import a few PST files into Exchange Online as it involves multiple steps as mentioned below that can consume a lot of time and effort.
- Exporting the mail items from Outlook to PST or converting the mailboxes of your current mail server to PST format. For instance, NSF to PST or MBOX to PST.
- Once you have the PST file, sign in to Outlook using the Exchange Online account.
- Start the Outlook Import Export wizard to import the PST file into the Exchange Online mailbox.
Repeat these steps to import more PST files into Exchange Online.
4. Third-Party Migration Tools
There are several third-party migration tools available that simplify the PST to Exchange Online (Office 365) migration process. One such specialized tool is Stellar Migrator for Outlook. By utilizing this tool, you can easily migrate Outlook PST files into Office 365. This software simplifies the PST import process where you can select the PST files and securely import them into Exchange Online or Microsoft 365 mailbox.
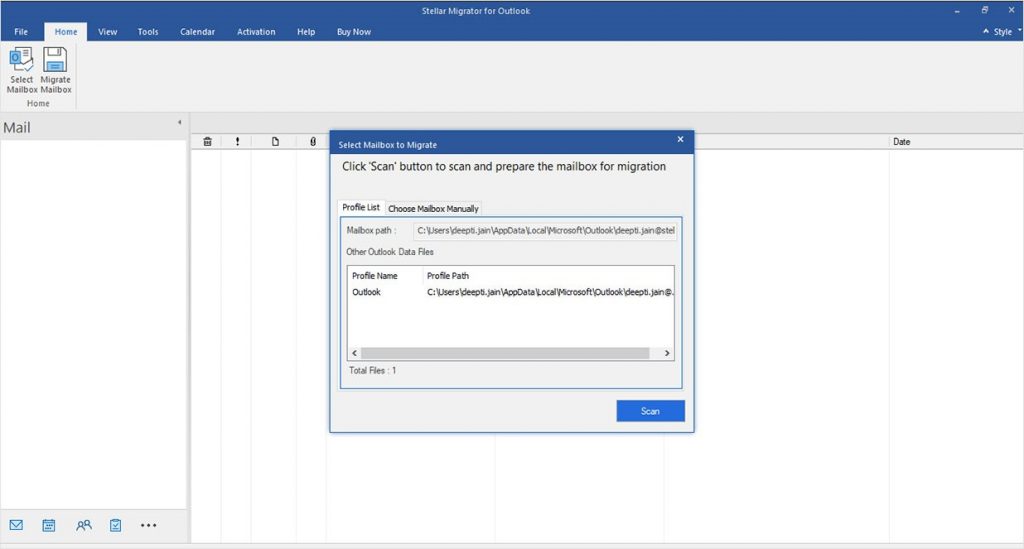
Stellar Migrator for Outlook ensures that the original folder structure and hierarchy are preserved during the migration. If any folders are missing in the destination mailbox, the software creates them and migrates the corresponding mail items. To prevent duplicate folders, the software merges mail items into existing folders, such as Inbox or Sent Items.
One of the advantages of using this tool is its ability to handle large PST files, up to 50 GB each, and the capability to install it on multiple systems. This means you can simultaneously upload multiple PST files to Office 365, streamlining the migration process. Additionally, the software supports the migration of mail items from Outlook OST files, even if they are orphaned or inaccessible.
An important feature of Stellar Migrator for Outlook is its cost-effectiveness. Rather than charging based on the PST file size, the software offers a “pay per mailbox” model, allowing you to migrate multiple PST files without incurring additional costs.
Conclusion
Migrating PST files to Exchange Online is a critical step in moving user mailboxes from traditional or on-premises mailbox servers to cloud-based platform and consolidating/centralizing email data for better management, security, and accessibility. By following the methods mentioned above, you can successfully import PST files into Exchange Online. To ease up and expedite the mailbox import process, you can use a migrator tool, such as Stellar Migrator for Outlook.
Was this article helpful?