It can be distressing to find an overwritten file, especially if it was an accident or a careless click. However, there are methods to recover lost data and restore peace of mind. You can retrieve overwritten files on Windows by following the step-by-step instructions in this piece.
Keep scrolling down to learn the causes of file overwriting and how to implement effective recovery strategies.
How Does a File Become Overwritten?
In Windows, a file is considered to be overwritten when new data is saved to the same location on the storage device where it is stored.
Here are a few common scenarios when a file can be replaced on Windows:
- Saving data with the same name and folder as an original one.
- When copying or moving files to a location with the same name already exists, Windows will prompt you to confirm whether you want to replace the existing file. If you choose to proceed, the original file will be overwritten.
- If you extract data from a compressed archive (e.g., a ZIP file), some extracted files have the same names as existing ones in the destination folder.
- Some directories may be replaced or updated during software installations or updates. If the new files have the same names as the existing ones, they will overwrite the old ones.
To avoid accidental overwriting of essential data, it is recommended to create regular backups and exercise caution when working with information with the same name or performing file operations involving potential data loss.
Is It Possible to Recover Overwritten Files on Windows?
Yes, it is possible. However, you must know one significant difference between overwritten and deleted files. Deleted files are usually removed from the computer system, meaning data recovery software can restore them. However, if it is overwritten, it reduces the chances of restoring it to its original state.
How To Recover Overwritten Files On Windows?
Our guide below has described 4 methods to help you regain your data.
I. How to Recover a Replaced File on Windows with Stellar Data Recovery Professional
Recovering files with Stellar Data Recovery Software is the easiest way to regain your data due to its powerful scanning capabilities and comprehensive file recovery options. Here’s how to use the app:
1. Download and install Stellar Data Recovery Professional for Windows.
2. Select what to recover. You may select all the files by choosing All Data or do a custom scan by checking the boxes near the needed file types.
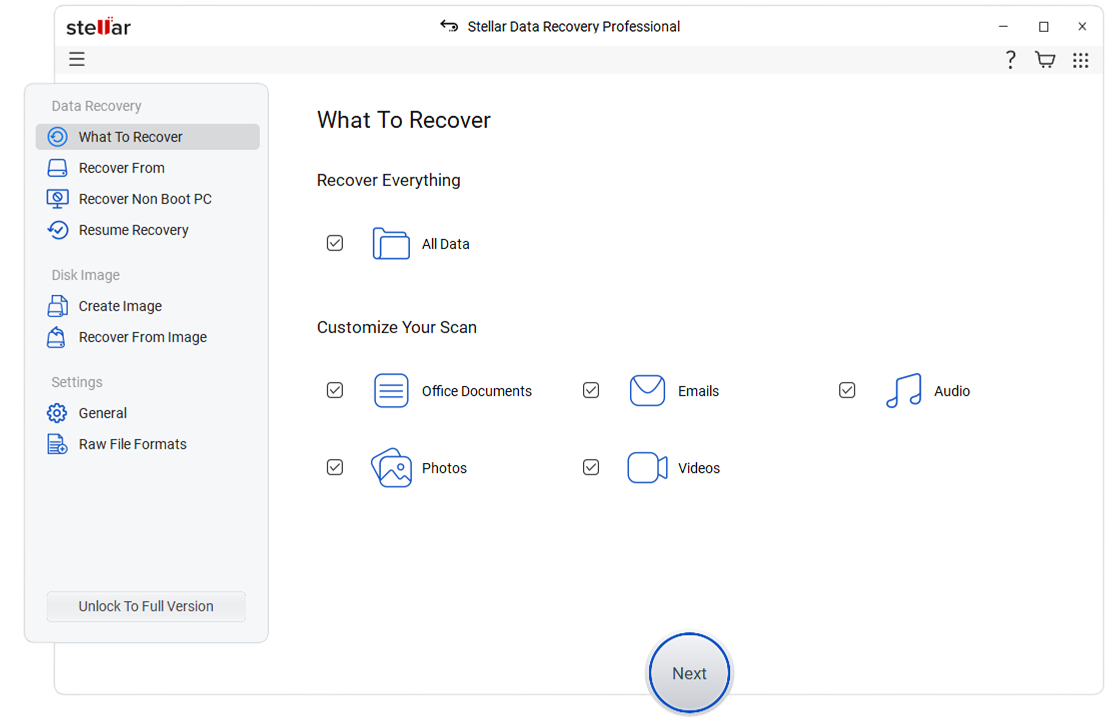 Stellar Data Recovery Professional App main screen
 3. Choose the disk you want to recover files from.
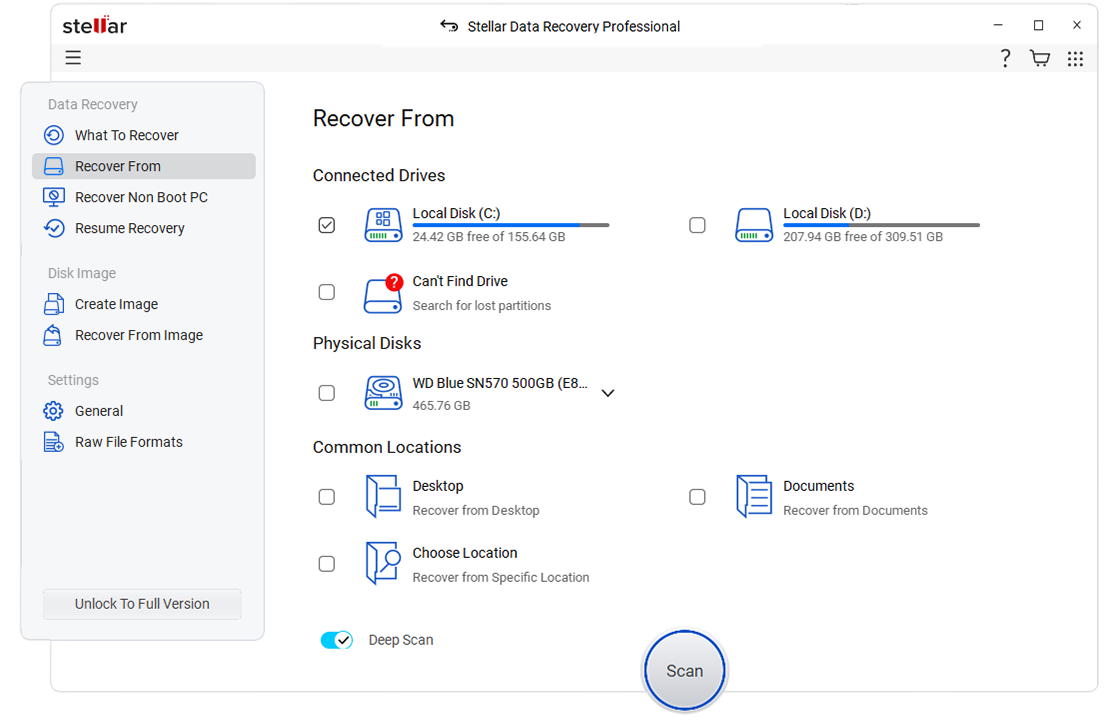 Select a disk to recover from
 4. When the scan is done, you may preview all the files and choose the ones needed to recover.
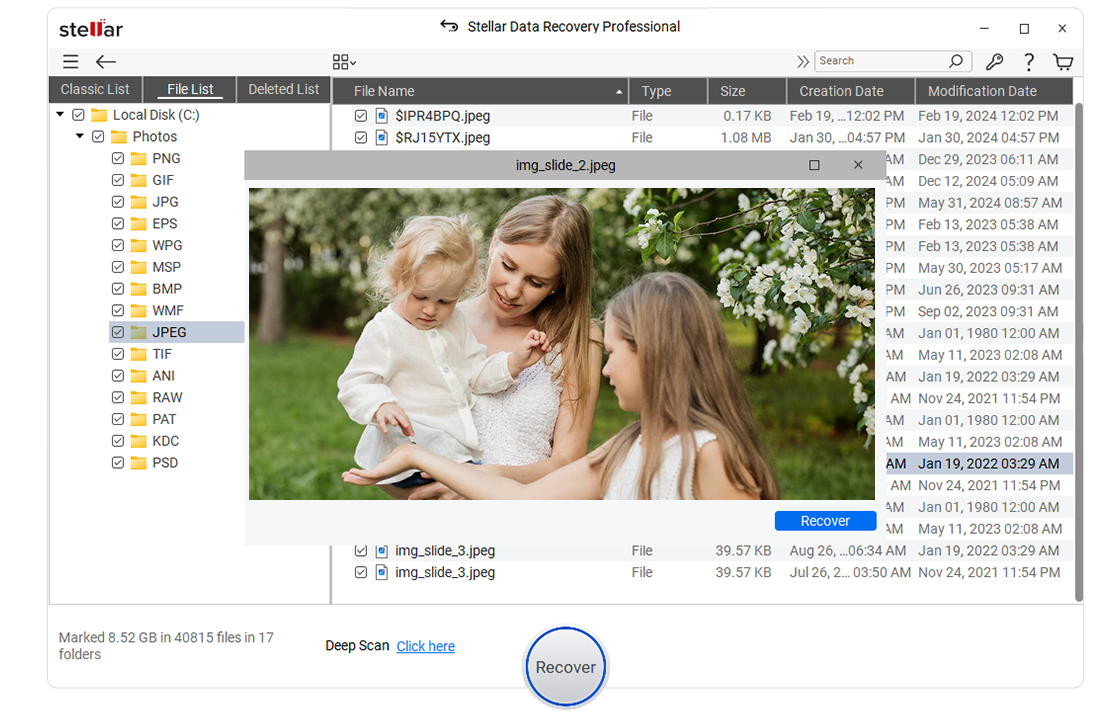 Preview Files to recover
 5. Click Recover.
II. How to Recover Overwritten File From the Previous Version
The Previous Version tool is a built-in data recovery feature used to recover overwritten files on Windows.
Here is how to get your files back with the Previous Version:
1. Open File Explorer and select the folder where the overwritten file is stored.
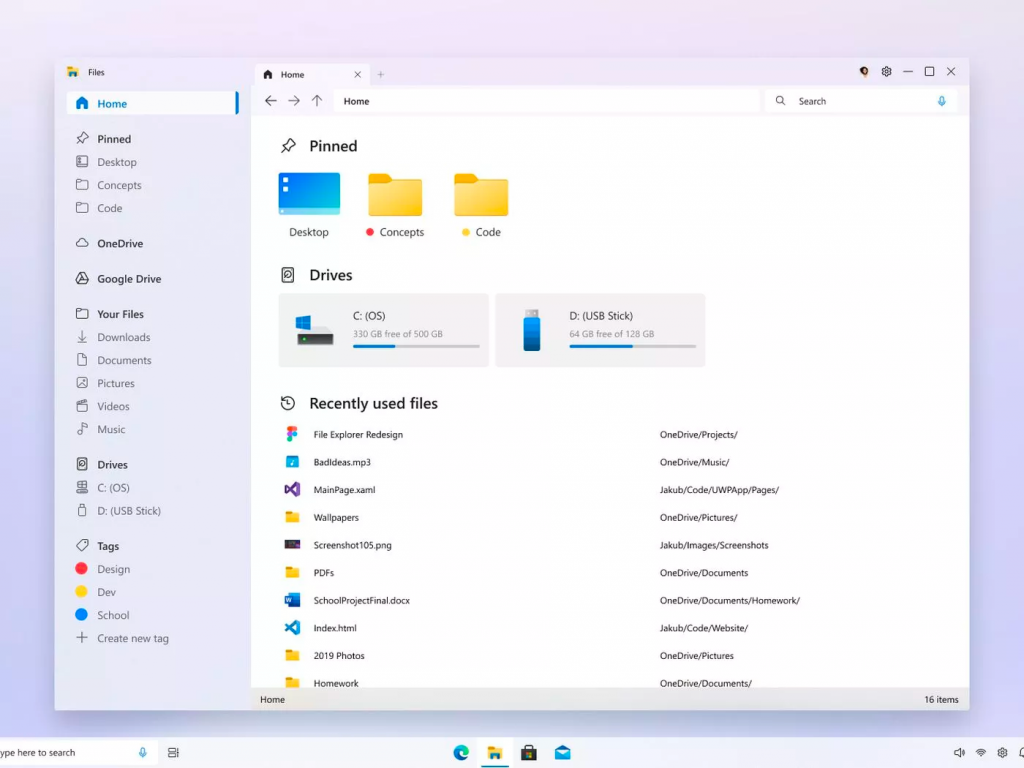 Open File Explorer on Windows
 2. Select the overwritten file and click Properties.
3. Select the Previous Versions tab.
 File Properties > Previous Versions
 4. Select the latest version of a folder or file and click Restore.
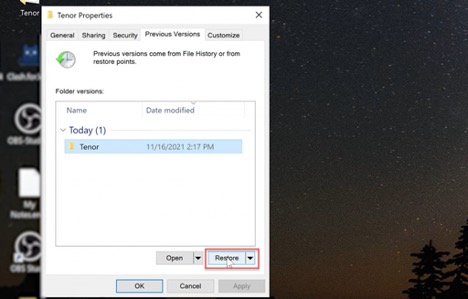 File Properties > Previous Versions > Restore
 5. Select Replace the file in the destination to finish.
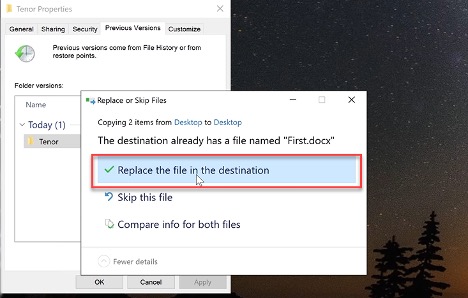 File Properties > Previous Versions > Replace the file in the destination
 III. Restore Files Using Backup And Restore
Another useful Windows OS feature we can employ in our situation is a Backup and Restore.
Follow the instructions to restore overwritten files with this function:
1. Open Settings.
 Windows Settings
 2. In a search bar, type in Backup and select.
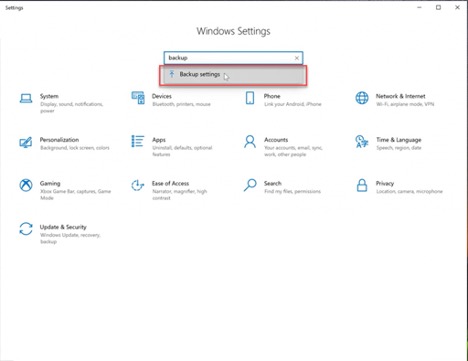 Windows Settings > Backup Settings
 3. Select the Go to Backup and Restore (Windows 7) button.
 Backup Settings > Go to Backup and Restore (Windows 7)
 4. Click on Select Another backup to restore files from and choose the backup you want to restore. Click on Next to continue.
5. In a new window, select Browser for files.
6. Then select the file or data to be recovered and click Next.
7. Finally, choose the destination where you want to restore your files.
How to Make a Backup of Your Computer?
To have an opportunity to restore your files from a backup, follow these steps:
- Connect an external storage device to your computer. Ensure that it has enough free space to accommodate the backup.
- Open the Backup and Restore Tool by clicking on the Start menu, then go to Settings and select Update & Security.
- In the left sidebar, choose Backup from the list of options.
- Under the Looking for an older backup? section, click on Go to Backup and Restore (Windows 7).
- In the opened window, click on the Set up backup button.
- Select the external storage device you connected earlier as the backup destination. Click Next to proceed.
- Choose whether to let Windows choose what to back up or select individual folders and files. Make your selection and click Next.
- Review your backup settings on the Review your backup settings screen. If everything looks correct, click Save settings and run backup to begin the backup process.
- Ensure that your computer remains powered on and connected to the external storage device until the process is complete.
- Once the backup process finishes, you can check if it was successful by returning to the Backup and Restore (Windows 7) window. It will display the date and time of the last backup performed.
Wrapping Up
We hope the guide has helped you restore overwritten items on your computer with ease. Remember to back up your data with a Plan B in your pocket by installing recovery software.
Read more:
Was this article helpful?