Email Migrations are a pain, but organizations that undertake them have good reasons to do so. Take the case of Novell GroupWise to Microsoft Outlook migration. While GroupWise has been a prominent player in the emailing arena, with users nowadays preferring user-friendly and customizable tools, the platform has been losing out on its popularity. And what’s GroupWise’s loss has become Outlook’s gain. Famed to be one of the easiest to use emailing platforms, Outlook has been witnessing a steady growth in its consumer base. And the added features of flexibility, affordability, and security have added to Outlook’s demand. Thus, many organizations and users are looking for ways to export GroupWise data to Outlook.
If you’re among such users, this article should be of particular interest to you.
Before you start
Migrating GroupWise to Outlook can be tough and time-consuming, but you can limit the hurdles if you take care of a few things. Here are a few helpful pointers:
- The size of GroupWise files to be migrated should be known
- You should have a proper backup of the GroupWise data being migrated
- Once migrated, you should ensure you clean all traces of GroupWise from your system
When you’re good to go after making the above preparations, proceed to export GroupWise email to Outlook as shown in the next section.
Manual Method to Export GroupWise email to Outlook
Use the inbuilt Import-Export utility of GroupWise to perform the migration. Here are the steps to be followed:
- Install Microsoft Outlook on your system and create a user profile.
- Launch GroupWise and login with your credentials.
- Launch Outlook (This will connect your Outlook account to the GroupWise account you are currently logged in with).
- Close the GroupWise client.
- In Outlook from File menu select Import and Export.
- Select option Export to a file and then select the PST file to export.
- Click Finish.
Once this process completes, you can open the file in Outlook as follows:
- Go to File -> Open -> Outlook Data File
- Select desirable file
- Press OK
While the above mentioned manual process exports GroupWise data to Outlook, it has a few drawbacks which make it less appealing to users. These shortcomings include:
- The process is time-consuming since it can export a single file at a time.
- The format of the mailbox being exported can change drastically during the export. Some of the emails can also get misplaced. This method thus isn’t reliable.
- The process would seem to be a bit too technical for a user who doesn’t have prior technical knowledge or experience of performing migrations. Minor errors by such users could result in problems.
A better approach
To overcome the drawbacks mentioned above, users seldom have any other option than to rely on automated tools to perform GroupWise to Outlook PST conversion. One of the most reliable tools currently available that can help you with the task is Stellar Converter for GroupWise. The software is equipped with an interactive interface through which even non-technical users can export GroupWise items to PST without any hassle. It performs the conversion in an accurate and reliable manner while maintaining the format of the original mailbox items.
Here are the steps to convert GroupWise items to PST format:
- Download, install and launch Stellar Converter for GroupWise.
- By default, the Connect to GroupWise Server dialog box will be displayed. In this dialog box, select an appropriate option to connect GroupWise mailbox in online mode, in remote mode, in cache mode, or in archive mode. You may also choose to “connect all GroupWise mailboxes to PST files”.
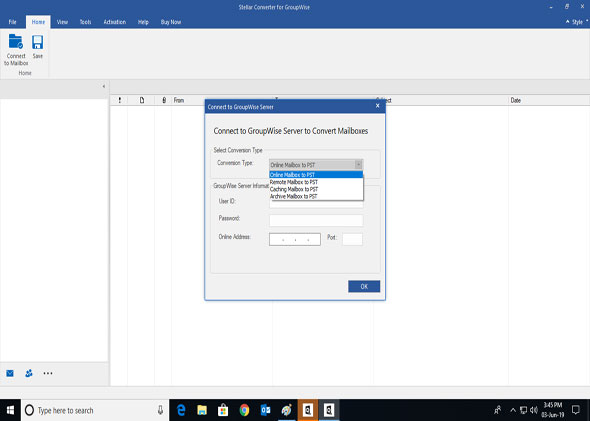
- Fill in required information in the GroupWise Server Information section.
- Click OK button to continue.
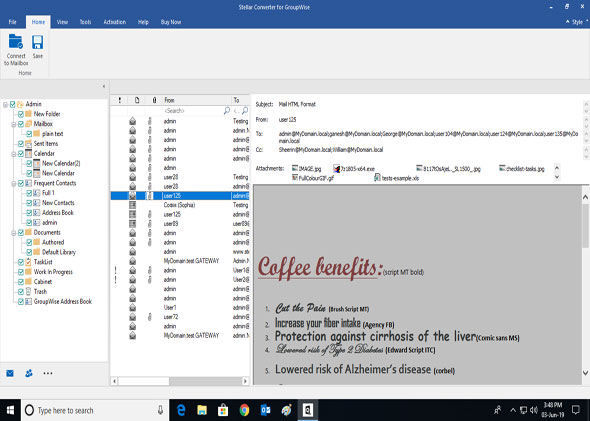
- Once the GroupWise server is connected and the scanning process completed, the software’s left-hand panel which is the Preview Window is populated with the mailbox items. The items will be displayed in a tree-view list. Click on any item in the preview window to preview it in the bottom-right panel of the software interface.
- Select the desired mailbox items you wish to convert and then click on the Save button from the menu.
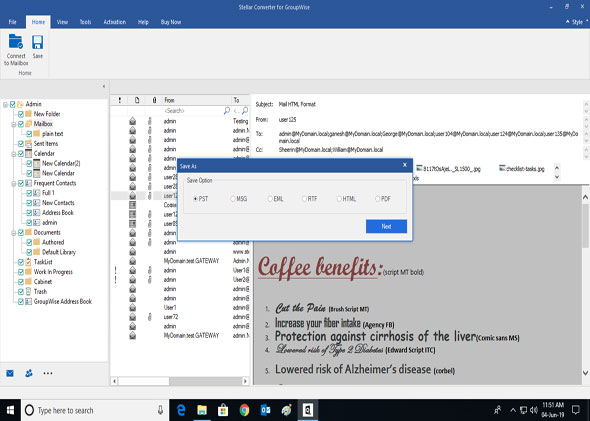
- When prompted to select file format, select PST and click OK.
- Choose whether you wish to save the converted mailboxes in a new PST file or append them to an existing PST
- Pick a destination folder to save the converted file and Click OK.
From the technician version of the Software, you can save converted emails to Office 365.
Summing it up
If you have some experience with email migrations, going ahead with the manual approach isn’t a bad idea. However, you should be prepared for a little data loss with the manual process. To avoid all hassle and make the process safe, use reliable third-party tools for the process as complex as email migrations.