Facebook supports images of 720, 960, or 2048 pixels at max. Any size above than that is automatically trimmed to fit Facebook’s photo upload size requirement. This is a standard followed by various social media platforms to ensure swift webpage loading for users. However, such forceful compression of images leads to pictures turning out blurry on Facebook after upload. The blurry Facebook photos are due to high pixilation.
Manual Methods to Fix Blurry Pictures on Facebook?
Thankfully, there are some great solutions available to change your blurry images into high-definition Facebook-friendly images. Each one of these fixes is easy to execute and does not require any prior technical knowledge. Let’s dive into the solutions:
HD Quality Photos Upload on Android
Android smartphones have an optional image setting that can turn your Facebook photos into high-definition (HD). This setting, when enabled, will make sure that any picture uploaded on Facebook is in high-definition. Follow the simple instructions given below to enable HD-quality photos on your smartphone:
- Open Facebook on your Android phone and on the top-right corner tap on the Hamburger icon.
- Now go to the ‘Settings and Privacy’ option and select the Settings tab from the drop-down.
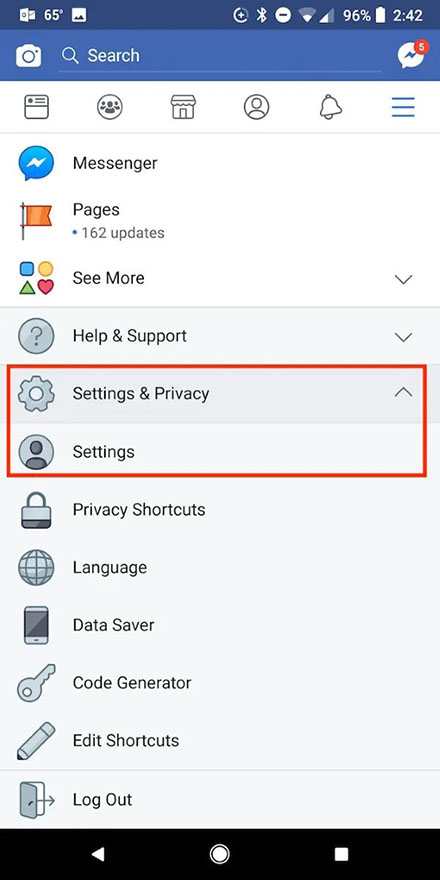
- Once you are in the Settings screen, tap on the ‘Media and Contacts’ option.
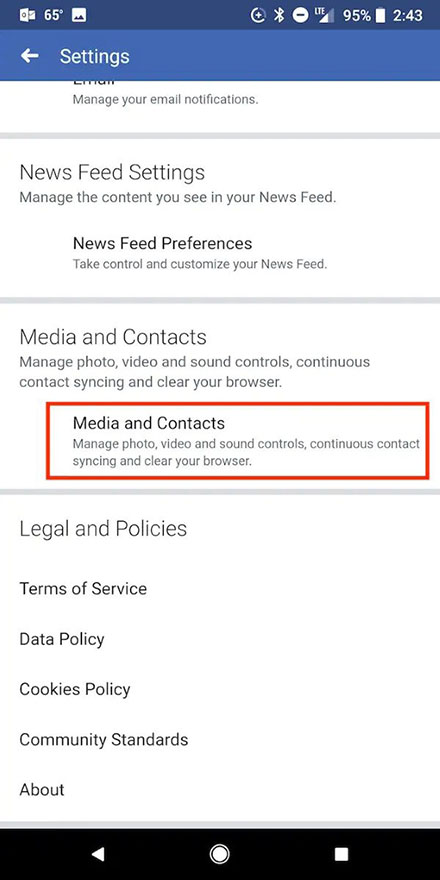
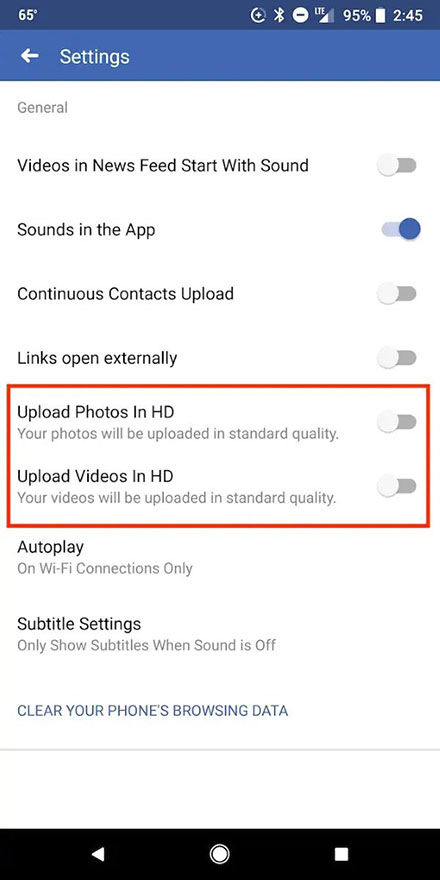
- A new screen will give you multiple options. Enable the ‘Upload Photos in HD’ option and it will avoid the problem of blurry pictures on Facebook.
Change iOS Photos Settings
Since iOS has a different interface, the above-mentioned method to fix picture quality won’t work for iPhone users. You must follow these steps on your iPhone to improve picture quality:
- Download and open the Facebook app on your iPhone.
- Tap on the three horizontal lines at the bottom-right corner.
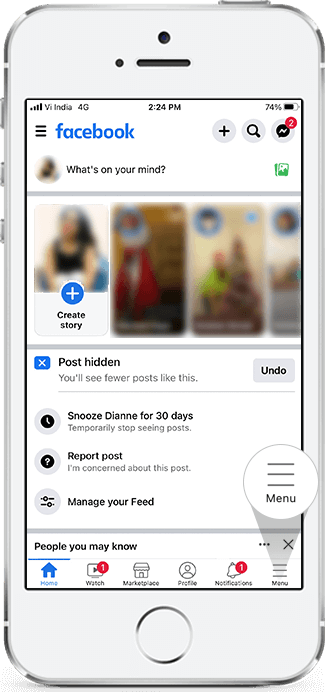
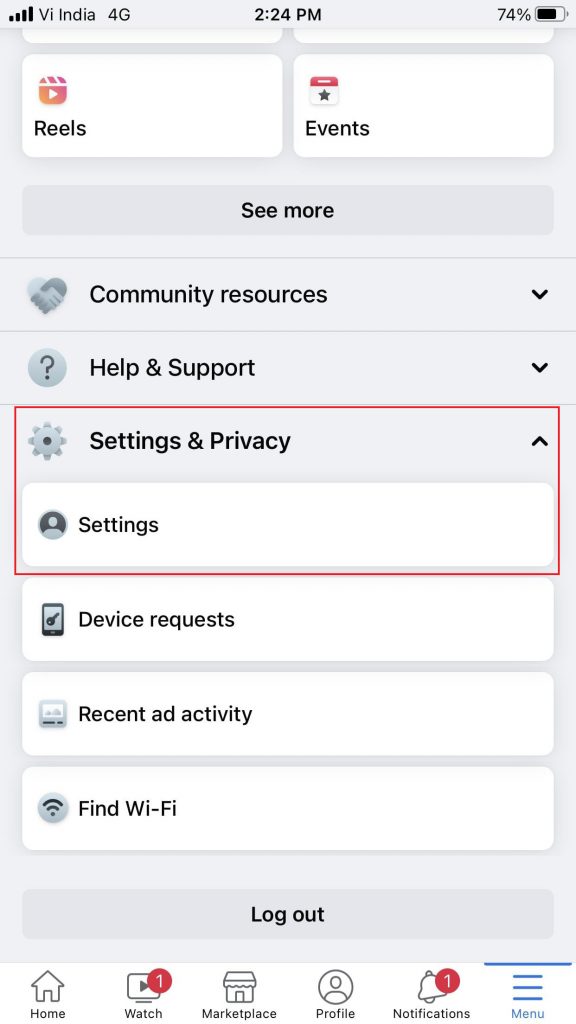
- Next, tap on the ‘Settings & Privacy’ tab and select Settings from the drop-down.
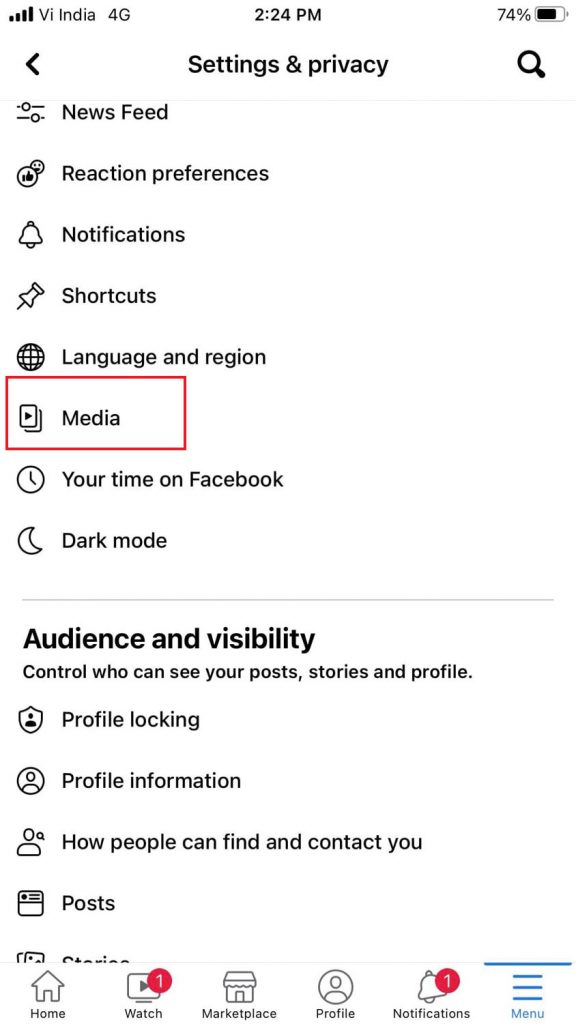
- The move will direct you to a set of options. Scroll down to tap on ‘Media’.
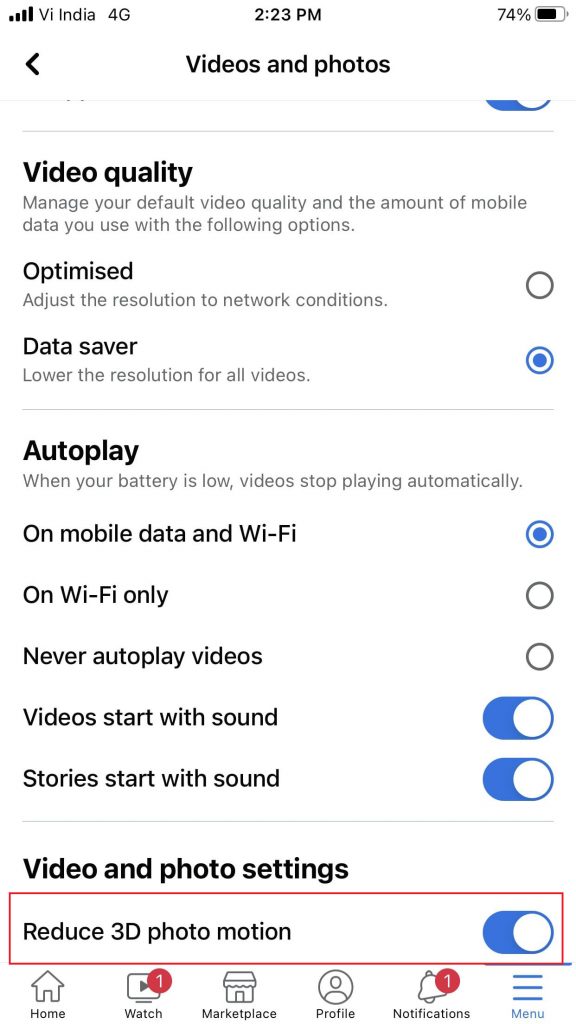
- A new screen will appear with the ‘Videos and Photos’ option. Carefully choose options that will improve your Facebook picture quality.
Maximize Camera Setting
You can customize a smartphone’s picture settings to get the maximum resolution of a photo. Here are the steps to boost the resolution of your smartphone camera:
- Open camera and tap on the Gear icon on your smartphone.
- Now change the picture size to the maximum resolution.
- Repeat the same procedure for rear and forward-facing cameras as per your smartphone model.
- iPhone users can turn on high-resolution settings by accessing camera settings.
Update Facebook App
Sometimes, a simple solution like an app update can fix blurry pictures on Facebook. The ideal way to do it is to close all applications and update Facebook:
- Tap on the Play Store (Android) / App Store (iPhone).
- Search for the Facebook app and click on the Update option, if available.
Wait till the application is updated. Open it and check the pictures to see if the blurriness is reduced.
Fix Blurry Pictures on Facebook using Photo Repair software.
If you are looking for a simple and straightforward way to fix blur photos, download reliable Photo Repair software. We recommend Stellar Repair for Photo, one of the most effective photo repair tools that can fix blurry Facebook photos in a couple of minutes. The software has a huge advantage over other photo editing software as it doesn’t affect the quality and intricate details of a picture. It helps you restore the original image while fixing the damaged, broken, blurred, or pixelated photos with the original sharpness and clarity. Moreover, the tool gives you the liberty to repair photos and files that are completely unreadable due to faulty headers, corrupt data, or an erroneous file structure.
Here’s how you can perform the repair process using the software:
- Download and install Stellar Repair for Photo from the official website.
- Launch the software once the installation process is complete.
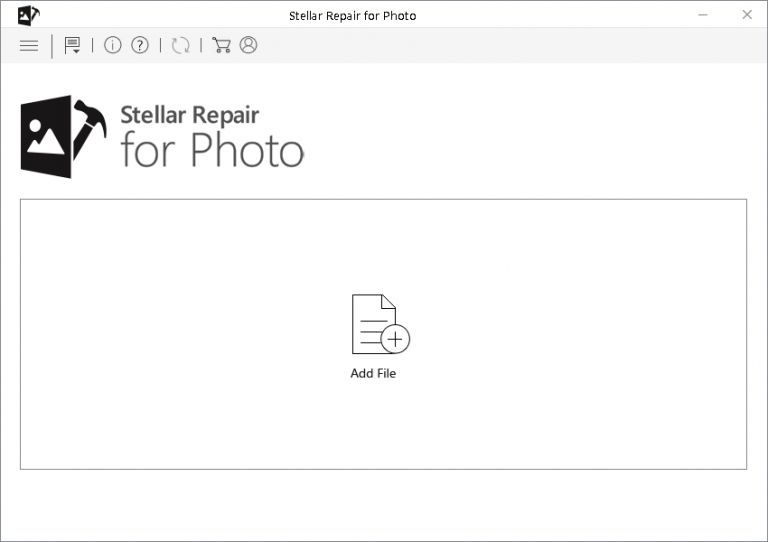
- A user-friendly interface will pop up. Go to the Add file button and add the file you want to repair.
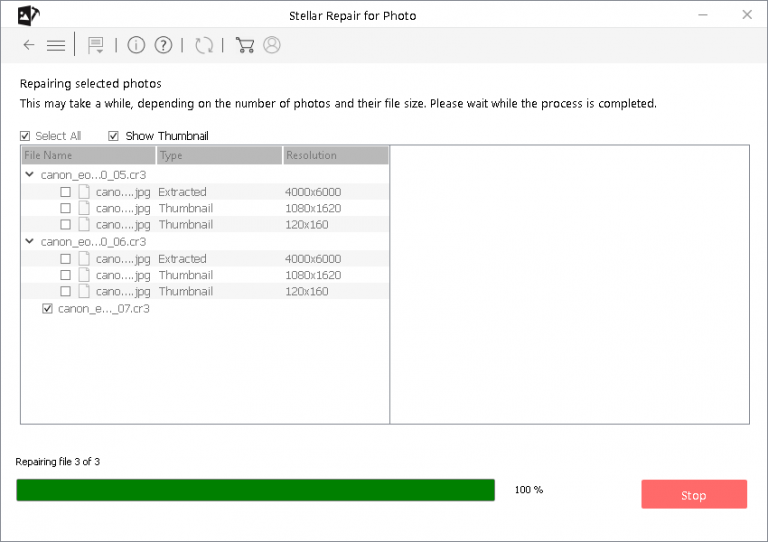
- Once you have added the corrupt files, start the repair process by clicking the Repair button. It may take a while for the repair process to finish depending on the size of the files.
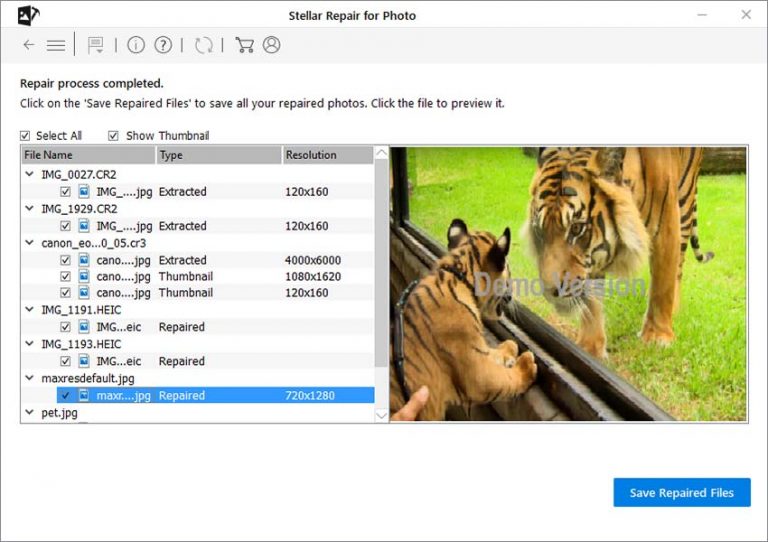
- You can preview the repaired JPEG photos once the repair process is over and save them to a desired location by clicking on the Save Repaired Files button.
Conclusion:
Facebook is an old yet widespread social media platform. Users fervently upload photos on this platform to stay in touch with their friends and acquaintances across the globe. However, the social media platform is not free from glitches and bugs. As a result, sometimes, the photos and videos uploaded on Facebook appear blurry or grainy. Besides changing the phone or computer settings to maintain desired picture quality, Facebook users can also try using Photo repair software to overcome unwanted disruptions in their pictures on Facebook. Read this informative blog on How to Fix JPEG Images that Look Grainy in Photoshop? to fix DSLR photos.
FAQ
Why are my Facebook photos blurry?
There are various reasons why your Facebook photos look blurry after upload:
- The image is not optimized correctly as per the Facebook image standard size.
- Poor internet connectivity when uploading photos on Facebook.
- You are using the correct image file type supported by Facebook.
How to fix a blurry profile picture on Facebook 2024?
To get rid of blurry Facebook photos, follow these solutions::
- Check your internet connectivity, and use mobile data instead of Wi-fi if needed.
- Ensure your Facebook app is up-to-date.
- Enable the HD-quality photos option on your smartphone.
- Use only correct image formats.
- Turn off Data Saver mode on the Settings of your Smartphones.
Was this article helpful?