Simultaneous switching between multiple apps is a vital part of multitasking on a PC or Laptop, but what if you double-click an app and suddenly see an Msvcr110.dll error pop up, disrupting your work? Well, first, you might close the error message and retry opening the app just to face the error message again.
Don't worry; there are a few simple fixes for this issue that you can try to solve effectively.
How Can I Fix MSVCR110.Dll Missing Errors in Windows 11
1. Check for Windows Updates
Windows updates come with fixes to any Windows problems or bugs. So, we advise updating the OS before moving to other fixes.
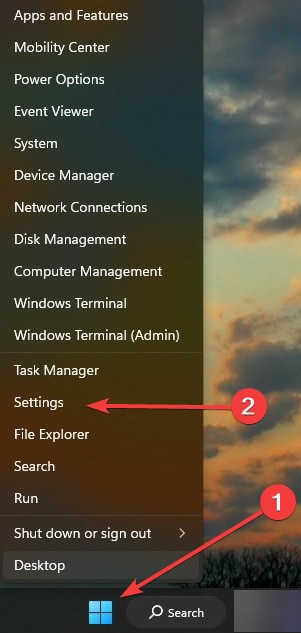
- Right-click on Start Menu and select Settings.
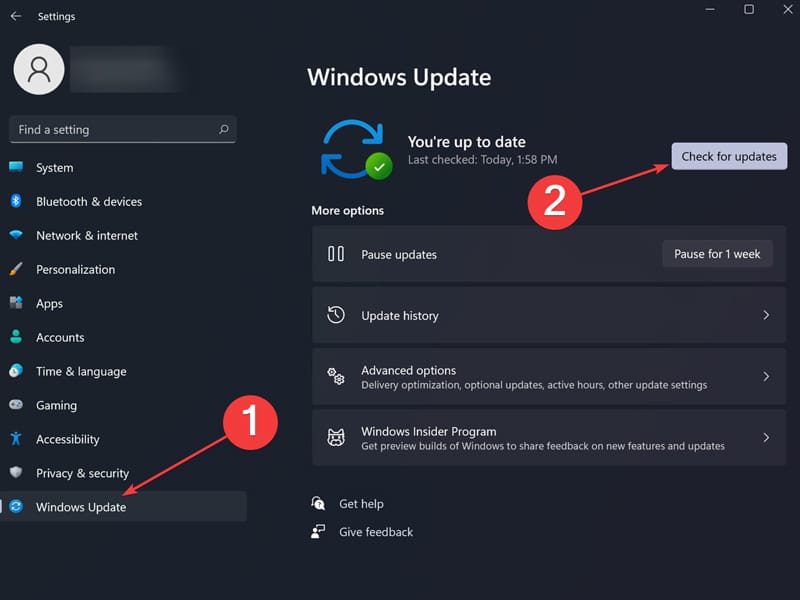
- Click the Check for updates option in the Windows Update tab. If your System has already found an update, you will see a Download and Install option. Go ahead and click it to update your OS.
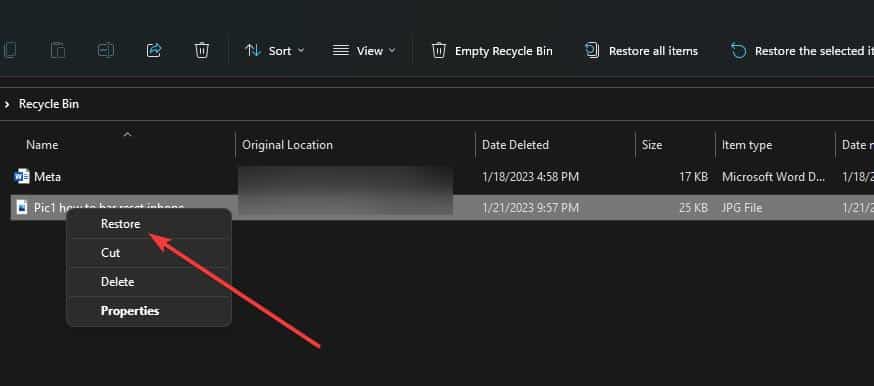
2. Check your Recycle Bin
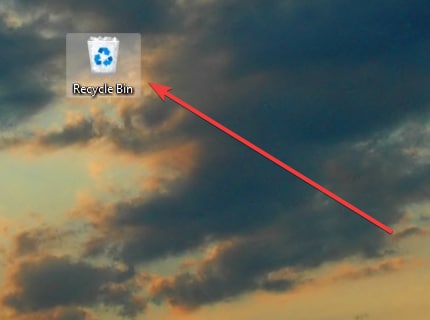
If you accidentally removed the Msvcr110.dll file, you can find and restore it from the Recycle Bin.
- Click on the Recycle Bin.
- On the top right corner, you should see a search box. Type msvcr110.dll and hit Enter.
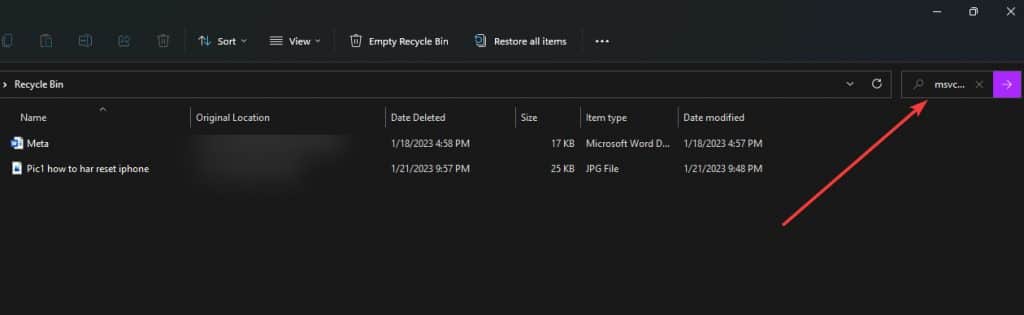
- If the System finds your file, right-click on it and select Restore or Undo Delete.
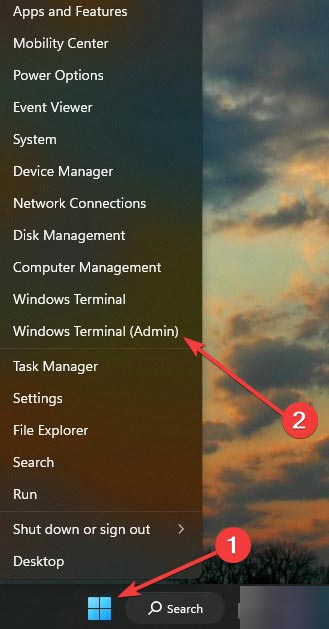
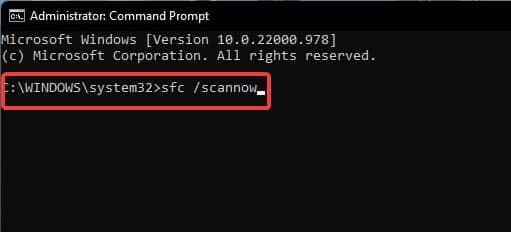
3. Run SFC scan
The main purpose of a System File Checker scan is to find and repair any damaged or corrupted system files. Since Msvcr110.dll is considered a system file and is vital for your PC to run apps, this Scan can repair the file if it is damaged.
- Right-click on Start Menu and select Windows PowerShell (Admin) or Terminal (Admin).
- In the newly opened window, type in sfc /scannow and hit Enter. System File Checker scan will automatically search for damaged files and repair them if necessary.
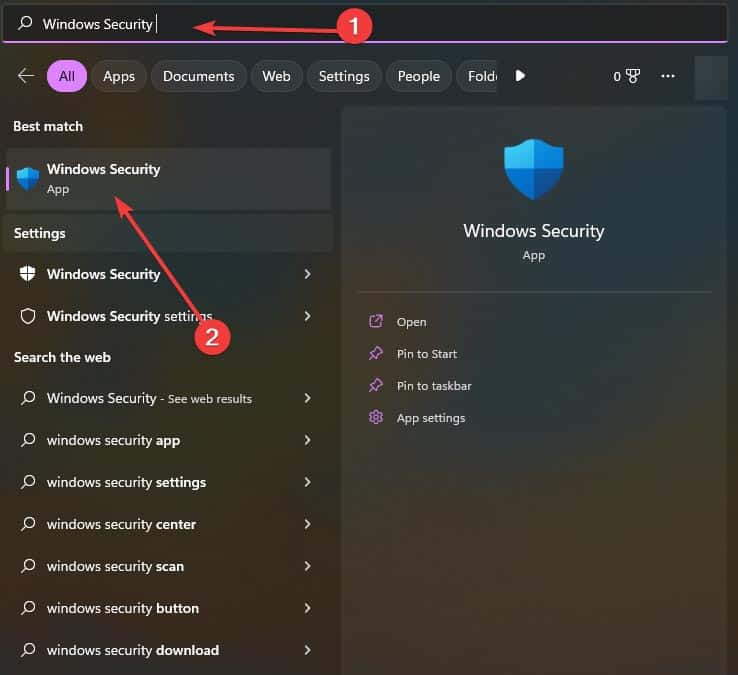
4. Run an antivirus scan
Your PC may be infected with a virus that causes your files to malfunction. So, running an antivirus will find and remove the virus from your PC, solving the issue effectively.
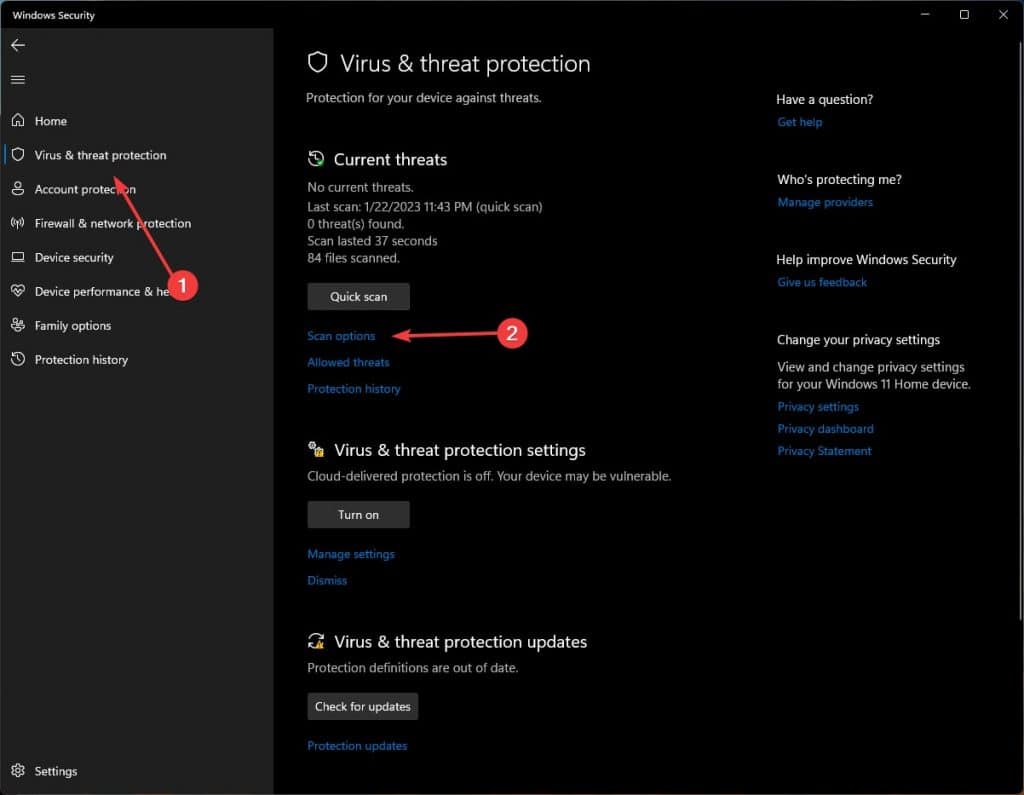
- In the taskbar's search box, type in Windows Security and select the best result.
- In the Virus and threat protection tab, click on Scan option.
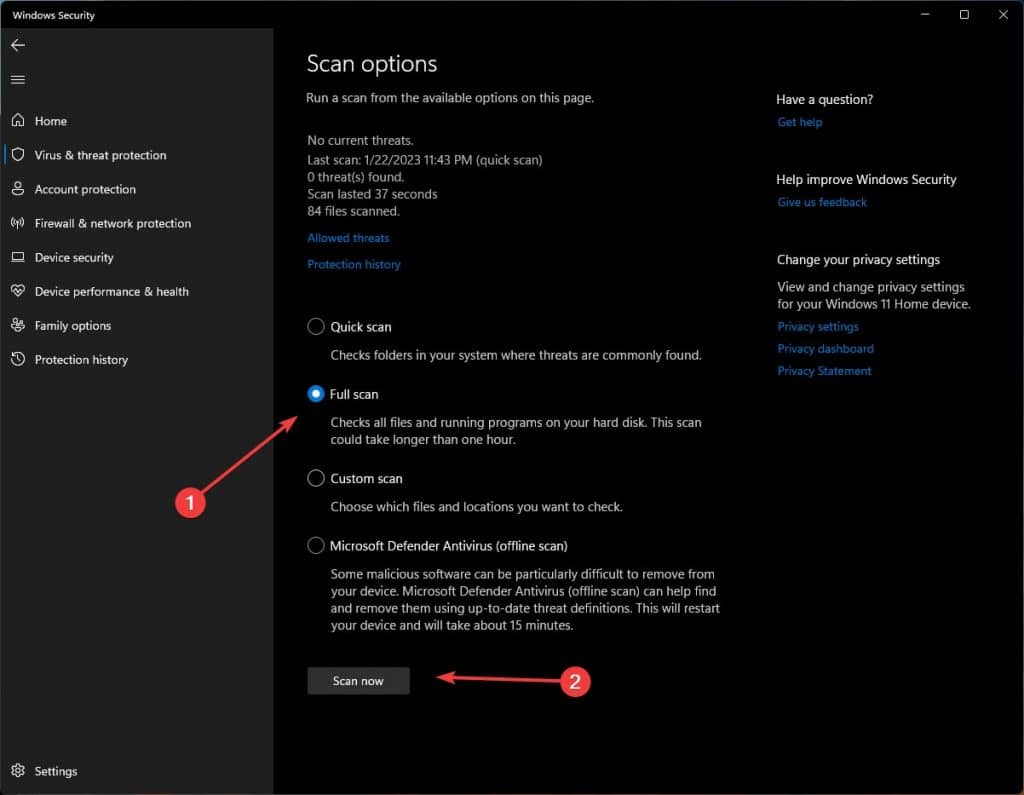
- Select the Full scan option to scan your whole PC and click on Scan Now.
5. Install Microsoft Visual C++ 2015 Redistributable Update
Updating your Visual C++ would recover all the lost files for this software. So even if your Msvcr110.dll is missing, the update will bring it back.
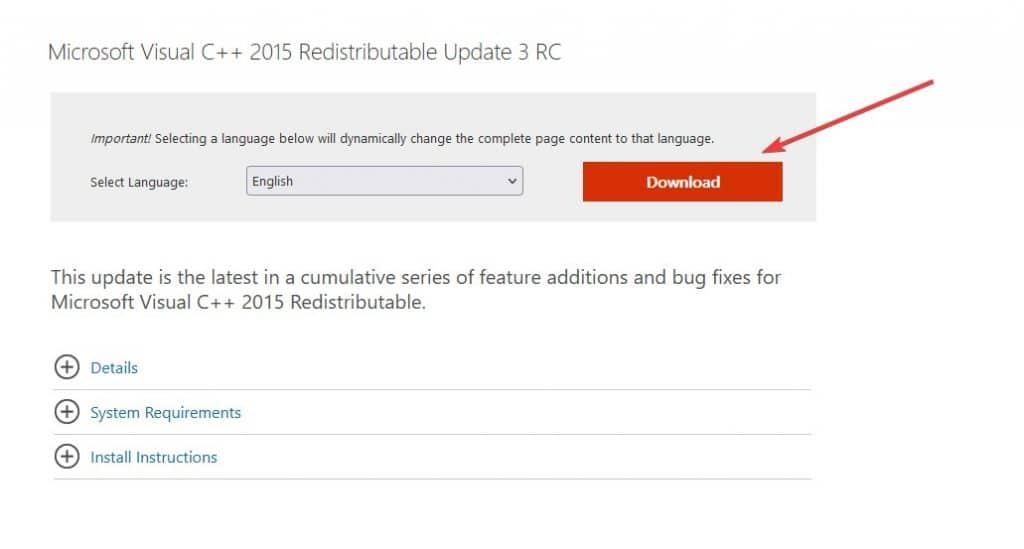
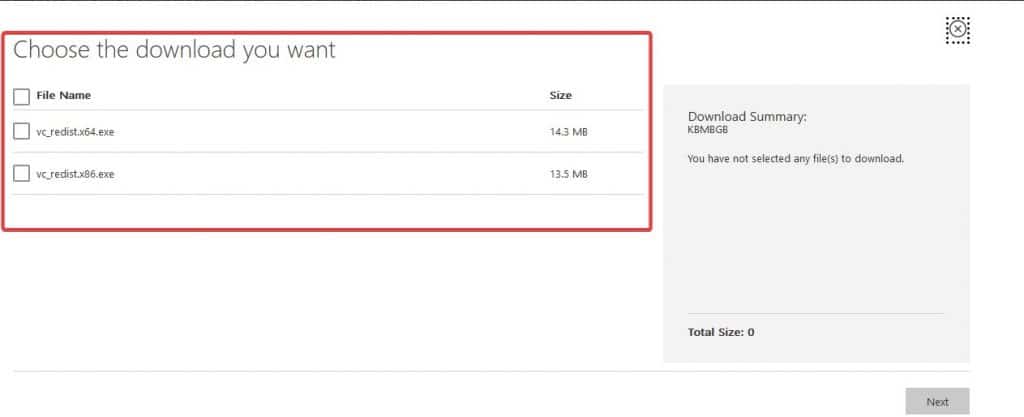
- Depending on your system architecture, click on the 64-bit or 32-bit download option.
- Open the downloaded file and follow-on the screen instructions to update your Visual C++ software.
6. Install DirectX Runtime Libraries
A lack of DirectX Runtime Libraries can also cause this annoying Msvcr110.dll issue.
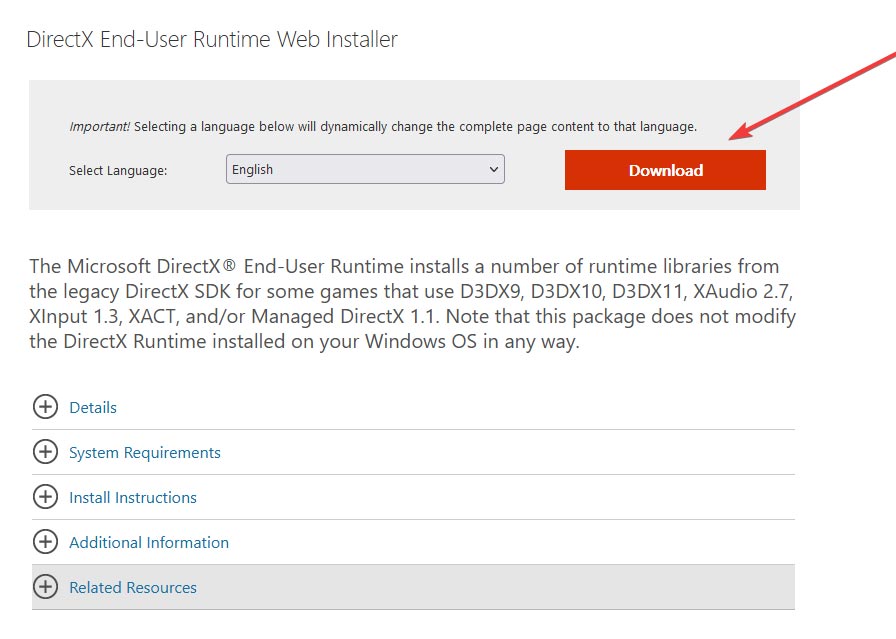
- Open the file and follow-on the screen instructions to install the DirectX Runtime Libraries.
7. Reinstall the problematic software
Sometimes the problem comes from the app or software you are trying to open. There is a good chance that the app has a bug or a few corrupted files that cause it to display the Msvcr110.dll error on launch. In this case, reinstalling it might help.
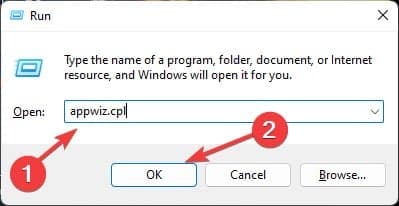
- Press Windows Key and R simultaneously and type in appwiz.cpl and click OK.
- Find the app from the list, right-click on it, and select Uninstall.
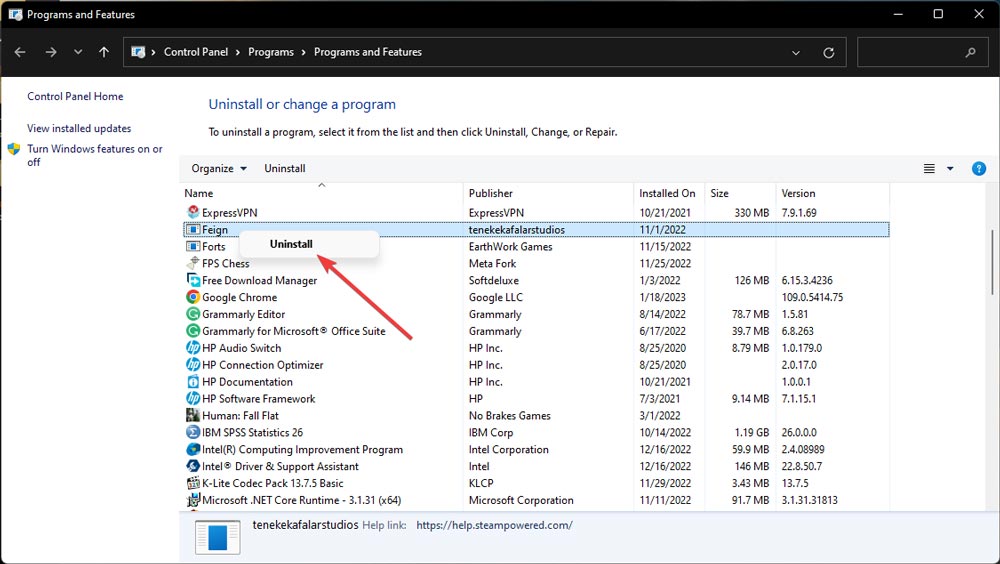
- Finally, reinstall the latest version of the app you just Uninstalled.
8. Roll back Windows 11
If you just installed the new version of Windows, which is Windows 11, and the problem started to occur after that, then you need to downgrade the OS.
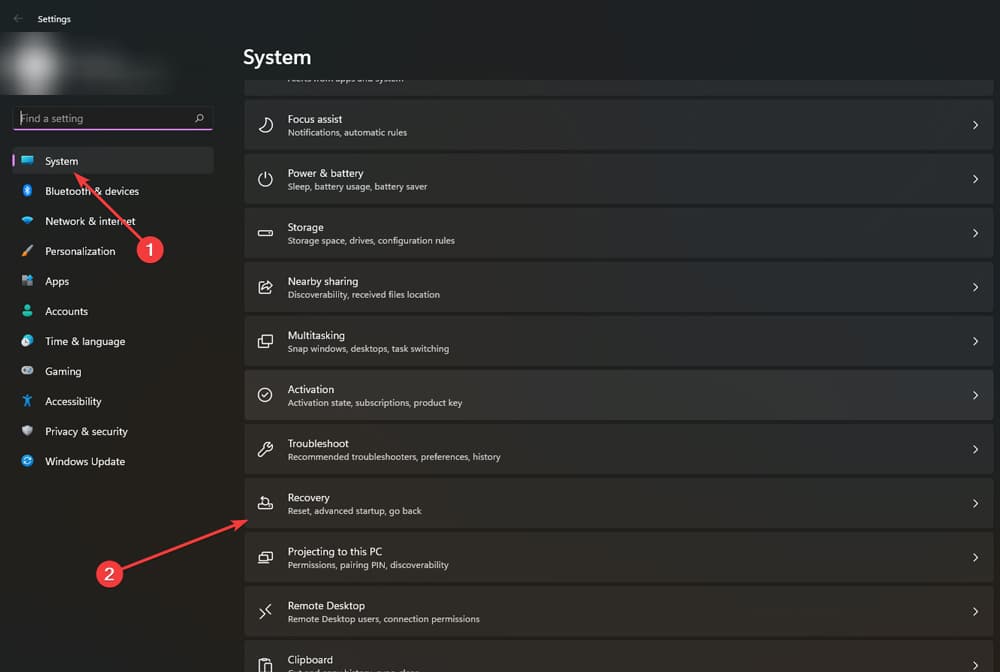
- Right-click on Start Menu and select Settings.
- Go to the System panel and click Recovery.
- If your PC still has Windows 10 files which it removes ten days after the upgrade, you will see the Previous version of Windows option available. Click on it and select Go back.
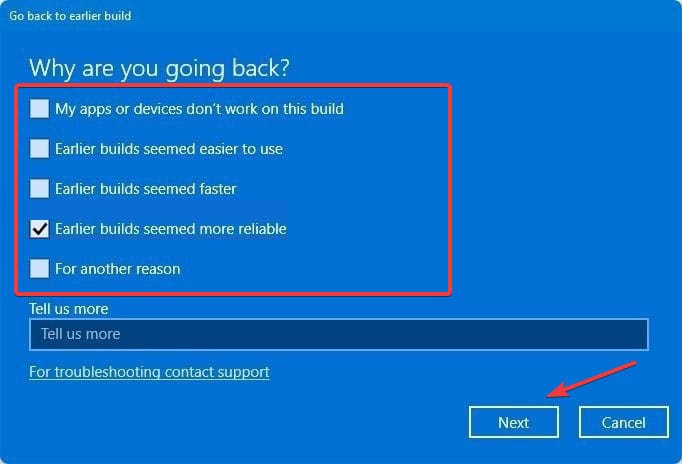
- Select one of the reasons why you are downgrading and select Next.
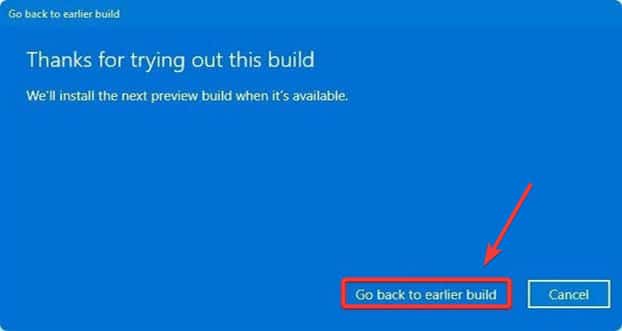
- On the next screen, click on No, thanks.
- Click Next on two consequent screens and select Go back to the earlier build.
9. Reinstall Windows
Reinstalling Windows essentially replaces all your system files with new ones, fixing any problems your PC might face.
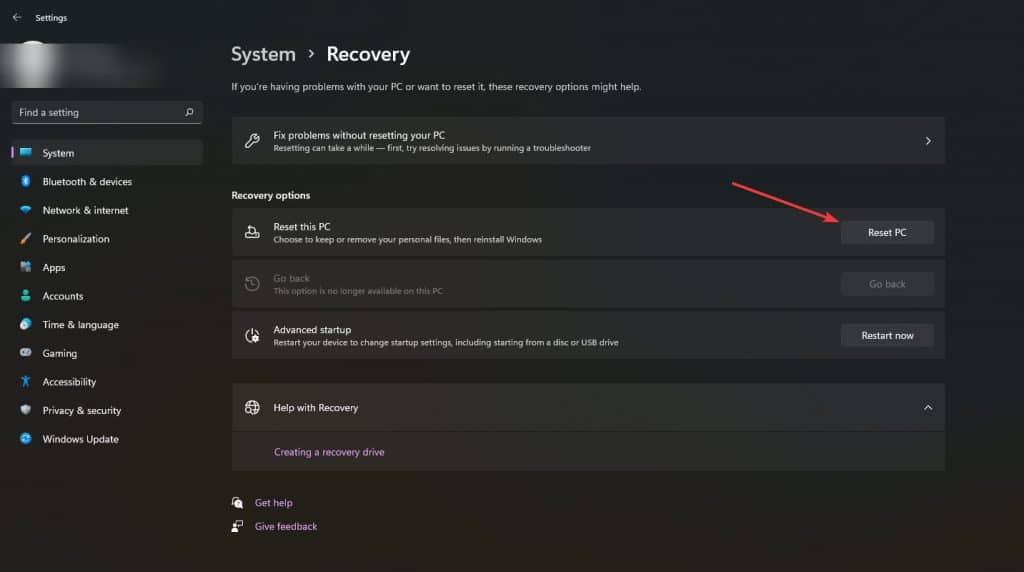
- Right-click on Start Menu and select Settings.
- Click on System and then Recovery on the right side.
- Select the Reset PC button next to Reset this PC.
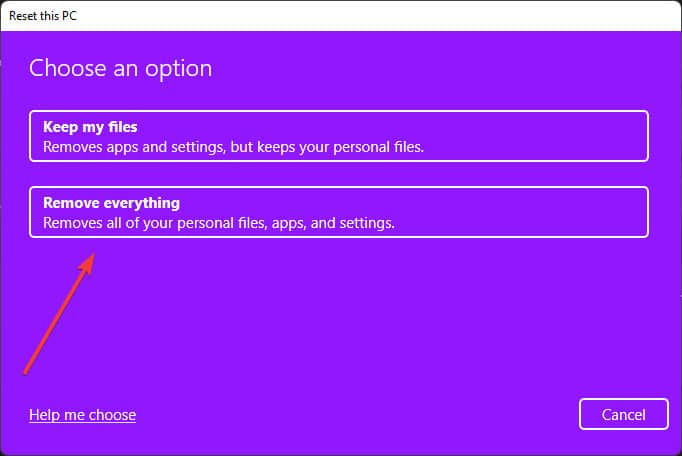
- On the next window, select Remove Everything.
- Choose Cloud Download, and finally hit Next and then Reset to start reinstallation.
How to Bring Back My Data After a Windows Reinstallation?
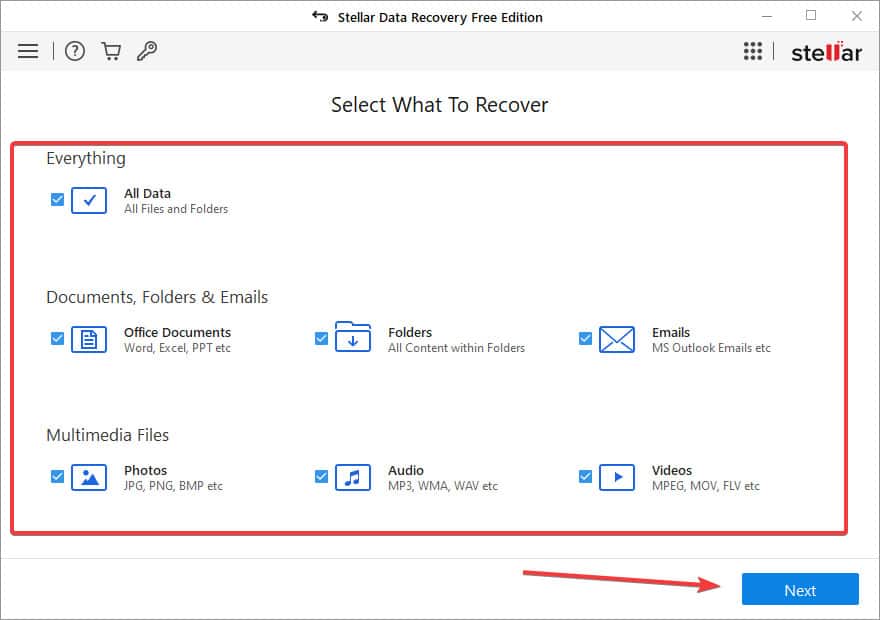
Thanks to Stellar Data Recovery, you can bring back up to 100 percent of your lost data in seconds.
- Install the Stellar Data Recovery software from the official website.
- Open the downloaded application, select the data type you want to recover, and click Next.
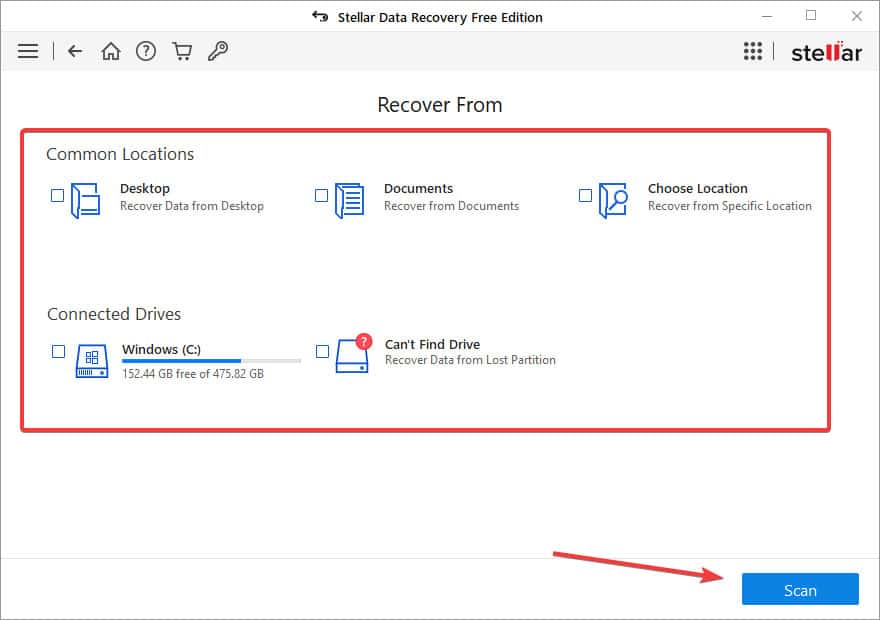
- Select the folder location or drive volume and click Scan.
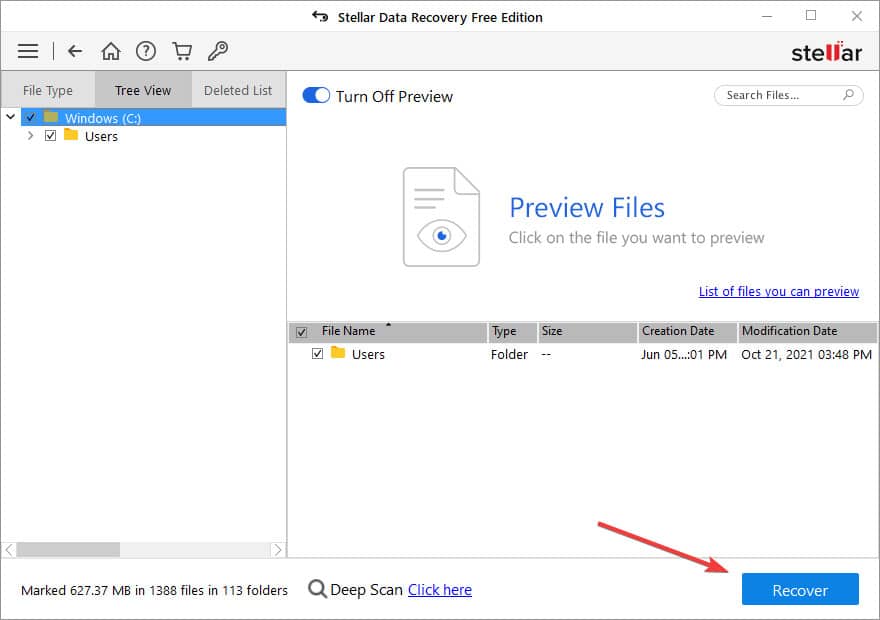
- Select files in the preview section and click Recover to save recovered data.
Conclusion
A Windows reinstallation is your final solution, and most people fall into this trap of paying loads of money to data recovery companies to bring back their data. But don't worry about your data since you can bring it back with Stellar Data Recovery software.
Was this article helpful?