Do we need to ‘safely eject’ the USB before unplugging it? How often did the thought cross your mind when removing USB device from a computer? You are advised to eject a USB or other external media from a computer only after the system displays a message to eject the hardware safely. But, what will be the implications if you don’t safely pull out the USB or follow the proper USB removal process? Or is there any way to skip the ‘Safely remove USB’ step and directly remove the USB from the PC?
Let’s understand here.
Why ‘safely remove’ USB drive from a computer?
Safe eject of your USB flash drive ensures your files are completely transferred on the device. If you remove the USB before any read, write, or transfer activity is completed, it would corrupt the data stored on the USB and may even result in data loss.
So if often in a hurry, you pull out the USB or the connected hardware without clicking the safe to remove the icon, beware.
In case you’re still wondering why there is a need to safely eject the USB, then let’s take a look at the following reasons:
-
Abrupt removal of USB may corrupt data
One of the main reasons why you need to follow the appropriate ejection procedure is that the operating system uses a process called
write caching. When the file is ready in the execution state, the system OS doesn’t immediately write file to the drive; instead, it caches the file and waits until other read/write operations are completed. However, when you remove the USB while the cache is in use, your data may get corrupted. Therefore, you should also avoid abruptly unplugging the USB while it is not in active use as this may corrupt some data stored on it.
Safely removing the USB clears the cache and the remaining data and stops any background process. This is the reason why there is a delay of a few seconds after clicking the
‘Safe to Remove Hardware’ option and getting a notification that it’s safe to remove the USB.
-
Results in data loss
Abruptly pulling out a USB flash drive during file transfer across USB and computer can erase your data saved on USB flash drive.
-
Damages the logical file system
Another impact of unsafe ejection of USB is that it may damage the logical file system. The unsafe ejection of USB sometimes damages the cells. Single Layer Cell (SLC), Multi-Layer Cell (MLC), and Triple Layer Cell (TLC) are usually three major cell types. These cells hold internal drive information; if damaged, the information becomes inaccessible.
Suppose you’ve stored all your important pictures on a USB, but if the USB logical file system gets damaged, you would need image recovery tool to retrieve your lost photos. If there is corruption in images, you can repair the photos with the help of
JPEG repair software. Therefore, to prevent damage to logical file system, you must follow the appropriate steps to eject the USB safely.
How to safely remove USB flash drives?
Make sure the USB flash drive is not in use, when trying to disconnect it from your PC. This is necessary to avoid data loss. Further, the method to safely remove USB from Windows depends on how you choose to remove the USB. If it’s the default
‘quick removal,
’ you can instantly unplug the device. However, if write caching for
‘better performance’ is enabled, you must wait for the ‘
Safely Remove Hardware’ notification before unplugging the USB from PC.
Method 1: Eject via USB ‘Quick Removal’
On Windows 10, Microsoft offers a default
‘quick removal’ feature that allows instant disconnecting a USB flash drive or memory card from the computer, provided no read/ write action is being done on it. This method disables the write caching, which adds an extra layer of security when users abruptly remove the USB.
Alternatively, the
‘better performance’ removal method enables write caching, which requires safely removing the USB after the notification icon is visible. You can enable write caching in Windows Operating System by following these steps below:
- Go to Control Panel and select Device Manager.
- Select the USB drive and right-click on it.
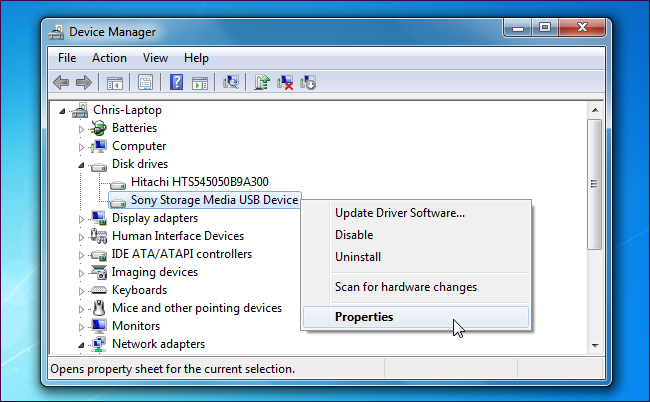
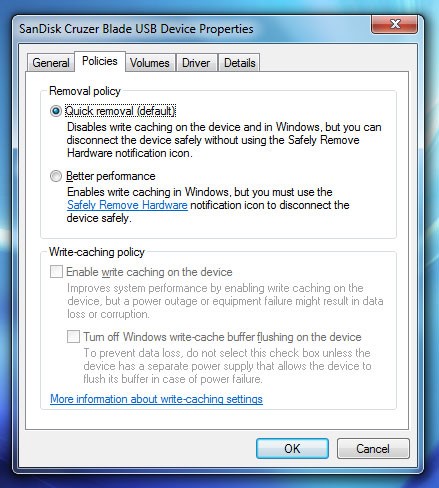
- Select Properties and click Policies tab.
- Under Removal Policy, select Better performance option to enable write caching on the device.
Next time, while removing the USB, ensure that you eject via clicking the
‘Safely Eject the Hardware’ icon.
Method 2: Remove USB flash drive from Taskbar
- On your Windows desktop, at the bottom-right corner of the taskbar, right-click on the Safely Remove Hardware icon (looks like USB).
- In the menu pop-up, click on ‘Eject…’

- Once Windows ensures there’s no read/ write operation on the USB, it will pop-up the message ‘Safe To Remove Hardware’, indicating the USB device is ready to be removed safely.

- Now you can eject USB on Windows 10 computer.
Method 3: Eject USB through ‘This PC’ on Window
- On your Windows 10 desktop, click on This PC.
- Under Devices and Drives, right-click on the USB drive you want to eject.
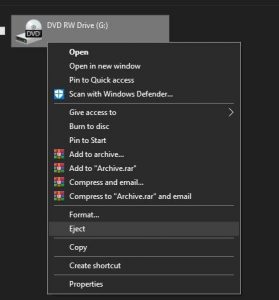
- Select Eject from the menu pop-up.
- Now safely remove USB on Windows 10 from the system.
Recover lost data due to ejecting USB improperly
Data loss and corruption are the major risks when you don’t safely remove hardware. However, if you have lost the photos, videos, or audio files due to the unsafe removal of a USB or other external hard drives, professional data recovery software, such as
Stellar Photo Recovery is helpful. The software can
retrieve permanently deleted pictures, music, podcasts, videos, and movies of any format and doesn’t require any technical know-how. Take its free trial that shows recoverable files preview.
Stellar Photo Recovery can
recover USB data on macOS and Windows systems. In case your photos or videos on USB have corrupted due to sudden removal, try a
photo repair or
video repair software
Wrapping Up
There is a high probability of losing data when you improperly eject USB drive from a computer. Even when the USB device is not active, it may still be in use as some background program may be running; Therefore, always safely eject the USB as we can never anticipate the effect of unsafe removal of USB.
Was this article helpful?