White balance in photos is the technique of reducing unwanted color cast, i.e., a tint or hue responsible for disturbing all or some elements of a photograph. A poor white balance makes your image look either too blue (cooler) or too orange (warmer). Only a correct white balance helps you seize a perfect shot in which the subject or all the objects look natural.
Most digital cameras nowadays, including your smartphone camera, are proficient at manually adjusting the white balance. Nonetheless, there’s always a possibility of capturing a beautiful moment with bad white balance. Professional photographers are skilled in achieving the correct white balance. However, if you fail to do so or lack professional photography skills, you can try your hands on post-production software to fix bad white balance in photos.
White balance is a way to set a photograph to neutral, to make the white look white.
Adam Long
Photographer and Educator (www.adobe.com)
Post-Production Tools to Fix White Balance in Photographs
Using professional quality photo editing software is a fantastic way to improve light and colors in your pictures. Try Adobe Photoshop or Lightroom to edit and adjust bad white balance in photos. Both the software let you edit a raw file and fix all kinds of lighting flaws in it. Simply download the photo editing software and follow the guidelines below:
Adjust White Balance in a Photo Using Adobe Photoshop
Photoshop is a sophisticated photo editing tool that offers many adjustment tools to fix bad white balance. With an option to work on layers, the tool gives you the liberty to add depth to all your pictures in the editing process.
- Install and set up Adobe Photoshop on your laptop or computer.
- Open the application. Click File > Open at the top-left corner, and then select the photograph with bad white balance to import it in the application.
- Next, click on Layers, and you’ll see a list of options in a drop-down menu. Select the New adjustment layer option. This will prompt another dialog box with different adjustment layer options.
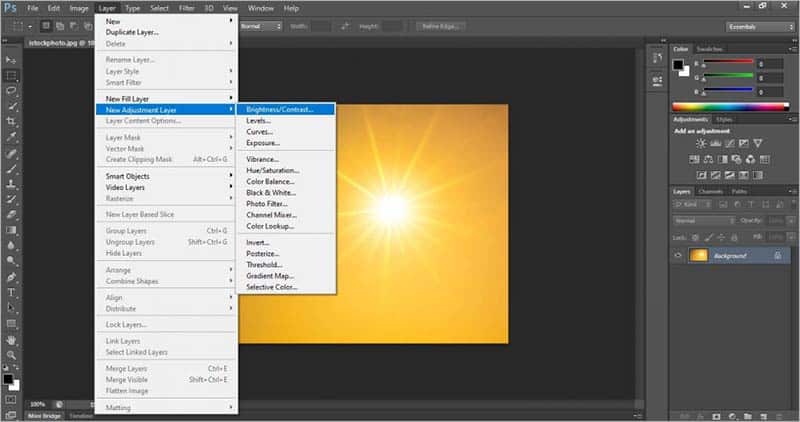
- Select levels to control the intensity of Red, Green & Blue (RGB) shades.
- Next, you’ll see a histogram with a default/custom RGB channel. Play around the available options to find the right adjustment out of the RGB colors.
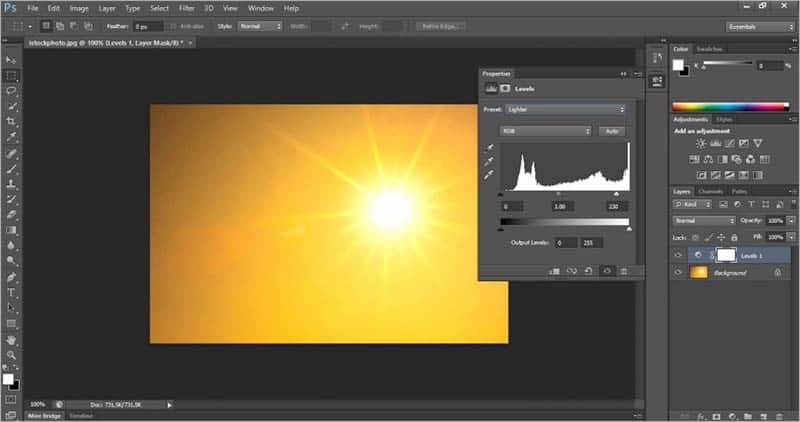
- Once satisfied with the desired light and colour balance, save the image in JPG, JPEG, or PNG format.
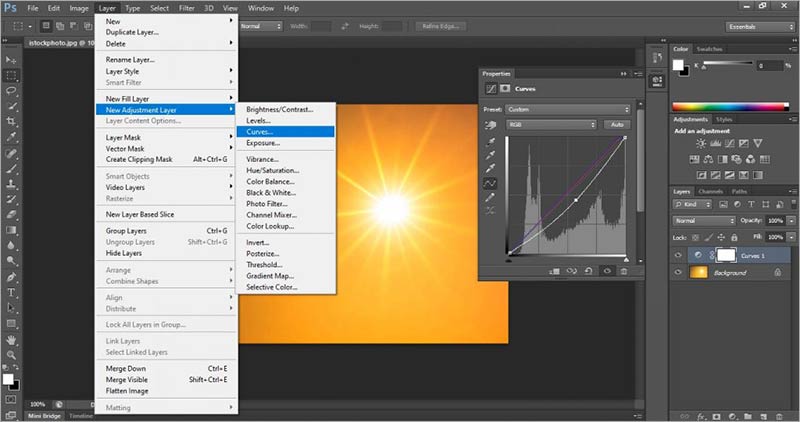
- You can also use adjustment curves to play along RGB colors in your picture.
Adjust White Balance in Adobe Lightroom
You’ll be surprised that fixing bad white balance in photos at the post-production stage will be as easy as adjusting as the Temperature Slider in Adobe Lightroom. Just like in your DSLR camera settings, all you have to do is choose from a set of options to adjust White Balance (WB). Let’s explore different options offered in Lightroom:
- Follow the instructions to Download Adobe Lightroom and sign in to install the app.
- Once successfully downloaded, open the application and export the photos with bad white balance. Pick the eyedropper tool in the basic panel to get started.
- Move it to a neutral part of your photograph where the Red, Green, and Blue (RGB) values are close to each other.
- Once you hover over the apt location, a box will pop up with the RGB color values at the bottom.
- Lightroom will automatically adjust the white balance of your image. If you’re happy with the outcome, continue experimenting the same with other available editing tools.
- Save the image once done.
Nonetheless, if you are not happy with the outcome, switch to other options like white balance sliders. Lightroom offers two white balance sliders – Temp Slider and Tint Slider. The Temp slider adds blue or yellow hues to neutralize warm or cool color casts. While the Tint slider adds green and magenta hues to the photograph.
Note: The Temp slider is more useful than the Tint slider because bright lights mostly produce a warm or cool color cast that cannot be fixed with Tint slider.
A Word of Caution
Despite being renowned for fixing flaws like underexposure or bad white balance in photos, Lightroom is not completely secure when it comes to editing valuable images. It can corrupt your RAW file during import to the hard drive. In fact, the editing tool can also affect your JPEG photo quality. Learn more about the same from our blog on Does Editing JPGs in Lightroom Reduce Image Quality?
As a precautionary measure, while using either of the photo editing tools, if your photos turn corrupt, use Stellar Repair for Photo to fix it. The tool can repair corrupt photos in JPG and JPEG format stored on a memory card, hard drive, USB flash drive, or any other storage medium. Follow the steps below to use Stellar Repair for Photo:
• Download the trial version of Stellar Repair for Photo on your laptop or computer.
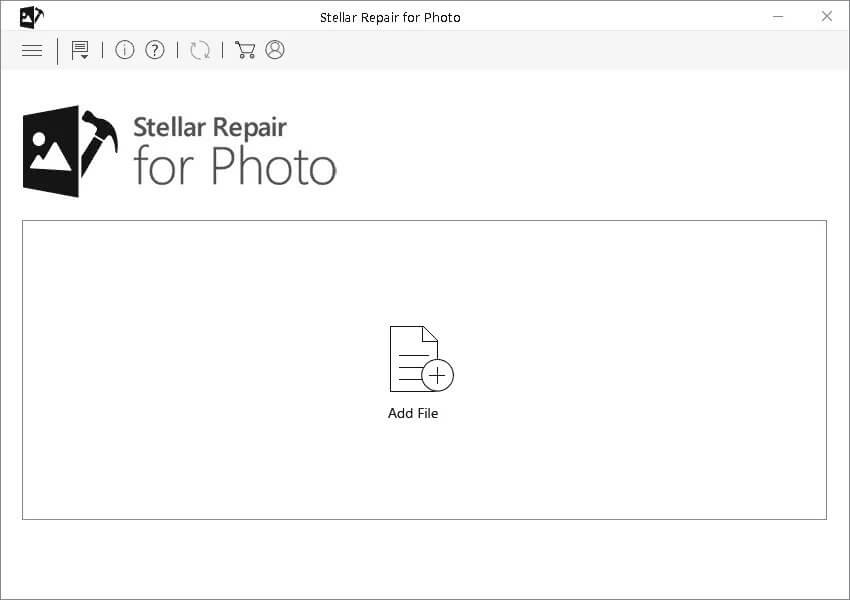
• On the maintain interface, click on ‘Add File’ to upload the file you wish to repair. The tool can fix multiple corrupt photographs at once and swiftly load them all.
- You can select multiple JPEG images at this stage by marking the tick box beside all the images. Click Repair at the bottom to commence the repair process.
- You can see the progress of the files repairing at the bottom.
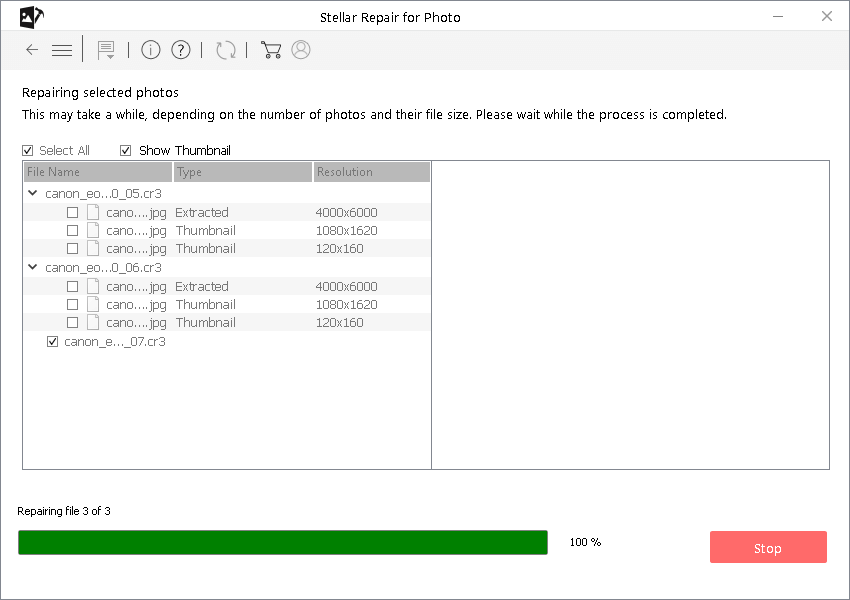
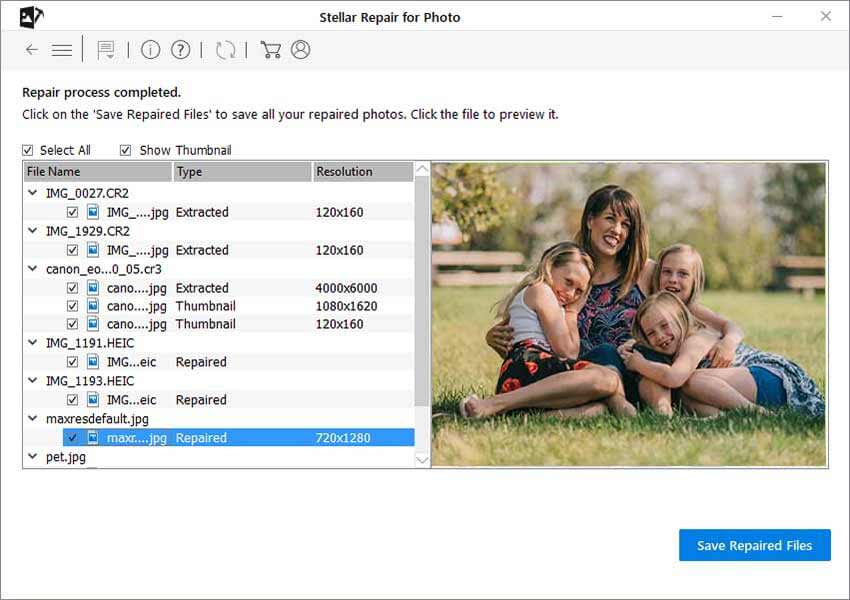
- Preview the repaired images. If the tool cannot repair a photo due to a bad sector or unforeseen corruption, you will get a notification of the same.
- Click Advanced Repair button to fix the issue.
- Click Save and navigate to the folder on your computer to store the repaired JPEG photo.
Pro Tip: Download the trial version of Stellar Repair for Photo first to get a hang of the software and the entire photo repair procedure. As per your experience, you can upgrade to advanced version of the software for more lucrative solutions.
The Bottom Line
After carefully considering both the professional photo editing tools, which one do you think is ideal to help you overcome bad white balance in photos? The answer to this question depends on personal preference and experience. However, we highly recommend you to stay one step ahead with a professional photo repair tool in case your photos turn corrupt.
What happens if you don’t white balance a photo?
Well, if you don’t use the correct white balance setting, you may get a picture with colors different from the original image. Therefore, in order to produce a beautifully exposed image with true to life colors, you must learn to effectively use the white balance setting of your digital camera.
Do photographers use auto white balance?
The AWB in-camera setting is the one the vast majority of photographers stick to. We can define auto white balance as the adjustment that allows the camera to select the best white balance and color temperature settings for a given scene.
Was this article helpful?