The Mac blue screen of death is rather a rare issue, though there is no need to panic!
There could be a variety of forms why you might be facing this problem. For instance, you might see a half-blue screen or screen with lines. The main point is that your data is safe. There is a way to fix it, and not even one. We offer you 5 methods to resolve the blue lines on the screen.
What’s Causing the Blue Screen on Mac?
Let’s figure out what is the reason for the blue lines on the Mac problem.
- A problem with a peripheral device connected to a Mac device.
- Issues with the Mac startup.
- Some specific apps are not working properly.
- Conflicting startup files.
- Damaged software elements.
How to Fix Blue Screen on Mac?
Solution #1: Shut Down your Mac and Disconnect All Peripherals
Begin with disconnecting everything connected to your Mac (for example, mouse or keyboard). The problem with the peripheral can cause blue lines on the Mac screen.
Here’s what you should do:
- Unplug all wires connected to your Mac (even the power cable).
- Turn off your Mac and let it shut down completely.
- Wait a few seconds.
- Turn your Mac on.
Did it help to resolve the annoying blue screen? Then the problem was in the peripheral.
In case the problem remains, let’s try another way.
Solution #2: Boot into Safe Mode
Try booting your Mac into Safe Mode. If you start your Mac in Safe Mode, macOS will only load the files and programs it needs to run. This way, it could help you with the blue screen.
1. Press and hold the Shift key immediately after starting or restarting your Mac. Once the Apple logo appears on your display you can release the Shift key.
2. Let your Mac boot.
3. Click on the Go tab and choose the Utility option.
4. Find the Disk Utility and click on it.
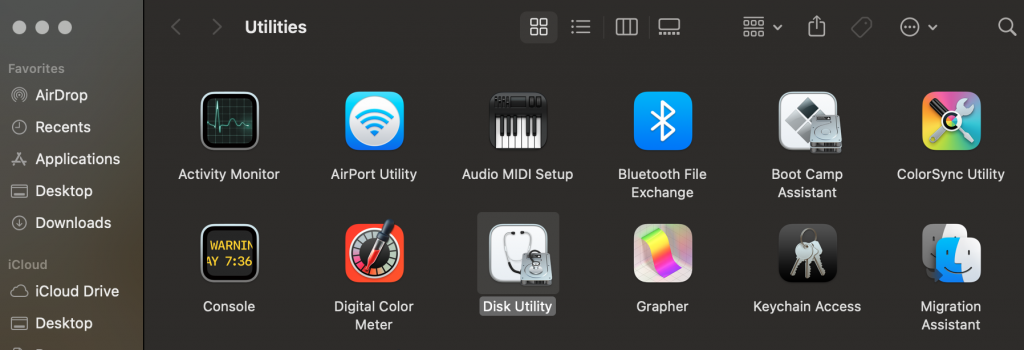 Utilities > Disk Utility
 5. Choose your drive and press on the First Aid icon.
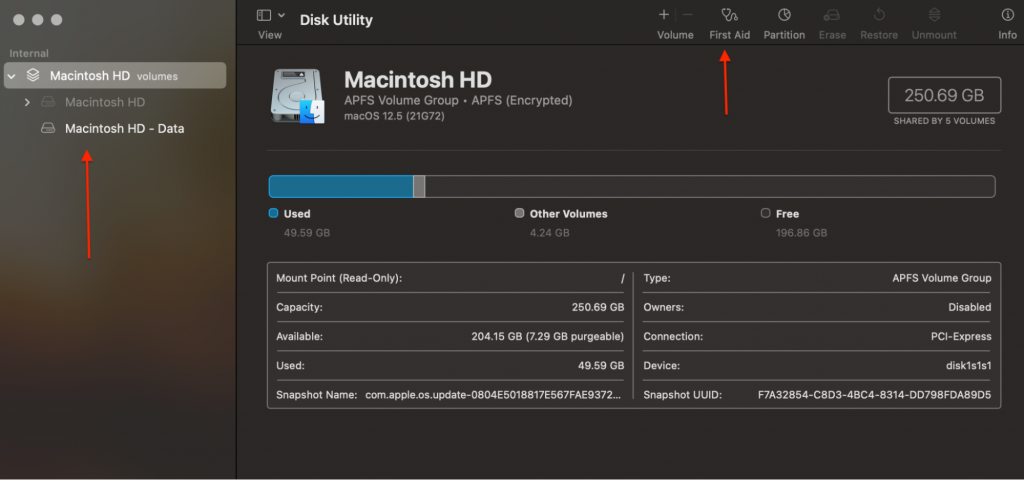 Disk Utility > Drive > First Aid
 6. Click the Run button.
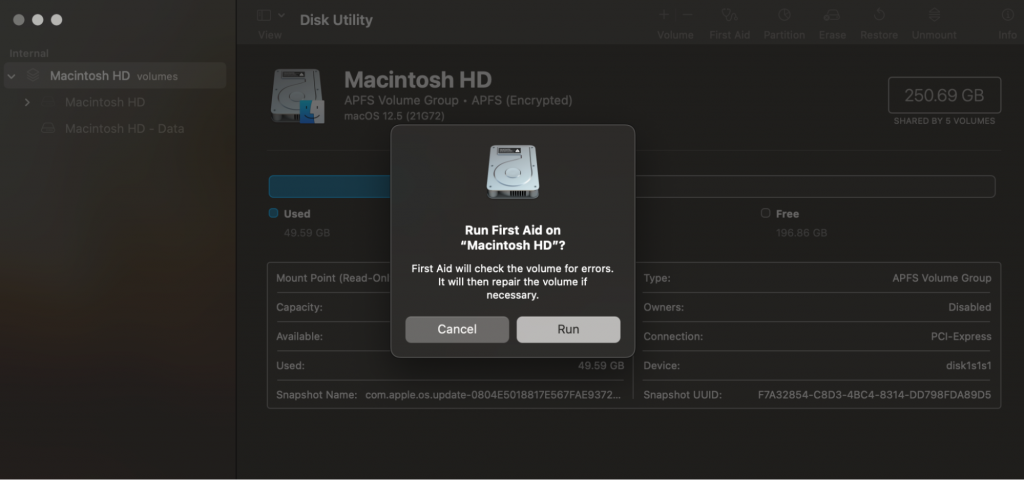 First Aid > Run
 7. Wait until the process is complete.
8. Press the Repair Disk option (if you see such).
9. Restart your Mac.
If Safe Mode hasn’t resolved the Mac blue lines on screen malfunction, you can check the Login Items.
Solution #3: Check the Login Items
Login Items are programs that open right when you start your Mac. Sometimes the login elements can cause such issues as a blank blue screen at startup or other problems. So let’s move to the steps on how to check your Login Items:
1. Click on the Apple logo and then click System Preferences.
 Apple logo > System Preferences
 2. Click on Users & Groups.
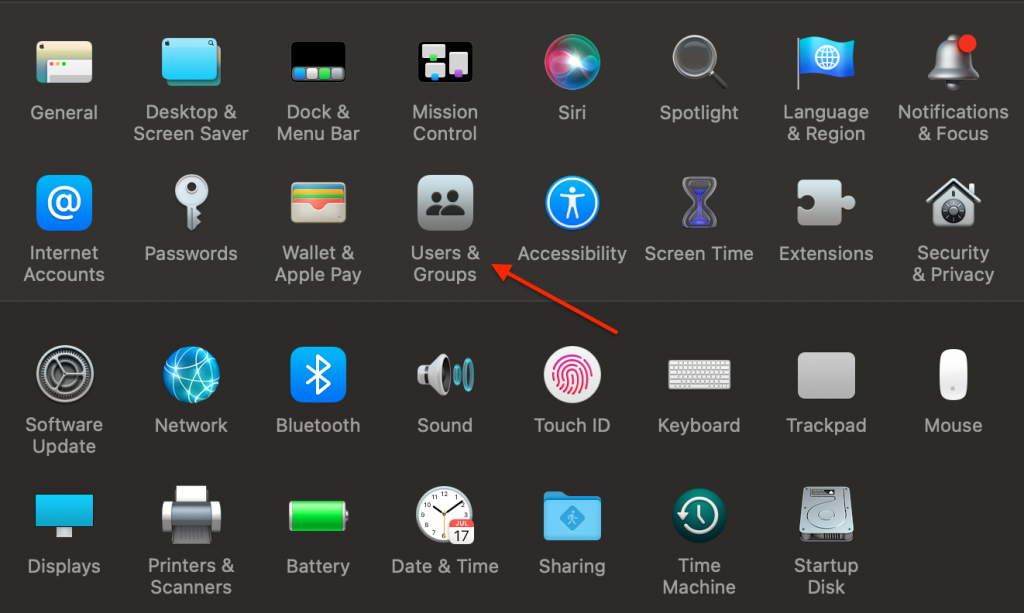 System Preferences > Users & Groups
 3. Here choose the account name (which is located under Current User) > click Login Items.
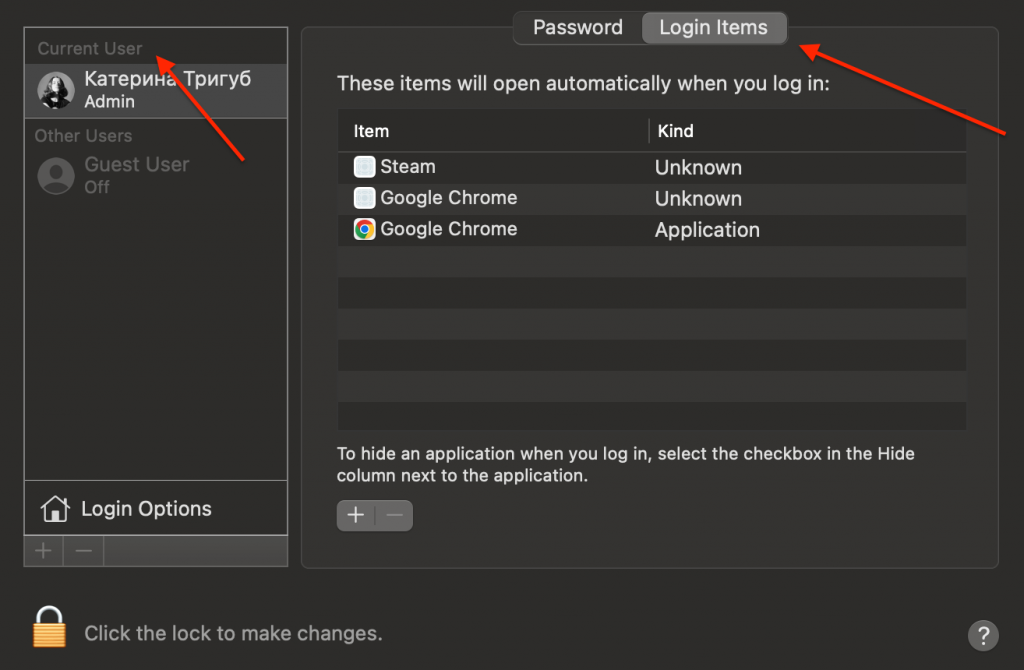 Users & Groups > Login Items
 4. Pick all of the Login Items > press the Remove (-) button.
 Login Items > Remove
 5. Restart your Mac (go to the Apple logo > Restart).
 Apple logo > Restart
 If the issue persists, let’s try updating your Mac.
Solution #4: Update your Mac
Outdated OS versions can cause many issues, and the blue screen of death as well. Make sure you have the latest version on your Mac.
1. Go to the Apple menu, and click System Preferences.
 Apple logo > System Preferences
 2. In the System Preferences, choose Software Update.
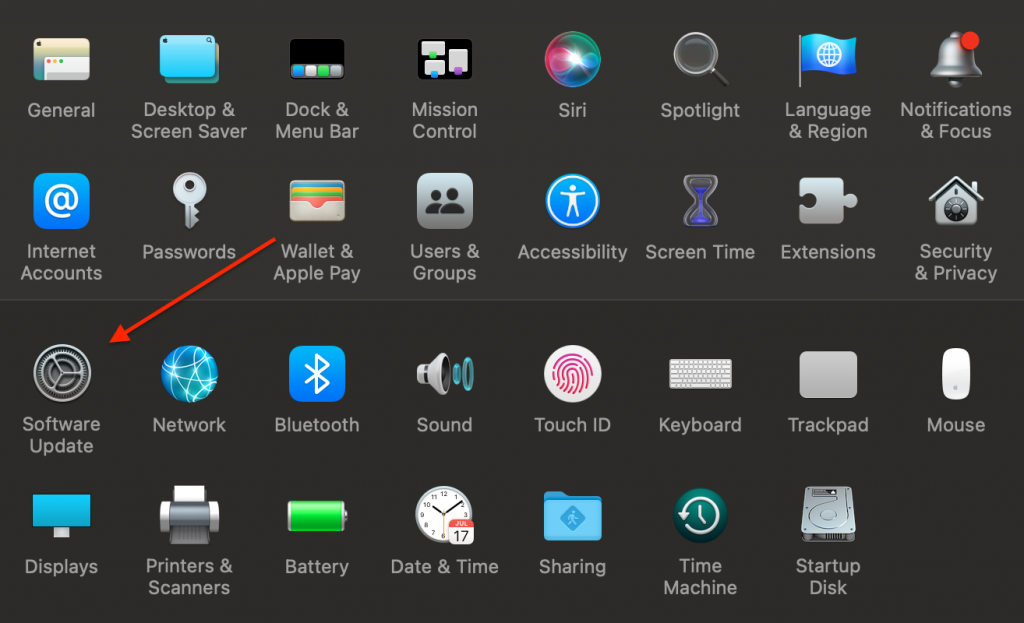 System Preferences > Software Update
 3. Click Update Now or Upgrade Now (in case you see available updates).
4. Update Now will install the newest updates for the currently installed version.
5. Upgrade Now will install a major new version with a new name (macOS Ventura, for example).
When you see a message that your Mac is up to date, then macOS and all the apps are up to date.
Solution #5: Reinstall macOS
A clean operating system install can fix the issue when your Mac is working erratically (for example, you are stuck on a blue screen).
Whether you do it over the Internet or install from a recovery partition (hard drive or flash drive on a Mac), reinstalling macOS keeps your files and user settings intact. When you reinstall macOS, you’ll need to connect your computer to the Internet. Here’s how to do it:
1. Click on the Apple menu logo and click Restart.
 Apple logo > Restart
 2. During your Mac is restarting, you can do one of the following:
A. Reinstall the initial version of macOS on your device from the Internet
- Press and hold Shift+Option+Command+R (hold these buttons until a spinning ball is displayed);
- Release the keys.
B. Reinstall your macOS using the built-in recovery disc on your device
- Press and hold Command-R until you see the Utilities window on the screen.
- Release the keys.
This instruction will reinstall the macOS version reserved on your device’s built-in recovery drive, including any updates you’ve installed.
3. Select Reinstall macOS and press Continue.
4. Follow the steps you will see on your Mac.
Before proceeding with macOS reinstall, it is better to ensure your data is safe. But what if you already lost your important files? Is there no way back? Fortunately, you can turn around time with the Stellar Data Recovery app.
Imagine that you have emptied the Trash bin and then realize that you had important files there. Did you use Command+Shift+Delete or Command+Option+Shift+Delete? Stellar Data Recovery can restore them!
The software can scan formatted sections on your Mac’s startup disk and removable media to locate lost data. Make sure you downloaded the Stellar before reinstalling your macOS.
Wrap Up
Considering the blue screen of death on Mac is a rare issue, thought it could happen to anyone. We offer you five quick solutions on how to fix it without bringing your computer to the store. Hope you found your way!
Read more:
Was this article helpful?