
Be it for screen recording an online interview or creating videos, QuickTime is a popular tool among Mac users. But, technical hiccups can spoil the otherwise simple working of QuickTime. Incidents such as QuickTime app crashed, sudden shut down of macOS, inadvertently closing MacBook without saving the recording, or accidentally deleting QuickTime recordings can freak you out as they lead to loss of important QuickTime files. Plus, simple troubleshooting like restarting QuickTime or Mac never helps. So how to recover unsaved or deleted QuickTime recordings?
This post shares the tested and workable solutions to recover unsaved, missing, or deleted QuickTime recordings. You can apply these methods on latest macOS Monterey, Big Sur, Catalina, High Sierra, and below versions.
Methods to Recover Unsaved QuickTime Recordings on Mac
Apple offers AutoSave feature in QuickTime app that can protect your unsaved recordings. Further, if you have deleted QuickTime recordings, other than backup, a recovery software can rescue you from the loss situation. Besides, if QuickTime recordings are saved somewhere on drive and not deleted, try to find them with Spotlight search on Mac or by using mdfind command in Terminal.
Method 1: Recover Unsaved QuickTime Recording from AutoSave on Mac
‘I was recording an important meeting on QuickTime, but suddenly my Mac crashed. When I restarted, couldn’t find the unsaved screen recording anywhere. How to recover unsaved QuickTime recording in my case?’
The AutoSave feature on macOS for apps helps to retrieve the files which you couldn’t save or forgot to save. AutoSave works when you close a macOS application without saving the file manually. For QuickTime, too, you can utilize the feature to recover unsaved recordings on Mac. The unsaved QuickTime recordings are usually saved at ~/Library/Containers/com.apple.QuickTimePlayerX/Data/Library/Autosave Information/.
Follow the below steps to recover unsaved QuickTime recordings with AutoSave:
- Click on the Apple icon and navigate to Go > Go to Folder on Mac.
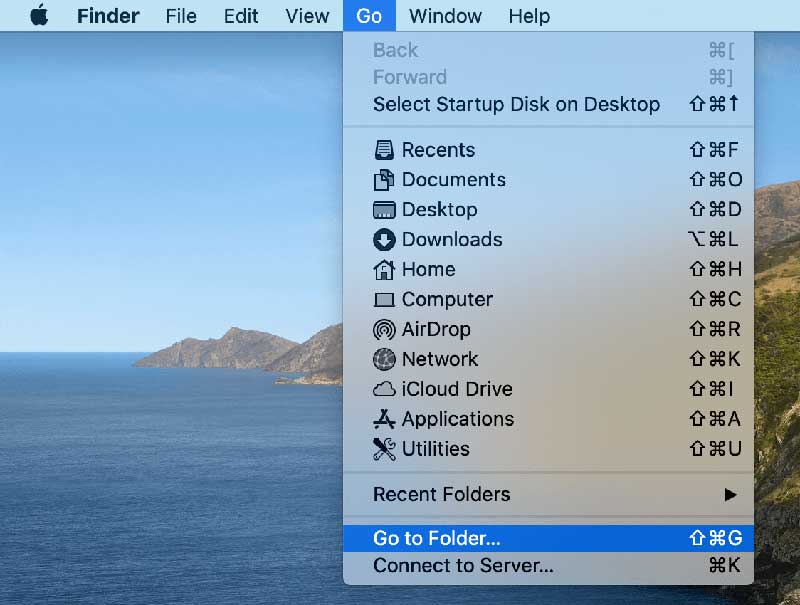
- In the box, copy and paste the following path: “~/Library/Containers/com.apple.QuickTimePlayerX/Data/Library/Autosave Information/”

- Click Go to open the unsaved QuickTime files in Autosave Information window. You will see the list of unsaved QuickTime screen or audio recordings along with modified date, time, and size.
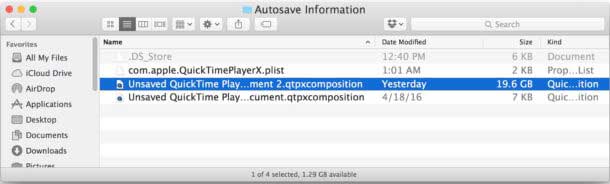
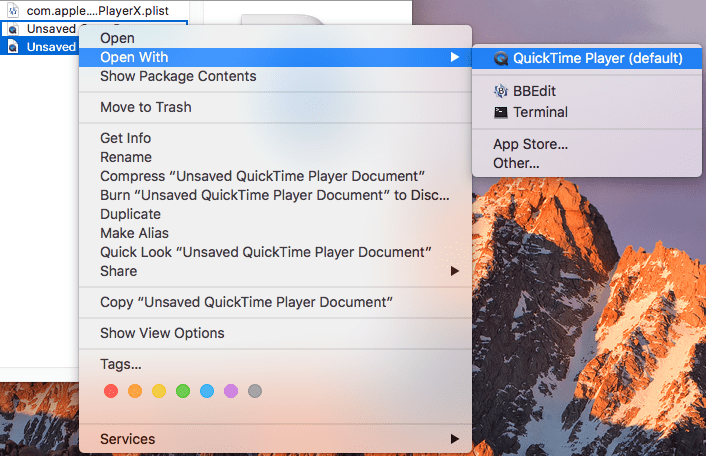
- Select and right-click the required unsaved QuickTime recording file. Usually the largest file size is the screen recording file. Follow Open With > QuickTime Player.
- In QuickTime window, go to File > Save.
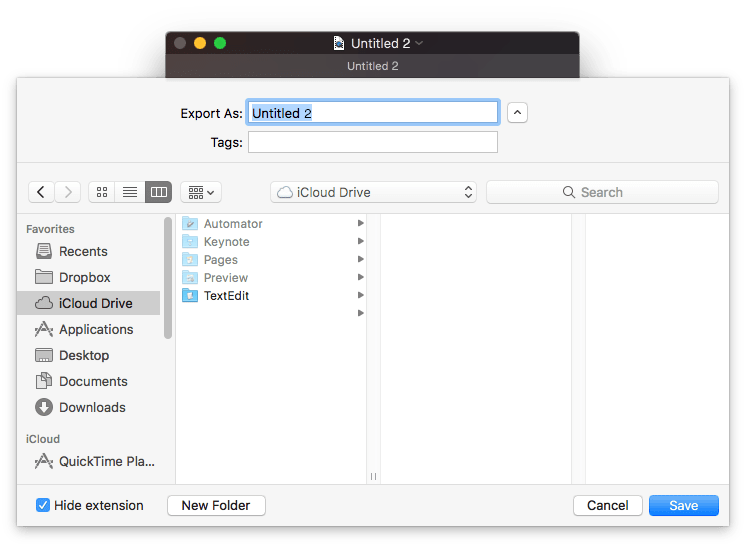
- In the Export As box, rename the recovered QuickTime recording and click Save.
You can save it to any location on your Mac.
Method 2: Recover deleted QuickTime recording from Time Machine
If enabled, Time Machine automatically backs up your videos, data, music, etc., at set intervals.
You can recover deleted QuickTime audio and video recordings from Time Machine backup on Mac. However, this can be tedious, if you don’t know the QuickTime file name or the directory where it is saved in the backup file.
Follow the below steps to restore the deleted QuickTime screen recording in Time Machine:
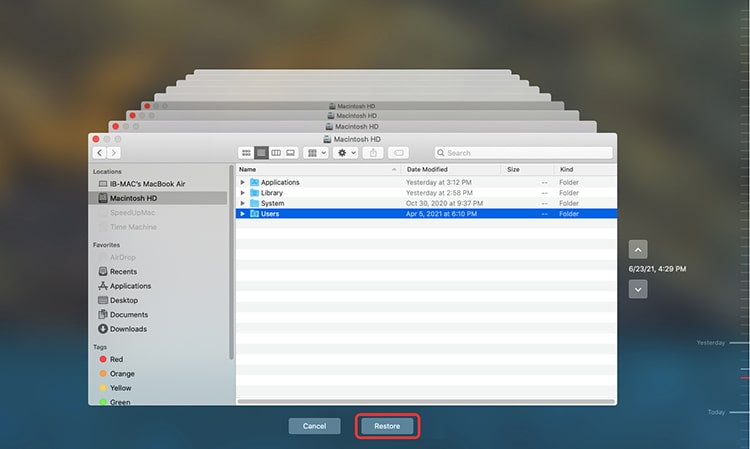
- Connect the Time Machine drive to your Mac.
- From the menu bar, go to Time Machine > Enter Time Machine.

- Using the TimeLine, navigate to the backups. Find the required QuickTime recording file. Click Restore.
Learn more on how to recover data from Time Machine.
Method 3: Use Spotlight to recover missing QuickTime recordings
If you can’t find QuickTime recordings and are sure they are not deleted from your system, then use Spotlight. The macOS search utility thoroughly scans macOS drives to retrieve QuickTime recording files. Spotlight recovers files along with their metadata information.
Here’s how you can use Spotlight to recover deleted screen recording on Mac:
- Press CMD+ space to open Spotlight.
- In the search box, type kind:MOV date:today
- Press Enter.Spotlight will search for the MOV files created on the specified date. Note: Spotlight doesn’t search Trash on Mac.
Method 4: Use the mdfind command in Terminal
Alternatively, try to recover missing or disappeared QuickTime recordings using the mdfind command in macOS Terminal. To use this method, you need the QuickTime file name.
Steps to recover lost QuickTime screen recording with Terminal command:
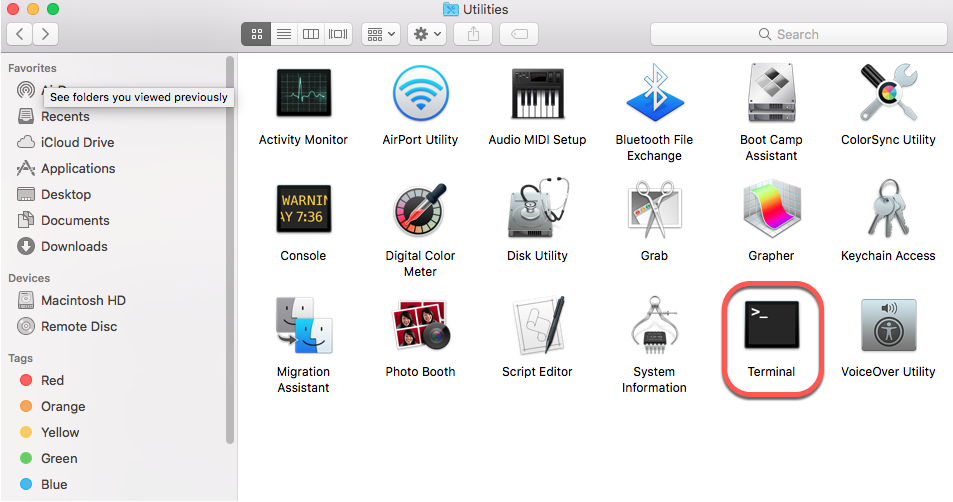
- Go to Finder > Applications > Utilities.
- Click on the Terminal app to open.
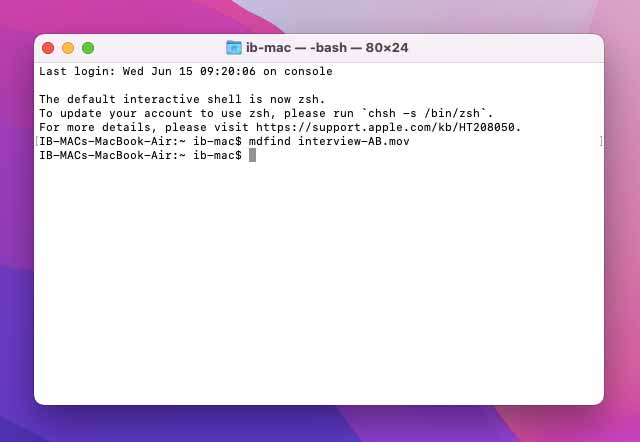
- In the Terminal window, type: mdfind filename.mov. Here replace <filename> with the name of your QuickTime recording file name.
- Hit Enter. The command displays the path of the lost QuickTime file from where you can recover it.
Method 5: Recover QuickTime recordings from Trash
All the files deleted on Mac stay in the Trash bin for 30 days or until you permanently remove them from the bin. If you have deleted the QuickTime screen recording, it should be in your Trash folder on Mac. So check and restore the QuickTime files from Trash on Mac.
Method 6: Recover Deleted QuickTime Recordings with software
Unfortunately, if none of the above solution proves useful, run a QuickTime files recovery software. You can downloaded the popularly used Stellar Photo Recovery for Mac that can scan the drive to recover video recordings, audio recordings, and images. Plus, you can customize the scanning process to quickly recover only the .MOV format files used in QuickTime recordings and avoid unnecessary data recovery. The software restores the deleted .MOV files with original name, date, and timestamp.
Below are the steps to recover deleted QuickTime recordings with software:
- Download and run Stellar Photo Recovery on your macOS, the official site.
- Launch the software and select the location from where you want to retrieve the deleted or lost video recordings.

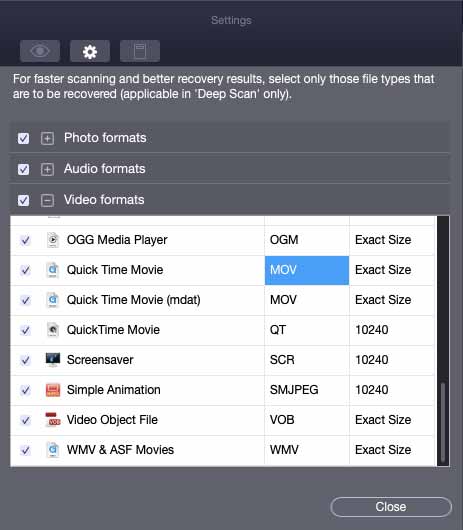
- In addition, you can go to ‘Advanced Settings’, under the video formats, select MOV file, and close the box.
- After the scanning process finishes, save the recovered QuickTime recordings on your Mac.
Wrapping Up
With all the reliable methods shared in this post, now you know where to look for the unsaved, deleted, or disappeared QuickTime recordings. You can easily recover unsaved QuickTime recordings from Autosave. If you can’t find QuickTime files on your Mac, recover the lost videos using Spotlight or ‘mdfind’ command in Terminal. Besides, to recover lost or deleted QuickTime recordings, try Time Machine or an efficient QuickTime Recovery software like Stellar Photo Recovery for Mac.
FAQ
Can I recover QuickTime recordings from temporary folder on Mac?
Like other macOS apps, QuickTime often stores temporary files on Mac from where you can try to restore the lost recordings. However, recovery from temp files is not useful. Usually, these temp files get deleted automatically after QuickTime recording stops or the app closes. On testing, we found that we couldn’t save or read the recovered QuickTime files from temporary folder.
You may find QuickTime temp files at these locations on your Mac:
- /private/var/folders/subfolder name/-Tmp/TemporaryItems/quicktimefilename.mov
- ~/Library/Caches/QuickTime/
- /Library/Application Support/
- /$TMPDIR/com.apple.QuickTimePlayerX
ow to change QuickTime Default save location?
Follow the below steps to change the save location of your QuickTime files:
- In QuickTime, open the screen recording controls.
- Select Options > Save to. Select the location where you want to save your QuickTime recordings.
- Select Remember last selection.
Do QuickTime recordings automatically save?
Yes, QuickTime saves the files automatically in Movie. mov on desktop. You can rename the file from desktop or from the QuickTime menu bar, select ‘Save As’ to rename the QuickTime file.
Why are my screen recordings not saving on Mac?
QuickTime screen recording may not save due to background apps running on macOS that may be causing software conflict. Plus, sometimes, the problem is noted when you change the default save location of the recordings. Hence, force quit all the background apps when recording on Mac and change your QuickTime save location to default.
Was this article helpful?