If you've arrived at this page, it's obvious that a video you’re trying to watch has failed to open or has become choppy or jerky. You should know, this could be the result of a corrupted or broken video codec.
It's critical to address the problem immediately so that you can continue with uninterrupted video playback. This article shares different solutions to fix broken video files. Additionally, learn the causes behind such issues in your video files.
Signs of Video File Corruption
Although losing your favorite movies and videos to corruption is annoying, technical glitches are often unavoidable. Irrespective of the video quality and camera type, videos can get corrupted anytime — while recording, processing, or when you’re trying to save them on your USB or hard drive.
If your videos give playback errors, showing signs of stuttering, flickering, or looking choppy, jerky, or out-of-sync, it indicates file corruption. Additional signs include showing black screen, bright, flashy color bands, or audio lag.
Reasons Behind Video File Corruption
A corrupt video file means missing one or more critical components, thus resulting in disrupted playback. For example, the video is missing frames or audio/video components, or it’s severely damaged. There could also be some faulty metadata or a missing header.
There could be many reasons for video file corruption:
- Sudden power cut, system shutdown, or OS crash
- Virus or malware attacks
- Bad sectors in the storage drive
- Physically damaged hard drive or storage media
These unavoidable technical malfunctions can damage the video file header, data, sound sections, and frames. Let’s understand them in detail.
Case 1: Video File Header Corruption
A file header contains specific video file attributes, such as file format, audio codec, size, resolution, camera model, video settings, etc. Any software would first read the header information to open a video file. But if this header gets damaged or broken, no media player would be able to read the video file and show errors like:
- Windows media player encountered an error while playing this video.
- Can’t play video. Error occurred.
- Loading media file could not be played.

Case 2: Video Data Corruption
A professional video repair tool can only fix corrupt data in media files making the video perfectly playable. Make sure the software supports the file format of the corrupt video.

Case 3: Video Frame Corruption
Choppy, broken, jerky, stuttering, splitting, or audio lag in videos point towards frame corruption in the file.
Corrupt or missing frames in videos can be caused due to a virus, malware, sudden power failure, OS crash, system shutdown, etc., while transferring, viewing, or editing a video file. You can repair video frame corruption using advanced Stellar Repair for Video software.
Case 4: Video Track Corruption
A video file consists of a container that has both audio and video data. If you’re facing missing sound, audio lag, or video sync issue, it indicates corruption in the sound section.
The advanced algorithms of software like Stellar Repair for Video can automatically reconstruct damaged audio data structure and video data.
How to Fix Corrupted Video Files - DIY method
Repair corrupt videos using professional video repair software. Video repair tools automatically fix broken or damaged file information making the videos playable again. An advanced tool would resolve stuttering, choppy, flickering, black screen, no sound, out-of-sync, and other video issues caused by file corruption. But not every repair tool is programmed to fix all kinds of video corruption. Some may repair a corrupt file header or data but may not be equipped to fix sound sections. Other tools like FFmpeg repair corrupt videos but use complex command lines. They require technical knowledge, which a novice user may not have.
So choose a video repair tool that can effectively fix video playback problems as which is also easy-to-use.
Note: No video repair software can fix corrupt video files with missing/ lost data or information.
A one-off software, Stellar Repair for Video can repair corruption in the file header, data, video frames, sound section, or errors in the video slider movement. It is uncomplicated and quickly finishes the repair process in three steps:
- Add files
- Repair
- Preview and Save
Key advantages:
- Works on various video formats - MOV, MP4, AVI, MKV, FLV, DIVX, WEBM, AVCHD, WMV, 3GP, MTS, etc.
- Repairs videos from DSLR, security camera, drone, Android, iPhone, etc.
- Supports 4K, HD, and UHD video repair
- ‘Advance Repair’ for severely corrupt videos that are not repaired in initial quick repair
- Repairs videos corrupted due to bad sectors on SD card, USB drive, hard drive, etc.
- Batch repairs multiple videos in one go.
Step-by-step: How to repair corrupt videos on Windows and Mac
Step 1: Click Add File to upload corrupt videos.
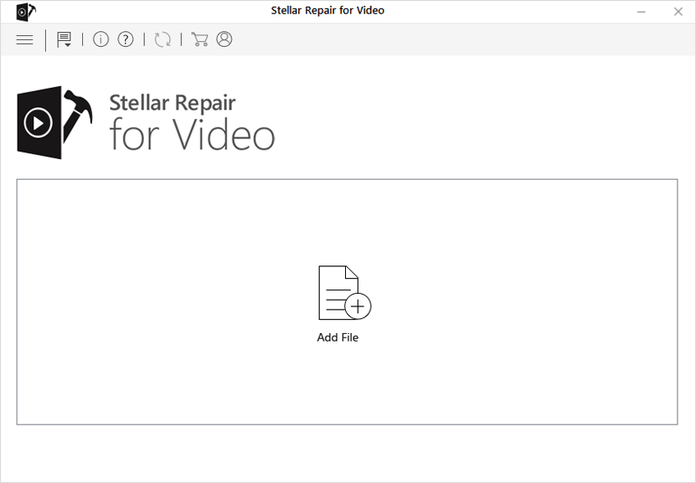
Figure: Add file screen
Step 2: Click Repair to begin the repair process.
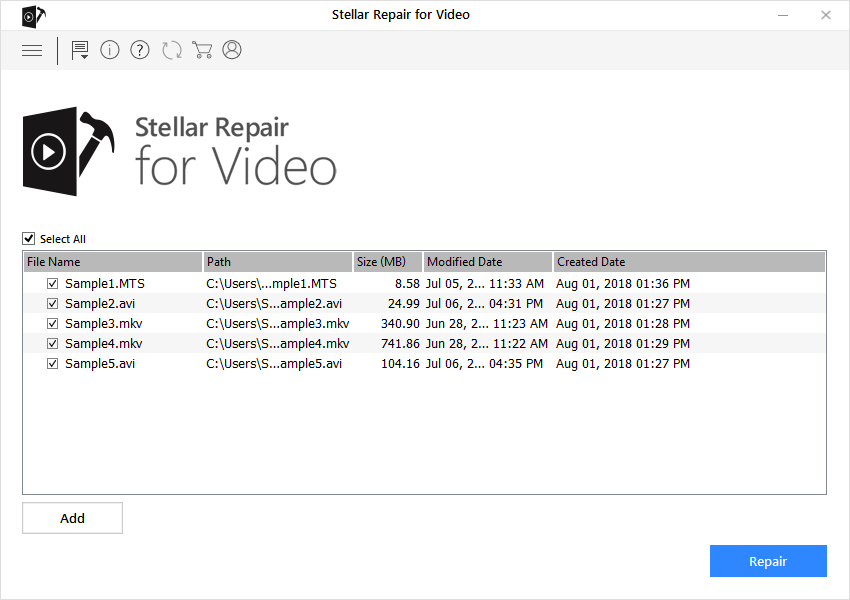
Figure: Repair option in software
Step 3: After the repair process finishes, Preview and click Save Repaired Files to save the repaired videos at your chosen location. You can save the repaired files either at the source location or at your desired location.
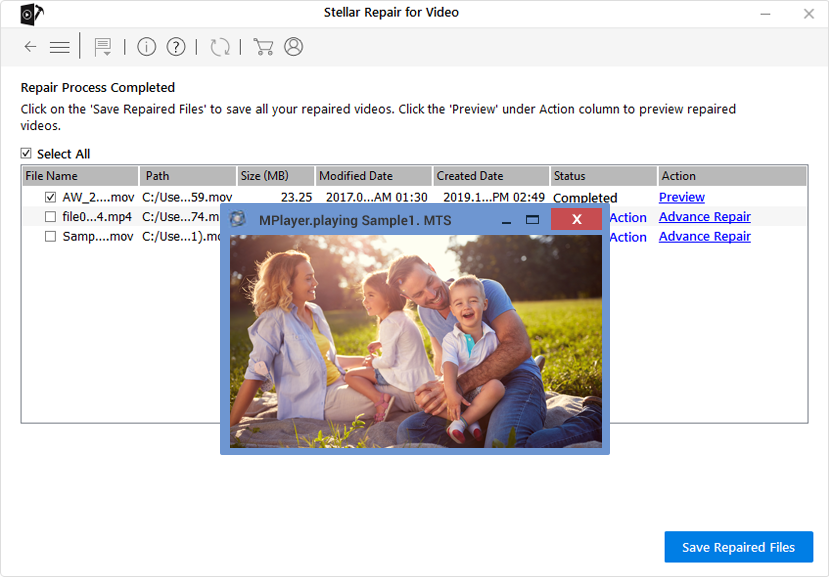
Figure: Preview repaired video screen
If you see the 'Advance Repair' option instead of Preview across a video file, it means your file is severely corrupt. The software automatically recommends ‘Advance Repair’ for severely corrupt videos after the scan. The feature lets you repair complex video corruption issues using ‘Sample File’— a working file of any size created from the same device and the same format as your corrupt video file. The software uses the sample file information to repair severely corrupt videos.
How to use ‘Advance Repair’ for severely corrupt videos
Step 1: Click on Advanced Repair.

Figure: Select ‘Advance Repair’ for severely corrupt files
Step 2: A dialog box asks for a Sample video. Click Next.
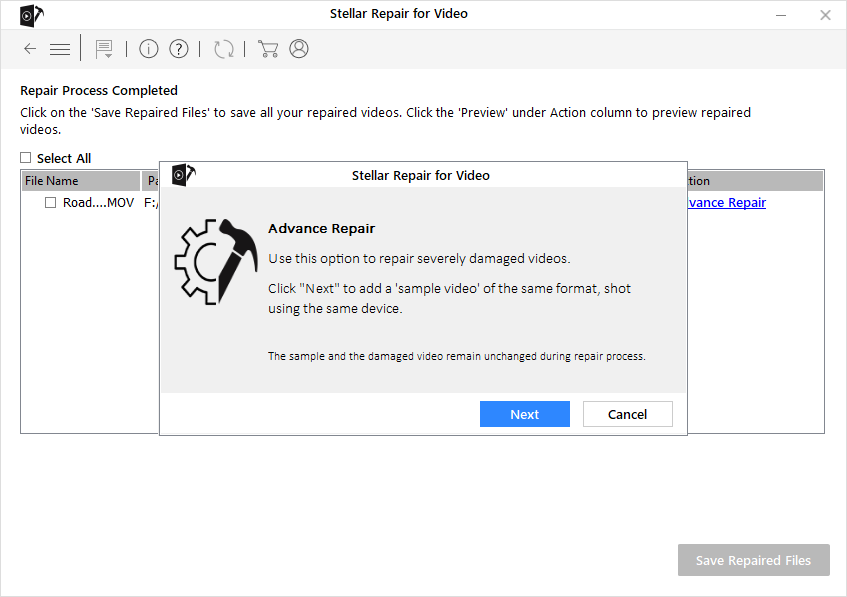
Step 3: Browse to select the sample file on your drive and click Repair.
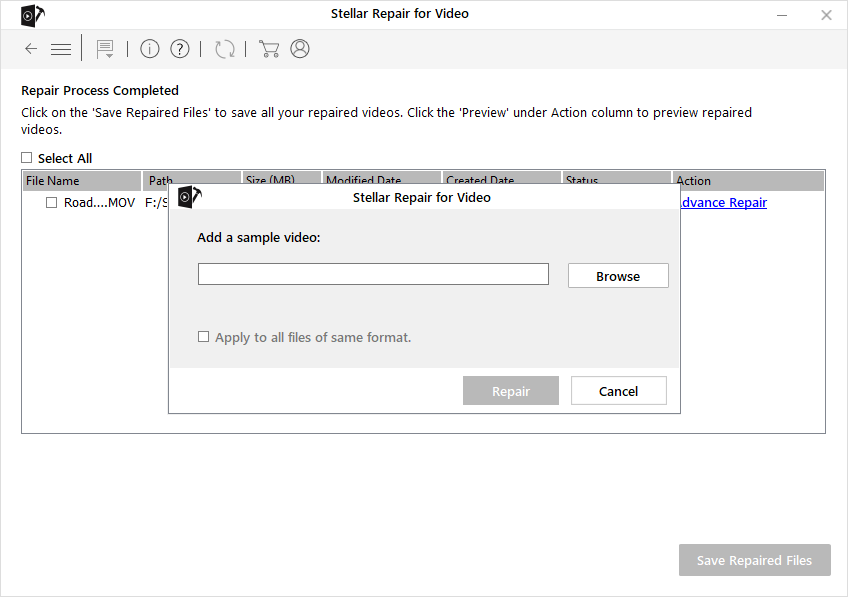
Figure: Dialog box to add Sample Video
Step 4: As the repair process completes, hit OK. Next, click Save Repaired Files.
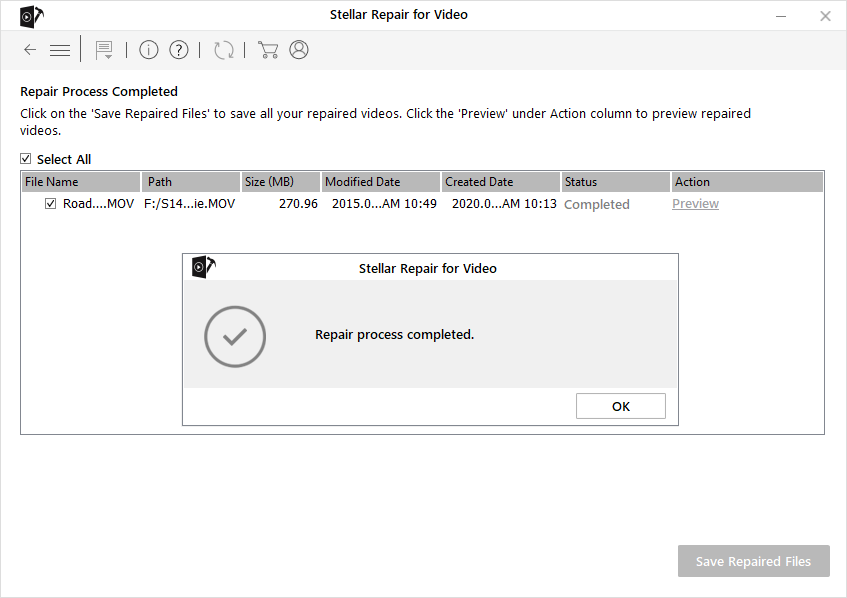
Figure: Repair process completed message
Step 5: Preview the repaired video and click on Save Repaired Files.
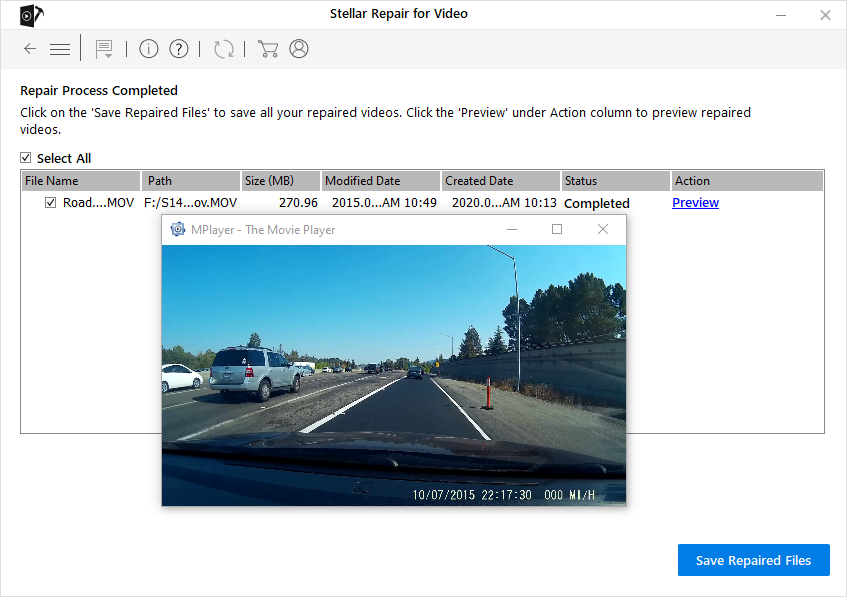
Figure: Preview repaired video after ‘Advance Repair’
Conclusion
Your videos can get damaged, distorted, broken, or give playback error due to corruption in the file header, frame, data, or a sound section. Stellar Repair for Video is a comprehensive solution to fix all video problems occurring due to such file corruptions. Its ‘Advance Repair’ feature ensures severely corrupt video files are also made playable. The software supports all popular video file formats from any camera.
Stellar Repair for Video is fast & intuitive, and any non-technical person can use it without help.
Hope you found this DIY guide to fix video corruption helpful. You can try a free demo and preview the repaired videos to assess the software’s performance.


 9 min read