After configuring and setting up a hybrid setup for on-premises Exchange and Exchange Online in Office 365 using Hybrid Configuration Wizard (HCW), you must check the hybrid setup for client connectivity and mail flow before moving or migrating the mailboxes.
In a Hybrid configuration, you can choose to keep the mailboxes on on-premises or move them to Exchange Online based on your organization's need. However, it's important to test the configuration before deploying the server in the production environment to avoid issues later.
Testing New Exchange Hybrid Configuration with Office 365
To test the new on-premises Exchange hybrid configuration with Office 365, you must create a test mailbox in Office 365 to ensure the following:
- Verify the mail flow between on-premises and Exchange Online is working
- Check client connectivity with Exchange Online
- Move mailbox from on-premises to Exchange Online
The detailed steps are as follows:
Step 1: Create Mailbox in Office 365
You can create an Office 365 mailbox from the Exchange Admin Center on your on-premises Exchange Server. The steps are as follows:
- Login to Exchange Admin Center and click recipients.
- Click + icon and choose Office 365 mailbox.
- Enter the mailbox details, including name, last name, login name, mailbox type (User mailbox), and password. Make sure to choose the Organizational unit you added in the Azure AD Connect Synchronization during hybrid configuration.
- Click save.
Once the mailbox is created, click Office 365 in Exchange Admin Center and check if the mailbox is visible. It may not be visible immediately as it takes some time to reflect in Office 365 or Exchange Online. Thus, you must wait for the directory synchronization to occur itself. This will also let you know if the directory synchronization is working fine. But if you want, you may also force directory synchronization to make this quick.
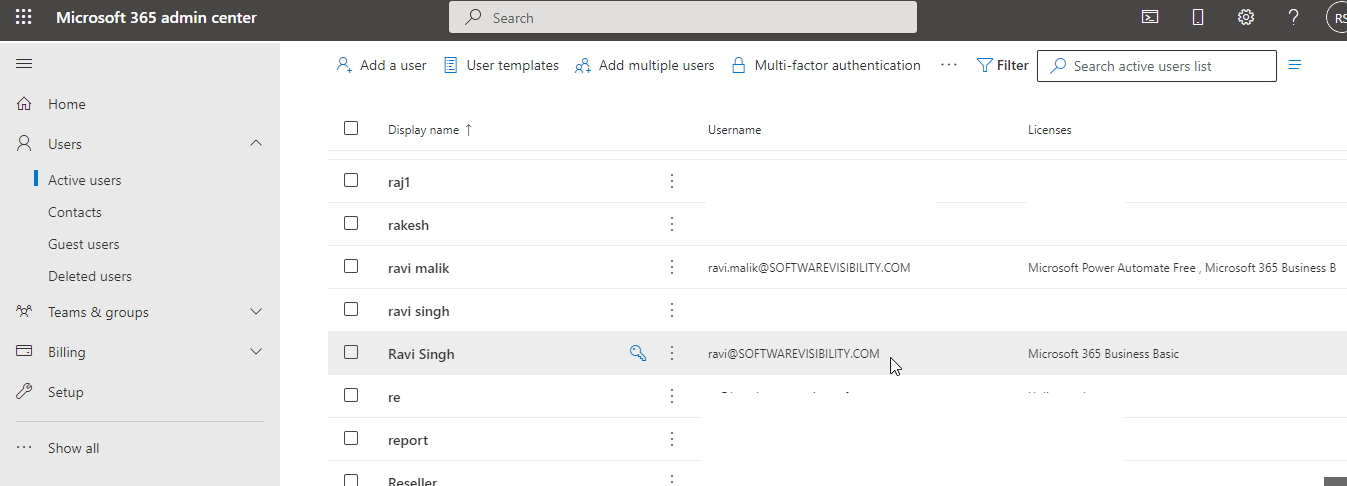
After directory synchronization, the mailbox should be visible in the Office 365 admin center under Active Users.

To check if the mailbox is accessible and Autodiscover is working, sign in to the Outlook client on your PC. Use the credentials entered during mailbox creation in Office 365 via EAC. If the account is configured successfully, it indicates synchronization and Autodiscover are working.
Step 2: Check the Hybrid Mail Flow and Client Connectivity
To verify the hybrid mail flow and check if the cloud mailbox can send/receive emails for on-premises mailboxes and emails are flowing through the Exchange Online, send a test email. For this, you can create another mailbox in Office 365 via Exchange Admin Center and then send an email using the Outlook client. If the email is received in the other mailbox, reply to check both send and receive are working. Also, send an email to on-premises mailbox users and vice-versa.
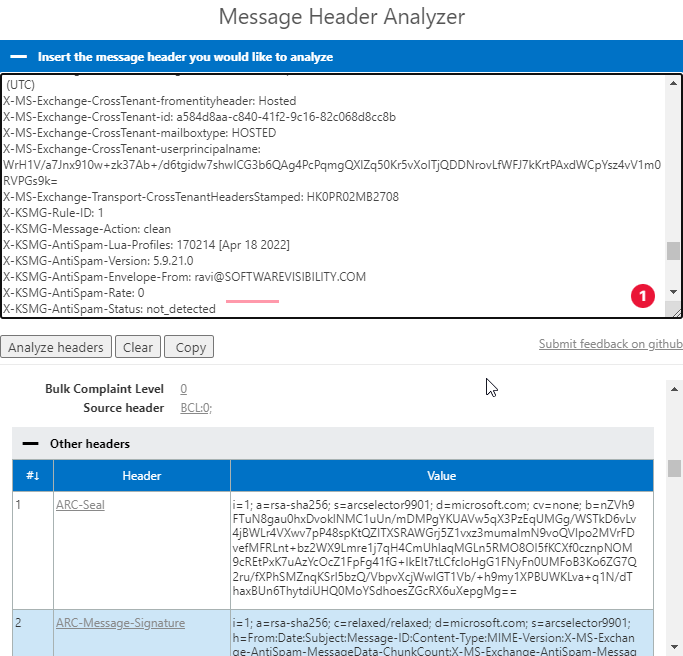
You can then use Message Header Analyzer to verify the path emails take to deliver. To find the email header, double-click on an email in Outlook to open it in a new window and go to File > Properties.

This will help you check and verify if the hybrid mail flow is working in both directions.
Step 3: Move the Mailboxes to Office 365
Once you have tested everything needed to verify that the hybrid configuration is working as expected, you may now move the mailboxes from your on-premises Exchange Server to Office 365.
To begin the migration, follow these steps:
- Open Exchange Admin Center (EAC), click Office 365, and go to recipients > migration.
- Click + icon and choose Migrate to Exchange Online.
- Create a migration batch and choose a recipient that will receive an email notification when the migration batch is completed.
You can also use an EDB to PST converter software, such as Stellar Converter for EDB, to move mailboxes from on-premises Exchange to Office 365. The software can extract mailboxes from your on-premises Exchange database (EDB) files and export them directly to Office 365. Furthermore, it auto-maps the source with destination mailboxes and provides an option to edit/map mailboxes manually. This helps in faster mailbox migration without any risk of data loss.
You may also set priority to move important mailboxes first than the others. It can export up to four mailboxes from the Exchange database to Office 365 simultaneously, that's 4x faster and much more reliable than the manual batch migration method.
Once the migration is completed, retest the client connectivity for the users and mail flow by sending a test email. Also, schedule or book a meeting to check busy/free info is visible to others in the calendar on both on-premises and Office 365. Create one from both sides to verify.
Conclusion
This article explains how to test a new Exchange hybrid configuration with Office 365 (or Microsoft 365) before moving the mailboxes from on-premises to Exchange Online. By testing the configuration with a few test mailboxes, you can verify the connectivity and mail flow to ensure end-users do not encounter any issues later while using their mail account. Once the testing is complete and the hybrid deployment is working, you can create a migration batch in Office 365 via EAC or use an EDB to PST converter software to move the mailboxes to Office 365 or Exchange Online.
Yes, you can re-run Hybrid Configuration Wizard as many times as you want and select a different endpoint. For more information, refer to the following Microsoft guides.


 4 min read
-to-Office-365-1733.jpg)


