Microsoft decided to roll out Windows 11 in phases (builds) to provide the best experience to its end user. With the help of the Windows Insider Community, the first Windows 11 Insider Preview build to the Dev Channel Build 22000.51 was released. Later, Beta Channel insider builds (21H2) and Release Preview Channel Builds 22621.457 came into existence.
Now, Microsoft keeps rolling the builds to all Dev, Beta, and Release Preview Channels; however, Build numbers are higher in Dev Channel and no longer match the stable release of this new OS. If you’re currently using Windows Insider Program and wish to switch to Windows 11 Stable Build, here’s how you can do it.
Switch from Windows Insider to Windows 11 Stable Build
Here, we’ll discuss how to download Windows 11 official release for all Windows insiders. However, if using Dev Channel, you’d need to clean install the OS. So let’s start without further ado!
Switch from Beta or Release Preview Channel
You’d have to flip a switch in Settings to unenroll Windows 11 devices from the Windows Insider program if currently using Beta or Release Preview.
- Open the Settings app and go to Update & Security.
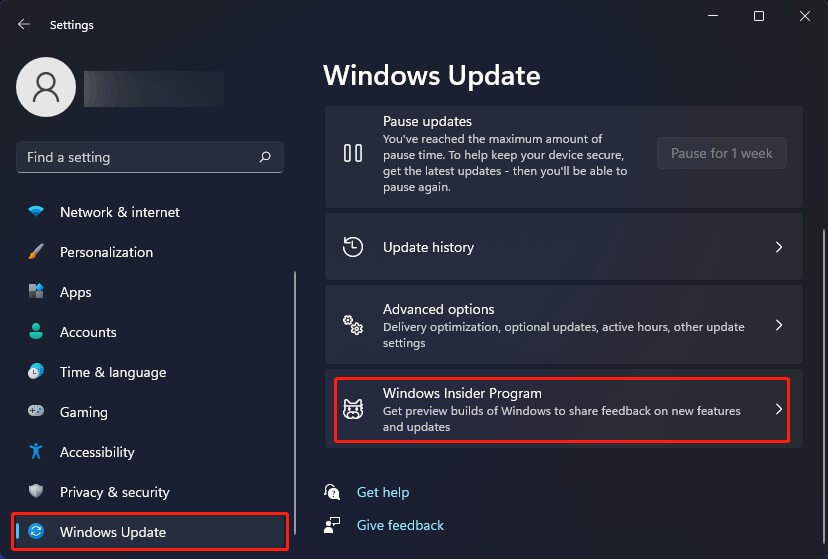
- Then select Windows Update and click Windows Insider Program.
- On the next page, expand Stop getting preview builds and flip the switch ON beside the option – “Unenroll this device when the next version of Windows releases.”
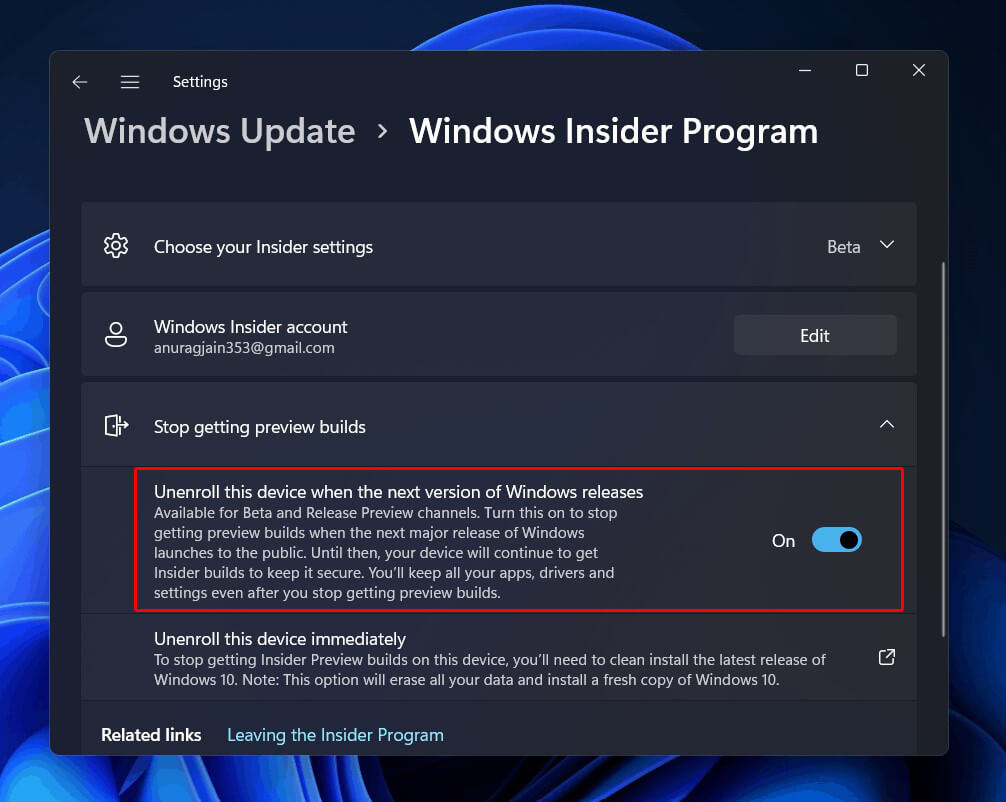
- You’ll stop receiving the preview builds when the major release of this OS launches.
- If you want to stop the preview builds instantly, click Leaving the Insider Program, given at the end of the same page.
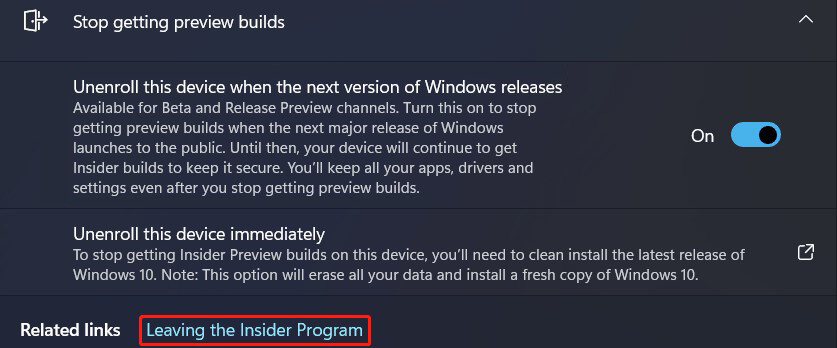
- It will redirect you to a web page where you must click Leave the program now.
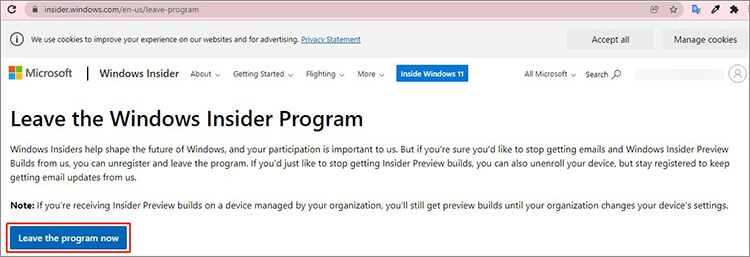
- That’s it. You’ll no longer receive preview builds.
- Next, you can check for the Windows 11 update in the Settings by following Start > Settings.
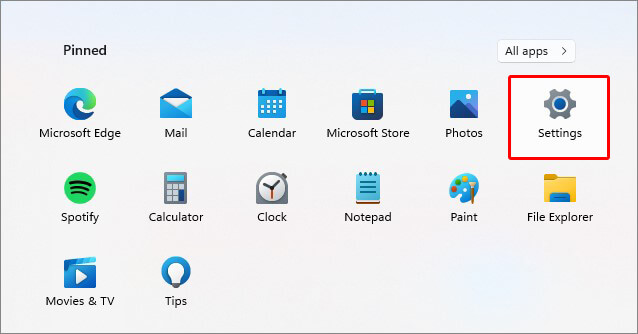
- You can also press Windows + I to open Settings.
- In the app, click Update & Security and then go to Windows Update.
- Next, click Check for Updates.
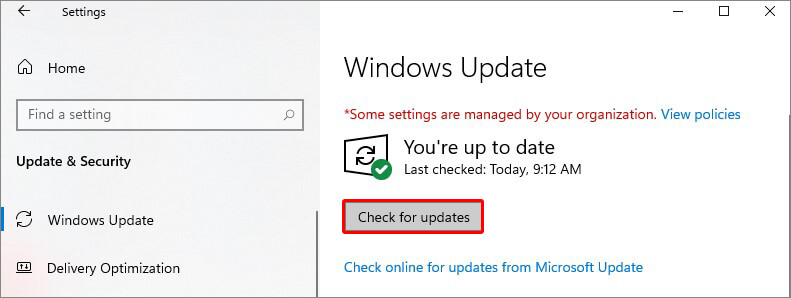
- If the stable release update is available for this newest OS, click Download/Install.
- Wait until the process ends, and then reboot your system. Windows 11 Stable Build will be installed on your laptop/PC.
Switch from Dev Channel to Windows 11 Official Build
In Dev Channel, the build number is higher than Beta or Release Channel, due to which builds released for this channel no longer match the Windows 11 experience. Hence, if you want to switch from the Dev channel to the stable build of this OS, you would need to change Dev to another Channel first. However, there are two scenarios:
Scenario A: Both Channel Build Number is Similar
To do the same, you need to check the current build number in the current channel and then check the build number in the channel you want to switch. If the build number is equal in both channels,
- Open Settings and follow Settings > Windows Update > Windows Insider Program.
- Next, click Choose your insider settings and select the one you find similar to your channel build.
- The next update you’ll receive for your new channel.
- Once switched to Beta or Release Channel, you can follow the above method to switch from Windows Insider to Windows 11.
Scenario B: Dev Channel Build Number is higher than the other channel
If the Dev Channel build number is higher than the channel you want to move to, you’d need to perform a clean installation of Windows 11.
We’d recommend you first take a backup of all your files, folders, apps, and other data. You can also use dedicated data recovery software, such as Stellar Data Recovery Free Edition to recover all types of data from your system.
Next, do as the following instructions say:
Create Windows 11 Installation Media
- On Download Windows 11 page, click Download now under Create Windows 11 Installation Media.
- Connect the USB flash drive to your system and run the downloaded file.
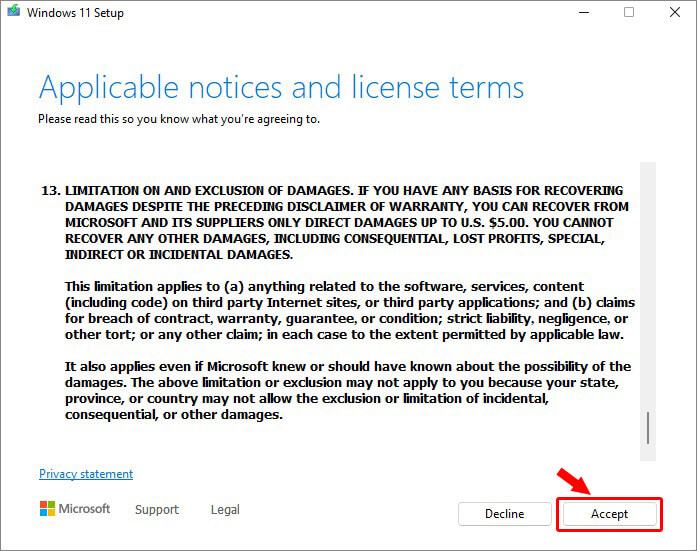
- Click Accept after reading the license terms.
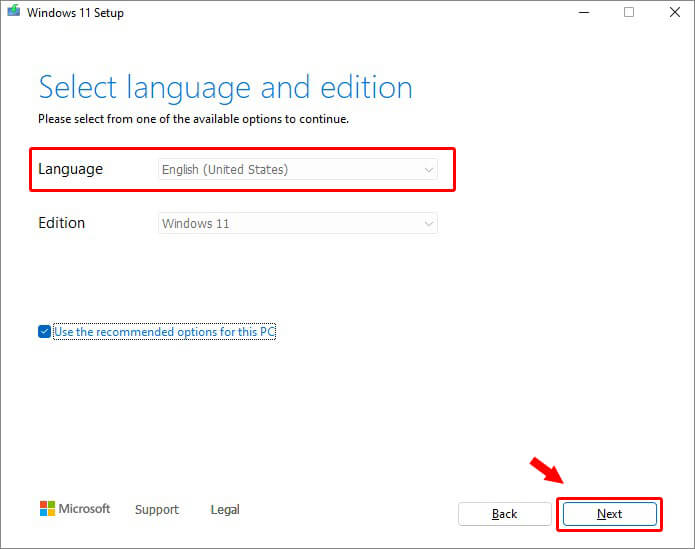
- Select the language and edition, and click Next.
- Choose a USB flash drive and click Next.
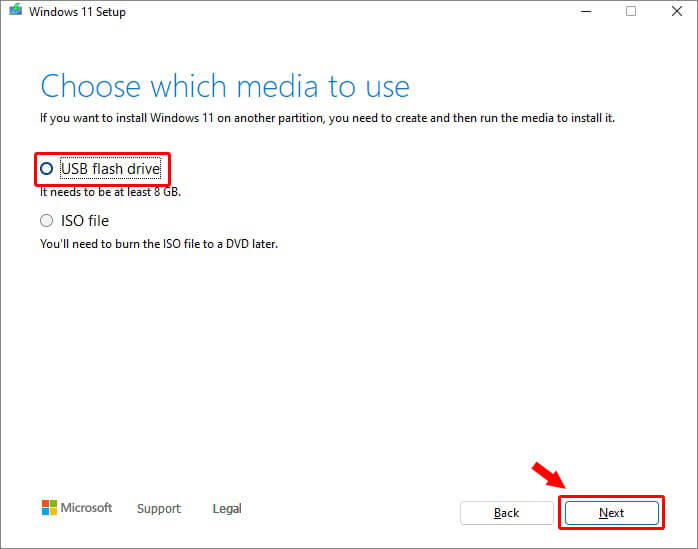
- Once the process ends, your bootable media drive will be ready.
Perform Clean Install of Windows 11
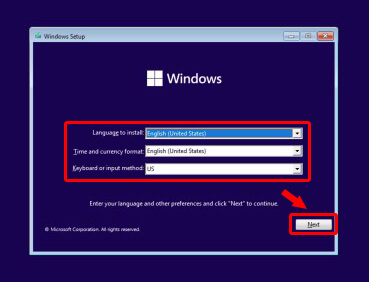
- Now, reboot your system with the USB bootable media. After this, Windows 11 Setup interface will show up on the screen.
- Choose Language, Time and currency formats, and Keyboard/input method.
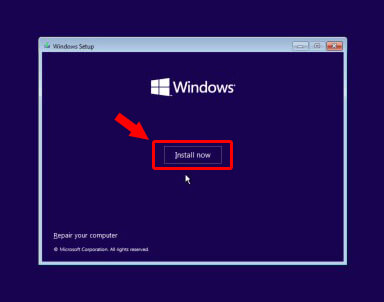
- Next, click Install Now.
- Enter the product key for Windows 11 if you have one. Else, click ‘I don’t have the product key.’
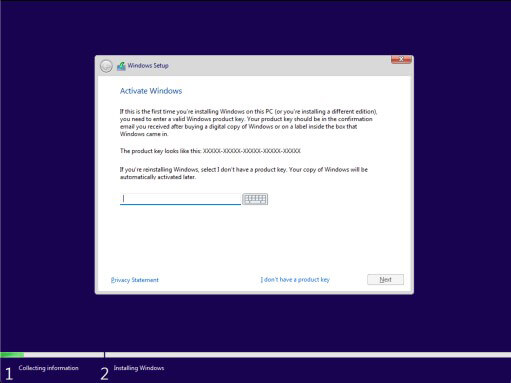
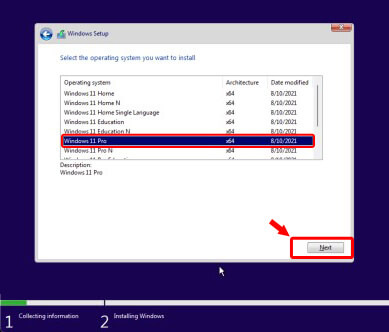
- Choose the edition you have the license for and click Next.
- Accept the license terms and then click Next to proceed.
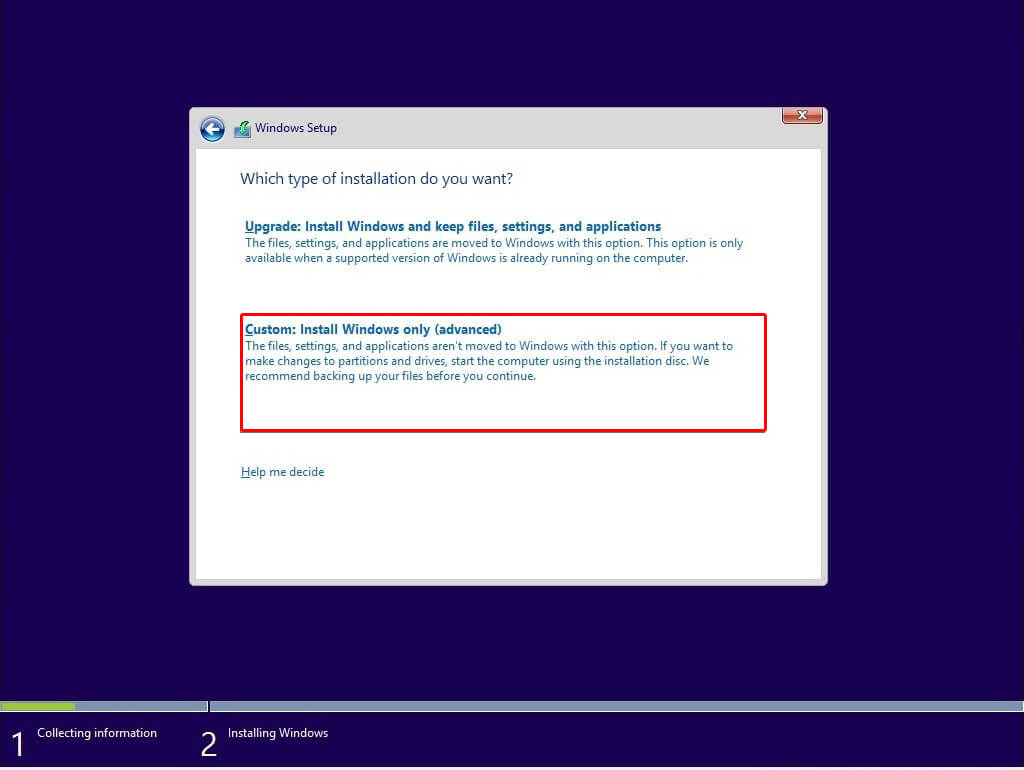
- On the next step, click Custom: Install Windows only (advanced).
- Choose the drive partition on which you want to install this OS and click New. If you have single partition, select the unallocated drive, click New > Apply > OK. It will create multiple partitions. You can choose the Primary partition to install Windows and click Next.
- Let the process complete, and then click Restart now. You’ll successfully download and install Windows 11 on your system.
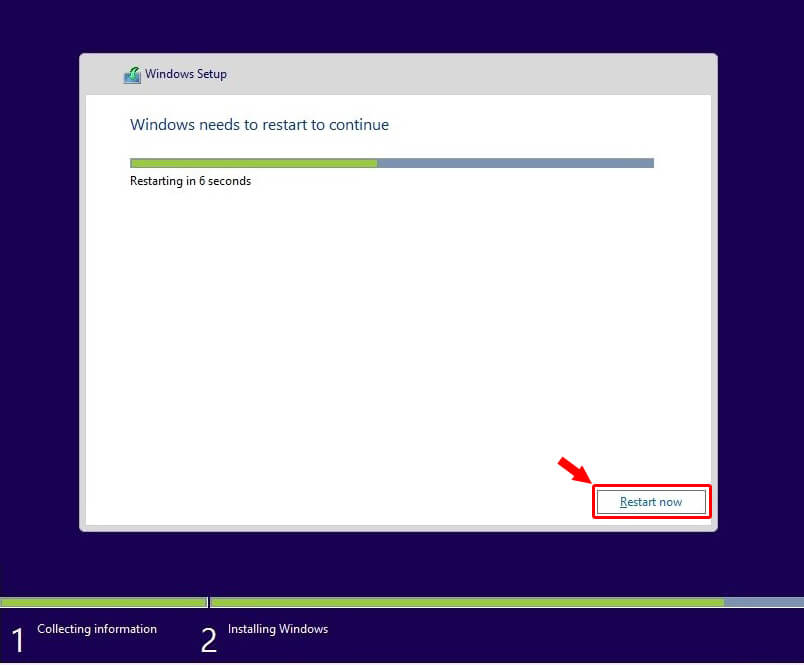
After this, you’ll be required to complete the Windows 11 Out of Box Experience to create a user account, configure privacy, sync PC settings, and so on.
All the best possible ways to switch from Windows Insider to Windows 11 Stable Build are discussed above. Hopefully, you’ll be able to follow the steps, get this latest OS installed on your system, and enjoy a seamless experience.



 3 min read