A damaged or broken RAID can result from human errors, hardware or software failure, malware attacks, mechanical errors, power outages, abrupt system shutdown, etc.
When a Redundant Array of Independent Disks (RAID) array breaks or corrupts, the RAID volume becomes inaccessible, and the data is lost. But unlike normal drives, you can't access or recover data from RAID hard drives independently. You must reconstruct or rebuild the RAID configuration to regain lost data.
However, that's easier said than done!
RAID is a complex data storage technology that uses multiple disks to create one logical volume. While building RAID, one needs to define several parameters, such as the number of disks, parity, block size, block order, disk offset, and file system. A user must document these RAID parameters while creating the RAID array, as they come in handy when rebuilding and recovering data from a broken RAID.
Today, we can utilize some of the most powerful RAID recovery tools, such as Stellar Data Recovery Technician. The tool makes RAID 0, RAID 5, RAID 6, RAID 10, RAID 50, and RAID 60 recovery simple and easy—even if you don't know or remember the RAID parameters.
Steps to Broken RAID Recovery
There are some instances where you’ll need to restore your critical files from a broken RAID:
- A logically failed, corrupt, inaccessible, and formatted RAID
- Broken RAID array as a result of malware or virus infection
- Deleted or missing RAID volumes or partitions
Follow the steps shared below to recover your inaccessible and lost files by rebuilding broken RAID 0, RAID 5, RAID 6, and Nested RAID sets.
Step 1: Stop Using the RAID Array
Do not perform any hit-and-trial method after a RAID breaks or fails, mainly if it contains critical data. The longer you use a broken RAID, the more complex (and sometimes impossible) it becomes to restore your lost data. If
Step 2: Disconnect Hard Drives from the RAID Rack
Turn off or unplug the broken RAID set and carefully disconnect each hard drive from the RAID array. Then, place the drives somewhere safe.
Step 3: Use SATA/IDE Connectors to Connect Drives
After disconnecting drives from RAID 0, RAID 5, RAID 6, or Hybrid RAID arrays, connect each drive to a Windows PC. You can use SATA/IDE connectors or a SATA/IDE USB 3.0 converter cable or enclosure—especially if you own a laptop or PC motherboard that does not have enough SATA/IDE ports.
Step 4: Check Disk SMART Status & Clone Failing Drive
Use a RAID recovery software, such as Stellar Data Recovery Technician, which features a SMART disk monitoring utility – Stellar Drive Monitor. This utility helps you check the SMART disk status before recovery.
This step is most important, as you never know when a drive may fail due to some underlying problem, which might also be a reason for your broken RAID. Checking SMART status gives you better and deeper insight into the drive and whether it can survive a data recovery scan.
- So begin by downloading, installing, and launching Stellar Data Recovery Technician software. Then follow the instructions given below:
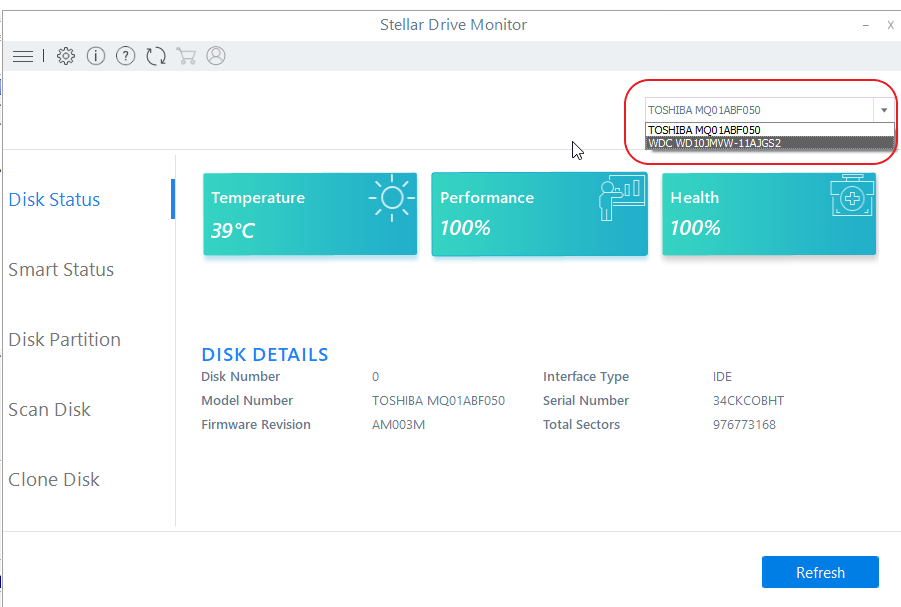
- Click on the Waffle icon at the top-right corner of the screen and click 'Monitor Drive.' The Stellar Drive Monitor utility will launch.
- Check the drive health indicators, such as health, performance, and temperature under the Disk Health category.
- Everything should be green colored. If any of this is yellow or red, you need to clone the drive immediately
Steps to Clone Drive for Safe RAID Data Recovery from a Failing RAID Drives
To clone a failing RAID drive, you need a new or healthy hard drive of same or larger volume. For instance, if the failing hard drive size is 500GB, you need a drive with either 500 GB or more capacity.
- Connect the new hard drive to the system.
- Then click 'Clone Disk' in the left pane and connect a new hard disk to the system.
- Select the 'Source Disk' that is failing and showing red or yellow warning signs in SMART status.
- Then select the 'Target Disk'—the new drive.
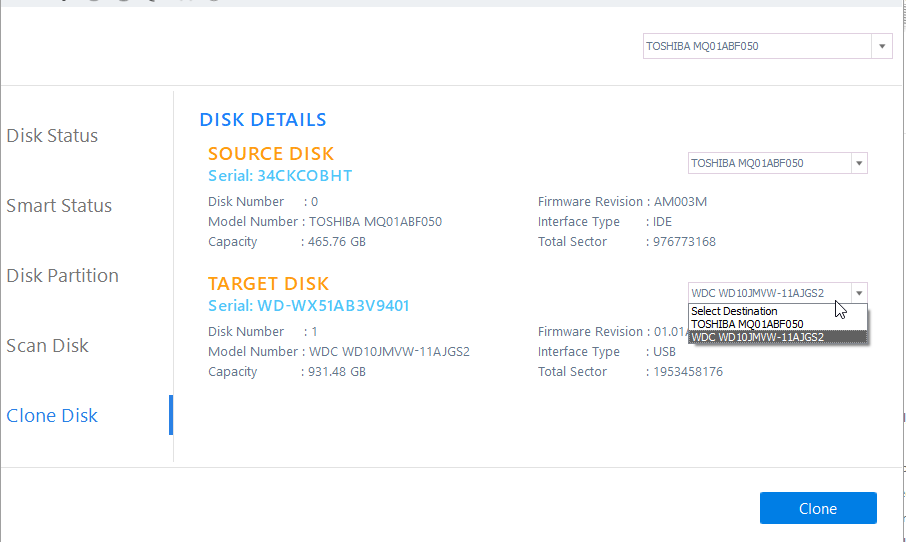
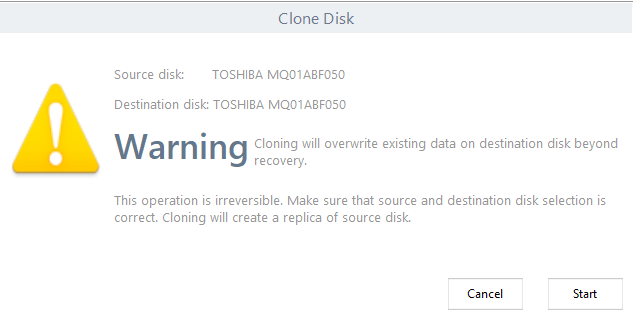
- To begin the cloning process, click 'Clone Disk' and then click 'Start' when the following warning message appears.
- After cloning is done, check other drives. Repeat the disk cloning steps for all other failing drives if you see similar SMART error warnings.
- Finally, connect all the healthy cloned drives to the system to proceed with RAID data recovery.
Steps to Recover Data from Broken RAID
-
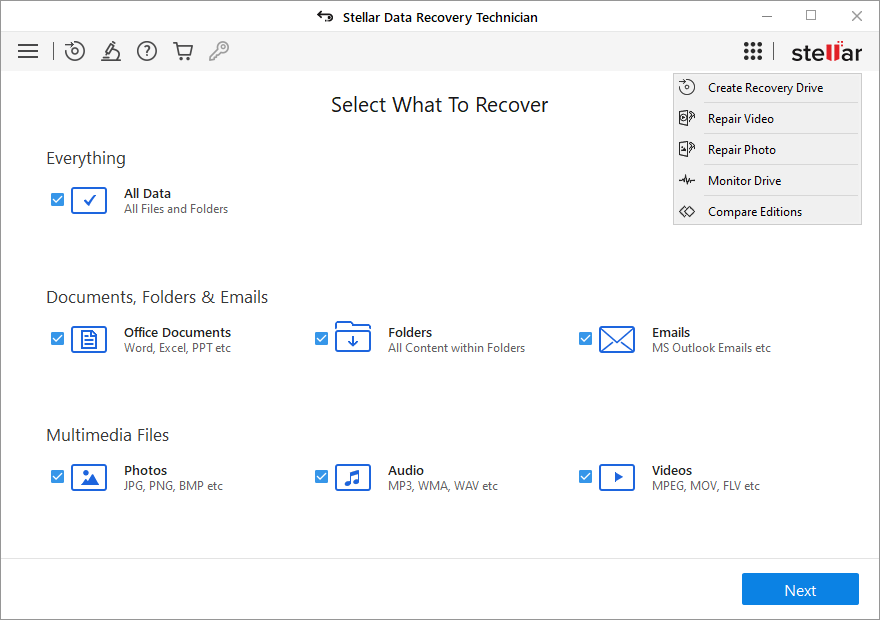
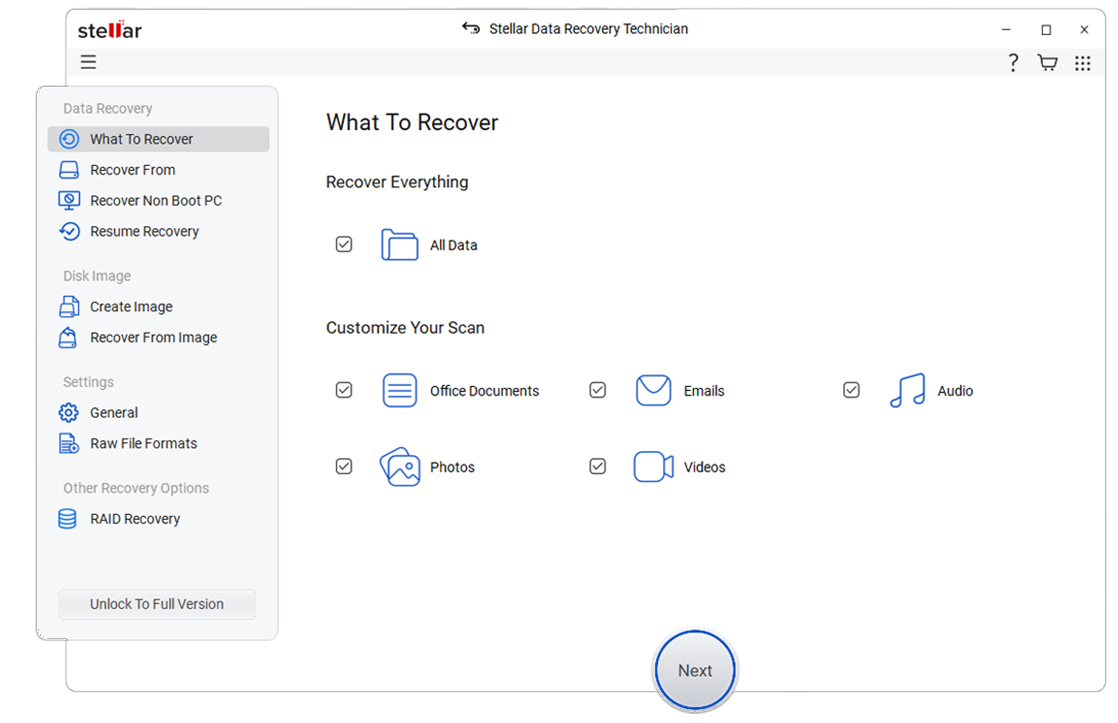
Close Stellar Drive Monitor. You will see the following screen.
- Click 'All Data' and then click 'Next.'
- Select 'RAID Recovery' under Other Locations and click 'Scan.'
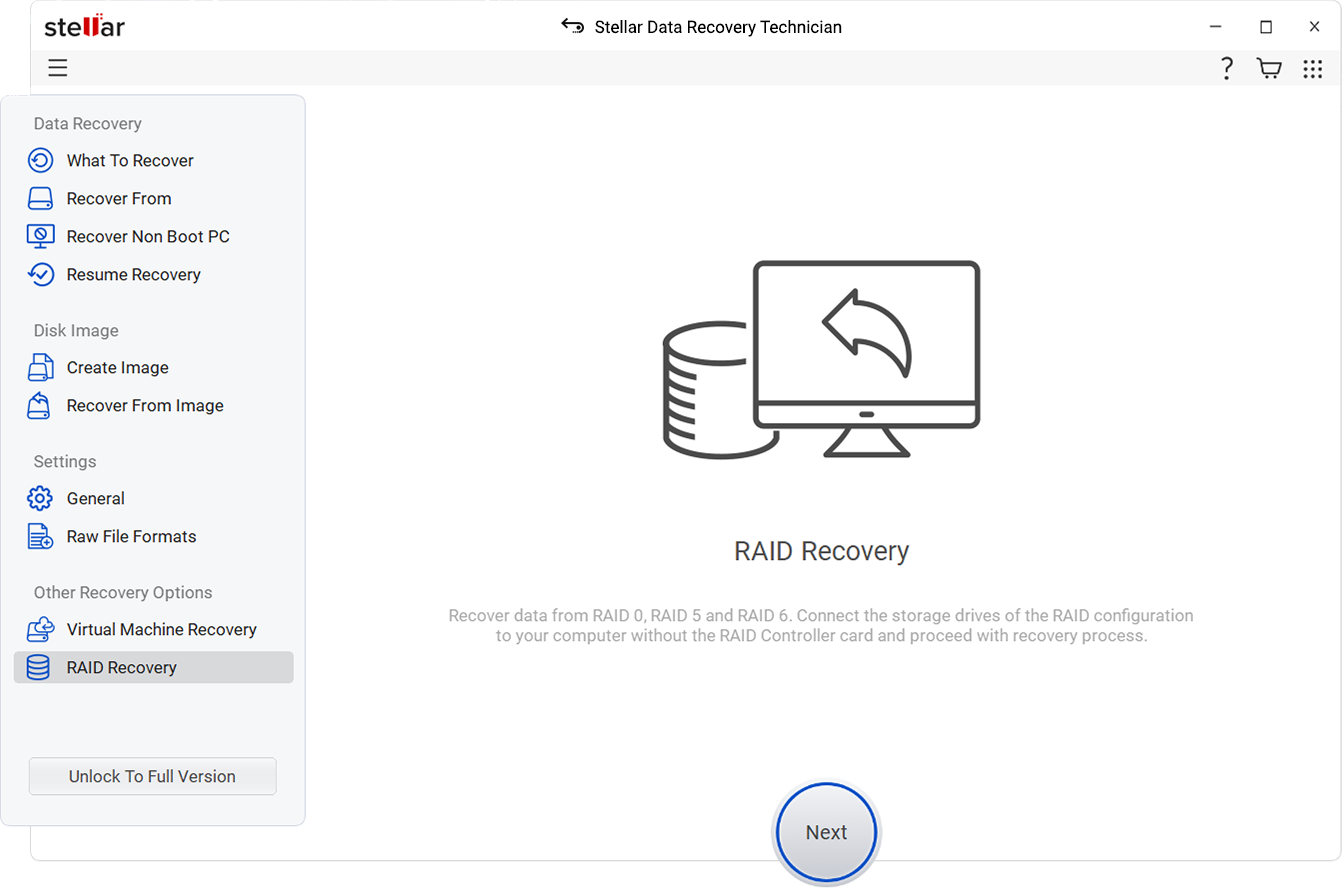
- A new 'RAID Construction' window will appear.
- Click on the respective RAID tab, i.e., RAID 0, RAID 5, or RAID 6.
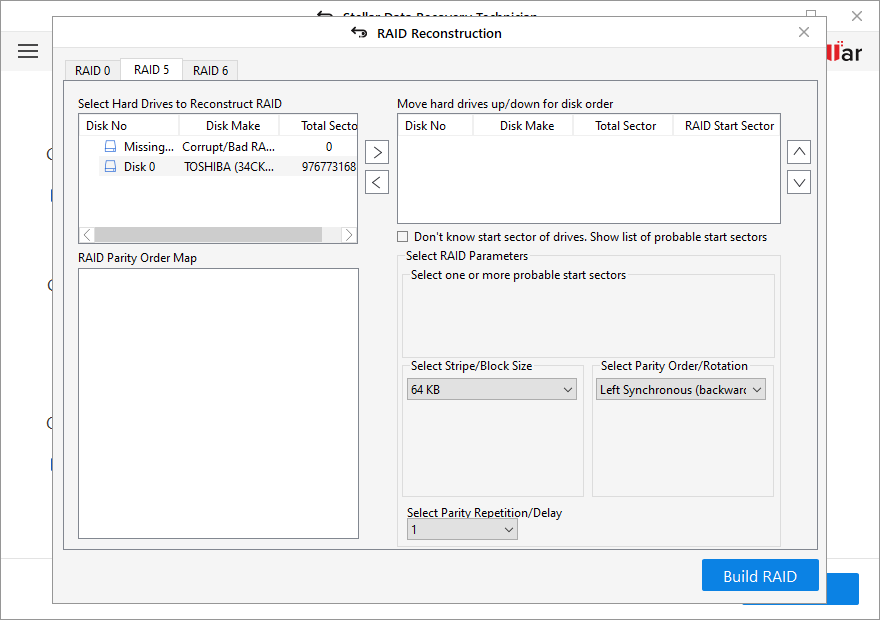
- You will see the connected RAID hard disks under the 'Select Hard drives to reconstruct RAID' list box.
- Click on RAID hard disks (one at a time) and use the arrow button to add or remove RAID drives from the 'Select Hard drives to Reconstruct RAID' list box to the 'Move hard drives up/down for disk order' list box.
- Use the Up or Down arrow buttons beside the list view box to arrange hard disks in sequence (the sequence starts from Disk 0) in the same order as in the RAID stack.
- Check the 'Don't know start sector of drives.' The software will only show a list of probable start sector checkboxes if you need to know the drive's start sector. A new checklist box appears in the 'Select RAID Parameter' section.
- Choose one or more probable start sectors or add the desired start sector in the text box. Click the ‘Add Sector' button if the sector is not listed in the checklist box.
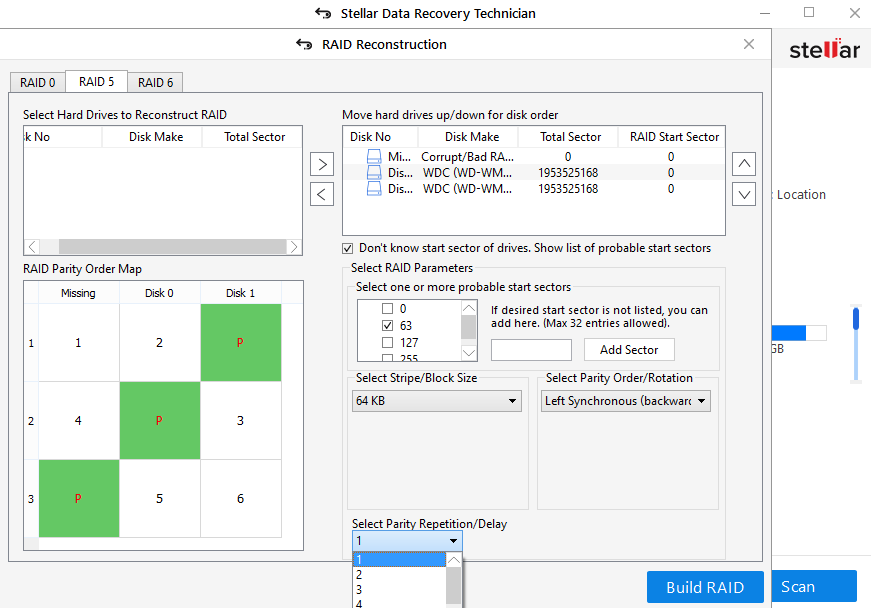
- Choose stripe or block size from the 'Select Stripe/Block Size' drop-down; select parity order or rotation from the 'Select Parity Order/Rotation' drop-down; and then choose parity repetition or delay from the 'Select Parity Repetition/Delay' drop-down. The RAID admin or user who built the RAID will probably know these values.
PLEASE NOTE: If you don't know or remember the RAID parameters, select Don't Know from the required parameter drop-downs.
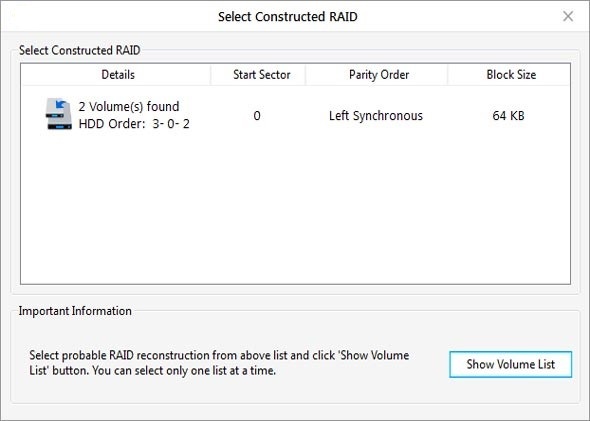
- Next, click Build RAID to proceed. The software will start rebuilding the RAID virtually. Once done, the software will show you the constructed RAID volume (or volumes) in the 'Select Constructed RAID' window. Click on the 'Show Volume List' button.
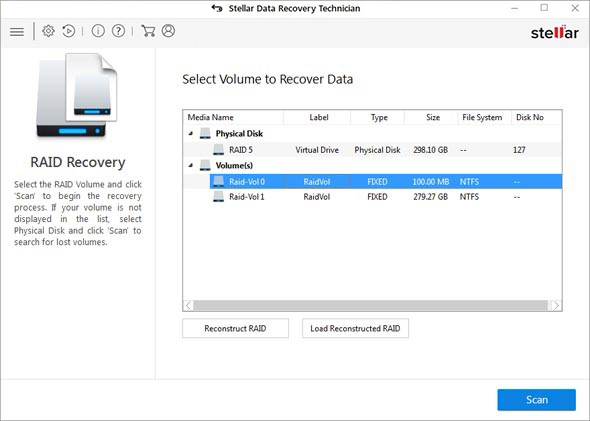
- In 'Select Volume to Recover Data,' choose the volume from the listed RAID volume where data will be recovered.
If you don't see the volume from which you want to recover data, click Reconstruct RAID. It will start rebuilding the RAID again. Don't interrupt the process; it might fail your recovery attempt.
TIP: In case you're not sure from which you want to recover data, select 'Physical Disk' and click 'Scan' to scan the entire RAID array and retrieve data (see screenshot below).
- After selecting the RAID volume, click the 'Scan' button. Wait until the scan finishes.
- Click on the blue 'Click Here' link beside the Deep Scan text at the bottom of the software window to start the 'Deep Scan' process if you don't see the desired files or folders to recover.
Deep Scan thoroughly searches for lost files based on file signatures and facilitates RAW data recovery by digging deep into the RAID drives. Therefore, it takes much longer than the 'Quick Scan' but returns maximum recoverable data from the reconstructed RAID volume.
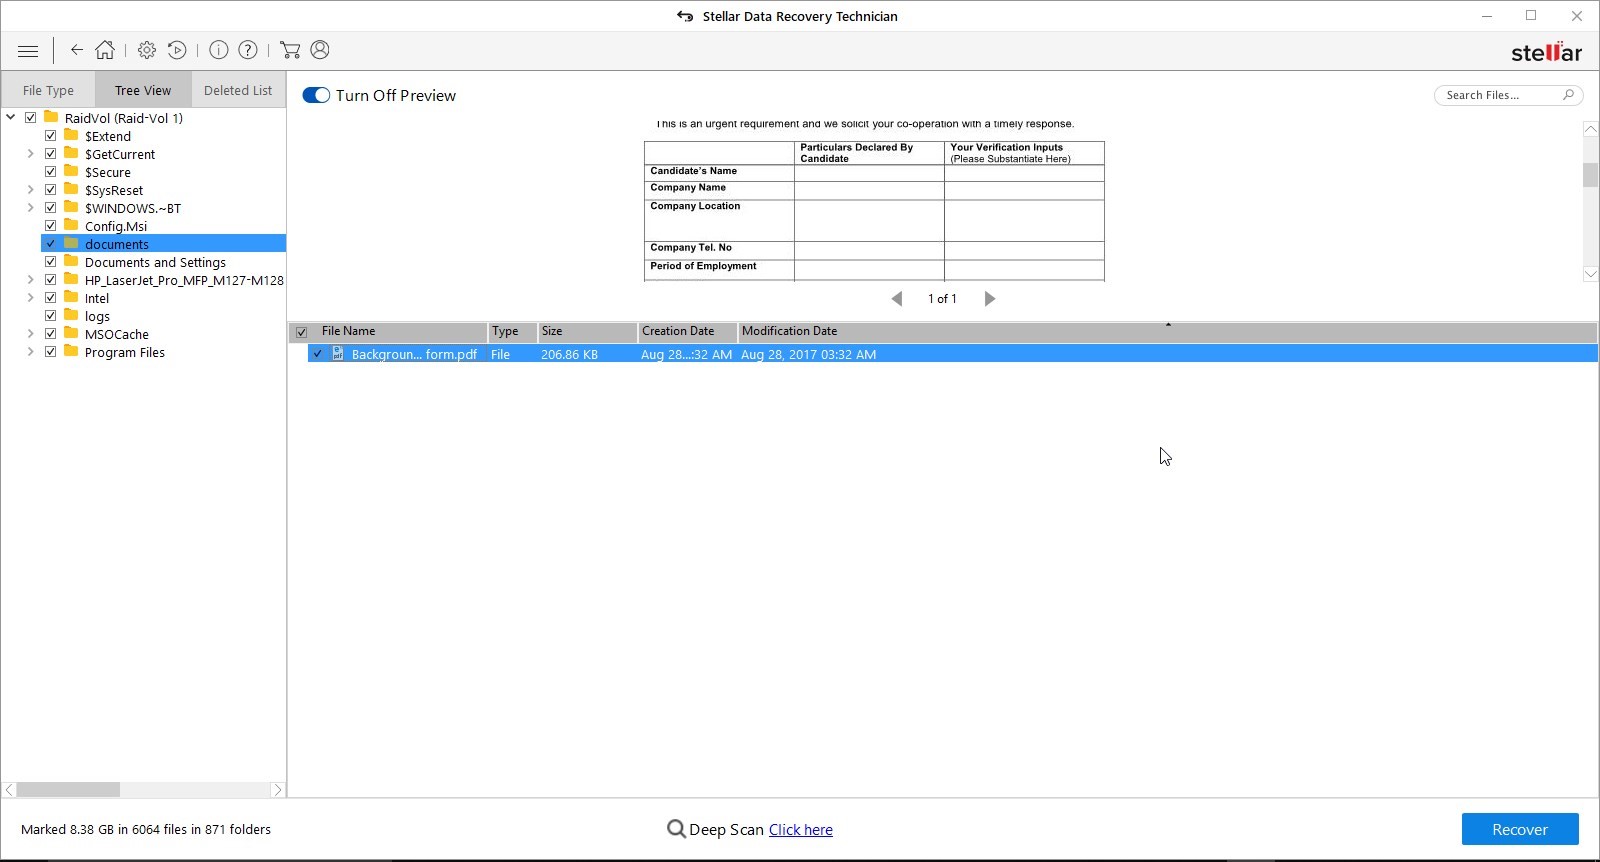
- All recovered folders and files are in the left 'Tree View' pane. Use the search box on the top-right corner to search, preview, and recover specific files and folders. Alternatively, you can click the 'File Type' tab to sort the recovered data.
- Select a file to see its preview before recovery, or select the check boxes of the files and folders you want to restore. Then click the 'Recover' button. A pop-up will appear.
Note: If the software is not activated, it will open a web page where you can get the activation key. Once you receive the activation key in your registration email, enter it, and proceed with the following steps.
- Click the 'Browse' button to select the location where you want to save the recovered data. Don't select the drive in the RAID set connected to your PC.
- Always choose an external drive or different drive partition with enough space to save recovered data in the desired location to store the recovered data.
- Finally, click the 'Start Saving' button. The selected recovered files and folders will be saved at the desired location.
- So, that's how you rebuild a broken RAID set for data recovery and retrieve the lost data. For more info and help on RAID recovery, comment below or contact our data recovery experts.
Conclusion
RAID is a logical arrangement of multiple disks. Thus, it is prone to corruption and may break due to various factors, such as power failure, abrupt system shutdown, hardware failure, human errors, etc.
Finally, it all comes down to data. After all, RAID is built to store and access data without worrying about data loss due to disk failure. People often use RAID a backup. However, when used regularly, RAID drives are also prone to corruption or logical failure. Hence, don't take RAID as a substitute for backup.
Instead, regularly back up your RAID data like other storage drives to restore files without affecting workflow and business continuity. Nevertheless, RAID recovery software, such as the Stellar Data Recovery Technician makes recovering lost files from a broken, damaged, or corrupt RAID array easier and more convenient.
The software has all the essentials required for safer data recovery from broken, corrupted, or formatted RAID 0, RAID 5, RAID 6, or Nested RAID arrays in Windows.
.


 5 min read